MicroMod Alorium Sno M2 Processor Board Hookup Guide
Software Installation
Install Arduino Board Definitions
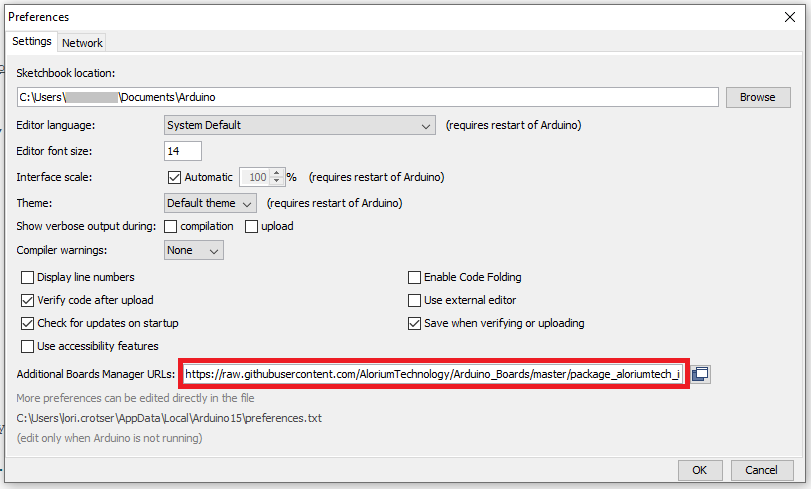
In your Arduino IDE menu bar, go to File > Preferences and locate the ‘Additional Boards Manager URLs’ input field. Paste the following URL into the “Additional Boards Manager URLs” input field:
language:json
https://raw.githubusercontent.com/AloriumTechnology/Arduino_Boards/master/package_aloriumtech_index.json
It should look something like the following:
Install Alorium's XLR8 Board Package
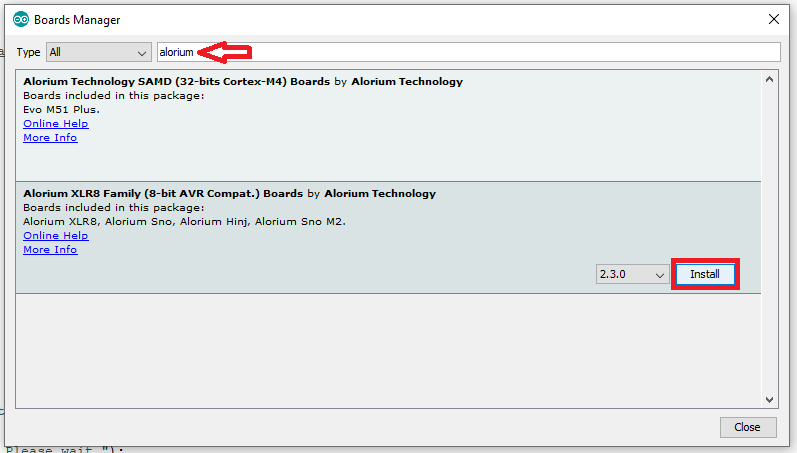
Start by going to Tools > Board > Boards Manager. Type “Alorium,” in the search field and you will see an option to install board files for Alorium Arduino compatible boards. Select the “Alorium XLR8 Boards” package and then click “Install”.
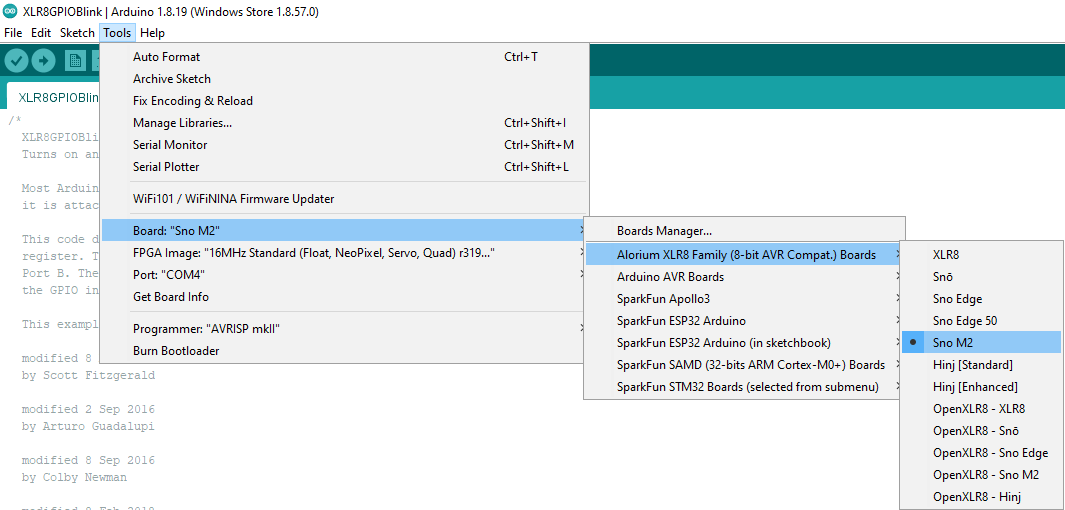
Go to Tools > Board. You should see that a new section titled “Alorium XLR8 Family” now exists. Under this new heading should be the Sno M2 board. You can select the "Sno M2" board just like you would normally select the “Arduino/Genuino Uno” board.
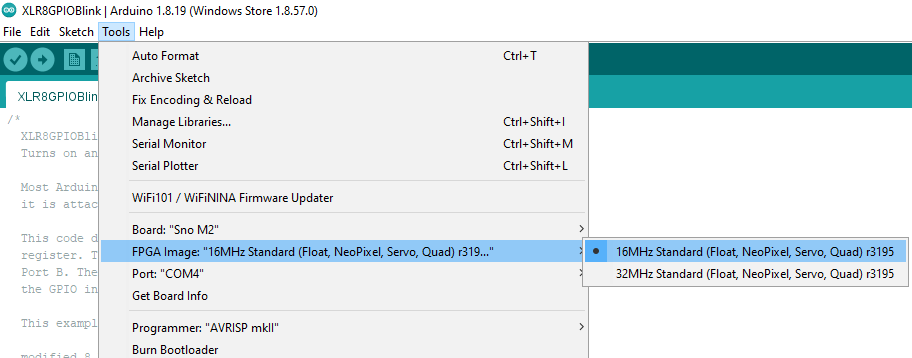
After selecting the Sno M2, you will find a new menu item at Tools > FPGA Image, where you will find a number of FPGA images that provide different operating speeds and different XB configurations.
XLR8 Libraries
Installing the XLR8 board support will also install a default set of libraries that are needed to take advantage of the extra capabilities of Snō. You can see these libraries listed in the Sketch > Include Library menu.
There are additional libraries available that can be installed using the Library Manager. In the Arduino IDE, go to the menu Sketch > Include Library > Manage Libraries, which will open the Library Manager in a new window. Enter "Alorium" in the search bar and you will find the entries for the various XLR8 and Snō libraries available.
There are many libraries you can install to support a variety of our board functions and Xcelerator Blocks. For the purposes of this getting started guide, find the “XLR8Info” library and click on it.

An Install button will appear for it. Click on the Install button, and when the installation is complete you will see that the library is now tagged as Installed.
After adding the library, you’ll find it in the menu Sketch > Include Library, under Contributed Libraries (You may need to re-start the IDE if you don’t see it).
You’ll also find some examples sketches in the File > Examples menu, under the library name.