LilyPad USB Plus Hookup Guide
Hardware Overview and Features
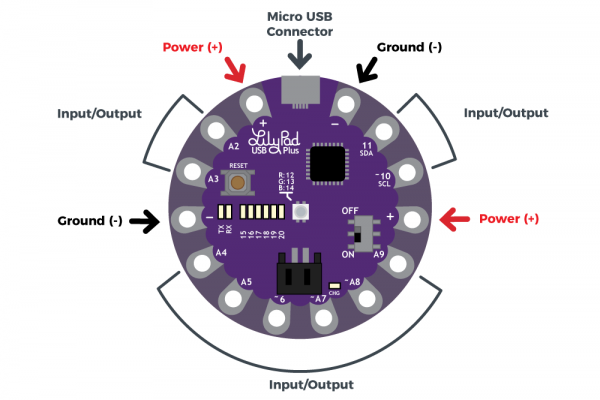
The LilyPad USB Plus is an Arduino-compatible microcontroller. It has fourteen sew tabs for connecting components with conductive thread. Four of these tabs are reserved for connecting power and ground of LilyPad sensors and accessory boards, and ten are input/output (I/O). For reference, each sew tab has a nearby label with its name and the pin number it is connected to on the ATmega32U4 chip at its center.
Features:
- USB port for connecting to a computer.
- Two sets of power (+) and ground (-) sew tabs.
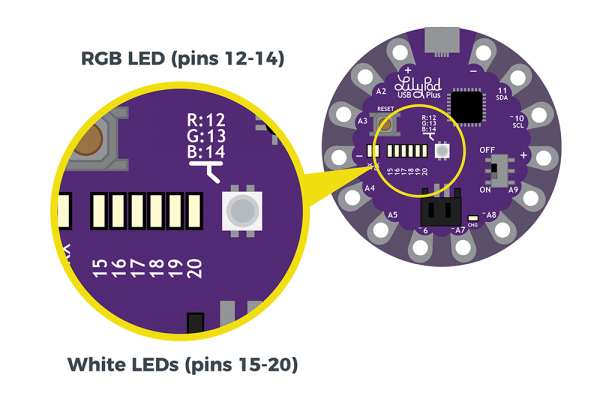
- Built-in RGB LED attached to pins 12 (R), 13 (G), and 14 (B).
- A row of six white LEDs attached to pins 15-20.
- Charging circuit for single-cell (3.7V) Lithium-Polymer batteries.
- An 'A' in front of the number denotes a tab that can function as an analog input. These sew tabs can read sensors that output a varying voltage like the light sensor built into the ProtoSnap Plus.
- A '~' symbol in front of the number indicates that tab supports PWM (Pulse Width Modulation) output. These tabs can output an "analog" signal that can be used to vary the brightness on LEDs, etc.
Note: The "A" in front of analog sew tab numbers in your code is optional. However, do not include the "~" symbol for PWM outputs. It is only provided to make it easy for you to check which pins can produce PWM (analog) output and is not used in programming.
Powering the LilyPad USB Plus
The LilyPad USB Plus can be powered in two ways:
If you have a USB power source available (a computer, 5V USB wall adapter, USB battery pack, etc.), you can run the board from a USB cable.
Once sewn into a project, you can easily attach a rechargable Lithium-polymer battery to the board. See Technical Notes section for more information on batteries and charging.
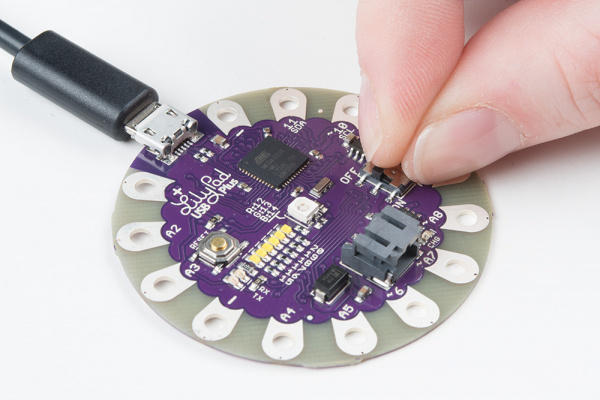
To power up the USB Plus, connect it to your computer using a micro-B USB cable or attach an E-Textiles Battery. Then slide the switch on the right side of the LilyPad USB Plus to the ON position.


