Introduction to MQTT
 Alex the Giant
 Resources and Going Further
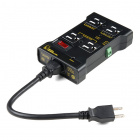
Hopefully, this tutorial has given you a starting point to integrate MQTT in your home automation project. Instead of turning a LED on or off, you could take it a step further and connect our IoT Power Relay to the ESP32 to control your AC powered devices.
A tool not mentioned in this tutorial is Home Assistant. With Home Assistant you can control a wide array for commercial smart home devices, including MQTT. This means that with Home Assistant you can create your own MQTT devices that can easily control your existing smart home devices, but stay tuned for a tutorial about that in the future. In the mean time, there's a blog post about MQTT and Home Assistant using an ESP8266 and Raspberry Pi which can be found here:
For more information about MQTT, check out some of the links below:
- Wikipedia Article on MQTT
- MQTT Official Documentation
- Mosquitto Documentation and API Reference
- GitHub Arduino Library: PubSubClient
Need some inspiration for your next project? Check out some of these related tutorials:
Photon Remote Water Level Sensor
SparkFun Blocks for Intel® Edison - Arduino Block
MicroPython Programming Tutorial: Getting Started with the ESP32 Thing
Dialog ULP WiFi DA16200 R3 Shield Hookup Guide
Interested in learning more about WiFi?
Get a background in how WiFi works as well as the hardware available to help you connect your project wirelessly.
Take me there!