Internet Datalogging With Arduino and XBee WiFi
This Tutorial is Retired!
This tutorial covers concepts or technologies that are no longer current. It's still here for you to read and enjoy, but may not be as useful as our newest tutorials.
 jimblom
Introduction
Phant is No Longer in Operation
Are you looking to get your data gathering project hooked into the "Internet-of-Things"? Then check out data.sparkfun.com! It makes posting data to the web as easy as constructing a URL and POSTing it to a server.
I wanted to create a quick project to test out SparkFun's data logging service. Combining an Arduino, XBee WiFi module, and a variety of gas, temperature, and light sensors I built an office conditions logger.
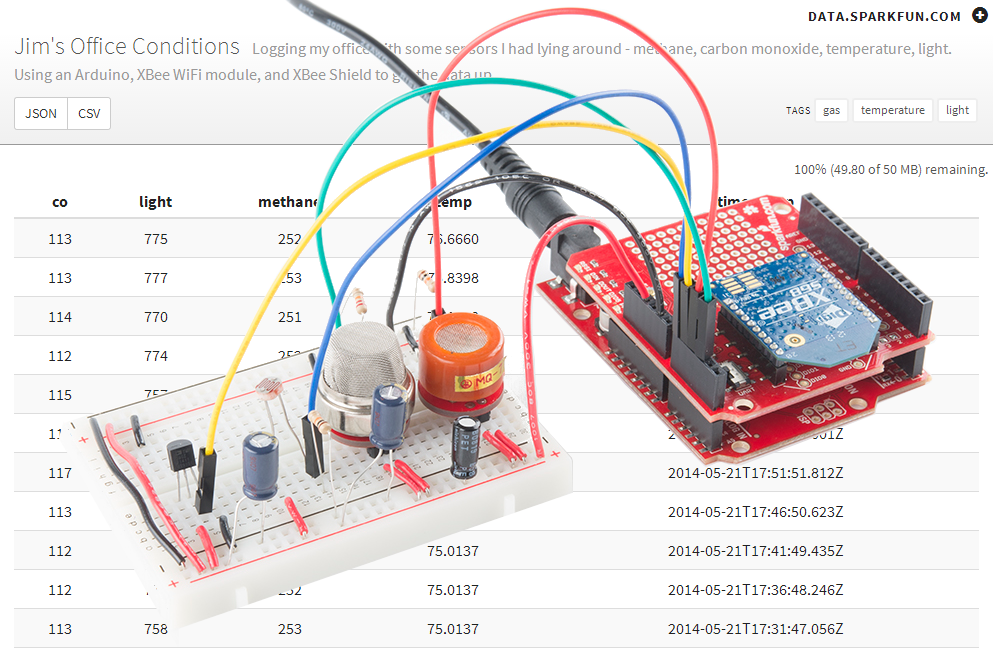
Logging data to the web provides many advantages over local storage -- most significantly it gives you instant and constant access to logged data. The trade-off for that instant data access is a loss of privacy, but, if you don't care who knows what the temperature, light, or methane (well...) levels in your office are, then logging data to data.sparkfun.com is an awesomely-easy solution.
Required Materials
In this tutorial we'll use a variety of simple analog sensors to create an "Office Conditions Logger", but the hardware hookup and example code should be easily adaptable to more unique or complex sensors. Here's a list of stuff I used to make my logger:
Some notes on this wishlisted bill of materials:
- You'll also need some breadboarding tools -- a breadboard and jumper wire.
- To assemble the shield you'll need soldering tools and headers.
- I didn't add resistors to that list, but you'll need a few 10kΩ-22kΩ resistors to complete the circuit. If you don't already have one, we recommend grabbing an ever-handy resistor kit.
- The XBee Shield can be swapped out for a Regulated Explorer, or even something as simple as an XBee Breakout, with some additional jumper wires (and maybe level shifting).
- I'm using the RedBoard, but any Arduino-compatible board will work, whether it's an Uno, Leonardo or Mega.
These days Arduino's have no shortage of routes to the Internet. I'm using the XBee WiFi modules because they're simple to use, relatively low-cost, and they work with XBee Shields (which you may already have in your electronics toolkit). So, while the code in this tutorial is specific to that module, it should be adaptable to the WiFi Shield, Ethernet Shield, CC3000 Shield, or whatever means your Arduino is using to access the Internet.
Suggested Reading
- XBee WiFi Hookup Guide -- This is a good place to start, especially if you need to get your XBee WiFi configured to connect to your WiFi network.
- XBee Shield Hookup Guide -- We'll use the XBee Shield to interface the XBee WiFi with an Arduino. Learn all about the shield in this tutorial.
- Analog-to-Digital Converters (ADCs) -- All of our sensors in this example are analog, so we'll be relying on the Arduino's ADC to read those analog voltages and turn them into something digital.
- How to Power Your Project -- The gas sensors can consume quite a bit of power, check out this tutorial to get some ideas for how to power your project.