How to Use Remote Desktop on the Raspberry Pi with VNC
Use VNC Over a Local Network
If your host computer is on the same local network (e.g. connected to the same WiFi or Ethernet network), then you can make a direct VNC connection to your Raspberry Pi. This method has several up sides: it's the easier option, does not require signing up for a RealVNC account, and can be done on a closed network (i.e. one not connected to the Internet). The down side is that you must be on the same network to access your Pi (i.e. physically connected or through a VPN). This is a known as a direct connection.
If you want to to access your Raspberry Pi over the Internet, then see the next section.
Still in your Raspberry Pi's terminal, enter the following command:
language:shell
ifconfig
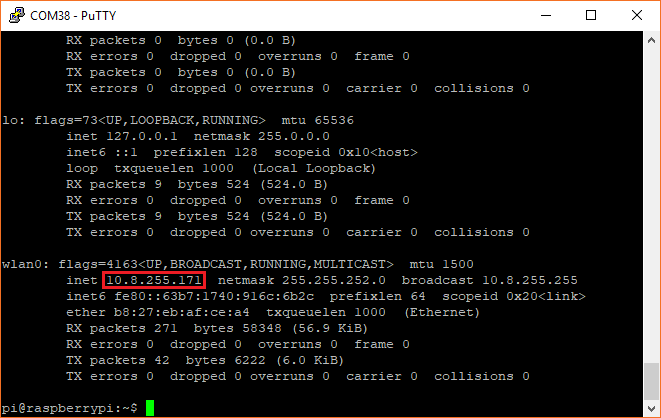
Copy down the Raspberry Pi's IP address, which is given as a series of 4 numbers next to inet. If you are connected over WiFi, this will appear under the wlan0 settings. If you are connected over Ethernet, this will appear under the eth0 settings.
On your host computer, head to the RealVNC Viewer downloads page to download the VNC client (known as VNC Viewer) for your operating system. Install it, accepting all the defaults.
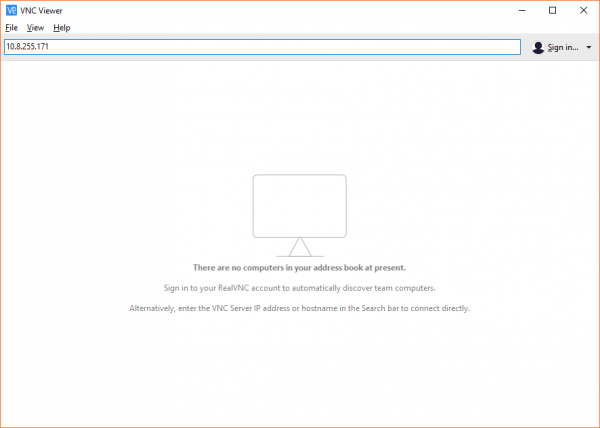
Open VNC Viewer. At the top address bar, enter the IP address of the Raspberry Pi (once again, make sure your host computer and Pi are on the same network!).
Press enter, and click Continue when warned that "VNC Server not recognized." You should be prompted with an Authentication window. If you did not change the login username and password for your Pi, your default login credentials are:
- Username: pi
- Password: raspberry
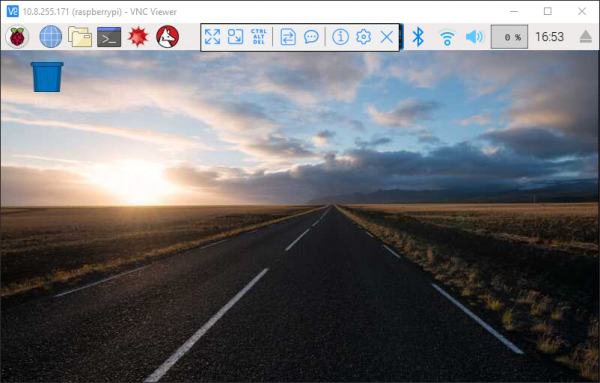
Once you successfully authenticate, you should be presented with your Raspberry Pi's graphical desktop. Now, you can do everything remotely as if you were sitting in front of your Pi with a keyboard, mouse, and monitor! If you hover your mouse over the top part of the window, you should see a drop-down box appear, giving you access to the various RealVNC settings, including closing the session.


