How to Use Remote Desktop on the Raspberry Pi with VNC
 Shawn Hymel
Use VNC Over the Internet
Using remote desktop on a local network is likely to offer a much faster and smoother experience, however, you can't necessarily guarantee you will have access to that network directly. Luckily, RealVNC allows us to log in to our computer over the Internet!
The other good news is that we don't have to go through the process of finding our Pi's IP address.
Sign Up for a RealVNC Account
To start, sign up for an account (or sign in, if you already have one) on RealVNC's site here. Head to your Account page, and click Activate under the Home version of VNC Connect.

Enable VNC Cloud Connection on the Pi
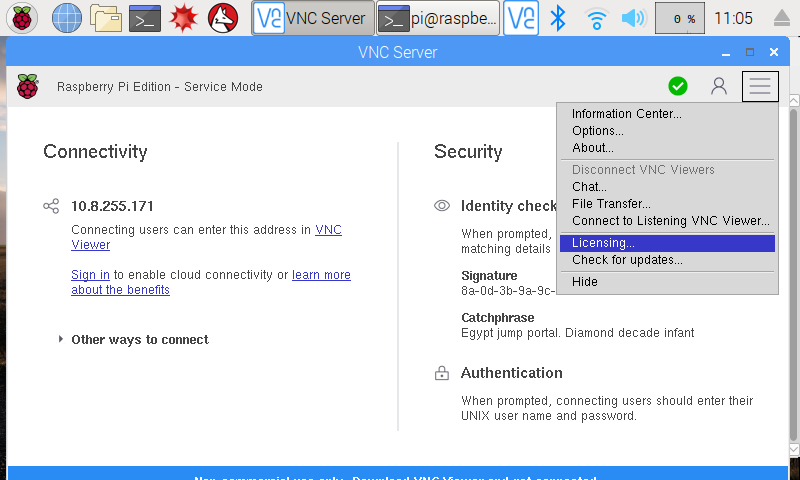
Assuming you have VNC enabled on the Pi, click on the VNC logo in the top-right portion of the desktop. This will open the RealVNC settings window. In the top-right part of that window, click on the properties button, and select Licensing....
Leave Sign in to your RealVNC account selected, and click Next.

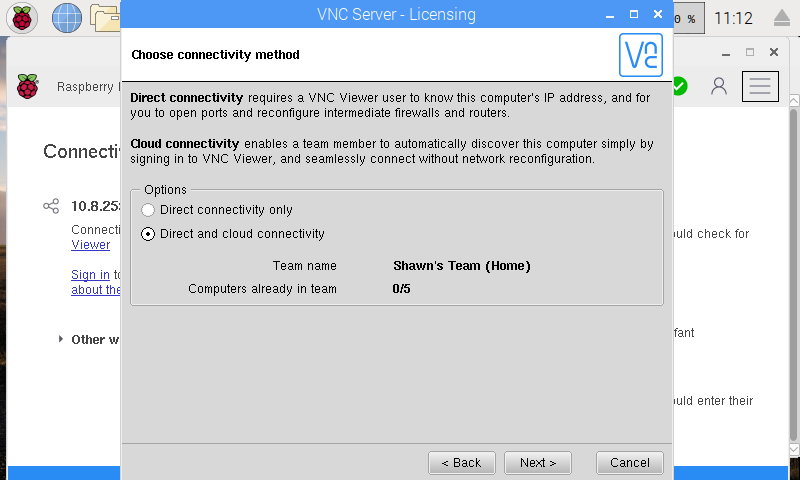
Enter your RealVNC email and password, and click Sign In. On the next screen, change the connectivity method to Direct and cloud connectivity.
Click Next. Review the settings and click Apply. If you get a pop-up warning you that permissions were granted without asking for a password, click Close. On the next screen, click Done.
Remotely Control the Raspberry Pi
On your host machine, download and install the RealVNC viewer. Open the application, and click the Sign in button in the top-right. Enter your email and password, and click Sign in.
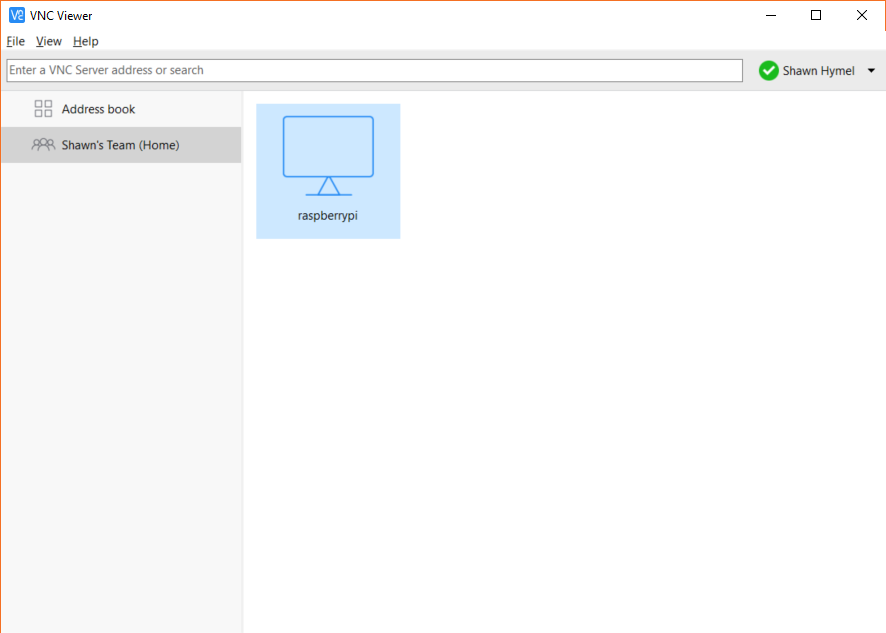
On the right side, you should see an address book (previously used connections) and something showing your "Team" (computers available for a VNC cloud connection). Click on your Team, and you should see your VNC-ready Raspberry Pi listed.
Double-click on your Raspberry Pi to connect to it. You should see a pop-up window explaining that the VNC server on your Raspberry Pi has been verified. Click Continue. You should be prompted with an Authentication window. If you did not change the login username and password for your Pi, your default login credentials are:
- Username: pi
- Password: raspberry
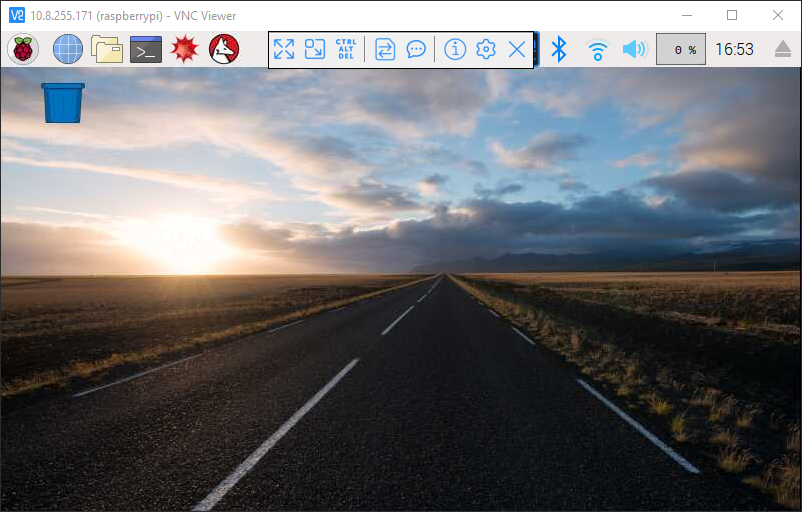
Once you have been authenticated, you should be presented with your Raspberry Pi's desktop. If you hover of the top part of the window, a drop-down should appear, giving you access to various settings for RealVNC, including a button to close the session.
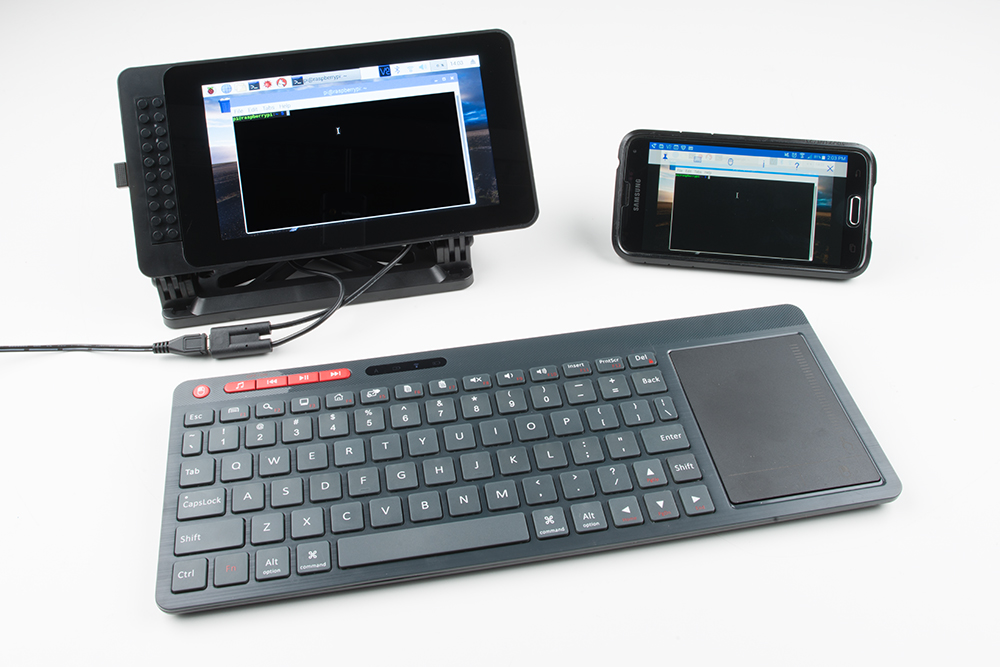
Another slick feature is the ability to control your Raspberry Pi from your smartphone or tablet! Download the VNC Viewer app from the iTunes store or Google Play. Open the app, sign in, and connect to your Raspberry Pi!