Gator:starter ProtoSnap Hookup Guide
Using MakeCode
So you've connected your sensors and LED to the gator:bit v2, but how do we get useful information from these sensors? Luckily, SparkFun has written a few MakeCode extensions to allow the gator:bit to make sense of the values that come in from the MCP9700 temperature sensor and TEMT6000 light Sensor.
Installing the Gatortemp Extension for Microsoft MakeCode
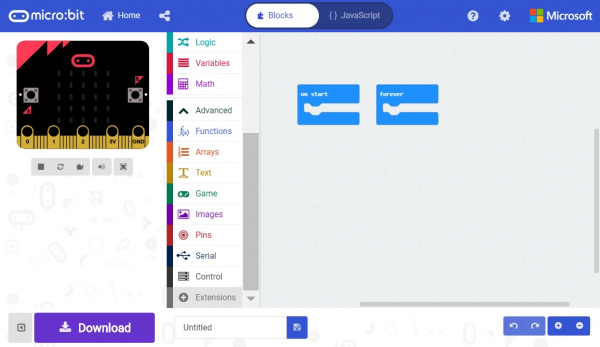
To download the MakeCode extension for the light sensor, go to Advanced -> Add Extensions.
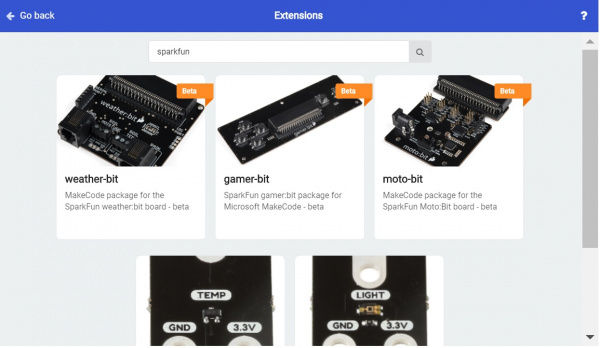
Then search for sparkfun or gator-temp.
Clicking on the gator-temp will add it to your list of usable extensions in Advanced. Go ahead and open the extension and you'll see a block that allows you to get the temperature on the pin that the gator:temp is connected to.
RGB LED
With the three primary colors, we're able to mix colors to create any color we like. LED's are either on or off, with no brightness in between, so we control brightness by turning the light on and off very fast in a process known as pulse width modulation (PWM). The common cathode LED does not require any additional MakeCode extensions. To use PWM, go to Advanced->Pins and select the analog write block, shown below.
You'll need three of these blocks, one to control each color of the LED. Make sure the pin selected in the block is connected to the proper color (P0 = Red, P1 = Green, P2 = Blue). The analog write block defaults to a value of 1023, or 100%. If you wanted to turn the light down to 50% brightness, you'd plug a value of 511 into your analog write function. This allows for really any color to be created. For instance orange would be created by writing 100% (1023) to red and 10% (102) to green.
Installing the Gatorlight Extension for Microsoft MakeCode
To download the MakeCode extension for the light sensor, go to Advanced -> Add Extension.
Then search for sparkfun or gator-light. Clicking on the gator-light will add it to your list of usable extensions in Advanced.
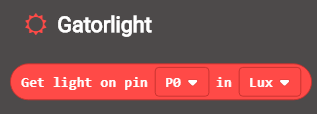
Go ahead and open the extension to take a look at the variable block we are now able to use. There are two drop down menus that you can use to change which pin the light sensor is attached to as well as the units of the measurement.
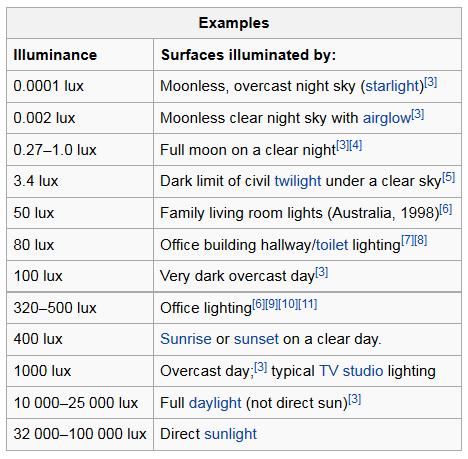
The light sensor measures light in terms of illuminance, or lux. If you're unfamiliar with illuminance, it's basically just a measure of the amount of light reaching a certain spot. The units can either be the raw value from the analog-to-digital converter (ADC) or in units of lux. Check out the chart below to get an idea for what this lux value corresponds to in terms of some common lighting situations.
This block can be used to modify the value of a variable in MakeCode.


