Firefly Jar Assembly Guide
Contributors:
 b_e_n,
  Mando
Mando
b_e_n, Mando 
Step 1: Positively Powerful
NOTE!
Be aware that the grayed out components on the schematic indicate that they are on the opposite side of the felt piece. Please pay attention to the direction of the word “FACE”.

NOTE!
You will only need one felt jar cutout to sew your components into. Put the other one away for now. Position your components similar to what you see in the schematics. Pay attention to which way FACE is oriented.
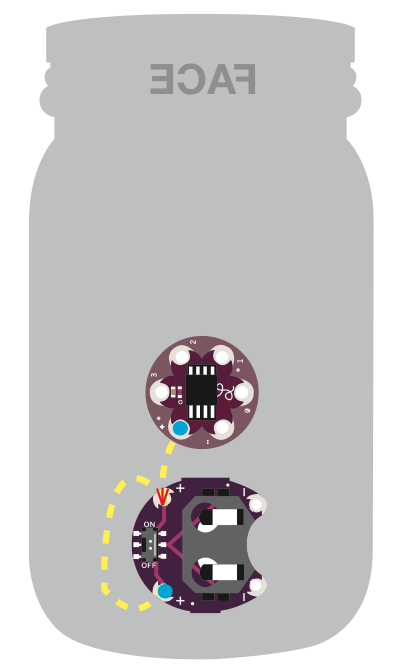
- Start by looping 2-3 times through and around the bottom positive pin of the battery holder.
- Sew up to the top positive pin. Loop through and around that pin 2-3 times.
- Sew up to the positive pin on the microcontroller. Loop and knot it there. Cut off any excess thread.