ESP32 Environment Sensor Shield Hookup Guide
Hardware Overview
The ESP32 Environment Sensor Shield incorporates three sensors capable of measuring five different environmental variables. It also provides connections for several other sensors that can be connected if so desired.
Onboard Sensors
All of the onboard sensors are connected to the ESP32 via I2C connection.
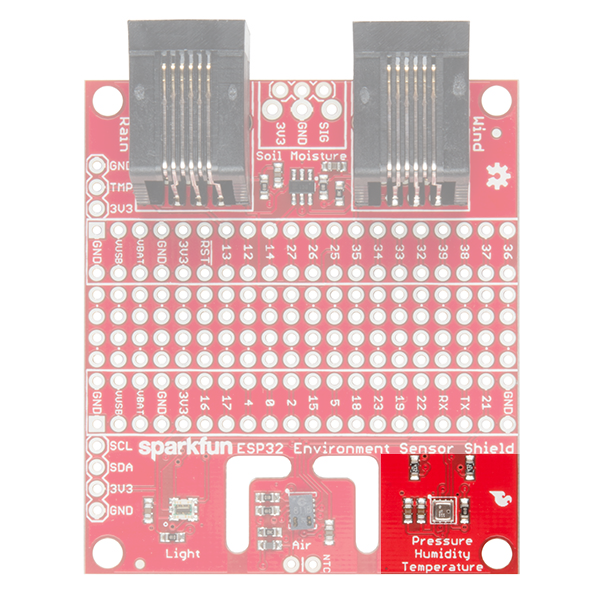
Pressure, Humidity, and Temperature
The first onboard sensor is a Bosch BME280. This sensor measures relative humidity, temperature, and barometric pressure. On the back side of the board is a solder jumper (labeled JP1) which can be closed to change the I2C address of the chip. By default the address is 0x77; closing the jumper forces the address to 0x76.
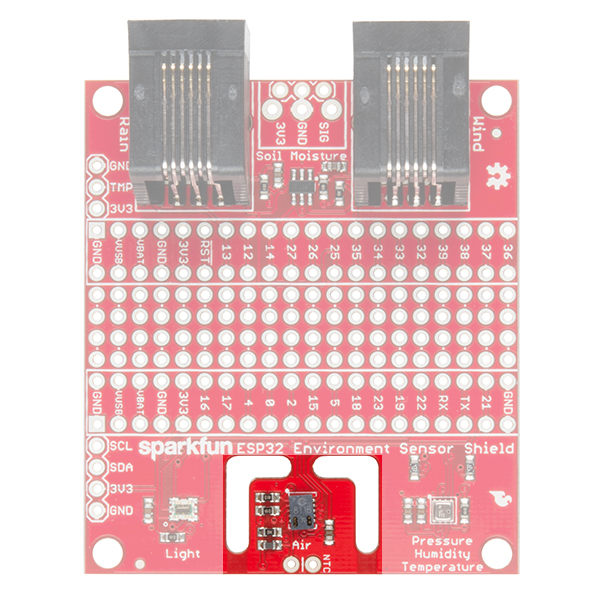
Air Quality and Temperature
Next is the ams CCS811 air quality and temperature sensor. Note the routed out region around this sensor. That provides a buffer against thermal changes stimulated by the circuitry on the rest of the PCB. As with the BME280, it is possible to change the I2C address of this sensor. Closing jumper JP2 on the reverse side of the board causes the sensor to adopt address 0x5A, and by default it will be 0x5B.
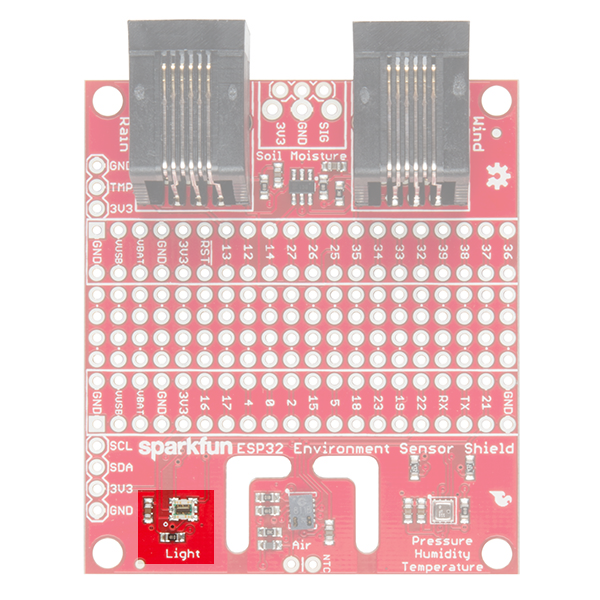
Luminosity
The last onboard sensor is the Broadcom APDS-9301. It's capable of detecting and reading light levels from nighttime through broad daylight. Keep in mind that the sensor will saturate if exposed to direct sunlight. By defaul, the sensor will have an I2C address of 0x39. By adding a solder jumper toward 0 on the jumper pads labeled JP3 on the back of the board, the address can be changed to 0x29. By adding a solder jumper toward 1, the address can be set to 0x49.
Jumpers on Back of the Board
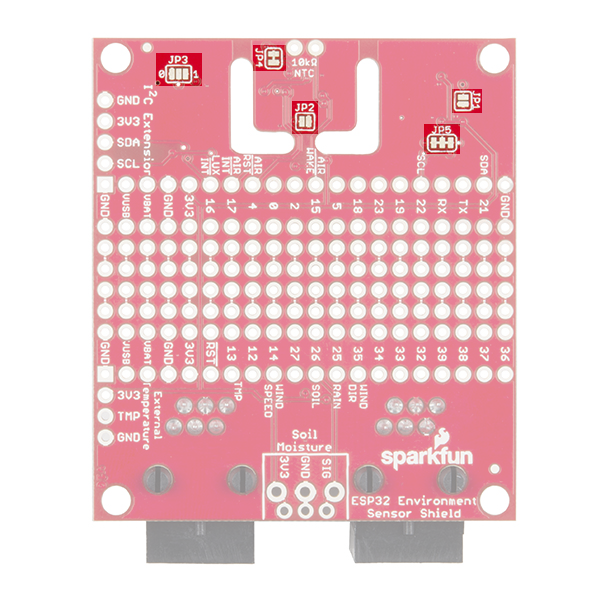
There are five jumpers on the back of the board.
Here's what they do:
JP1 - Close this jumper with a solder blob to change the I2C address of the BME280 sensor from 0x77 to 0x76.
JP2 - Close this jumper with a solder blob to change the I2C address of the CCS811 sensor from 0x5B to 0x5A.
JP3 - Close the 0 half of this jumper with a solder blob to set the address of the APDS-9301 sensor to 0x29. Close the 1 half of this jumper to set the address to 0x49. If you accidentally bridge the entire jumper, the address will be 0x29, but nothing bad will happen.
JP4 - Cut this trace to disable the onboard NTC thermistor used by the CCS811 for temperature compensation. If you do this, you must add an external NTC thermistor for the CCS811 to work properly.
JP5 - Cut the traces on this jumper to disable the pull-up resistors for the I2C bus.
Optional, off-board Sensors
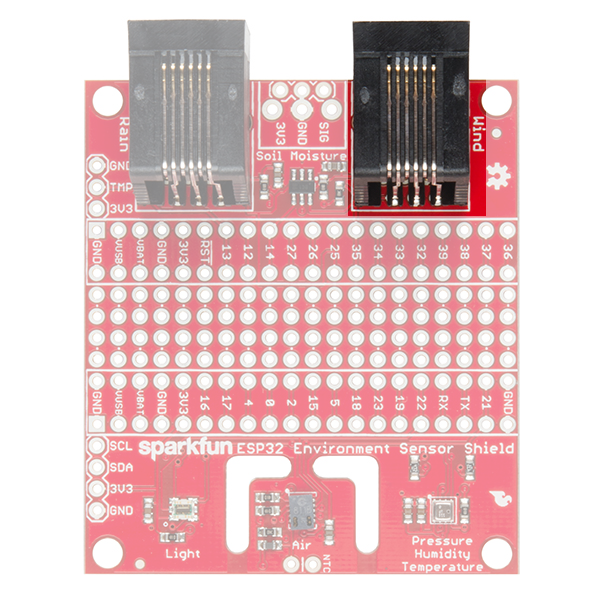
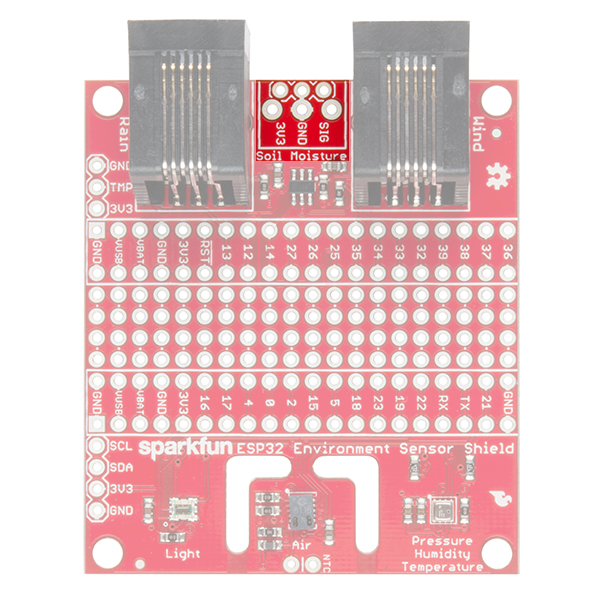
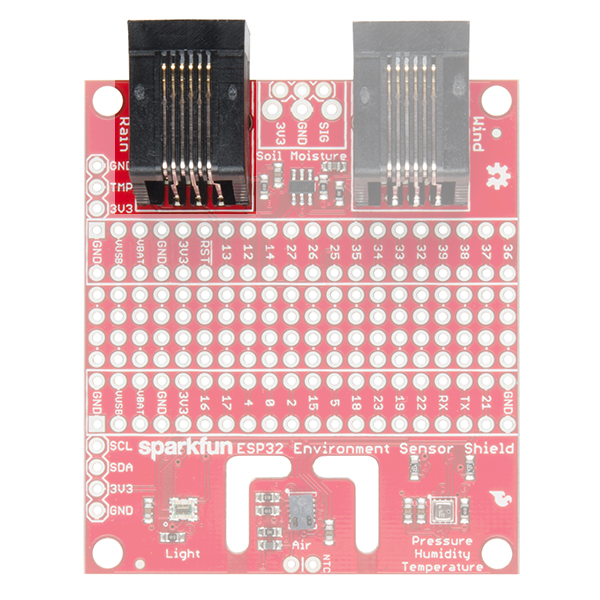
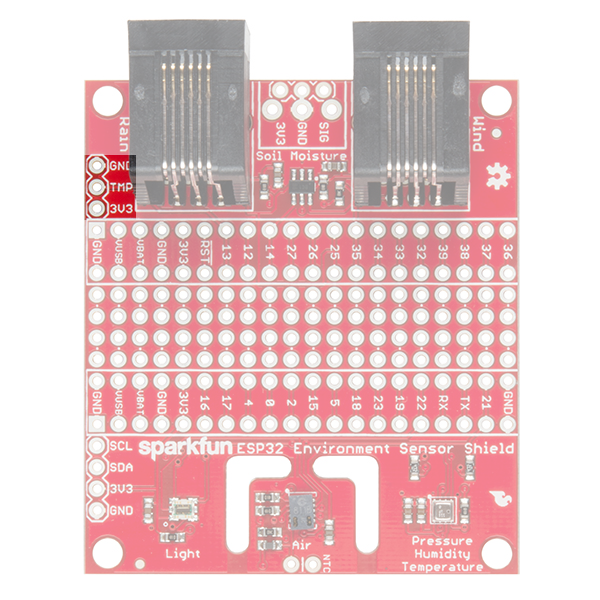
There are connections for five off-board sensors as well: wind speed and direction, rainfall amount, temperature, and soil moisture.
Wind Speed and Direction
Coupled with SparkFun's weather station, the wind speed and direction can be measured by counting pulses per second and by measuring the resistance of a discrete step potentiometer. The pins for these two functions are connected to ESP32 Thing pins 14 (speed) and 35 (direction).
One tick per second corresponds to 1.492mph (2.40 kph) of wind speed. Obviously, the orientation of the weather meter determines what the resistance is for a given position. Sixteen positions are available and the voltage corresponding to each can be found on page 2 of the weather meter's datasheet. Our example code provides you with a solid example on using the direction sensor, as well.
Soil Moisture
SparkFun's soil moisture sensor can be connected to the shield and monitored via analog voltage conversion. The sensor connects to pin 26 of the ESP32 Thing.
Rainfall
The weather station will also provide you with a rainfall gauge. Much like the wind speed gauge, the rainfall gauge generates ticks to tally the amount of rain that has fallen. Count ticks to determine how much rain has fallen recently. Each tick represents 0.011" (0.28mm) of rainfall. This sensor is connected to pin 25 of the ESP32.
External Temperature
If you so desire, you can connect one of our TMP36 external temperature sensors to the board at this location. Connecting it through a short wire will allow you to measure temperature outisde of the enclosure that the rest of the system is in. It measures with a 10mV/deg C output voltage. It is connected to pin 13 of the ESP32.
Any I2C Sensor
We've provided a header which will allow you to connect any other I2C sensor or device you may think useful to the board. In fact, the pinout of this header is such that many SparkFun I2C boards can be directly attached without any wire order change at all!
