E-Textiles ISTE Workshop
 Gella
Gella 
Setting Up Arduino
Note that the LilyMini only works with Arduino version 1.8 or higher and Windows 10 or Mac computers (for now).
What Is Arduino?
Arduino is a combination of inexpensive hardware and free software that allows you easily create "smart" projects limited only by your imagination. The LilyMini is one of many Arduino-compatible microcontrollers (a tiny, self-contained computer). It is part of the LilyPad system, which includes a variety of Arduino-programmable boards and components.
The LilyMini was designed to fill the need for something more easily programmed than the smaller LilyTiny, while being less complex and expensive than the larger LilyPad boards like the LilyPad Arduino USB. It's a great tool for the classroom, and an inexpensive and fun way to learn programming while making craft projects.
What is a Program?
A program is a set of instructions that a computer carries out. The computer reads each line of code (written in a language that the computer understands), carries out the instructions, and goes on to the next line. Depending on decisions the computer is asked to make, the computer may jump forward or backwards in the set of instructions.
Arduino uses a simplified version of a computer language called C. Programs are written in text, using special words called commands that the computer understands. Arduino hides most of the complexity of programming a computer, leaving the fun part to you.
Once you write your program, you'll need to transfer it to the board so it can run. Arduino uses an elegant system that uploads code from your computer to the board over USB. Once it's on the board, your program will stay there (even after you turn off the power) until you replace it with a new program.
Programs let you customize the board to do what you want it to do.
Ready to get started? Start up the Arduino software to follow along with the rest of this guide.
Connect the LilyMini to Your Computer
Before you can upload a program to the LilyMini, you will need to connect it to a computer using a micro-B USB cable. Connect the small end of the USB cable to the USB port on the LilyMini. It will only fit one way, and should click in securely.
Next, plug the other end of the USB cable into an available port on your computer. The LilyMini's built-in RGB LED should fade from off to green to indicate that it's powered on. If it doesn't, press the small black "ON" button on the LilyMini to turn it on. The LilyMini must be turned on to program it.
Select the LilyMini in Arduino
Arduino knows how to program many different boards. We now need to tell it that we'll be programming a LilyMini. In Arduino, select the Tools > Board menu. This will bring up a long list of Arduino boards. Scroll down to find LilyPad LilyMini in the SparkFun SAMD section, and click on it. A check mark will appear when the board is selected.
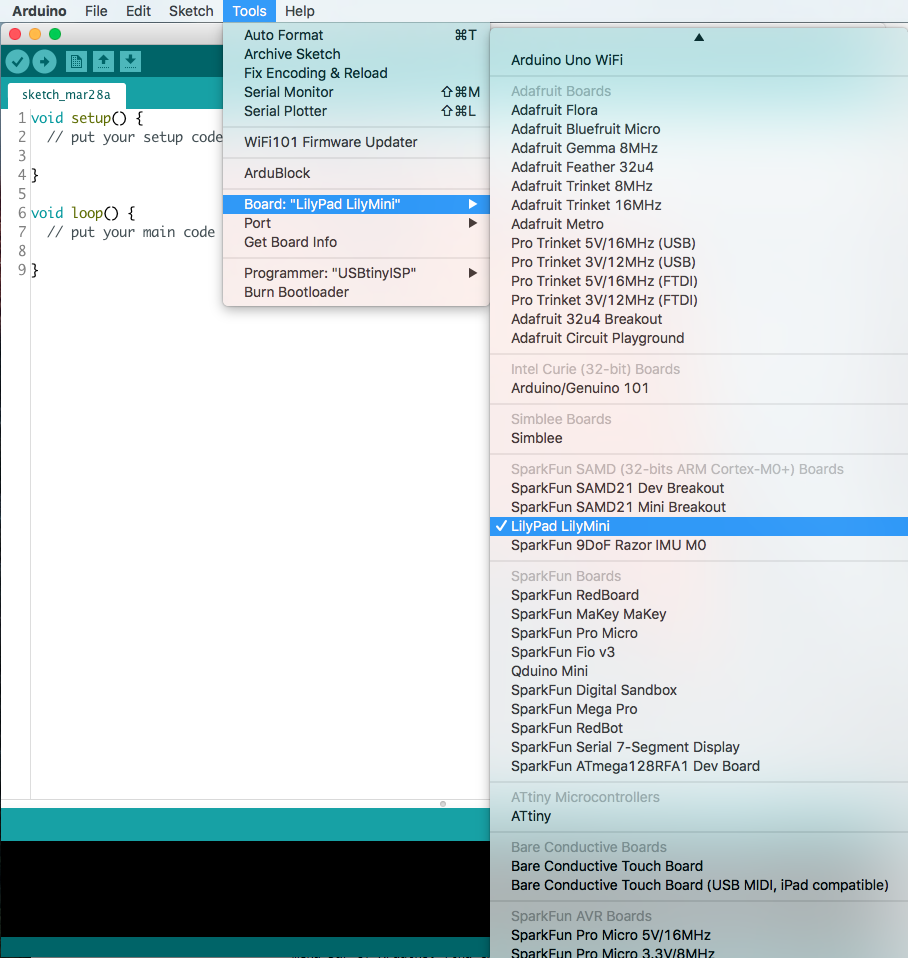
If you do not see the LilyMini in the list, double check that you did all the setup steps in the Programming the LilyMini tutorial.
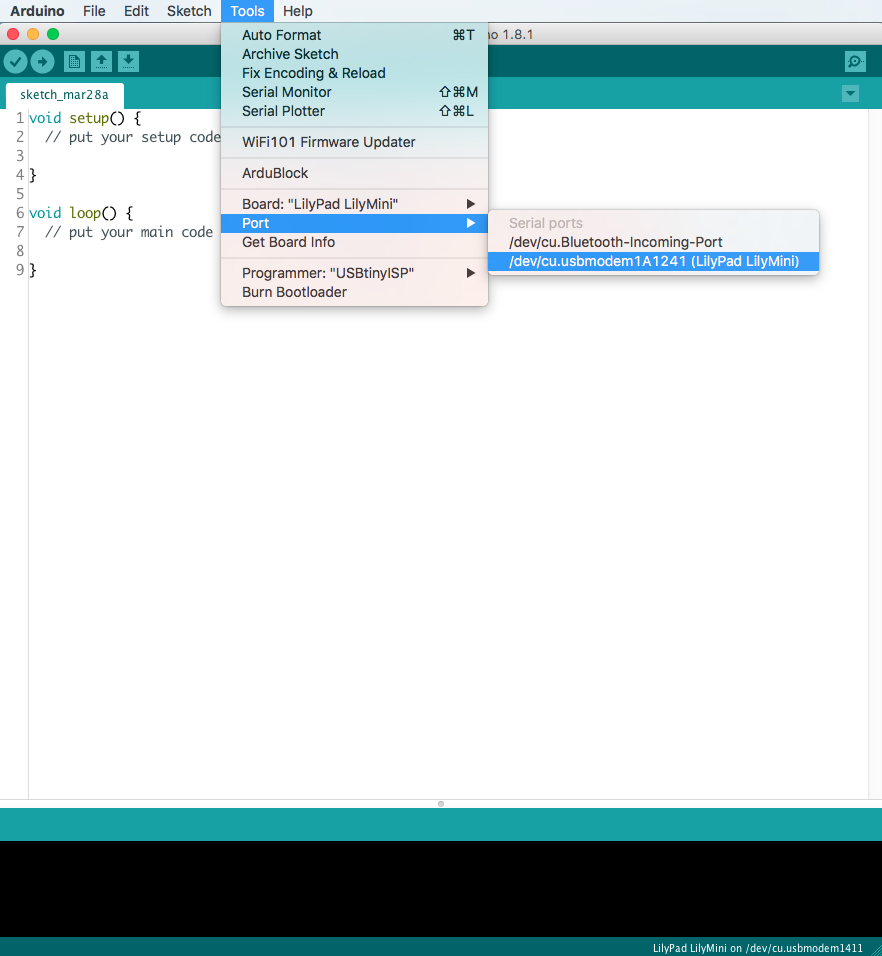
Selecting a Serial Port
Next, Arduino needs to know which USB port the LilyMini is plugged into. In the same Tools menu, select Port and look at the list of available devices. Find the one that says "LilyPad LilyMini" next to it, and click on it.