Computer Vision and Projection Mapping in Python
Set Up a Raspberry Pi
We’ll start with a fresh install of Raspbian however you’d like to install it. There are lots of tutorials on how to do this, so I won’t go into it here (check out our tutorial).
Raspberry Pi 3 Starter Kit Hookup Guide
Once the operating system is installed, we need to make sure that everything is up to date.
Open a terminal window and execute the following commands:
language:python
> sudo apt-get update
> sudo apt-get upgrade
> sudo apt-get dist-upgrade
This can take quite a while, depending on how out of date the software image you started with was.
The next part of computer vision is, well... the vision part. We’ll need to make sure that the PiCamera module is installed correctly.
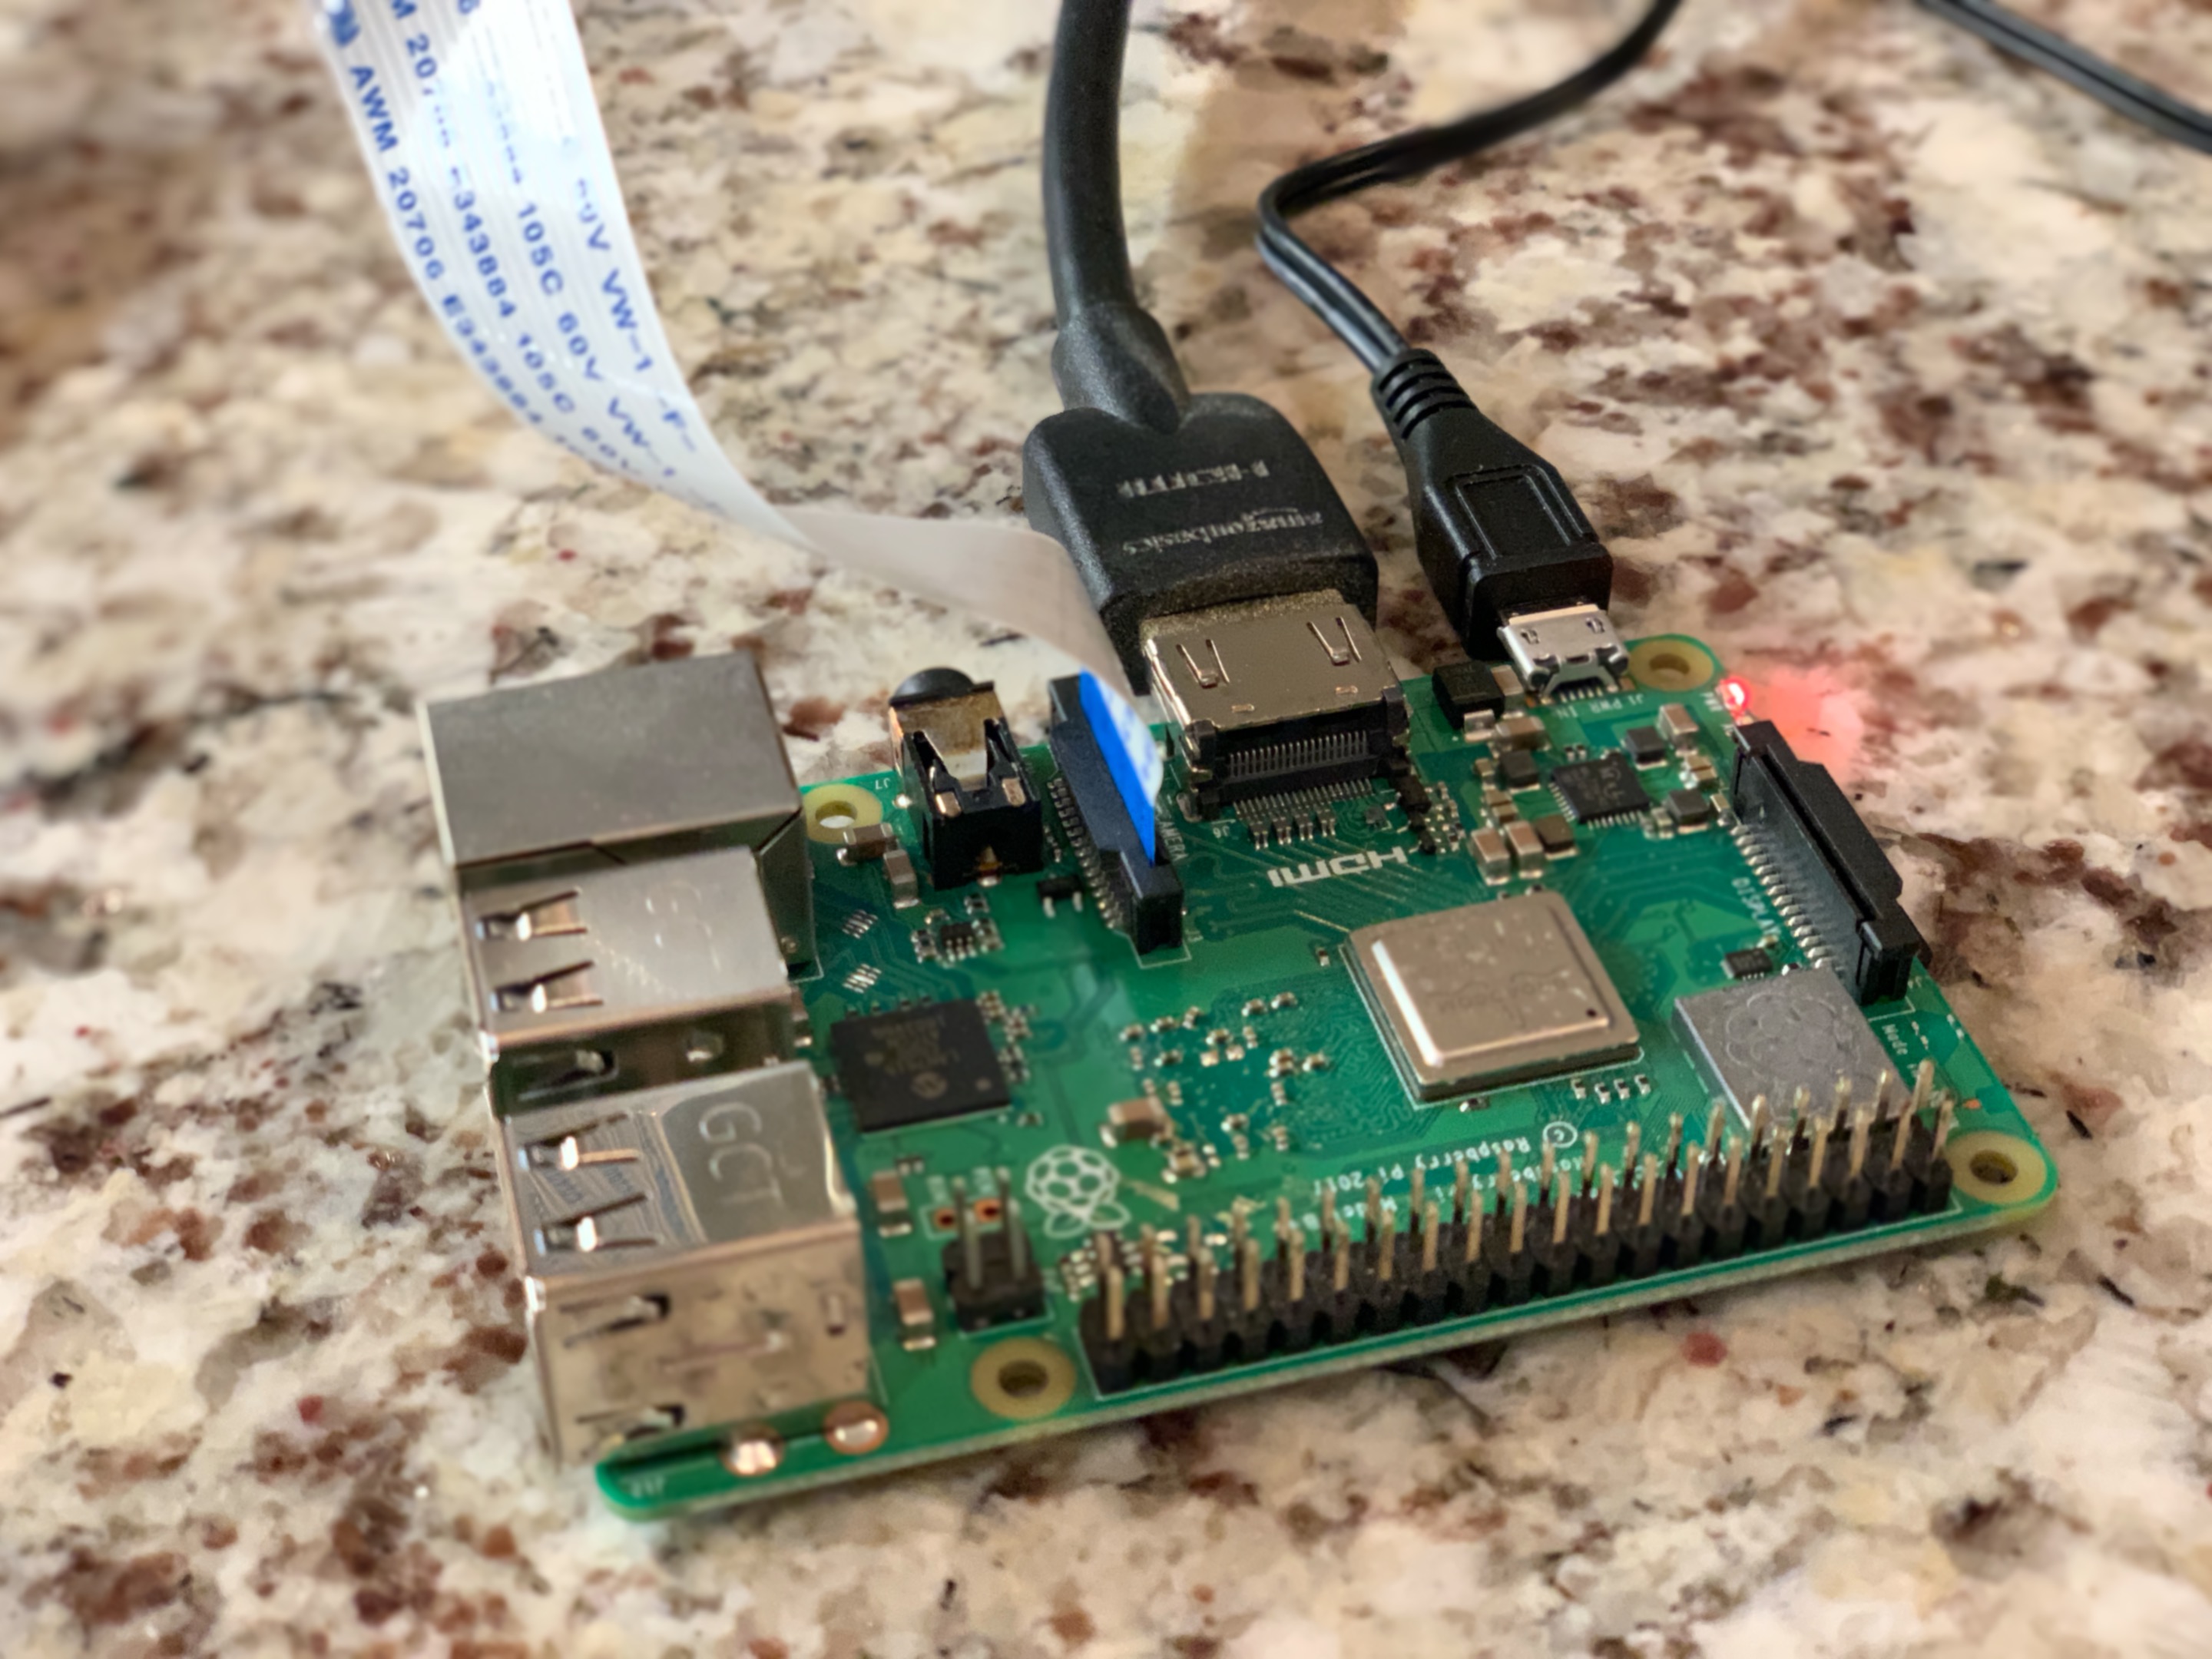
Start by making sure your Raspberry Pi is off, then open up the PiCamera module, and install it by inserting the cable into the Raspberry Pi. The camera connector is the one between the HDMI and Ethernet ports, and you’ll need to lift the connector clip before you can insert the cable. Install the cable with the silver contacts facing the HDMI port.
After you have the module physically installed, you’ll need to power on the Pi.
Launch the Raspberry Pi Config. There are two ways to do this, either from the command line, or from the desktop menu. Here’s the terminal command
language:python
> sudo raspi-config
You should see something like this
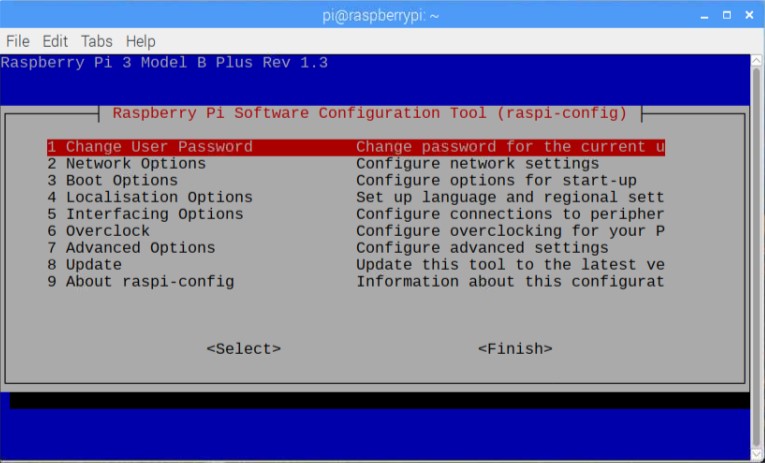
Under the Interfacing Options tab, enable the Camera module. You’ll need to reboot before the changes take effect. If you think you’ll use the features, it can be convenient to enable ssh and VNC while you’re at it. It should be noted that if you use VNC with some of the Pi Camera tutorials, some of the image preview windows don’t show up. If you are connected to a monitor, you’ll see the preview, but just not over the network. I've tried to stay away from those types of previews in this tutorial, but just in case you get some weirdness, it's worth checking with a dedicated monitor.
At this point, it’s good to stop and verify that everything is working correctly. The Raspberry Pi has a built-in command line application called raspistill that will allow you to capture a still image. Open a terminal window and enter the following command
language:python
> raspistill -o image.jpg
If you have a dedicated monitor connected, you will be given a few seconds of preview before the photo is captured if you'd like to compose your image. I believe this is the only example in the tutorial that falls under my display warning above.
Feel free to name the test image whatever you’d like. If everything is set up correctly, you should be able to look at you awesome new test image in all its glory. The easiest way I've found to do this is to open the file manager on the desktop, navigate to your image, and double click it. If you cannot create an image, or the image that is created is blank, double check the installation instructions above to see if there’s anything you may have missed or skipped. And don’t forget to try a reboot.
language:python
> sudo reboot