Computer Vision and Projection Mapping in Python
Put a Hat On It
Now that we've figured out how to map between our two spaces, we can finally create our new image! We will start from a blank black image, and merge our sprite image on top. We want to avoid projecting what the camera sees back on top of the real world thing it saw, so effectively a black image is no projection.
Interesting note here, if you are in an environment that has poor lighting and you run into issues with the camera seeing and detecting faces, you can change the black background to varying shades of gray to have the projector create its own lighting. You add utility at the expense of making the project-able region more pronounced.
Let's run through the complete code for our project.
language:python
#! /bin/env python3

from imutils.video import VideoStream
from imutils import face_utils
from imutils import rotate_bound
from contour_perspective_calibrator import load_camera_props
from contour_perspective_calibrator import undistort_image
from contour_perspective_calibrator import get_perspective_transform
from contour_perspective_calibrator import show_full_frame

import argparse
import math
import time
import dlib
import cv2
import numpy as np
In addition to our normal imports, you'll notice that I'm reaching back into our calibration file to reuse the load_camera_props, undistory_image, get_perspective_transfom, and show_full_frame functions. No need to copy and paste.
language:python
def build_image(frame, display_resolution, markers, predictor, sprite_path):
    """
    Function to build our marker image
    We're building a black image and adding the proper markers to it, so that
    when it's projected, only the markers display on the target
    :param frame: corrected and transformed image (already b&w)
    :param display_resolution: the current displayed or projected screen resolution
    :param markers: Found detector markers
    :param predictor: the loaded facial predictor
    :param sprite_path: the location of the sprite
    :return: built image
    """
    d_width, d_height = display_resolution
    f_height, f_width = frame.shape
    img = np.zeros((d_height, d_width, 3), np.uint8)
    for mark in markers:
        shape = predictor(frame, mark)
        shape = face_utils.shape_to_np(shape)
        # Grab some info from the detected face.
        # The top and left give us the origin
        # The width and height give us scale/size
        # DON'T FORGET we need to map the values back to screen resolution
        face_left = int(np.interp(mark.left(), [0, f_width], [0, d_width]))
        face_top = int(np.interp(mark.top(), [0, f_height], [0, d_height]))
        face_width = int(mark.width() * (d_width/f_width))
        face_height = int(mark.height() * (d_height/f_height))

        scaled_shape = np.copy(shape)
        for index, (x, y) in enumerate(shape):
            # We need to map our points to the new image from the original
            new_x = int(np.interp(x, [0, f_width], [0, d_width]))
            new_y = int(np.interp(y, [0, f_height], [0, d_height]))
            scaled_shape[index] = [new_x, new_y]
            # Uncomment the line below to set the point projected on the target
            # cv2.circle(img, (new_x, new_y), 1, (255, 255, 255), -1)
        inclination = calc_incl(scaled_shape[17], scaled_shape[26])  # get the info from eyebrows
        apply_sprite(img, face_width, face_left, face_top, inclination, sprite_path)
    return img
Here is where we build the full image we will project back onto our detected face. We start by unpacking the display and frame resolutions into their widths and heights.
Next we create our blank image. We use the np.zeros function to create an array with three channels (RGB) and all values set to zero for black.
Our next step is to step through all of our detected faces. In our loop, we use the dlib predictor to find our key facial points and convert them to a numpy array.
We need to gather some information about our found faces, so we pull the parameters from our face object, mark in the code above. We also perform our space mapping here, so that our locations and values are already in our display resolution.
In the next few lines, we make a copy of our facial features array, and transform each of the points to our display space. If you'd like to see where each of the points lands, uncommenting the cv2.circle command will draw little circles on each of the points. This can be useful to visualize where each of the points is in relation to our detected face. I used this to verify that we were accurately displaying our image on top of a real face.
In the last few steps, we calculate face tilt by looking at our detected face's eyebrows. Once we've found the angle, we apply our sprite to our black image and hand it back to the calling function.
One interesting thing of note: we don't need to save the result of apply_sprite(). Everything in Python is pass-by reference, so when we make modifications to img inside the function, we are modifying the same object img that exists in this scope.
language:python
def apply_sprite(image, width, x, y, angle, sprite_file):
    """
    Given an image, add our sprite
    :param image: our image to be projected
    :param width: Target face width
    :param x: Face location left
    :param y: Face location top
    :param angle: face tilt
    :param sprite_file: the filename of our sprite
    :return: projection image
    """
    sprite = cv2.imread(sprite_file, cv2.IMREAD_UNCHANGED)
    sprite = rotate_bound(sprite, angle)
    sprite, y_final = transform_sprite(sprite, width, y)
    sp_h, sp_w = sprite.shape[:2]
    img_h, img_w = image.shape[:2]

    if y_final + sp_h >= img_h:  # Off the page to the bottom
        sprite = sprite[0:img_h-y_final, :, :]
    if x + sp_w >= img_w:  # Off the page to the right
        sprite = sprite[:, 0:img_w-x, :]
    if x < 0:  # Off the page to the left
        sprite = sprite[:, abs(x)::, :]
        sp_w = sprite.shape[1]
        x = 0

    # loop through and combine the image and sprite based on the sprite alpha values
    for chan in range(3):
        image[y_final:y_final+sp_h, x:x+sp_w, chan] = \
                sprite[:, :, chan] * (sprite[:, :, 3] / 255.0) + \
                image[y_final:y_final+sp_h, x:x+sp_w, chan] * \
                (1.0 - sprite[:, :, 3] / 255.0)
    return image
Applying the sprite to our base image is fairly straightforward, with a few special pieces to consider. We start by reading our image from file. There is a lot of overhead with this, and if I were to do a second version of this code, I think I would make a class where I could store the loaded image and skip reloading it each frame. Once we have our sprite image, we rotate it in relation to head tilt, and the scale and move our sprite to the correct location.
Once we know where the sprite will be positioned in the final image, we need to crop it to the bounds of the image we will project back onto our face later. We do this with the series of if statements.
Lastly, we loop through our channels (RGB), and use the sprite's alpha values to overlay the images, pixel by pixel. Remember that the range(3) function will return a list from 0-2 inclusive, or [0, 1, 2] for three total values. When we use sprite channel 3, we're accessing the alpha value. This is why we need to load the image with cv2.IMREAD_UNCHANGED to preserve this data. As a note, when we use the backslash \, we are breaking a single line onto multiple lines. If you don't use this, Python will give you a syntax error.
language:python
def transform_sprite(sprite, width, y):
    """
    Match the size of our sprite to our detected face width
    :param sprite: the fun image
    :param width: the width we need to adjust to
    :param y: Vertical position of the sprite
    :return: the sprite (may be modified) and the new origin
    """
    manual_adjust = 1.2  # Added this to account for the extra width of the sprite
    sp_h, sp_w = sprite.shape[:2]
    ratio = (float(width) * manual_adjust)/float(sp_w)
    sprite = cv2.resize(sprite, (0, 0), fx=ratio, fy=ratio)
    sp_h, sp_w = sprite.shape[:2]
    y_origin = y - sp_h
    if y_origin < 0:  # the sprite is off the page, so cut it off
        sprite = sprite[abs(y_origin)::, :, :]
        y_origin = 0
    return sprite, y_origin
In this function, we scale our sprite to match the size of our detected face.
Our first parameter, manual_adjust, I added after the fact because we want our sprite to extend a little on both sides of the detected face. It looked a bit weird with the sprite exactly the same with as the face. There are situations where it would be desired to have this be the case, but I found that using a hat wasn't one of them.
After setting our manual scaling factor, we pull size information from our loaded sprite, and compute our scaling ratio.
We use OpenCV to scale our sprite, providing the ratios we calculated.
Next we look at y_origin, or the placement of our sprite. Remember that y=0 is located at the top of our screen, and positive y values go down our view area. We subtract the height of our scaled sprite from our y placement to see if it's negative (off the top of the page). If it is, we cut off the top of our sprite, and reset the calculated y_origin value to be 0 or the top of the image.
Finally we return the sprite and its calculated placement in the final image.
language:python
def calc_incl(point1, point2):
    """
    Calculate the angle of inclination between two points
    :param point1:
    :param point2:
    :return: the angle in question
    """
    x1, y1 = point1
    x2, y2 = point2
    incl = 180/math.pi*math.atan((float(y2-y1)/(x2-x1)))
    return incl
Here we just calculate the angle between two points. In our use case, this angle should be head tilt computed from the location of the eyebrows.
language:python
def parse_args():
    ap = argparse.ArgumentParser()
    ap.add_argument('-f', '--camera_props', default='camera_config.json',
                    help='Camera property file')
    ap.add_argument('-cw', '--camera_width', type=int, default=960,
                    help='Camera image width')
    ap.add_argument('-fh', '--camera_height', type=int, default=720,
                    help='Camera image height')
    ap.add_argument('-sw', '--screen_width', type=int, default=1824,
                    help='Projector or screen width')
    ap.add_argument('-sh', '--screen_height', type=int, default=984,
                    help='Projector or screen height')
    ap.add_argument('-s', '--sprite', default='santa_hat.png',
                    help='Our image sprite')
    ap.add_argument('-p', '--predictor',
                    default='shape_predictor_68_face_landmarks.dat',
                    help='Face landmark shape predictor')

    return vars(ap.parse_args())
Here we set up what options we can provide from the command line, and their defaults if no option is provided. This helps us be more flexible with our program, avoiding the need to make code changes for each use case. One thing to point out – I've set the default for my sprite file to be 'santa_hat.png'. You could use any image file here, but the thing that makes a good file is a transparent background.
language:python
if __name__ == '__main__':
    args = parse_args()
    print('Loading facial landmark predictor...')
    detector = dlib.get_frontal_face_detector()
    predictor = dlib.shape_predictor(args.get('predictor'))
    print('Camera sensor warming up...')
    camera_resolution = (args.get('camera_width'), args.get('camera_height'))
    vs = VideoStream(usePiCamera=True, resolution=camera_resolution).start()
    time.sleep(2)

    prop_file = args.get('camera_props')
    cameraMatrix, distCoeffs = load_camera_props(prop_file)
    screen_resolution = (args.get('screen_width'), args.get('screen_height'))
    m, maxWidth, maxHeight = get_perspective_transform(
        vs,
        screen_resolution,
        prop_file
    )

    while True:
        frame = vs.read()
        frame = undistort_image(frame, cameraMatrix, distCoeffs)  # Remove camera distortion
        frame = cv2.warpPerspective(frame, m, (maxWidth, maxHeight))
        gray = cv2.cvtColor(frame, cv2.COLOR_BGR2GRAY)

        rects = detector(gray, 0)

        image = build_image(gray, screen_resolution, rects, predictor, args.get('sprite'))

        show_full_frame(image)
        key = cv2.waitKey(1) & 0xFF

        if key == ord('q'):
            break

    cv2.destroyAllWindows()
    vs.stop()
We finally get to put the whole thing together! When we kick off this script from the command line, we start by pulling together all of the arguments provided and their defaults. We provide some messaging to the user giving some status indication, and load our facial detector and predictor from dlib.
Next, we grab the resolution for our camera from the arguments, and create our video stream. Since the stream is running in a separate thread, we sleep to make sure it has time to start before we try to get data from it.
We load our camera calibration properties from file, and gather our display resolution.
In the next line, we find our projection region and the transforms we need to correct the frames that we capture.
At this point, our setup has finished, and we can begin processing frames and building our projection image!
We step into a while True: loop to continue processing images until we press the q key.
In our loop, we get a frame from our video stream and remove its camera distortion. After that, we undistort our frame, and crop it down to our region of interest (only the area that we can project onto).
From this point, we get a grayscale copy of the image, and pass it to our face detector. We pass the returned faces into our image builder along with our cropped image, the display resolution, and our trained predictor (provided by dlib), and get back the image we need to project or display on our monitor.
Now that we have our image, we need to display it. We use our show_full_frame() function to do that for us. The next line, key = cv2.waitKey(1) & 0xFF allows OpenCV to update the projected image on the screen, as well as look for any pressed key. If a key has been pressed, and the key is q, then we break out of our while loop, clean up our windows and exit the program!
To run our finished project, all you need to do is type:
language:python
> python face_detector.py
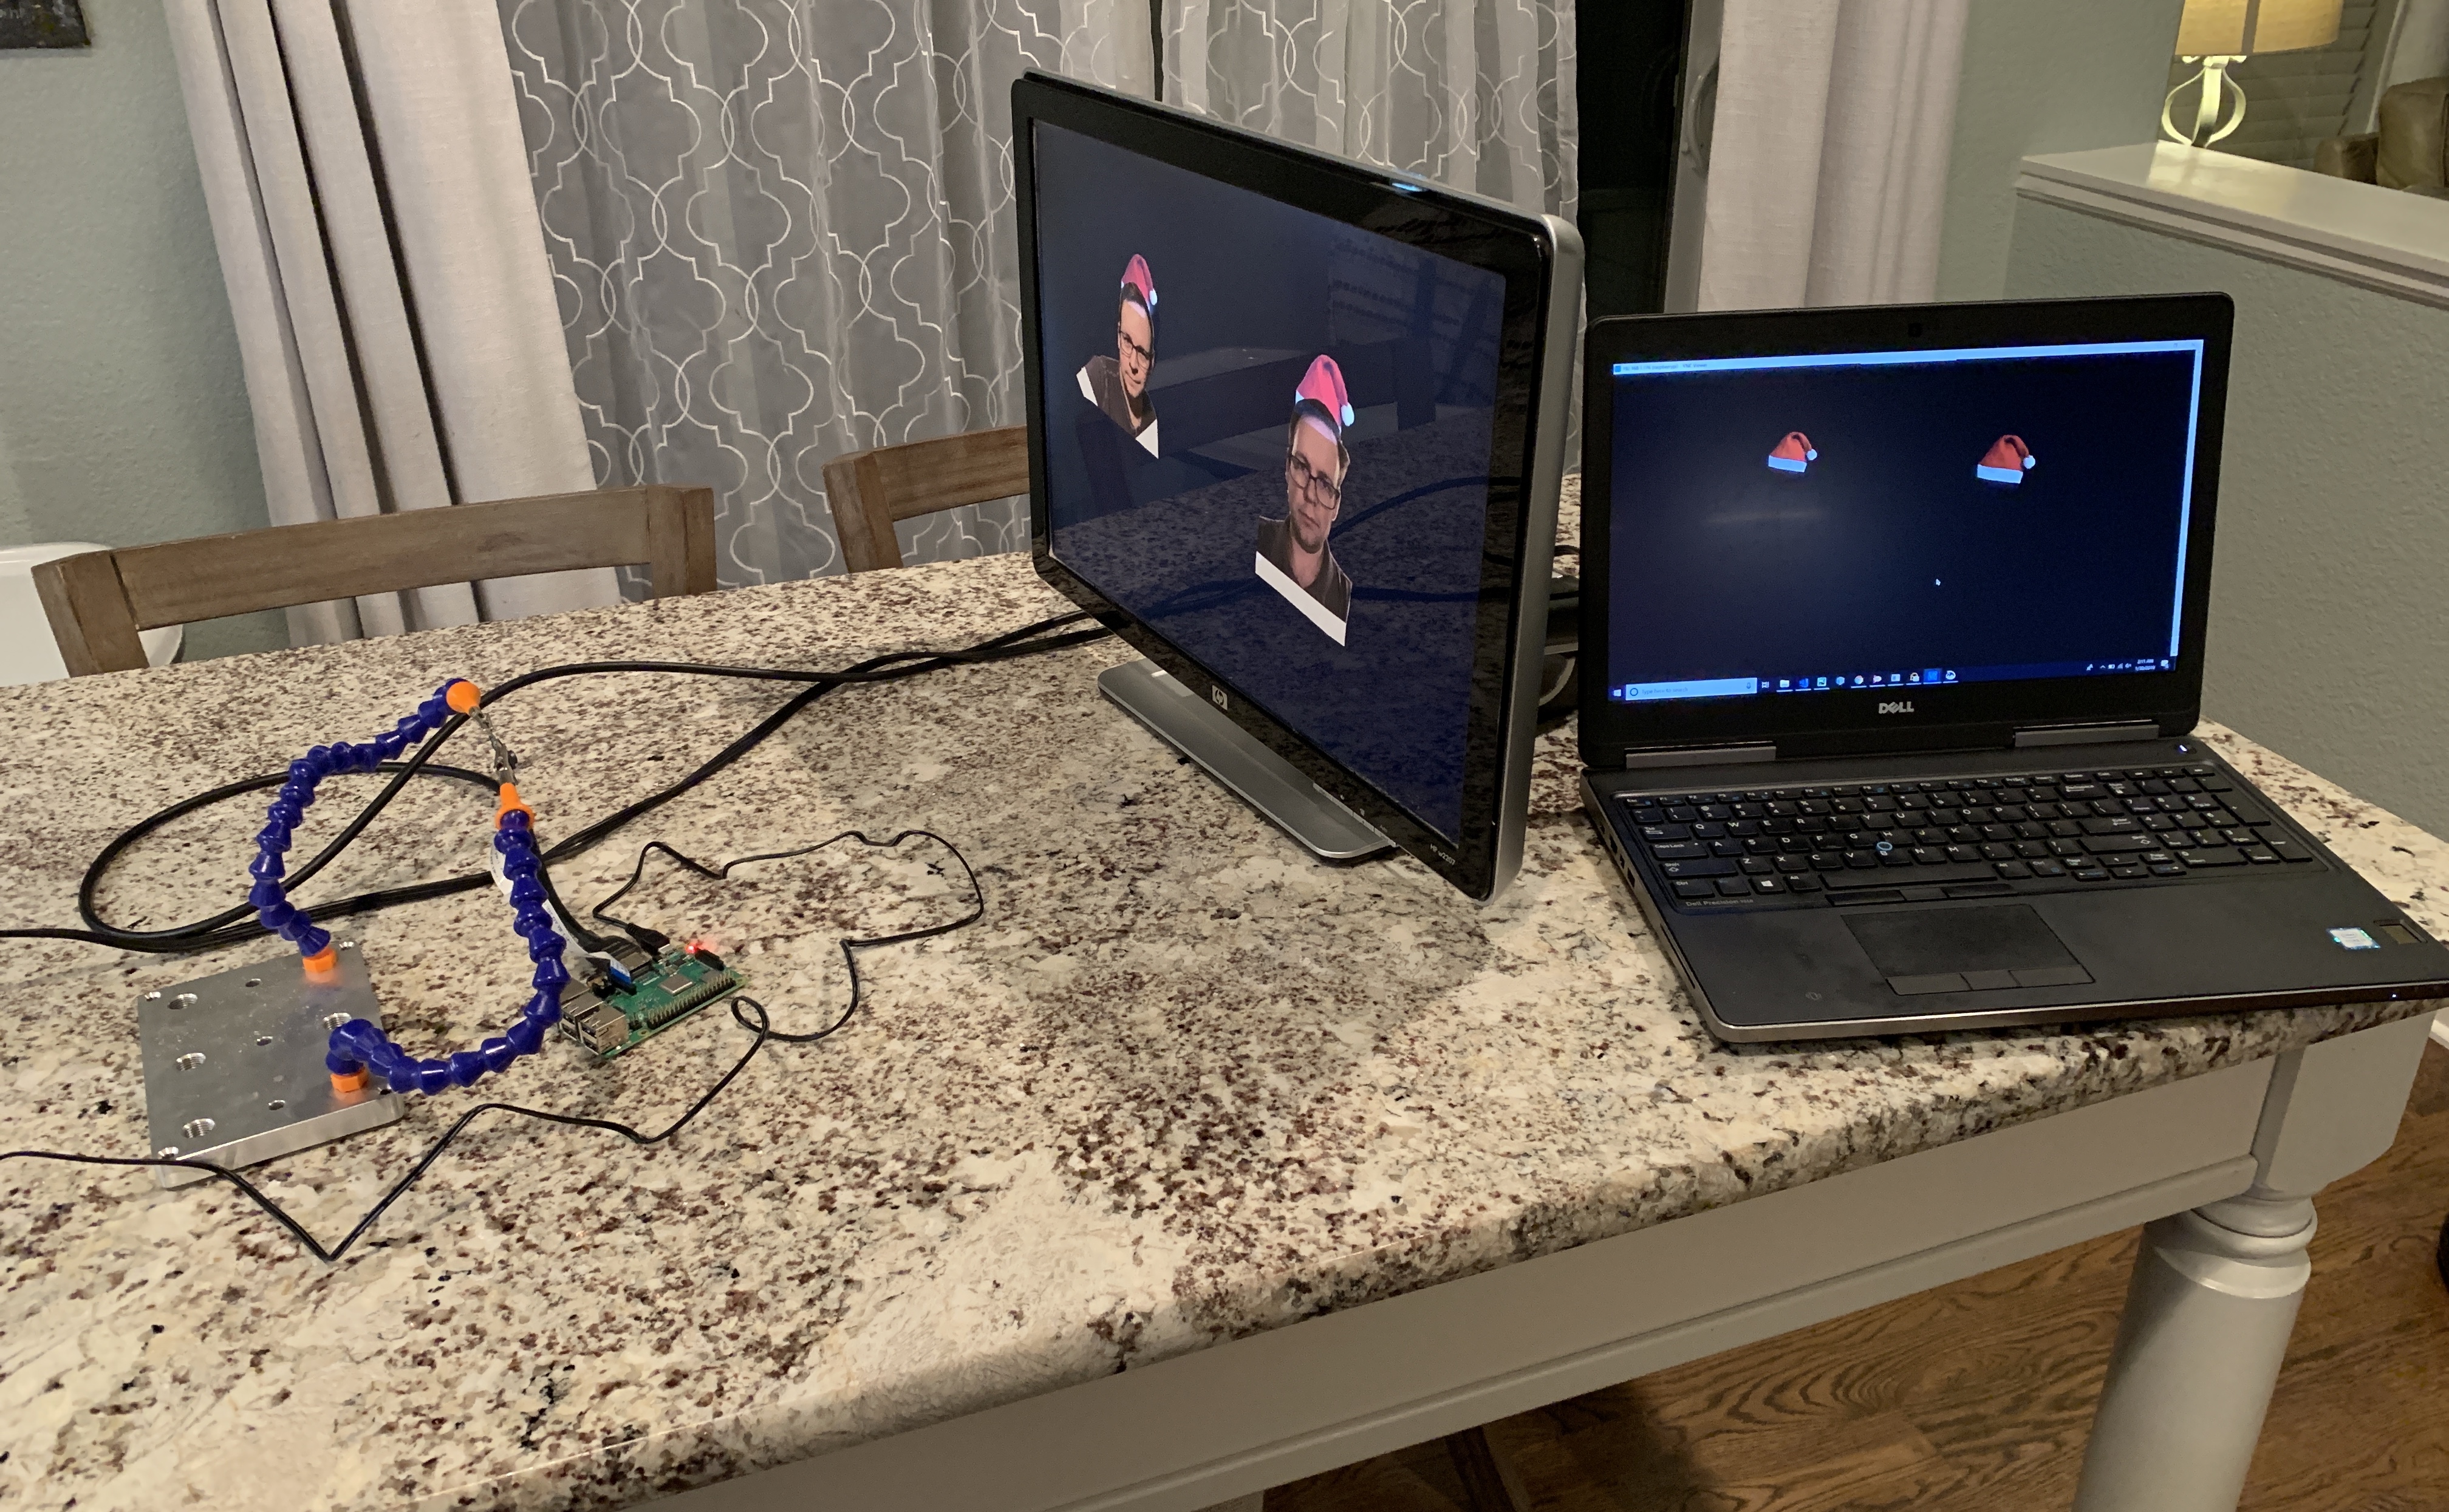
My hope is that you see something close to what I have here. Oh, I didn't mention it before, but since we loop through our found faces, nothing says this is limited to one face at a time!
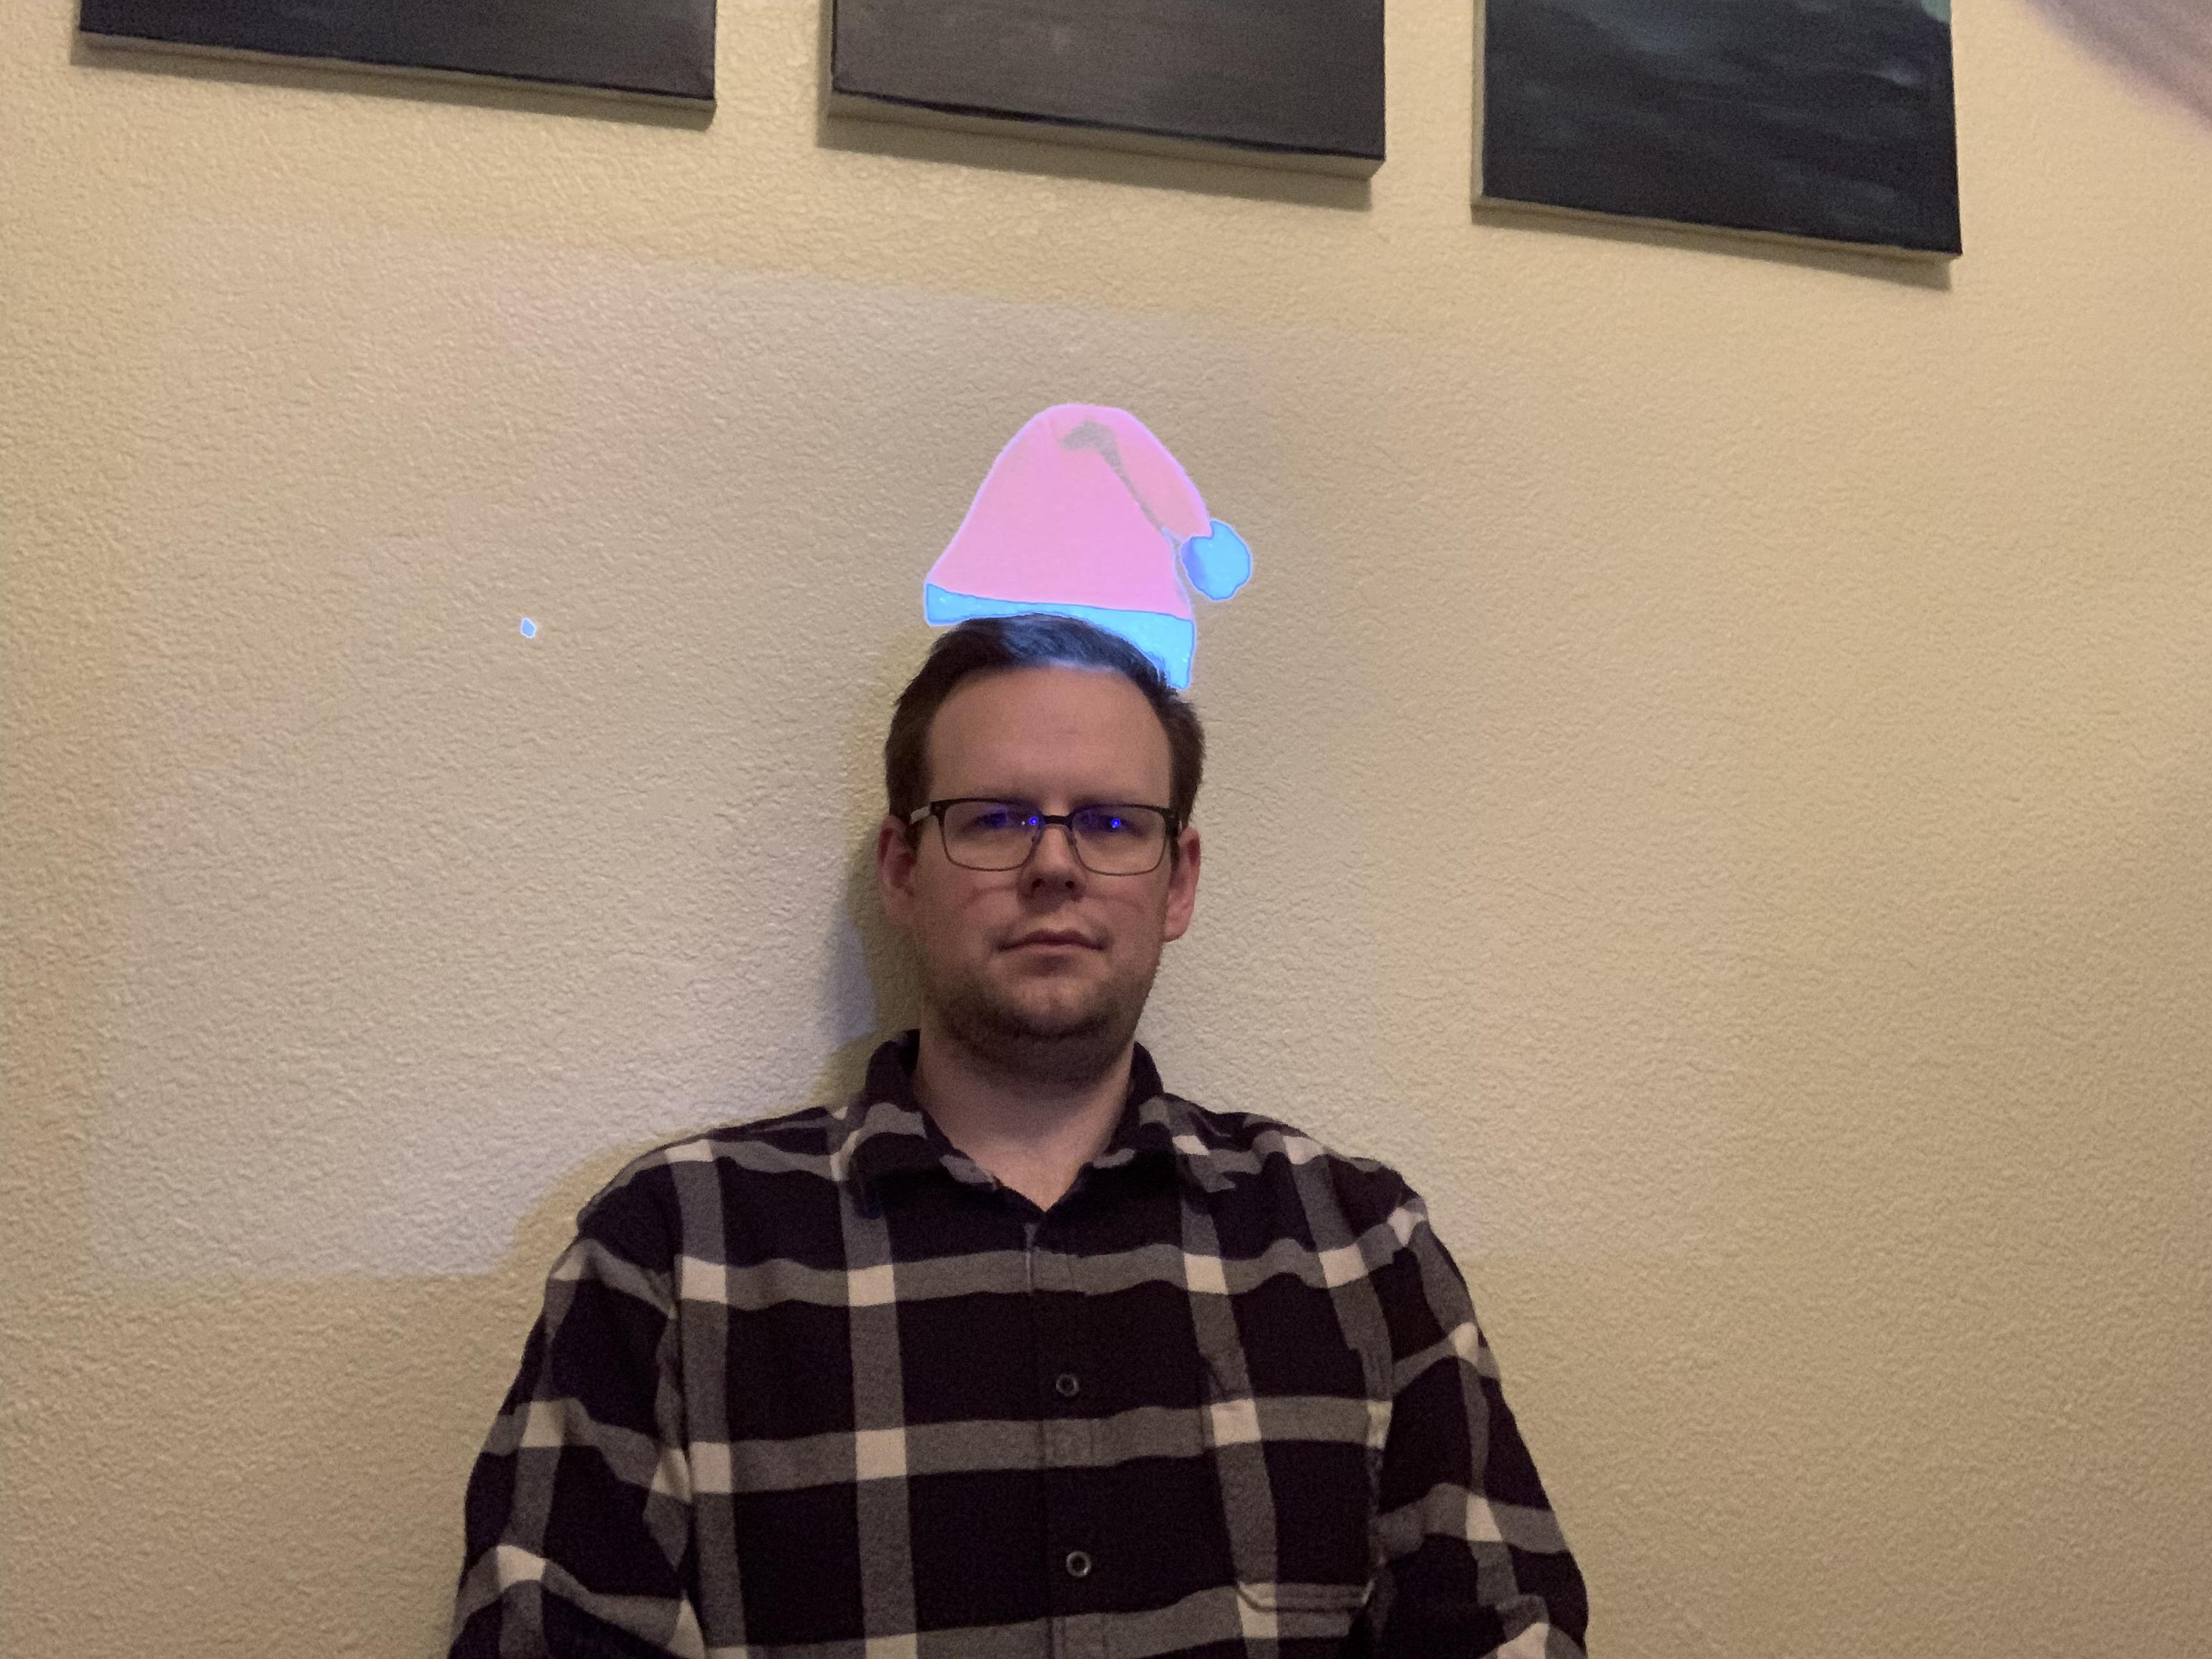
So what about the projector? Did that work too? Well, we defined success as when I could be in front of the projector and it could find me and put a hat on me... so yes! Once more with feeling:
My hope is that you found this tutorial informative and helpful in understanding some of what you can do with computer vision on a Raspberry Pi. If you have any questions or need any clarifications, please comment, and I'll try to clarify where I can.