Building Large LED Installations
 Joel_E_B
 Planning and Design Phase
The planning and design phase is by far the most important. A well-planned project usually results in an easier build process and execution. Here are some of the considerations you'll need to make as you plan out your installation:
Addressable or Non-Addressable LEDs
This should be one of the first things you nail down. Led strips typically come in two flavors: addressable or non-addressable. Addressable LED strips, such as this one, are usually the go-to for many art installations. Each individual LED on the strip can be controlled independently of one another via a small microcontroller attached to each LED. Any installation you've seen that is displaying images or patterns is most likely using addressable LEDs. The project covered in this guide uses addressable LEDs.
In contrast, there are non-addressable LED strips. These strips are generally cheaper, but they offer much less control. The entire strip can either be on or off, there is no individual LED control, and the entire strip can only be one color at a time. For installations that don't require the display of many different colors at once, this may be a better option. You could also use a number of these strips and control each strip independently, which would still give you many colors in one area.
Before diving in to the build, it's a good idea to test each strip individually to avoid complicated troubleshooting down the road. Also worth noting is that these strips can come in different densities, as in amount of LEDs per strip. Be aware of whether you're using strips with 60 LEDs per meter versus 64 LEDs per meter. This will come into play later on.
Controlling the LEDs and Hardware Limitations
If you want to get really crazy, hackaday demonstrates how to power 1000 NeoPixels with the Arduino’s limited RAM.
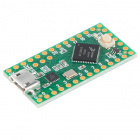
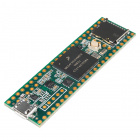
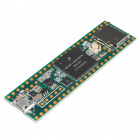
Or you can try to adapt the example code to your favorite microcontroller. Teensy development boards are an excellent choice when using a large number of WS2812 LEDs.
How do you want to control all these LEDs? One of the biggest factors when deciding this is figuring out how many LEDs you want your final installation to contain. Some LED controllers have limitations on how many LEDs they can control. For example, the FadeCandy can handle up to 512 LEDs each. If you have more than 512 LEDs, you'll need to add a second FadeCandy or use a different driver. More drivers means an added bit of complexity, as you'll need to keep track of the addresses of each one, as well as each LED's location.
Only one FadeCandy was used to control the 480 LEDs in the CandyBar. It lives atop the OctoController board from danjuliodesigns.com, and communicates to the Driver boards over varying lengths of Ethernet cables. The Ethernet cables provide both power and communication to each pair of LED strips through the DualDriver boards as well as ESD protection.
Power
This is one area that is often overlooked. A few LEDs draw very little power, but add up several hundred and you have one very power-hungry project. Not only that, but power must be distributed evenly to prevent some LEDs appearing brighter than others or putting off slightly different colors.
For the CandyBar, the same power scheme that Dan used in his Luminescence project was used, scaled for my purposes: a single 24V/250W power supply, which then delivers 5V to each subsequent DualDriver board at up to 30 Watts per pair of LED strips (2x1 meter segments).
If you want to add more LEDs, you will need to add more power. Dan ended up using five of these supplies to power, one for each of the five FadeCandies controlling the 2300 LEDs in the sculpture.

You're not limited to these particular power supplies. If you have high-current 5V supplies, you can power the strips directly from them. Just be aware of how much current you're drawing from any power supply you use.
Space and Environmental Conditions
How are you going to enclose this project? Is it going to be indoors or outdoors? Does it need to be sealed off from the elements? The answers to these questions can greatly affect how you build your project. If the LEDs need to be sealed up, heat may become an issue. If you're working indoors, you can save some money by not having to buy tons of weather proofing materials, or products that are already weatherproof.
Luckily for me, the location for the CandyBar had already been picked, and the idea to house the LEDs atop a long ledge covered in decorative molding had been decided before I was brought on to the project. Sometimes it's easier to design around a set of requirements rather than having free range to design as you see fit.
The CandyBar was built in pieces that could all be disassembled and reassembled atop the ledge. The plan was to use strips of hardboard cut into 8-foot segments. Hardboard is sturdy enough to house LED strips, but lightweight enough that it wouldn't put strain on the ledge.
I had 8 meters of LED strips to cover the 46-foot ledge. Adding more LEDs meant more power and another FadeCandy, but I wanted to keep this as simple as possible. I didn't have time to shop for different strips that have the LEDs more widely spaced apart, so I cut the strips into smaller sizes to even out the spacing between sections of LEDs. Each strip ended up getting cut in two, giving me 16 half-meter strips, and making the gaps between each much less noticeable.
As you're designing, just know that things may look good on paper, but you may have to improvise come build time.