Blynk Board Arduino Development Guide
Contributors:
 jimblom
jimblom 
Set Up the Blynk Project
This example Blynk program only specifies functionality for the RGB LED, but you can use any of the hardware pins regardless of what the firmware specifies.
Configure the Button, LED, and ADC
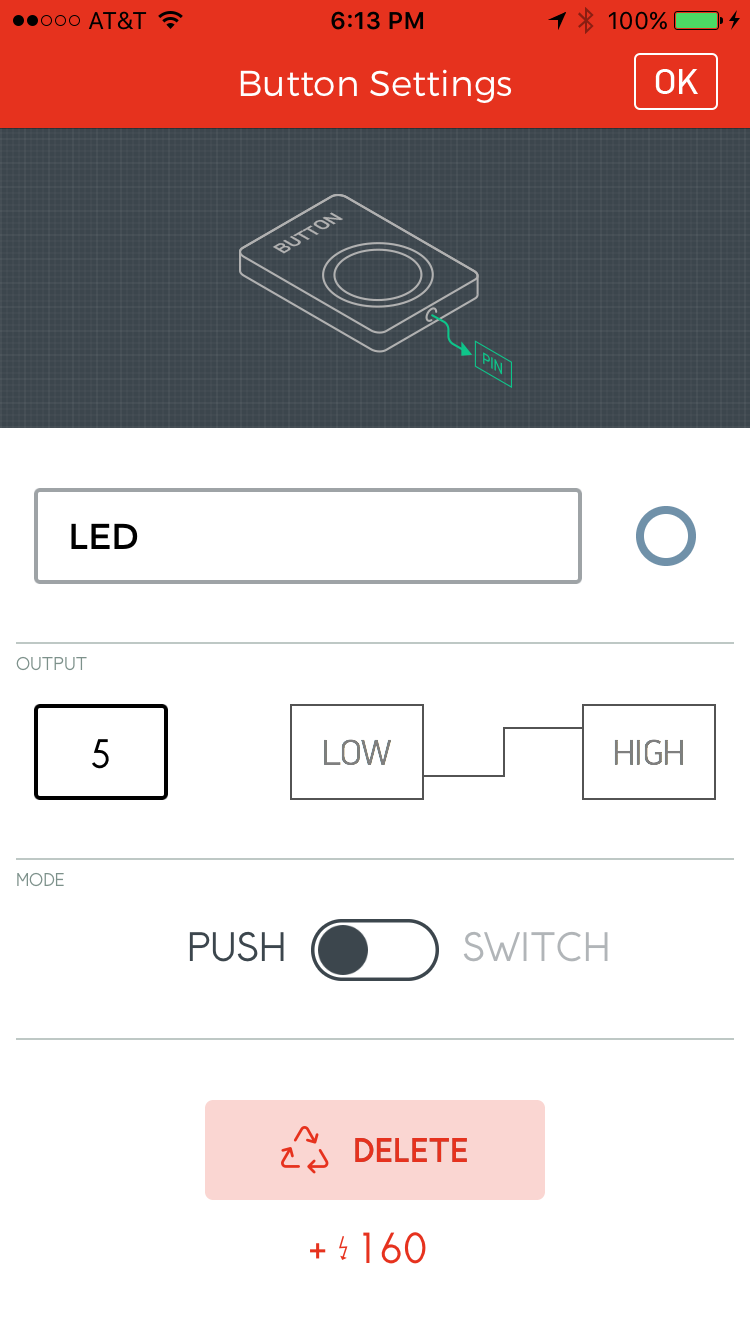
You can use the button widget to drive the tiny, blue, pin 5 LED. Configure it as either push or pull; just make sure the pin is set to 5.
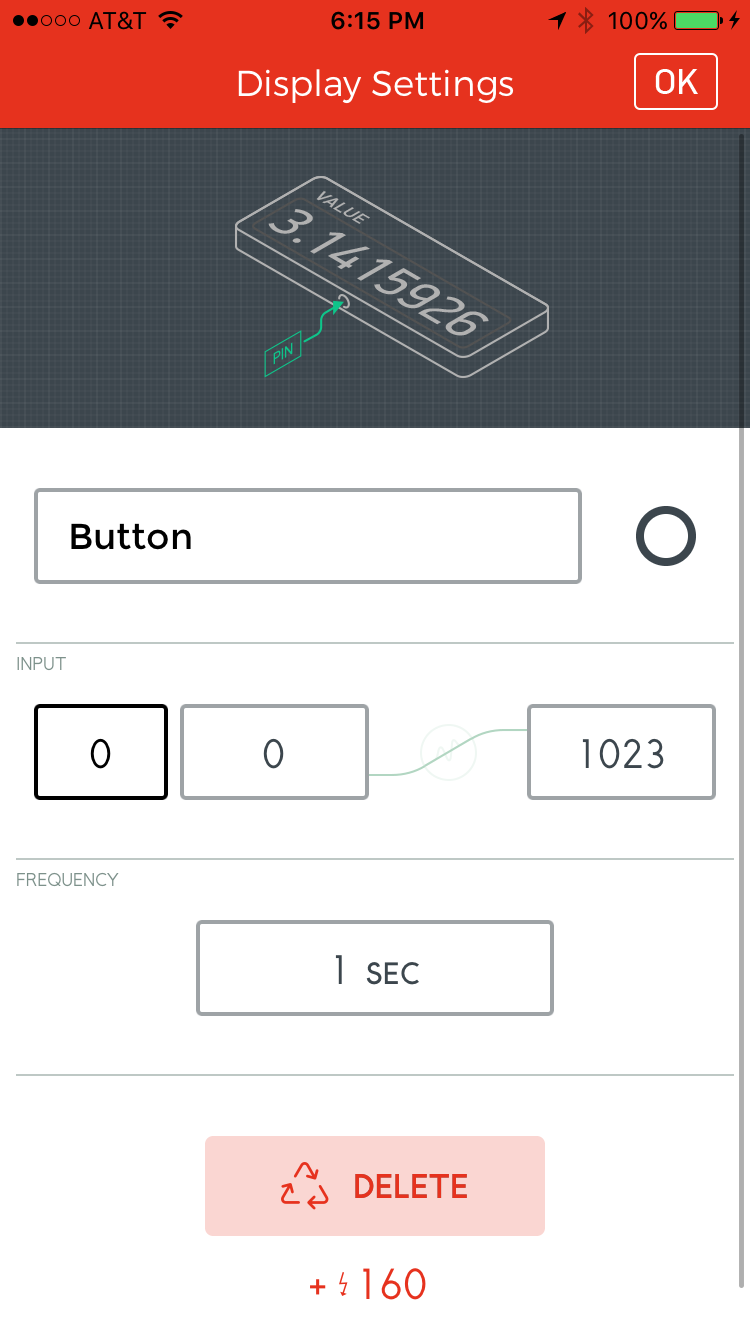
The Blynk Board's physical button can trigger a value widget. Set the widget's pin to 0.
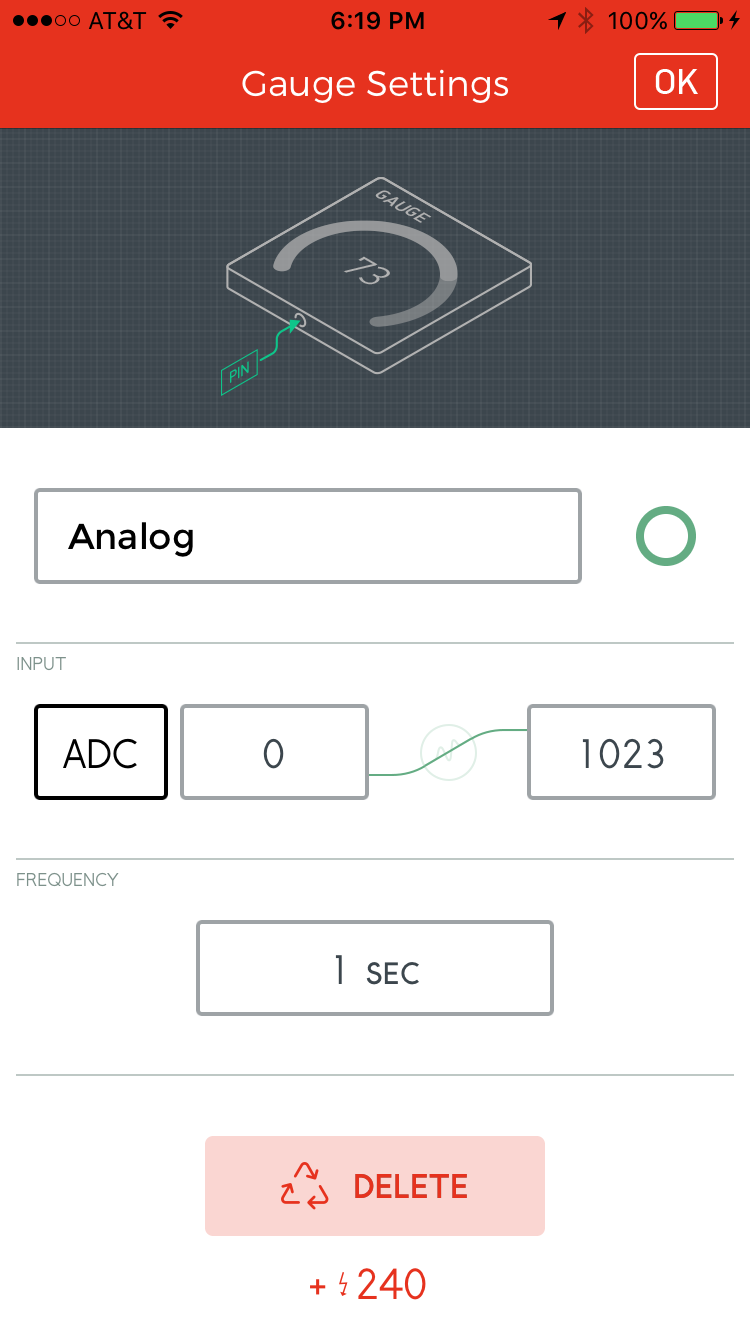
Finally, you can use either a gauge or value widget to display the value of the ADC. Just make sure to set the pin to ADC.
Configure the zeRGBa
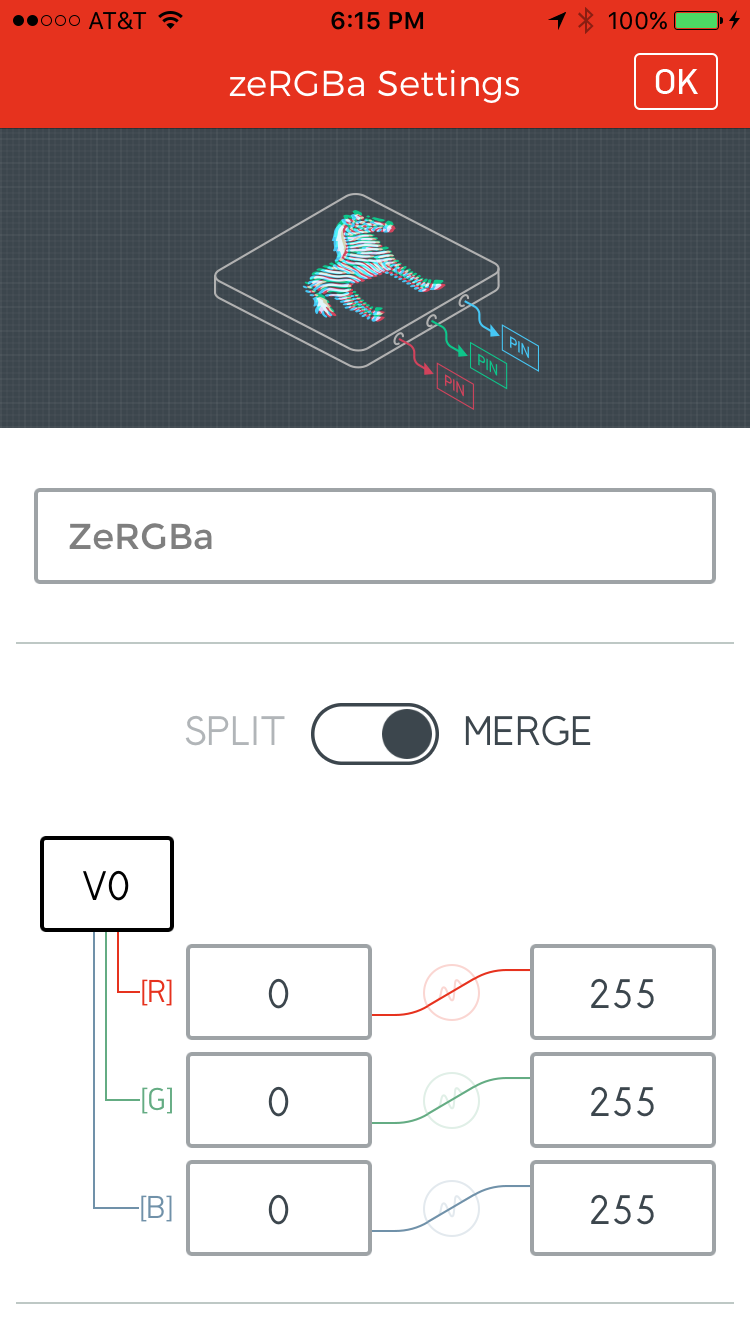
To use the zeRGBa widget, add it, set the switch to Merge and set the pin to V0.
Your project may look a little something like this when it's all configured:
