APDS-9960 RGB and Gesture Sensor Hookup Guide
 Shawn Hymel
Introduction
Touchless gestures are the new frontier in the world of human-machine interfaces. By swiping your hand over a sensor, you can control a computer, microcontroller, robot, etc. One manufacturer has even created a touchless toilet that flushes when you move your hand over the tank. The Avago APDS-9960 offers ambient light and color (as clear, red, green, and blue) measuring, proximity detection, and gesture sensing.
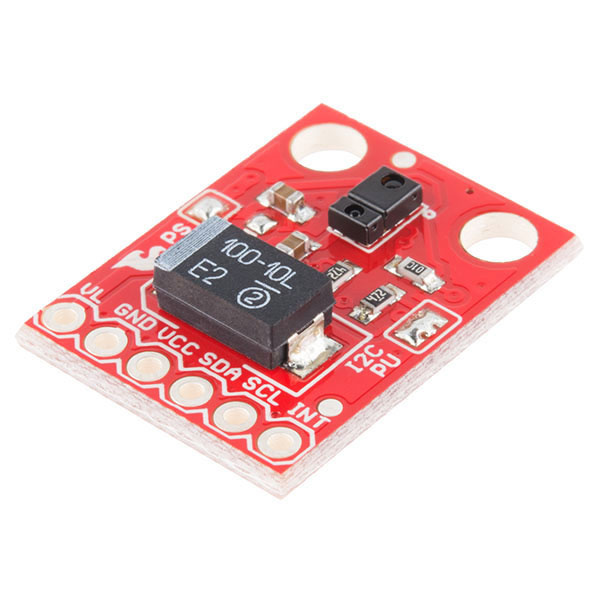
The APDS-9960 RGB and Gesture Sensor board breaks out the pins on the Avago APDS-9960 so you can easily use it in a variety of projects. The APDS-9960 uses the I2C interface for communications.
Covered In This Tutorial
In this tutorial, we will give an overview of the APDS-9960 sensor board and provide an example hookup and code. The tutorial is split into the following sections:
- Board Overview -- To begin, we'll go over each of the pins on the breakout board and their function. This section also overviews the jumpers on the front of the board.
- Hardware Hookup -- In this section, we'll show you how to hook the APDS-9960 up to an Arduino to detect gestures via I2C.
- Arduino Library Installation -- Here, we download and install the APDS-9960 Arduino library.
- Gesture Sensing Example -- We try out the sensor with the the GestureTest example.
- Resources and Going Further -- You made a simple gesture sensor, but where do you go from there? This section gives you some additional resources for getting more use out of the APDS-9960.
Materials Used
You will need a few components and tools to follow along with this tutorial. Here is what you will need:
If you do not have specifically a 3.3V Arduino Pro, there are a number of ways to complete the walkthrough. In general, you will need:
- Arduino or other microcontroller -- You will need something that is capable of I2C and communicating back to the computer (e.g. serial communications). The microcontroller needs to have a 3.3V I/O voltage or you will have to use a level shifter. We are using the 3.3V Arduino Pro, but the 3.3V Arduino Pro Mini would work as well.
- Level shifting -- If you are using a 5V Arduino, like the Uno or RedBoard, you will need to use a level shifter, such as the bi-directional logic level converter.
- Connectors -- You will need to interface your microcontroller with the breakout board. Male headers are perfect if you're using a breadboard. Another option is to use wire to connect the breakout board directly to the microcontroller.
- Soldering tools -- After you've picked a connector, you will need to solder it to the breakout board. A simple soldering iron and some solder should be all you need.
Recommended Reading
Before getting started with the APDS-9960, there are a few concepts that you should be familiar with. Consider reading some of these tutorials before continuing:
- What is an Arduino? -- We will use an Arduino to control the APDS-9960
- I2C -- I2C is the communication protocol used by the APDS-9960
- Serial Communication -- We use serial communications (with the FTDI breakout board) to program the Arduino and provide information to our computer from the Arduino
- How to Use a Breadboard -- The breadboard ties the Arduino to the APDS-9960 breakout board