Using the PSoC 6 Pioneer Board with the Pioneer IoT Add-on Shield
 SFUptownMaker
Example: PSoC 4 BLE to PSoC 6 BLE to ThingSpeak.com
This example uses a PSoC 4 BLE Kit with the Pioneer IoT Add-on Shield to read an air quality sensor and send the results via Bluetooth to a PSoC 6 BLE Kit, which then uses the IoT Add-on Shield to interface with a WiFi XBee and post the data to ThingSpeak.
Sign Up for ThingSpeak
The first thing we'll have you do is sign up for a free ThingSpeak account. ThingSpeak is Mathworks' free IoT data visualization tool. It's free for limited personal use, up to three channels.
To sign up, go to the ThingSpeak website, click the "Sign Up" button in the upper right, and fill in your information. If you already have a Mathworks account, you don't need to sign up, just sign right in. You should get a screen similar to the one below.
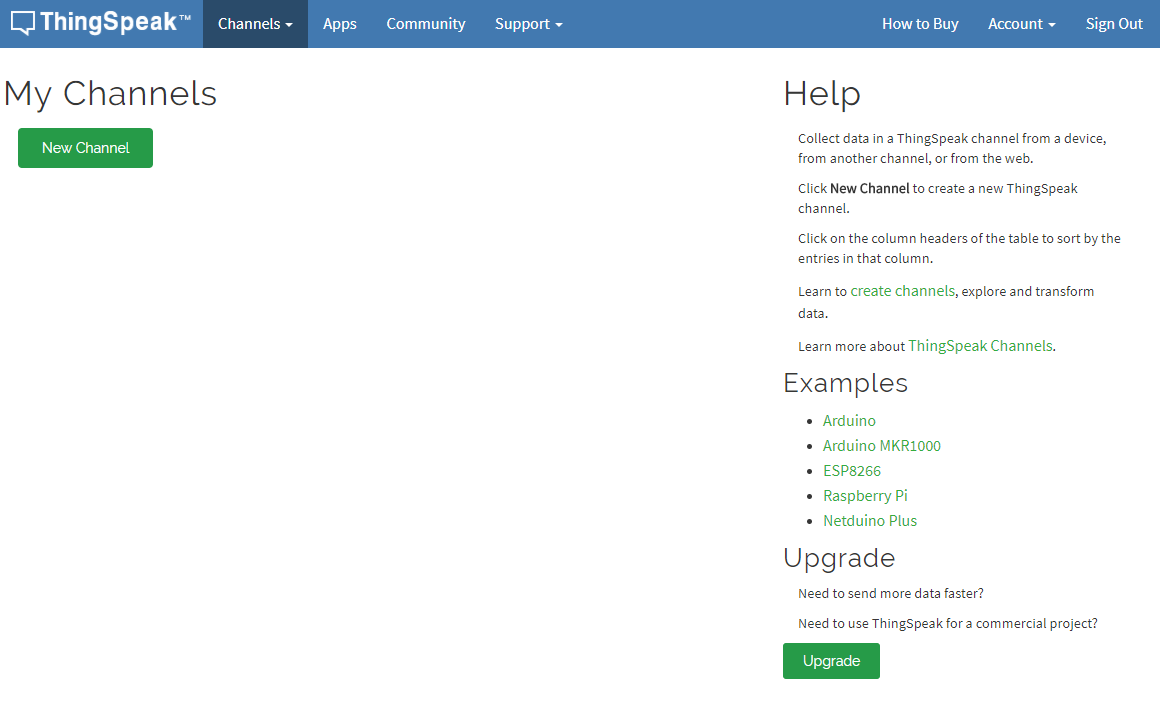
Click on the "New Channel" button to create a new channel to upload data to. A channel is effectively a collection of data sources under one heading. It could have several devices feeding into it, or, as in this case, one device feeding several data streams into it. You'll see a screen as below
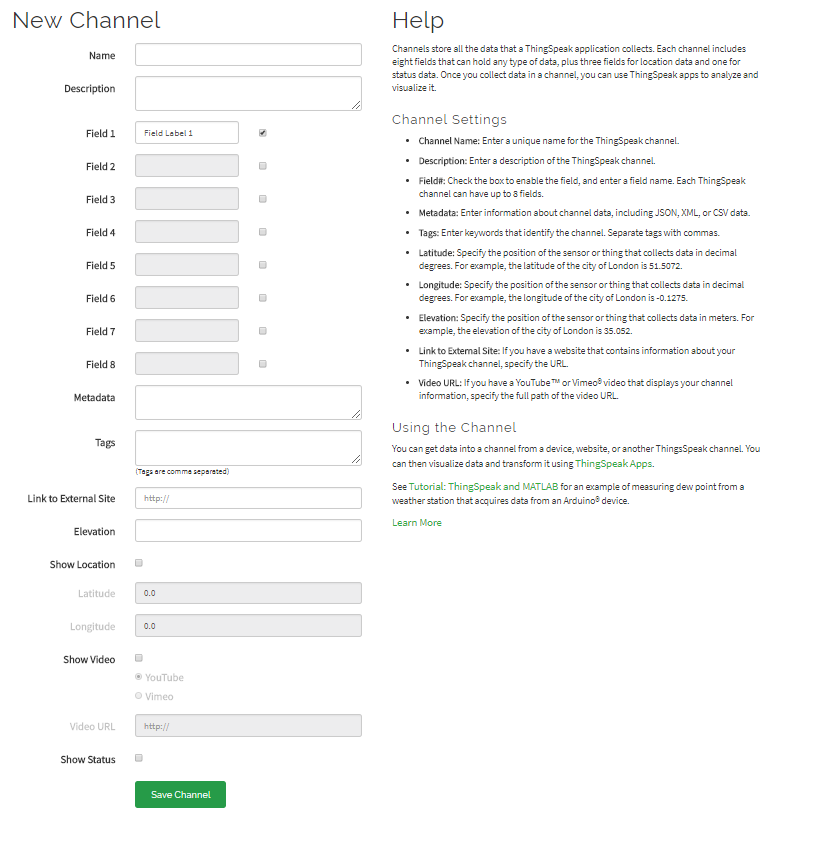
From here you can set up your channel. Give it a name ("Air Quality Data" is what we'll use), a description, and click the checkbox next to the first five fields. You can name them whatever you want, but to match the data coming from the PSoC 6, we suggest "Temperature", "Pressure", "Humidity", "tVOC", and "ECO2", in that order. That's all the data that you need to add to this page, but you can go on to add additional data (latitude and longitude, elevation, links to external websites, etc.) if you like. Click "Save Channel" at the bottom of the page. You'll be taken to a page that looks like this:

As you can see, there's a graph for each field on your channel, and they're all blank. Now we need to fetch the API key for posting to this channel, so we can update our firmware with that value and begin posting values to ThingSpeak. Near the top of the page there's a bar of tabs. We're currently on the "Private View" tab. Click the words "API Keys" to go to the API Keys tab.
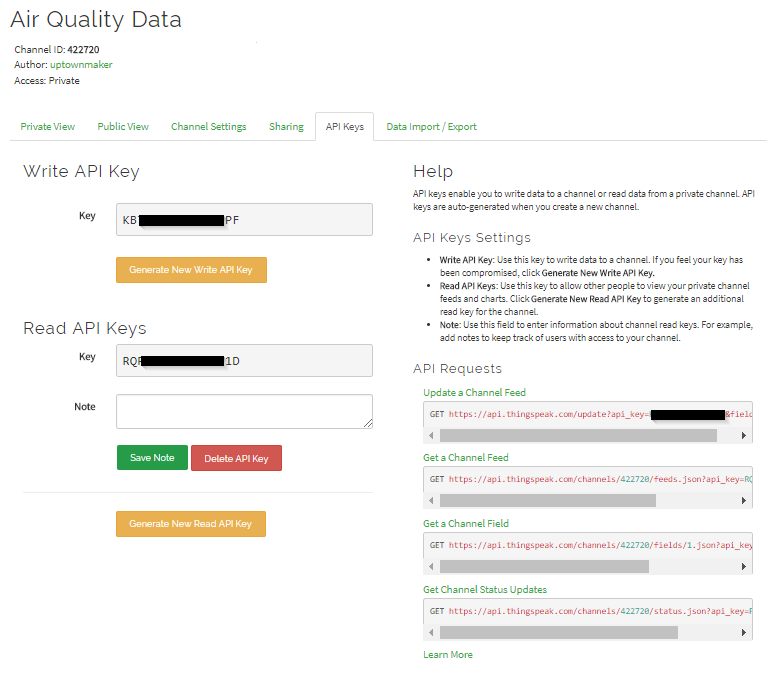
As you can see, there's a "Write" key and a "Read" key. Keep these private, as anyone can post to your channel if they have the "Write" key. Keep this window open, and open up the BLE_Sensor_Scanner project in PSoC Creator (v4.2 or later).
PSoC 4 Hardware Setup
No soldering is required. Simply plug in the Pioneer IoT Add-on Shield, then attach the Environmental Combo board to the shield. It doesn't matter which connector on the Environmental Combo board you use.
PSoC 4 Device Programming
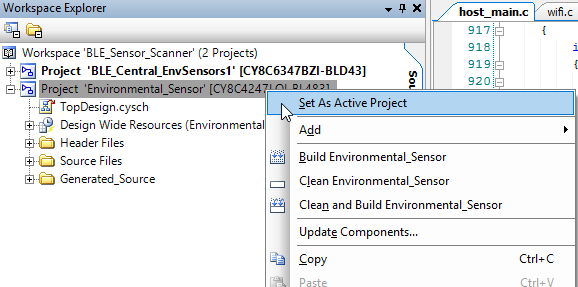
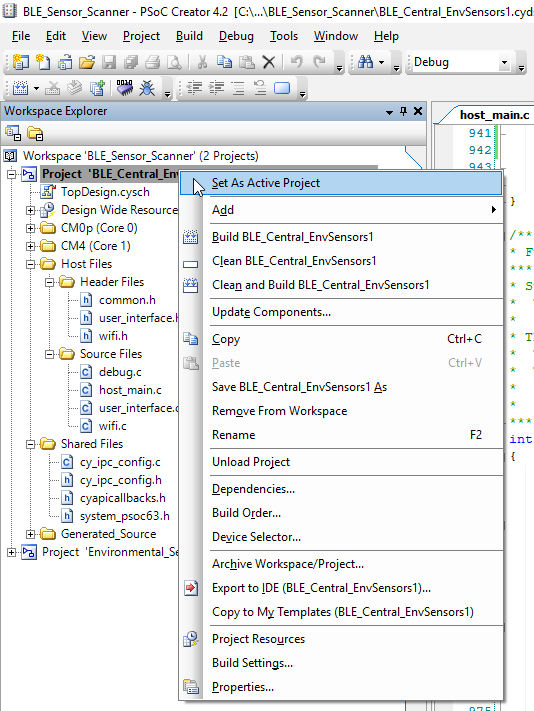
No reconfiguration of the code is required. It can be loaded onto the PSoC 4 BLE Pioneer Kit board exactly as it is when the project is opened. You must, however, select the right project to program the board with the firmware. To do this, right click on the "Environmental Sensor" project in the "Workspace Explorer" on the left side of the screen and select "Set As Active Project", as seen below. This tells Creator to, by default, build and program this project when you choose the "Program" option from the "Debug" menu.
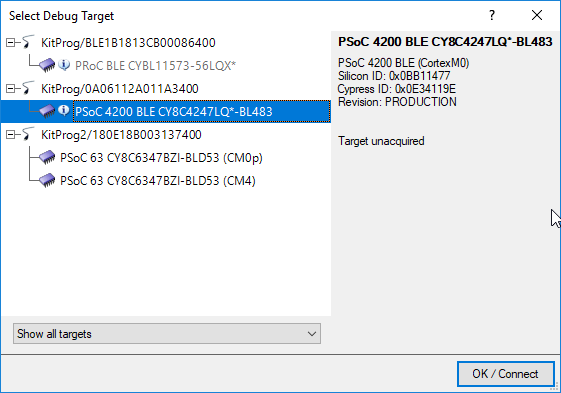
You may now open the "Debug" menu and click "Program". If a window as below opens, select the "PSoC 4200 BLE" entry and click "OK/Connect" or "OK".
PSoC6 Code Configuration and Device Programming
Before you upload the code to the PSoC 6, you must make a few changes to tell the firmware about the various local settings (WiFi info) and your ThingSpeak channel API. The first thing you need to do is to right click on "Project 'BLE_Central_EnvSensors1'" in the "Workspace Explorer" on the right side of the screen and select "Set As Active Project".
Next, you'll need to open the two files which we need to change: "host_main.c" and "wifi.c". These files are in the "Host Files" sub entry under the project in the Explorer frame. In "host_main.c", go to line 937, which should look as below.
sprintf(buffer, "GET /update?key=XXXXXXXXXXXXXXXXX&field1=%i&field2=%u&field3=%u&field4=%d&field5=%d HTTP/1.1\r\n", sensorData->temperature, sensorData->pressure, sensorData->humidity, sensorData->tvoc, sensorData->eco2);
Go back to your ThingSpeak page, copy the "Write" API key, and paste it over the Xs in line 937. Make sure you delete all the Xs, but not the '=' before or the '&' after them. This is the only change you need to make in this file. Save and close it.
In "wifi.c", go to line 29. It should look like this.
char ssid[] = "wifi_ssid_here";
Replace the string wifi_ssid_here with your WiFi SSID, retaining the double quotes surrounding the string. Then take a look at line 31.
char ssid_pw[] = "wifi_password_here";
Again, replace the string wifi_password_here with the password for your WiFi network, again, retaining the double quotes surrounding the string. Finally, you'll need to change the encryption mode setting for your network. Look at line 33.
char encrypt_mode = WPA2;
Replace WPA2 with the encryption mode used by your WiFi network. Valid options are NO_SECURITY, WPA, WPA2, and WEP. In this case, do not place double quotes around the string. Save and close the file. Open the "Debug" menu and select "Program". You may get a window like this:
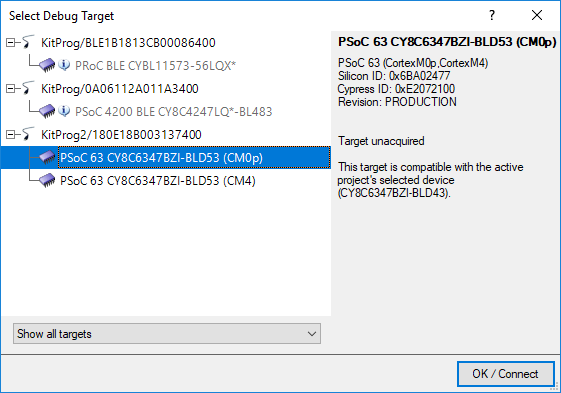
If you do, highlight either of the "PSoC 63" entries under the "KitProg2" heading and click "OK".
After programming finishes, you'll need to wait a while for the XBee to be configured and connect to your WiFi network. You'll know it's connected when the LED next to the XBee on the Pioneer IoT Shield starts blinking constantly.
Press the "Reset" button on the PSoC 4 BLE Pioneer Kit board, and the tri-color LED in the upper right (assuming the USB connector is to the left) should come on blue flickering. If everything uploaded correctly, that LED will soon become a flickering green color. This indicates that the PSoC 6 board has found it, connected to it, and is requesting data. Within 15-20 seconds, the first data should start to appear on ThingSpeak.