Using the Arduino Pro Mini 3.3V
 jimblom
Programming
Arduino IDE
If you've never used an Arduino before (how bold of you to go straight for the Mini!), you'll need to download the Arduino IDE. Check out our tutorial on installing Arduino for help on that subject.
Drivers
If this is the first time that you have plugged the FTDI Basic Breakout into your computer, you may need to install drivers for it. Check out our Installing FTDI Drivers tutorial for help there as suggested earlier in the tutorial.
Uploading Code
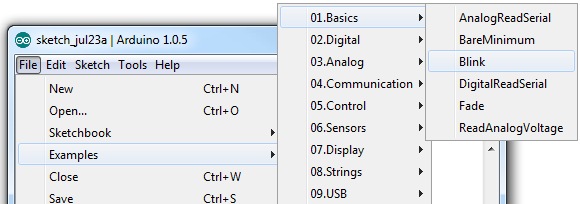
Once both Arduino and the FTDI drivers are installed, it's time to get programming. We'll start by uploading everyone's favorite sketch: Blink. Open up Arduino, then open the Blink sketch by going to File > Examples > 01.Basics > Blink.
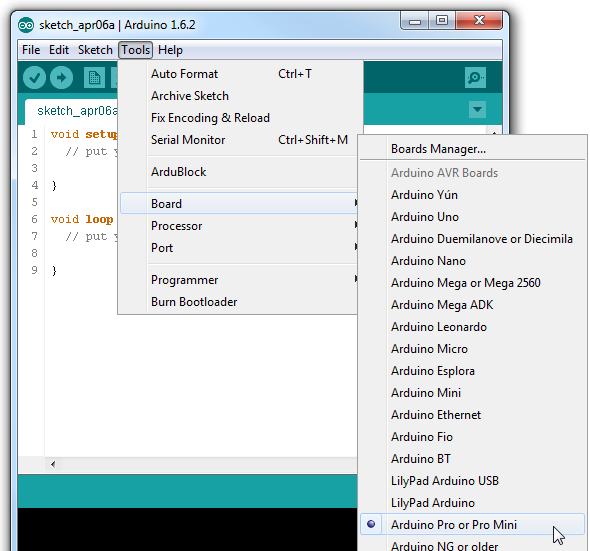
Before we can upload the sketch to the Mini, you'll need to tell Arduino what board you're using. Go to Tools > Board and select Arduino Pro or Pro Mini.
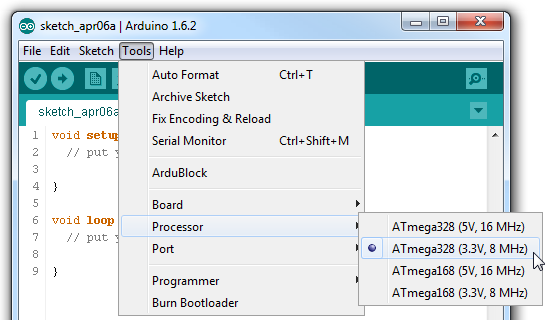
Then, go back up to Tools > Processor and select ATmega328 (3.3V, 8MHz). This tells Arduino to compile the code with an 8MHz clock speed in mind, that way the delay(1000); calls will actually delay one second.
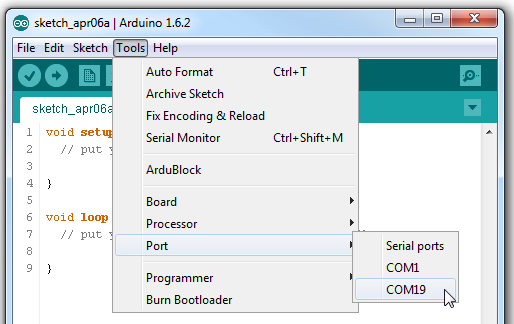
You'll next need to tell Arduino which serial port your FTDI Basic Breakout has been assigned to. On Windows this will be something like COM2, COM3, etc. On Mac it'll look something like /dev/tty.usbserial-A6006hSc.
Finally, you're all set to upload the sketch to your Mini. Click on the Upload button (the right-pointing arrow). After a few moments you should see the red and green RX/TX LEDs on your FTDI board flash, followed by a “Done Uploading” message in Arduino's status bar. Voilà, Blinky! The Mini may be missing a few components, but it's got the most important component: LEDs!