Using Artnet DMX and the ESP32 to Drive Pixels
 Englandsaurus
Resolume Setup
If you haven't already, go ahead and download and install Resolume Arena 6. Once we have this installed, we'll have to do some set up to create objects to represent our pixel strips. When dealing with custom-made DMX fixtures, you'll need to create a unique fixture so Resolume knows where your pixels are in Cartesian space. For this experiment, I'm going to create a unique lighting fixture in Resolume to represent a lighting strip, and then set up two of these custom fixtures (one to represent each LED strip) in a "Lumiverse"; Resolume's fancy word for a DMX Universe.
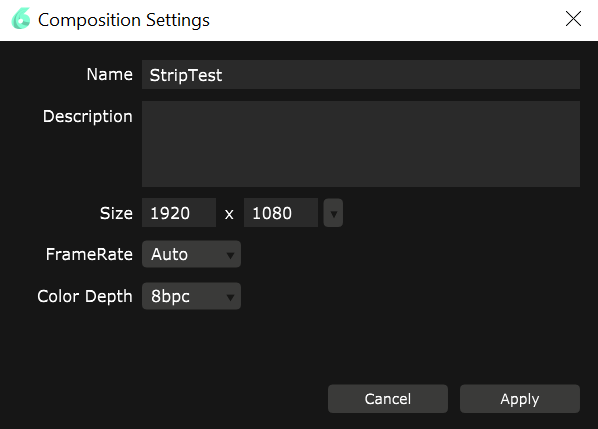
Before we begin, let's change our composition to full HD by going to Composition>Settings... and changing the width to 1920 and the height to 1080. Give your composition a name and also ensure that you have 8bpc color depth.
Create a Fixture
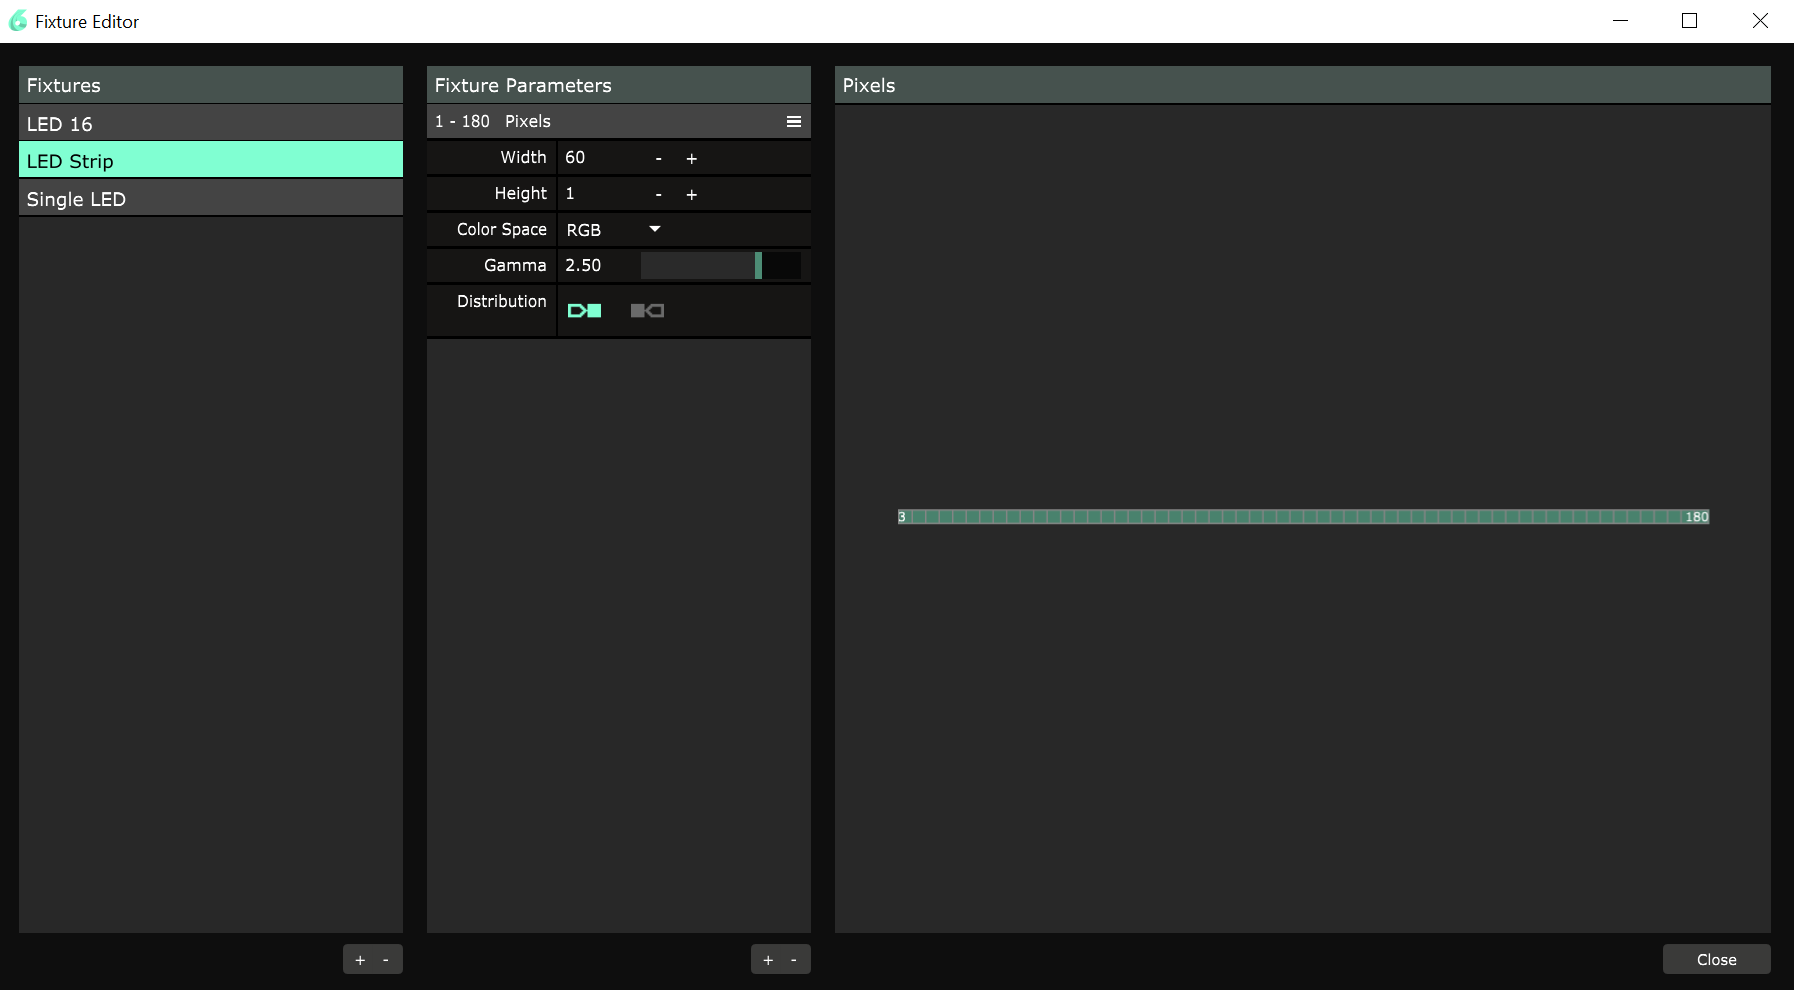
To get started creating a custom fixture, go to Application>Fixture Editor.... Once in this window go ahead and add a new fixture in the far left column, I'm calling mine LED Strip because, well, that's what it is. Once you've added your fixture, you should see a single pixel in the window on the right. This is because we currently have a 1 wide, 1 tall, pixel array. The 1 M LED Strip has 60 LED's on it, so we'll go ahead and change our width to 60 and look, we've got something to represent our LED strip.
Create a Lumiverse
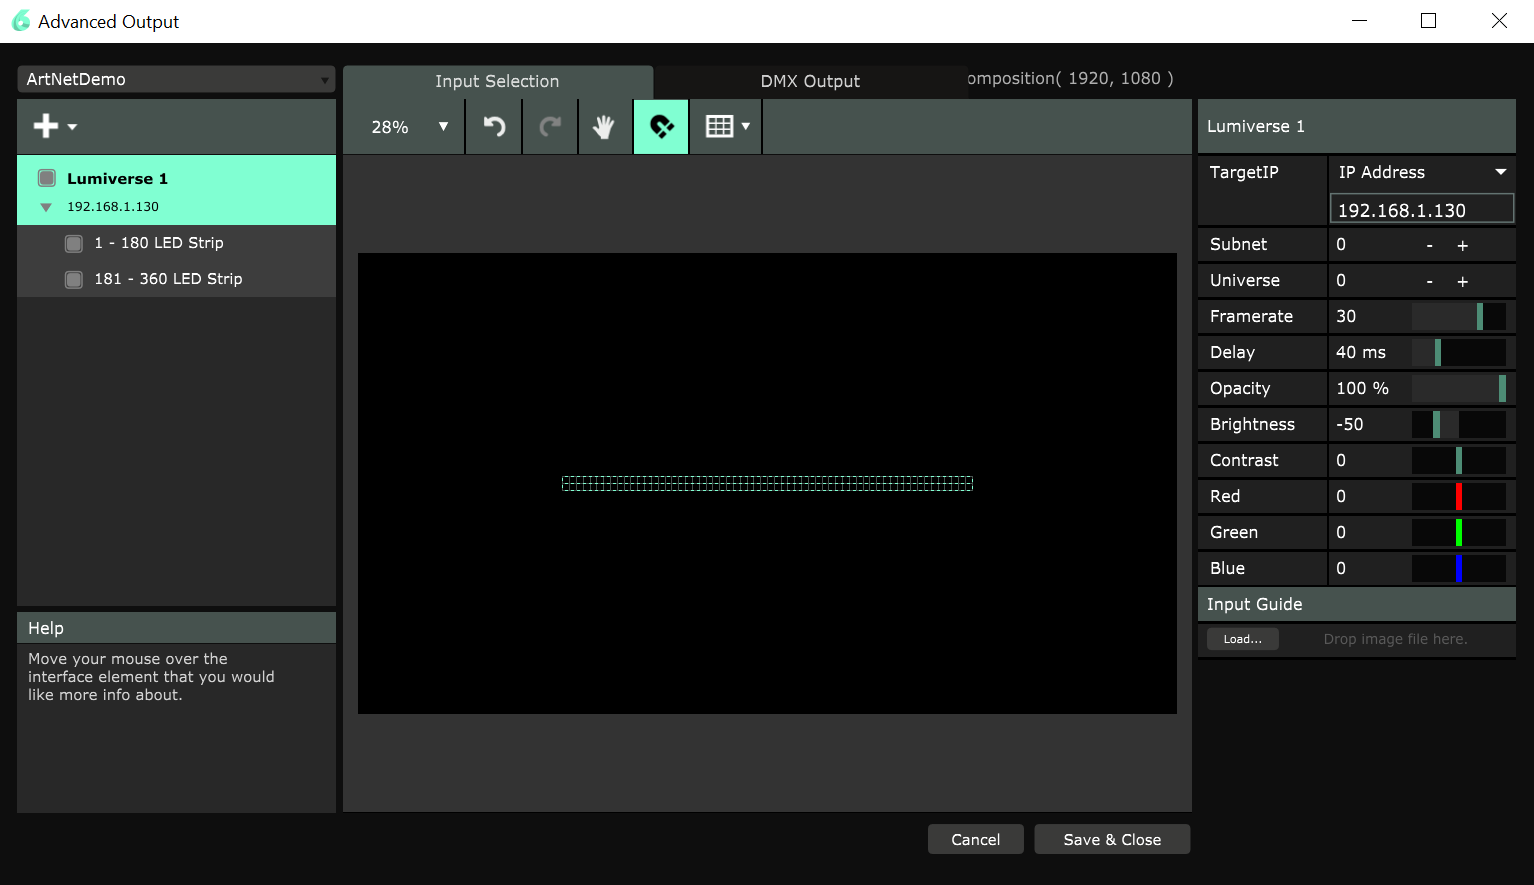
Now we need to set up our strips in a single Lumiverse. To do this, go to Output>Advanced... and create a new preset. This preset should default to having a Screen with a Slice in it. We've got to get rid of this, but Resolume won't allow you to have nothing in your output, so we'll have to hit the big + button and add a Lumiverse. Once we've done this, we'll be able to get rid of the extra Screen and Slice. We now need to add our LED Strips into the Lumiverse. To do this, click on the first fixture in our Lumiverse, this will bring up all of the features of the fixture on the right side of the screen. In the bottom right corner, you will be able to select LED Strip from a dropdown menu, changing the fixture to a 60 LED long strip! Now if we go back to our big + button and add a fixture, Resolume will add another LED strip. Finally change the width of each LED strip to 960 and change the height to 16. Since our LED strips are laid out right next to one another, this is how we should place them in our composition. To do this, set the Y-value of the first LED Strip to 532 and the Y-value of the second LED strip to 548. This will put them right on top of one another. We also know from the way that we hooked our strips together that data flows from left to right on the top strip, and from there it flows into the bottom strip and goes from right to left. Resolume needs to know this, so we must flip our bottom strip 180 degrees in order to make this happen. In the end, your Advanced Output window should look something like the below image.
If you are having some trouble setting up your Advanced Output, you can download the presets here and load it into your Advanced Output. Just make sure that before you try to load the preset, you've dropped the LED Strip fixture into Documents > Resolume Arena 6 > Fixture Library and restarted Resolume so the software knows which fixture to use.
Broadcast
Now that we have a map for our LED's, let's start broadcasting some video to them. First we'll need to snag some video to play. Go to the bottom right corner of Resolume's main window, go to Sources>Generators and pick out something you like. You may then drag it to whatever layer you'd like (I've found that playing around with and stacking line generators looks quite pretty). Double clicking on the video will send it to the output. Now we can reopen our Advanced Output window, select the Lumiverse we just created, and change the TargetIP setting on the right side of the monitor to the IP address we earlier saw the ESP32 give when it connected to WiFi. If your ESP32 is connected to WiFi, you should now be seeing your strips light up along with the media displayed on the output monitor. If you're seeing a little lag, try lowering the frame rate in Advanced Output. You should be able to drive your lights with very little noticeable delay between the Advanced Output and the actual LEDs, just like the below video.