Using Artnet DMX and the ESP32 to Drive Pixels
 Englandsaurus
Hardware Assembly
In order to connect our ESP32 to our lights, we'll first need to solder headers onto the ESP32. If you haven't soldered headers onto anything before, check out our through-hole soldering tutorial. Once you have headers soldered on, the circuit is relatively simple.
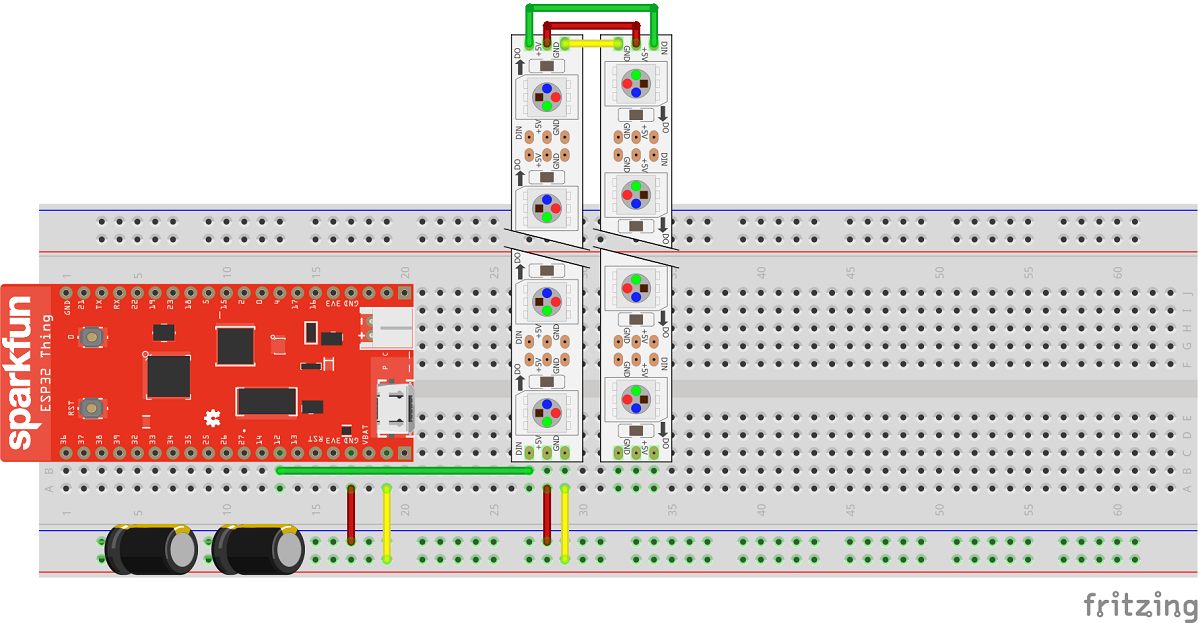
To set up the circuit, connect your LED strips together using the connectors attached to the strips, then connect the strip to 5V (supplied by an external power supply) and ground. The ESP32 can also be powered from 5V using either of the VUSB pins. Also be sure that the ground of the LED strips and the ground of the ESP32 are connected to avoid noise on the LED strips. Connect the data pin of your LED strip to pin 12 of the ESP32. Power the ESP32 by USB, as we will eventually be using serial communication to talk to the ESP32. I was having some issues with brownouts, so I added 2 1 mF capacitors. If you're confused on the layout, check out the below Fritzing diagram.
Now that our circuit is ready to go, let's lay out our pixel strips parallel to each other, about 5/8" apart (this is the spacing between pixels on the strips, so spacing our strips like this will mean that each pixel is equidistant to each of its neighbors, creating a consistent pixel density). Ensure that data flows into the top left of the pixel array, left to right across the top strip, then down to the bottom strip, and across the bottom strip from right to left.