SparkPunk Sequencer Hookup Guide
 Byron J.
Electronic Assembly IV - Integrated Circuits and Semiconductors
ICs
The chips, or integrated circuits (IC's) on this PCB are all in through-hole Dual Inline Packages (DIP). The IC's are polarized, and need to be installed in the proper orientation.
The IC polarity is indicated on the body of the IC - usually with a notch embossed in one end, though sometimes with a small dimple in one corner. These indications line up with the silkscreen markings on the PCB, which are rectangles with a small half-moon cut out of one end, and a nearby dot. Line the notch on the IC up with the half-moon in the silkscreen, as you can see below.
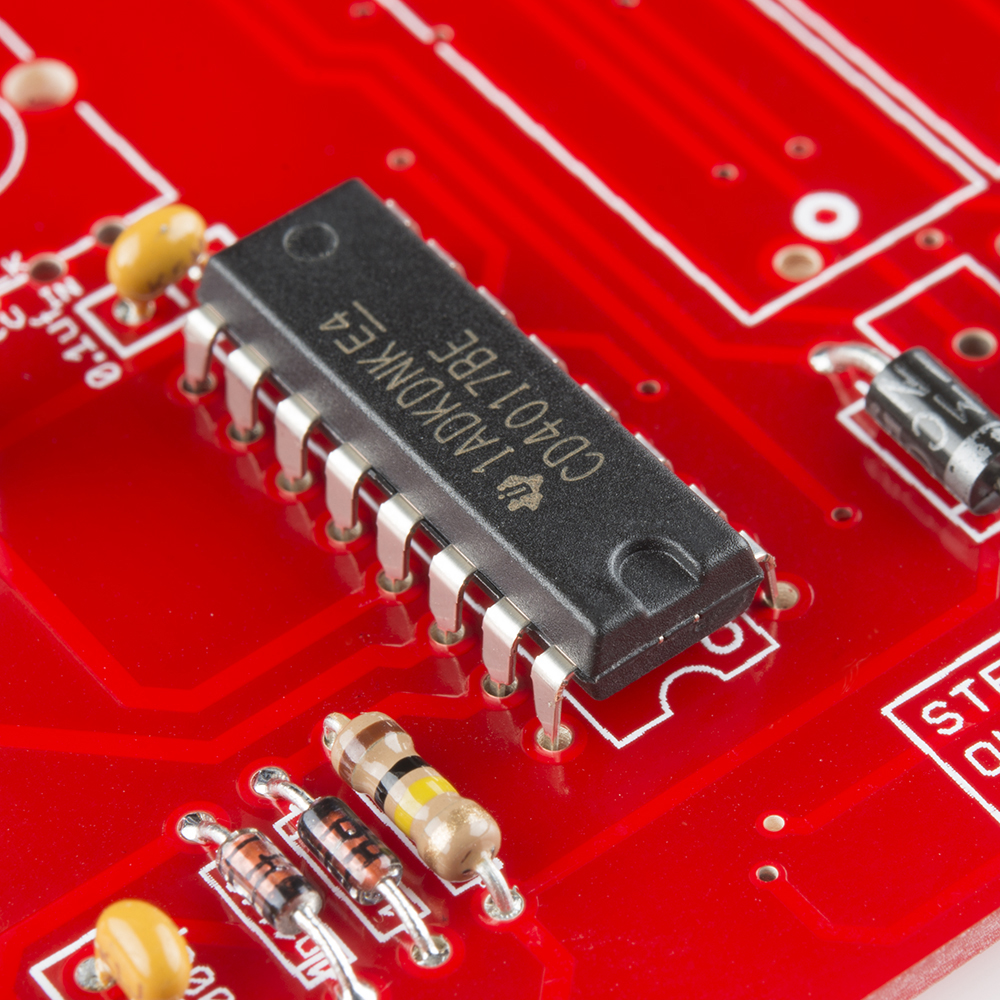
Inserting ICs into the board should be fairly straightforward. Sometimes the legs in the ICs have been bent such that they don't fit right in. If so, carefully straighten them to match the holes.
To solder an IC down, it can help to quickly solder down legs on opposite corners, which helps hold the chip in place while you solder the remaining legs. Take care that you don't overheat the chip, or create solder bridges between adjacent legs. It can help to work in a zig-zag pattern, back and forth between the rows of legs.
7555
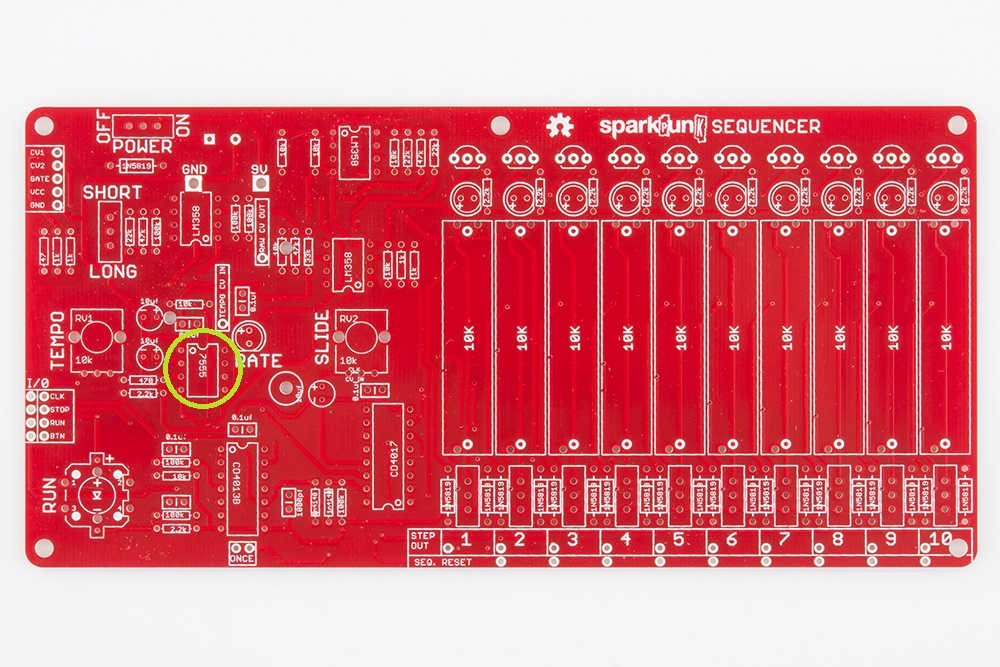
The first chip to go on is the 7555 timer. There are several similarly sized chips in the kit, so take care to read the markings on the ICs.
The 7555 is located here:
CD4013BE
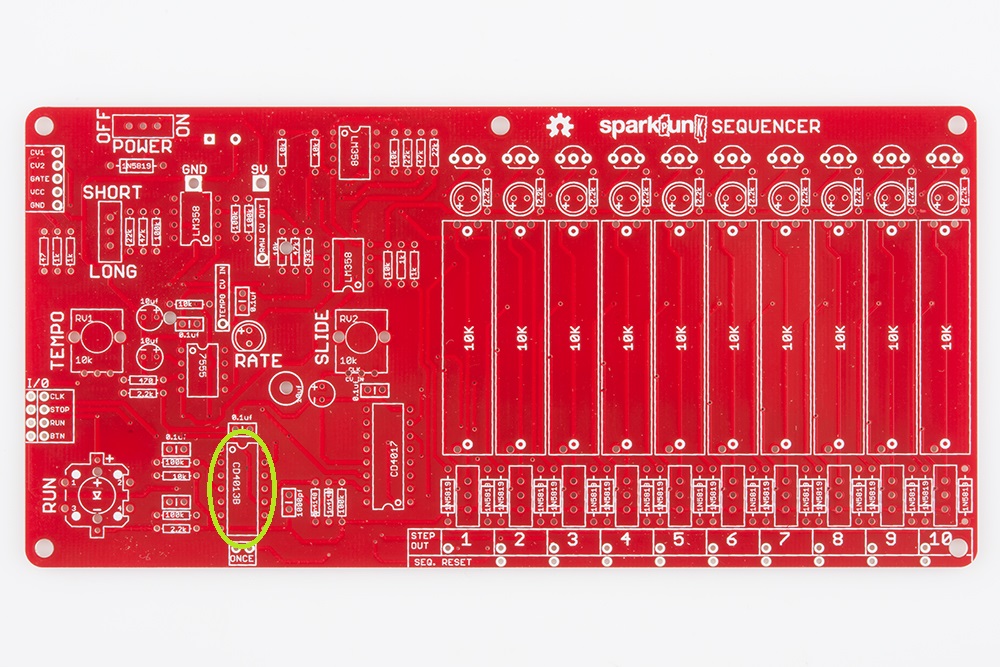
Now that we've warmed up with a small IC, we'll move on the the larger ones.
Find the CD4013BE dual flip-flop, and install it here:
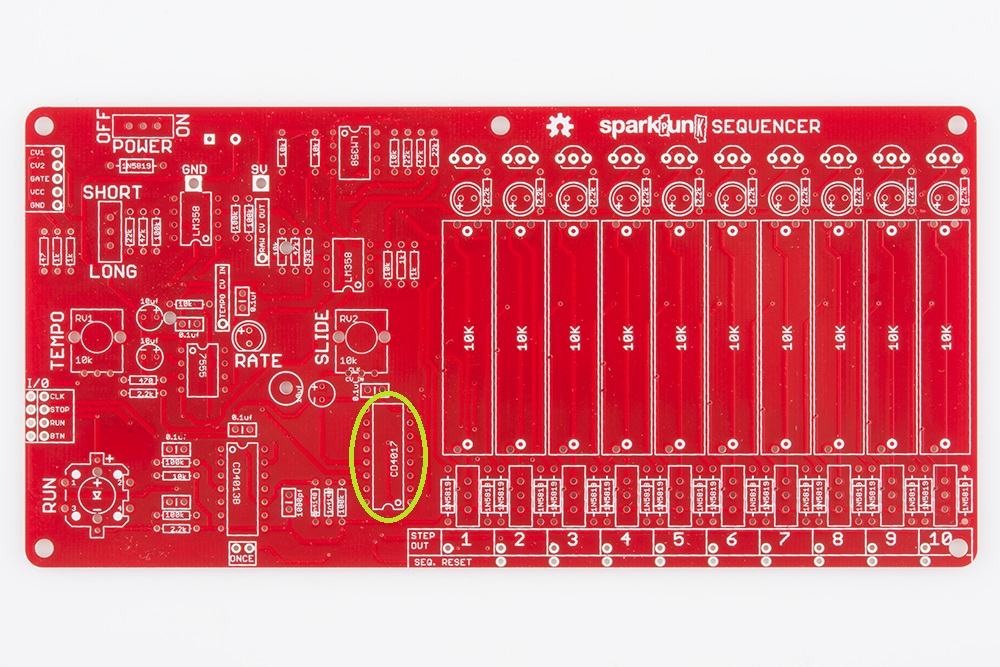
CD4017BE
Next is the CD4017BE decade counter.
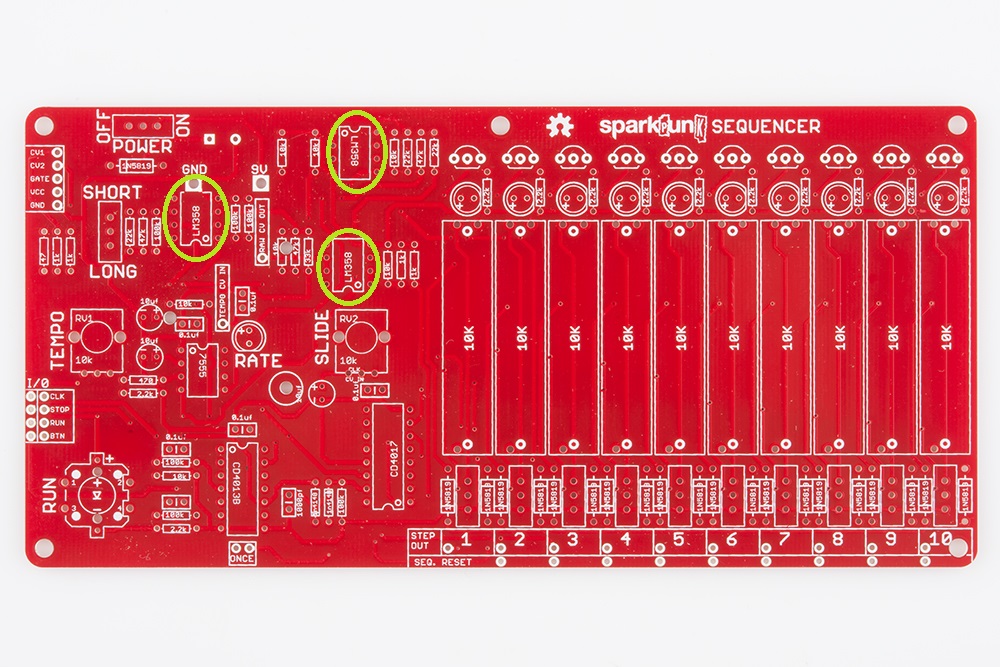
LM358
Rounding out the ICs are the three LM358 dual operational amplifiers. They are located towards the top left corner of the board, as shown here:
Semiconductors
After the ICs are down, we move on to the other semiconductors.
Transistors
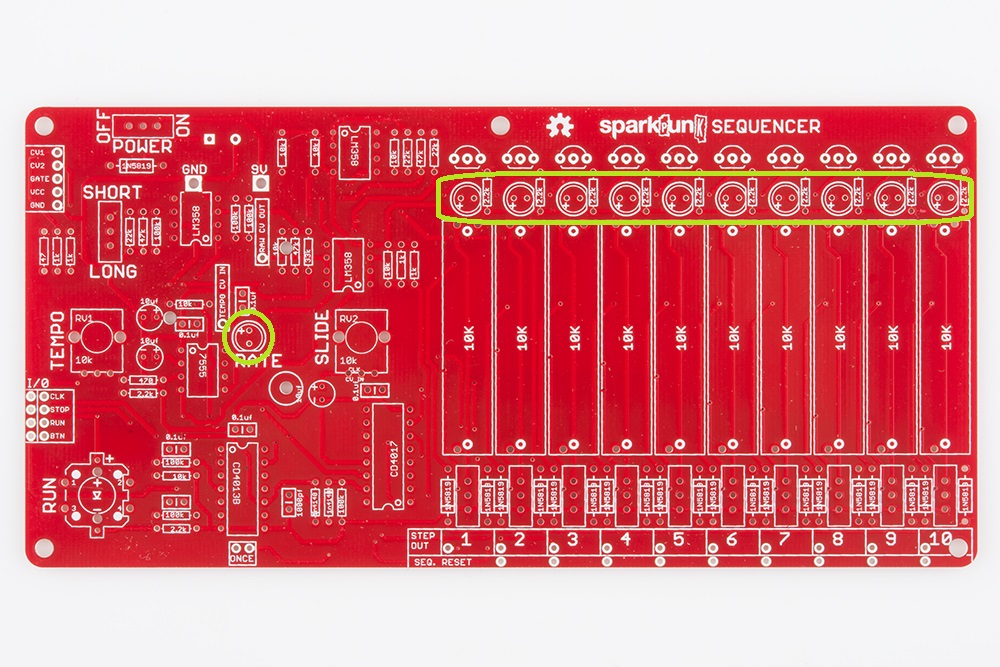
There are ten transistors, all 2n3904's. They each have three legs, and a cylindrical body with a flat on one side.
The transistors are installed across the top-right edge of the board.
Align the transistors by matching the flat side of the body with the flat of the silkscreen mark. You may need to bend the leads apart a bit so they fit into the board.
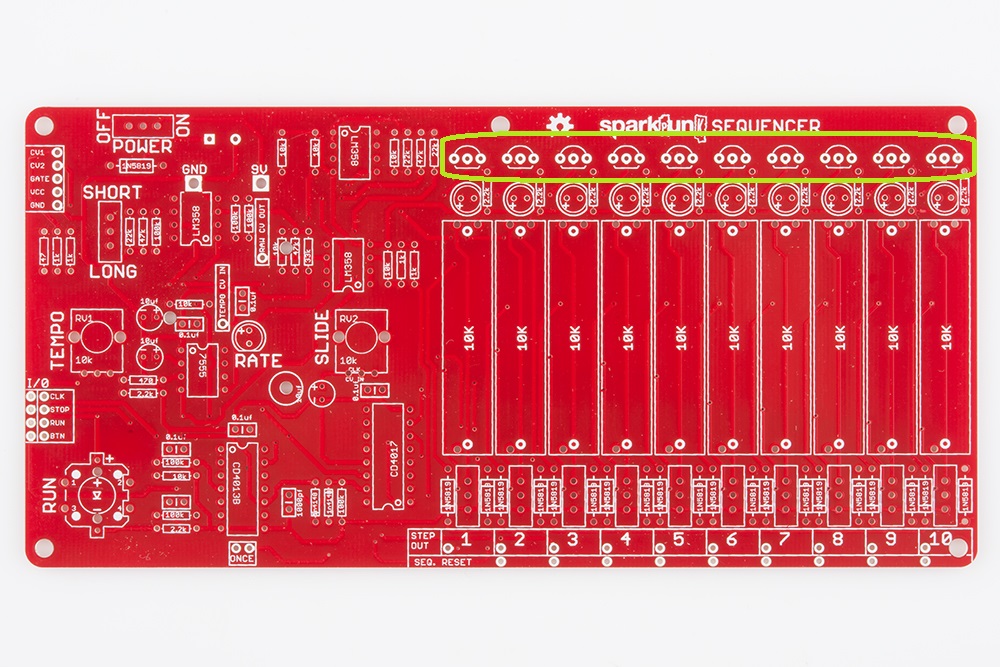
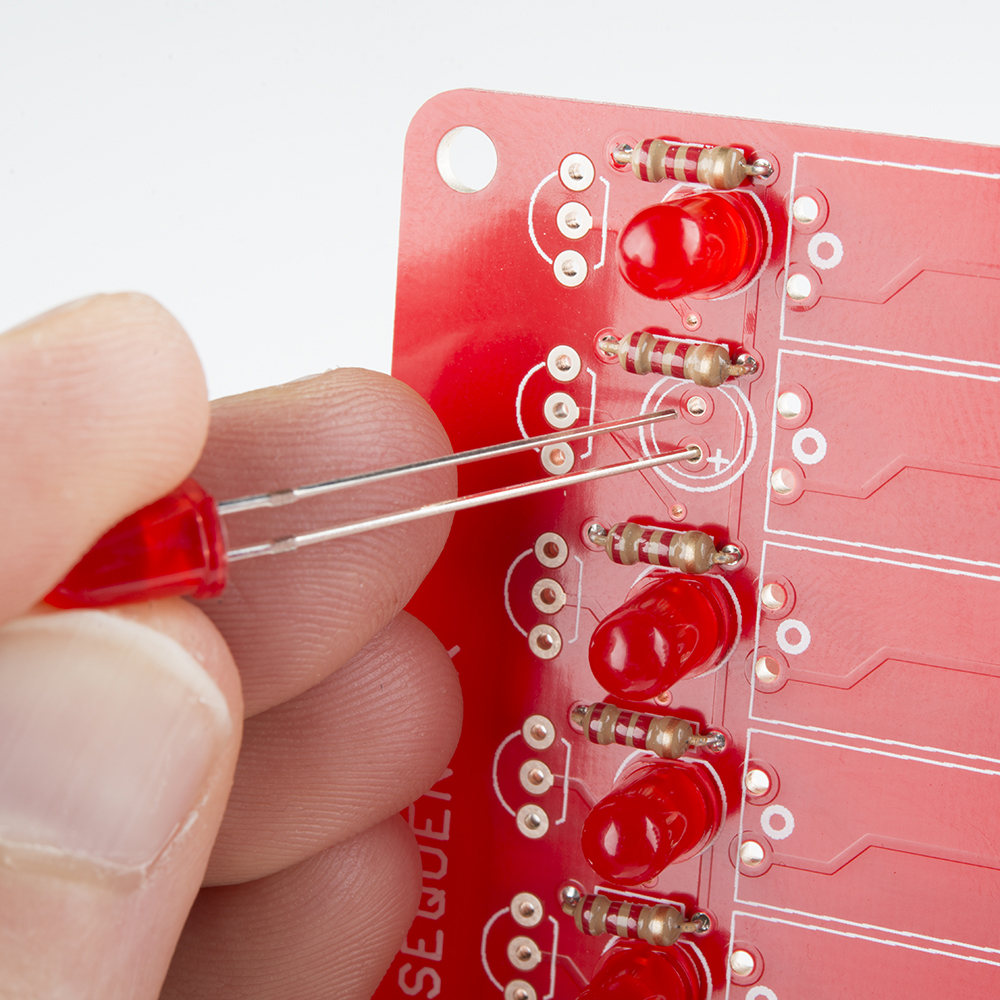
LEDs
The eleven LEDs are located as follows:
The LEDs are also polarized. The polarity is indicated two ways on each LED - the positive leg (the anode) is longer than the negative leg (the cathode). There is also a small flat spot in the base of the LED to denote the negative lead. Both of these are indicated in the PCB silkscreen. As you can see below, the longer lead is going through the hole marked +, which leaves the flattened side aligned with the flat edge in the silkscreen.
Almost Done
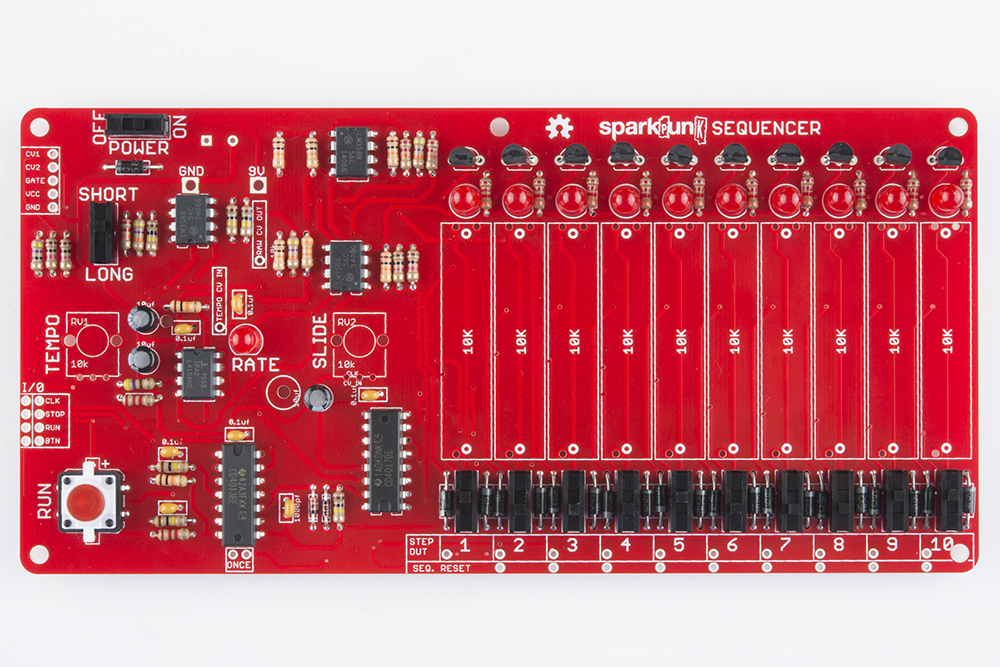
The SparkPunk Sequencer is nearly complete. There are only a few more components to be installed.
Before moving on, check you work against the photo below.