SparkPunk Sequencer Hookup Guide
Electronic Assembly II - Resistors
Resistors are not polarized - they can be installed in either orientation. We'll install the resistors in order of increasing resistance value. For each resistor value, we'll insert, solder, and trim the excess leads just as you did with the diodes.
There are quite a few resistors on this board. We'll install all of them in the following steps. To keep the process organized, we'll start with the lowest value, and work up the the highest. The resistor values are indicated by the colored stripes on the resistor body. The color codes are noted in the photo captions below, but if you'd like a more thorough explanation of how the codes work, you can find that in our Resistor Markings Tutorial. You can also verify ther resistor values using a multimeter.
The resistor locations on the PCB are marked with silkscreened numbers inside the outline of each resistor. Once you've deciphered the markings, you can find the corresponding value written on the board, and install the resistor there. This may sound daunting, but we've got helpful pictures with each value highlighted in the following steps.
47 Ω
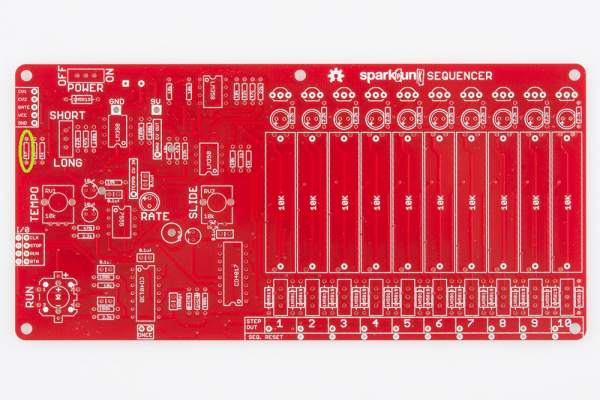
The lowest value resistor is the 47 Ω resistor. It is located near the left edge of the PCB, as seen below:
470 Ω
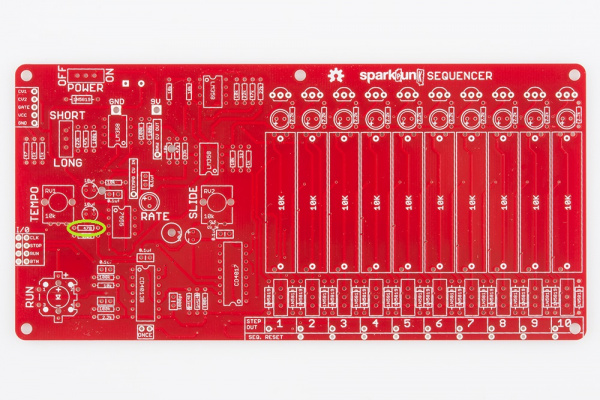
The next resistor is the 470 Ω. It's located on the left, near the center of the board, shown here:
2.2K Ω
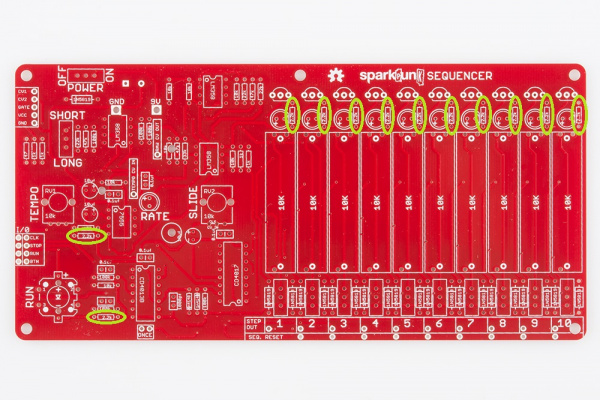
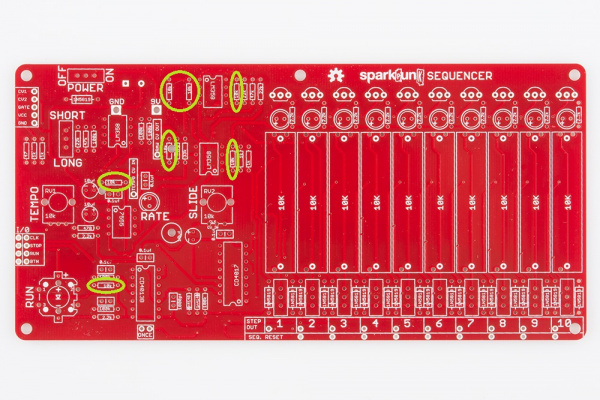
There are a bunch of 2.2K resistors on the board - twelve to be precise. Two are on the left hand side, and the other ten are across the top right edge of the board, highlighted below:
1K Ω
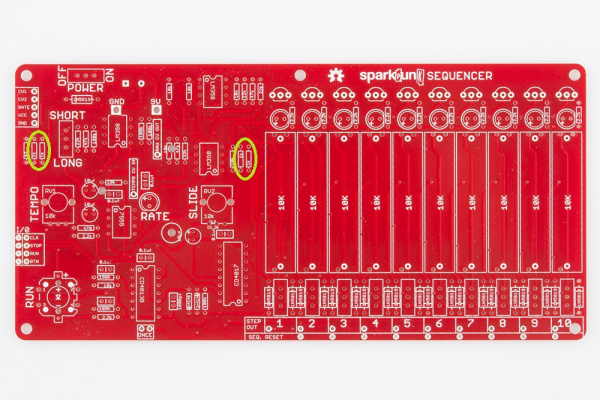
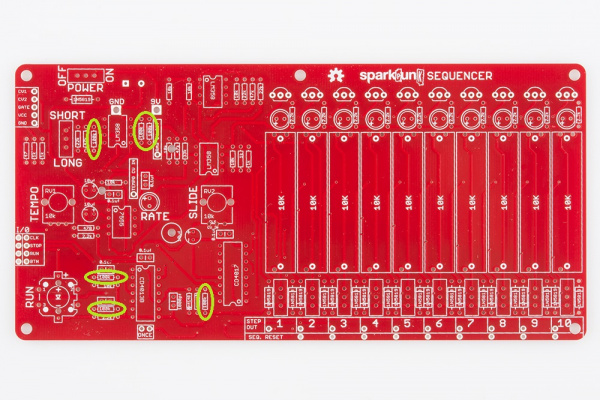
There are four 1K Ω resistors. Two of them are placed as a pair near the left edge, and the other two are paired near the center of the board. They're all circled in this photo:
10K Ω
There are seven 10K Ω resistors, spread across the left side of the board.
22K Ω
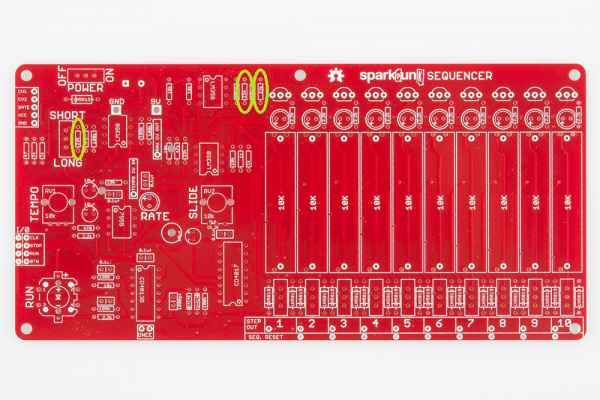
There are three 22K Ω resistors, two near the top center, and one towards the top left corner.
33K Ω
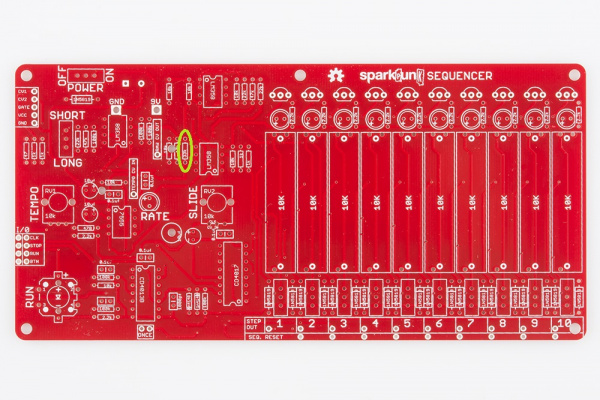
The single 33K Ω resistor is located here:
47K Ω
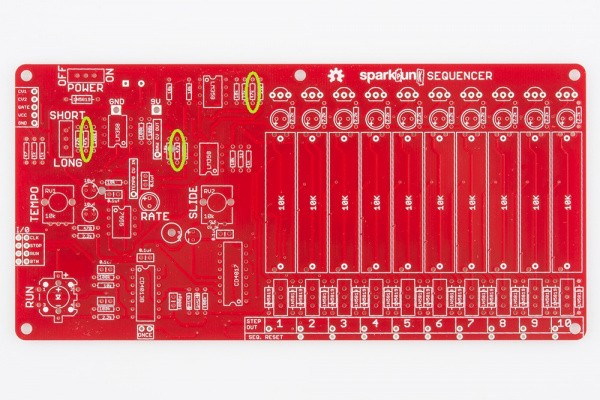
The three 47k Ω resistors are spread across the upper left of the board, as depicted below.
100K Ω
Finally, we reach the 100K Ω resistors. There are six of them, distributed around the left side of the PCB.
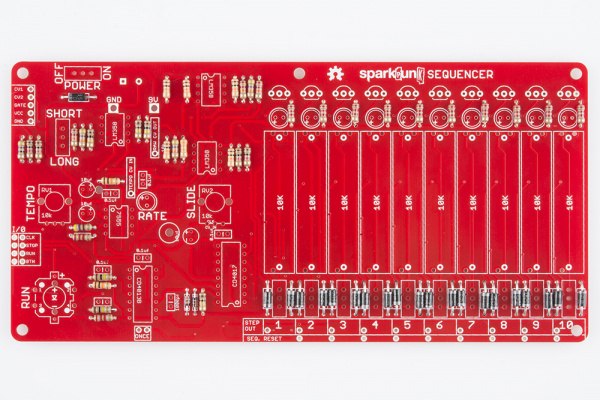
At this point, all of the diodes and resistors have been installed. Your board should look like this (again, click on the picture for a higher resolution version):
Take a moment to look around your work area for loose resistors or diodes that you might have missed. All of the resistors and diodes should be mounted on the PCB
