SparkFun Qwiic Shield for Teensy Hookup Guide
Contributors:
 QCPete
QCPete Resources and Going Further
That's a wrap! Your Qwiic Shield for Teensy/Teensy Extended is now ready to connect to any of a host of Qwiic devices SparkFun offers. For more information, take a look at the resources below.
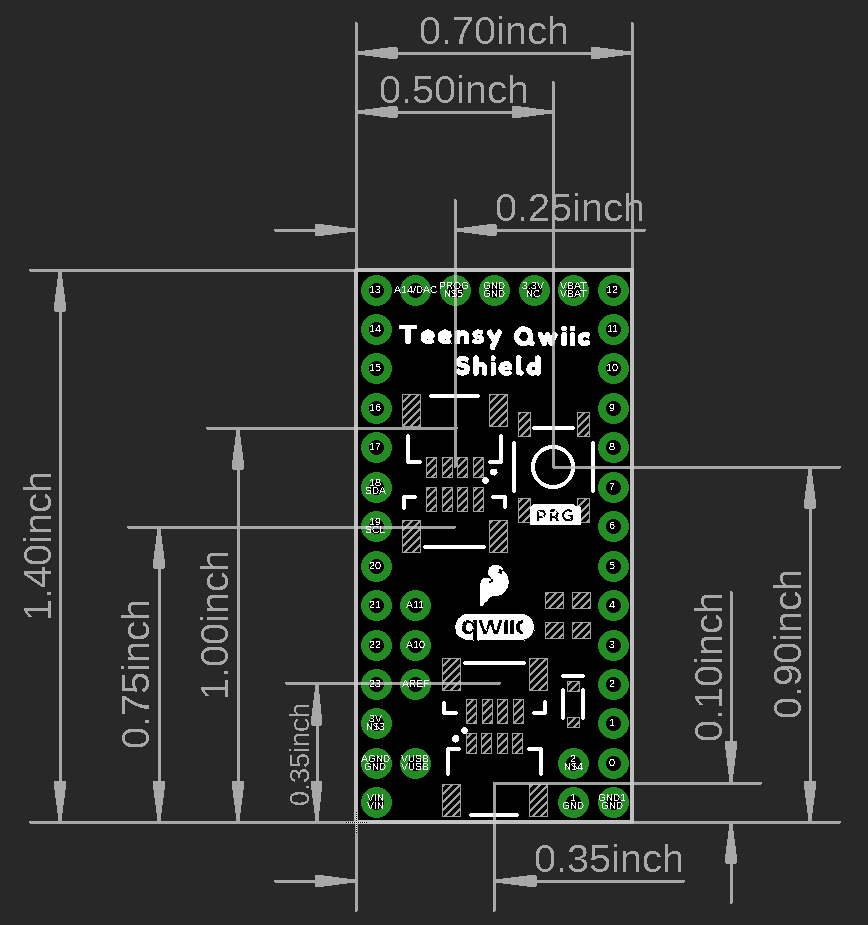
Qwiic Shield for Teensy
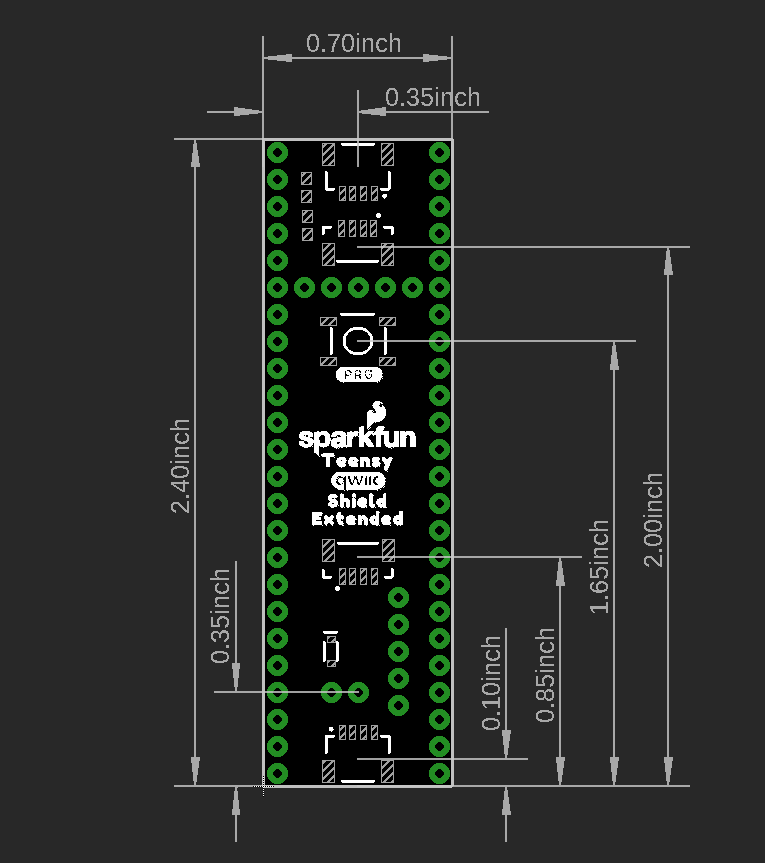
Qwiic Shield for Teensy Extended
Even More Resources
If you are having trouble getting your Qwiic devices to connect using your newly assembled Qwiic Shield, you may want to take a look at these tutorials for help troubleshooting and reworking your shield.
Now that you have your Qwiic Shield ready to go, it's time to check out some Qwiic products. Below are a few to get started.

Before you go, here are some other tutorials using the Qwiic Connect System you may want to look through:
Advanced Autonomous Kit for Sphero RVR Assembly Guide
Get your Advanced Autonomous Kit for the Sphero RVR built up with this hookup guide!
Programming the SparkFun Edge with Arduino
Running low-power machine learning examples on the SparkFun Edge can now be done using the familiar Arduino IDE. In this follow-up to the initial Edge tutorial, we'll look at how to get three examples up and running without the need to learn an entirely new SDK.
Raspberry Pi 4 Kit Hookup Guide
Guide for hooking up your Raspberry Pi 4 Model B basic, desktop, or hardware starter kit together.
MicroMod Main Board Hookup Guide V2
The MicroMod Main Board - Single and Double are specialized carrier boards that allow you to interface a Processor Board with a Function Board(s). The modular system allows you to add an additional feature(s) to a Processor Board with the help of a Function Board(s). In this tutorial, we will focus on the basic functionality of the Main Board - Single V2.1 and Main Board - Double and V2.2.