Sound Page Guide
 Shawn Hymel
Attach the Electronics
IMPORTANT: Read all of the directions in this section before doing anything first! You will need to perform them relatively quickly so that the paint does not completely dry while you attach the electronics. If some of the paint does dry, simply add more paint when you want to attach the electronics.

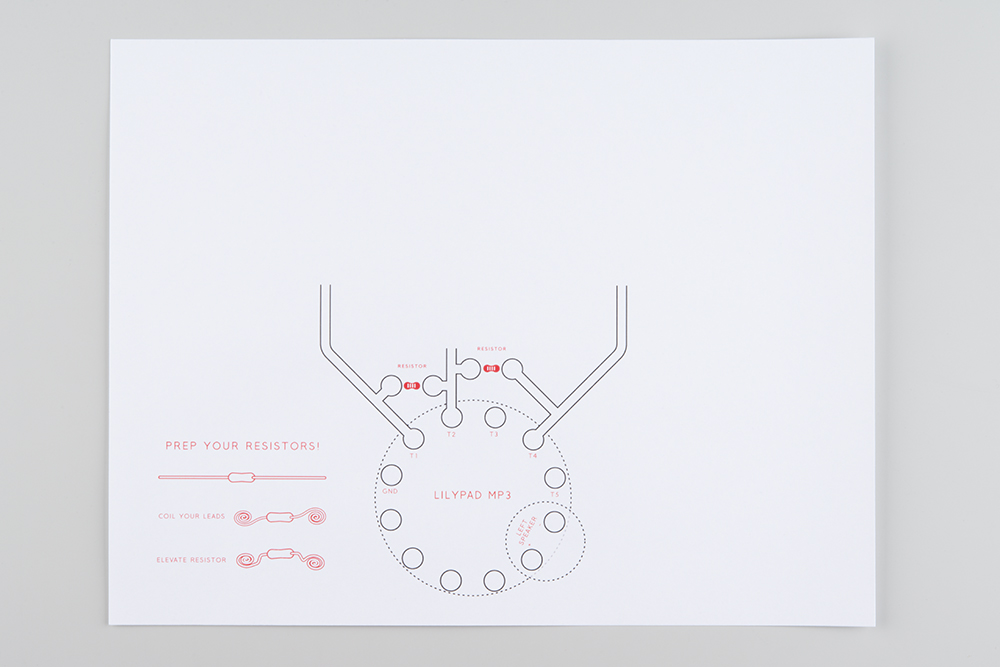
If you do not have the printed cardstock, you can download the artwork here. Just download the file and print it on cardstock or paper!
If you want to create stencils the same way we did, you will need to buy some sticky-but-not-too-sticky label paper. We used this stuff from onlinelabels.com. You will also need to download the stencils we made, and print them out on the label sheet. You can use an X-Acto knife to cut the stencil (we did ours with a laser engraver so we could make lots of them).

Create the LilyPad Footprint
The first thing we need to do is create the LilyPad board footprint in conductive ink so that we have a place to stick the electronics.
Separate the LilyPad MP3 footprint stencil from the rest of the stencils. Peel off the backing of the footprint stencil, and place it over the outlines. Make sure that the traces are facing toward the top of the page. They will be connected to our silhouettes!

Squeeze some conductive ink on the stencil, and use the foam brush to fill in the stencil with the ink. Make sure the spaces in the stencil get covered in ink completely! You don't want it to be splotchy, otherwise it won't conduct electricity very well.
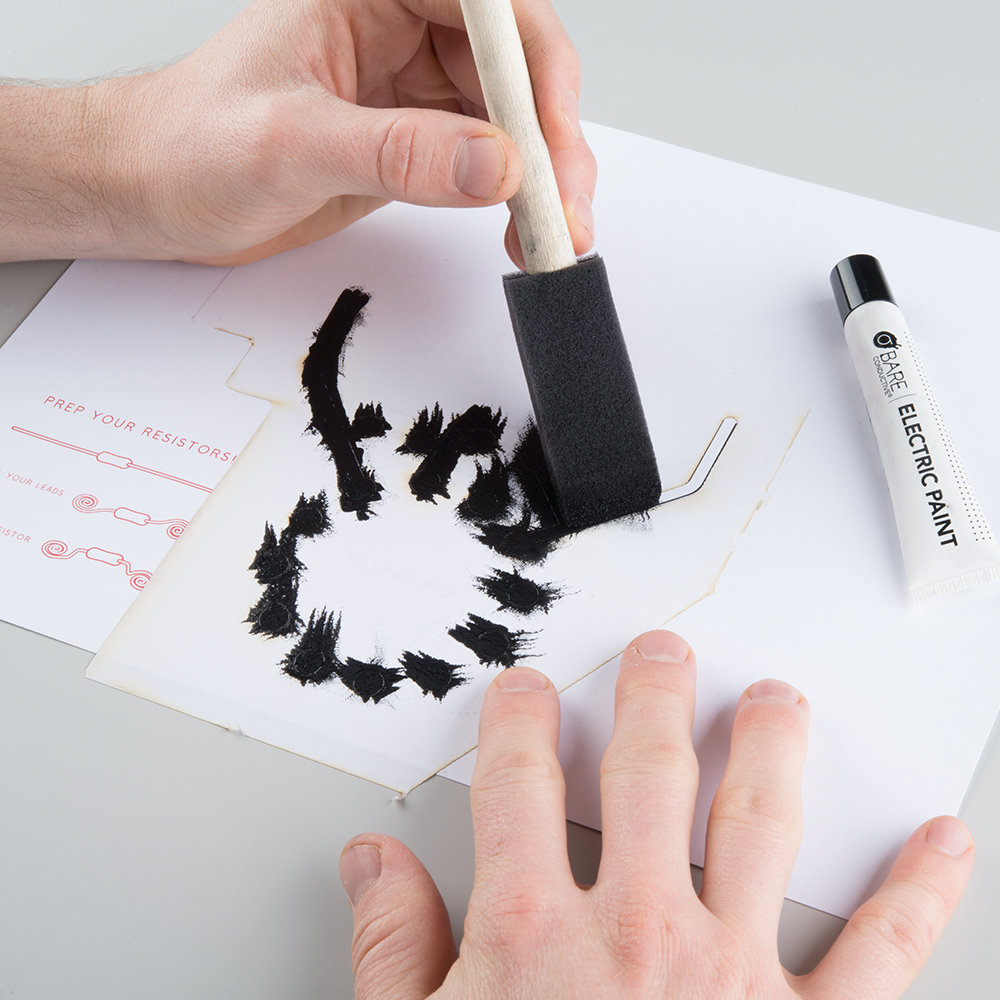
While the paint is still wet, carefully peel the stencil off the page.

Place the LilyPad Board
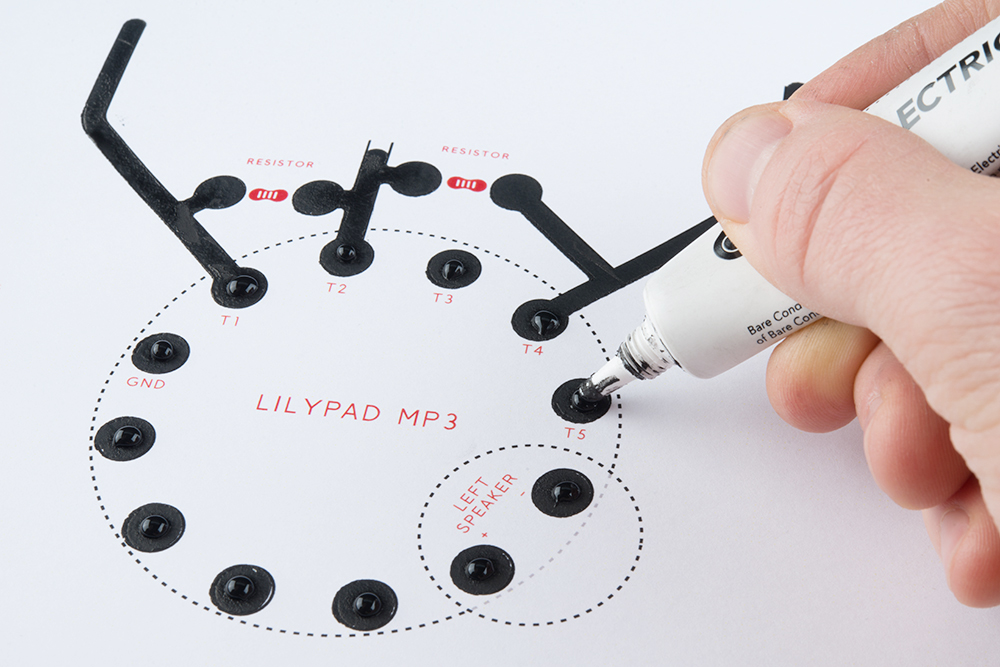
If any of the paint has dried, we recommend you add a drop of conductive paint to each of the circles where the LilyPad MP3 board will go.
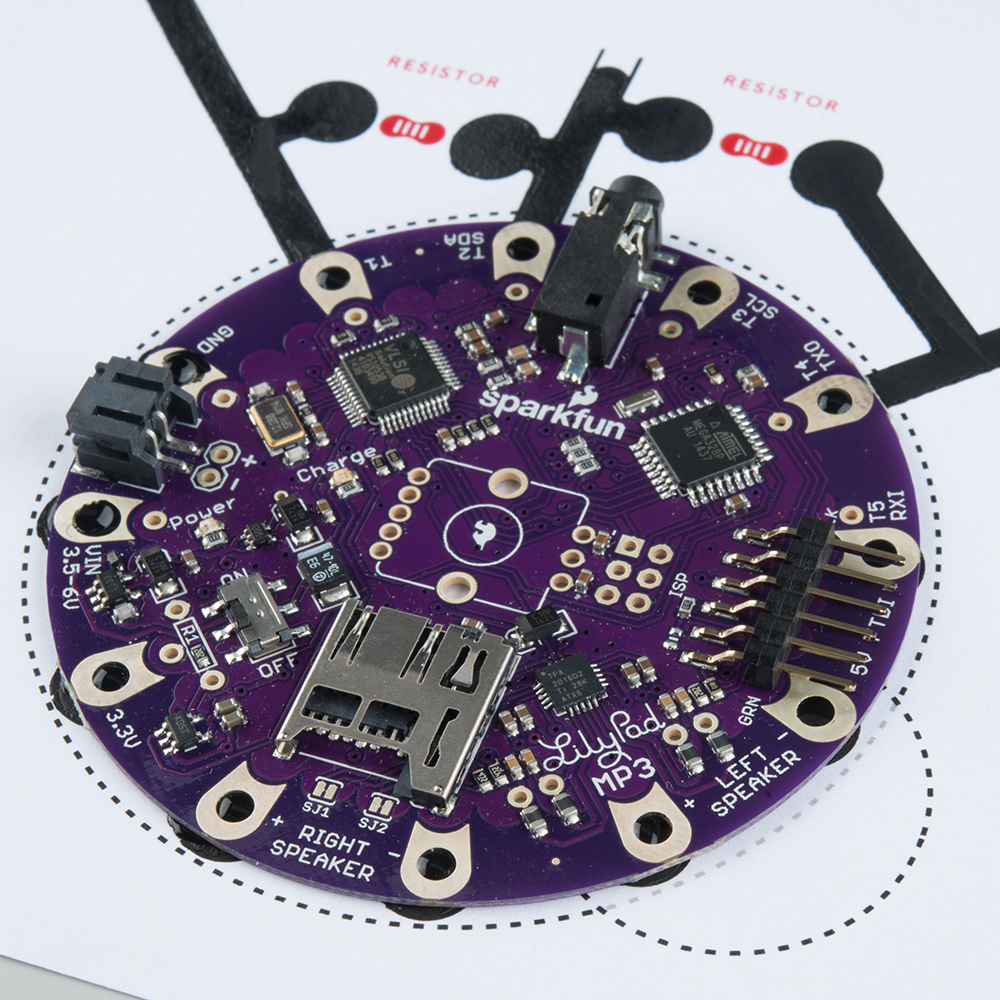
Carefully place the LilyPad MP3 board so that the holes on the edge line up with the circles of paint that we just made with the stencils.
IMPORTANT: Make sure that the SD card slot (the one by the holes labeled "RIGHT SPEAKER") is facing down and the headphone jack is facing up. The label "LEFT SPEAKER" should be facing the "LEFT SPEAKER" text on the cardstock.
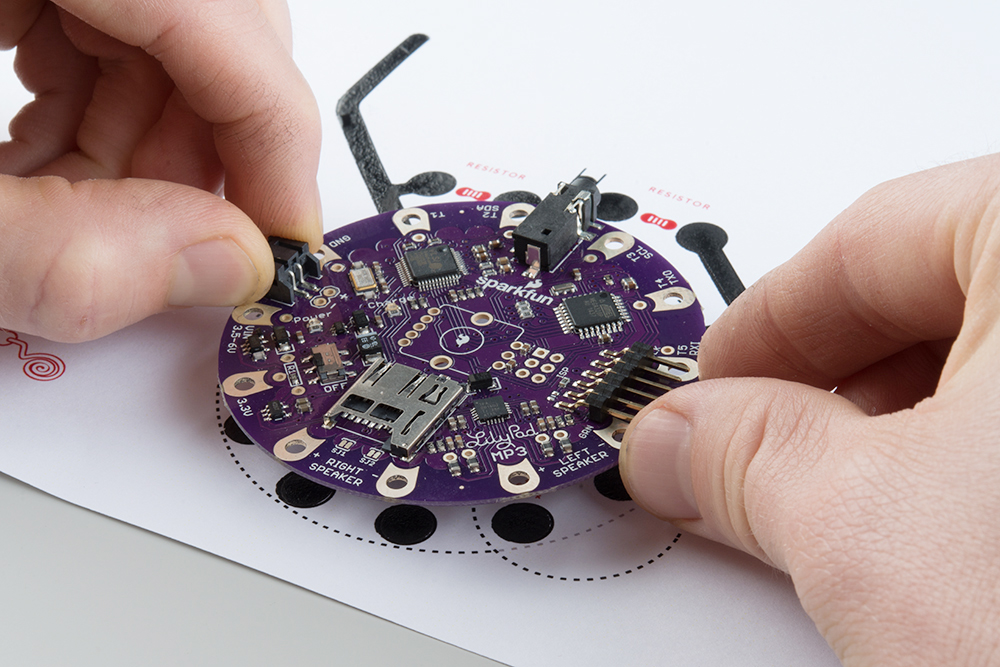
You will want the paint on to squish up into the holes a bit. This is how we make sure electricity can flow from the board to the touchable artwork!
We want the board to make a good electrical connection to the traces we just made with the conductive ink. So, add a drop of conductive paint to each of the 12 holes around the edge of the LilyPad board.

Add the Speaker
You can use the headphones jack at the top of the LilyPad board to connect to a large set of speakers if you want to pump out some real sound (feel free to skip this step if you are doing that!). We can also add a small speaker to the LilyPad MP3 board to get sound out.
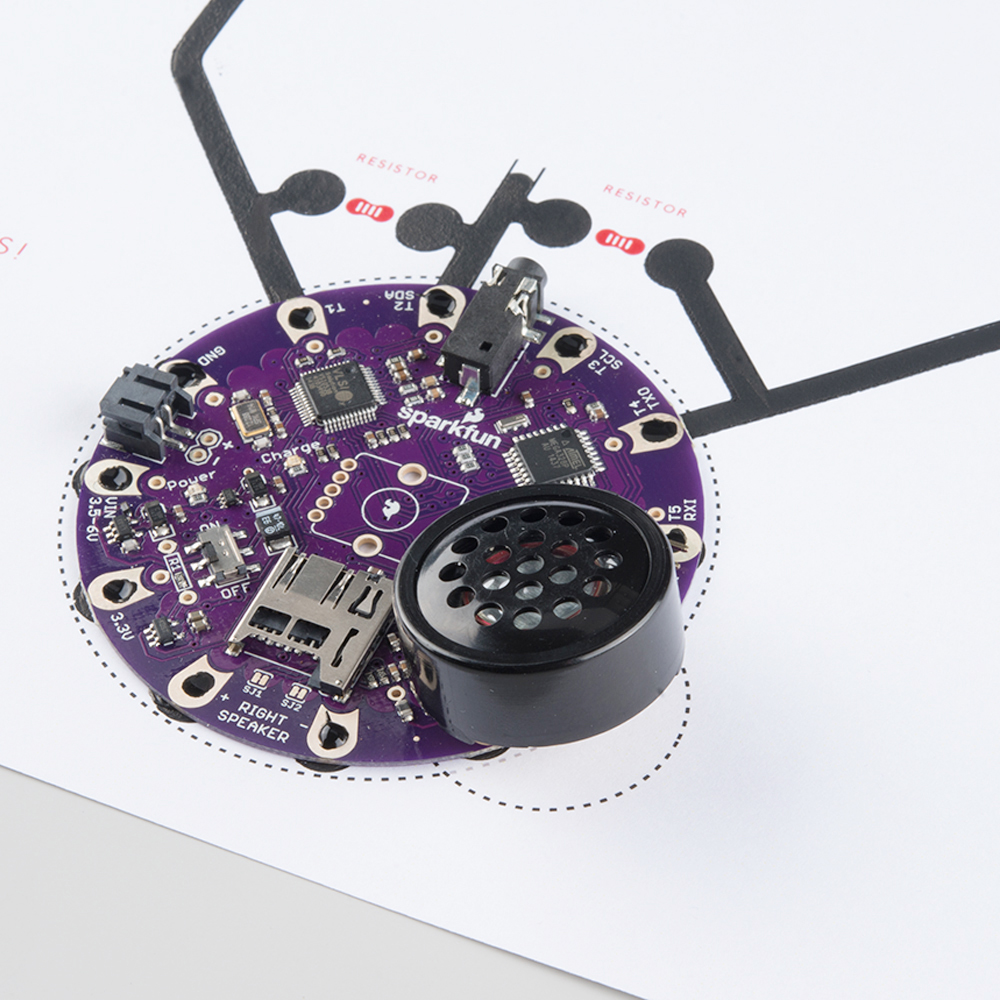
If you want to add the small speaker, add a drop of conductive paint to each of the "LEFT SPEAKER" holes.

With the paint in the LilyPad holes still wet, insert the pins of the speaker into the holes labeled "Left Speaker." It doesn't matter if the + and - of the speaker lines up with the + and - of the holes.
NOTE: IF you want to hold the speaker in place, you can add a drop of hot glue underneath the speaker. Don't worry, it won't hurt the electronics.

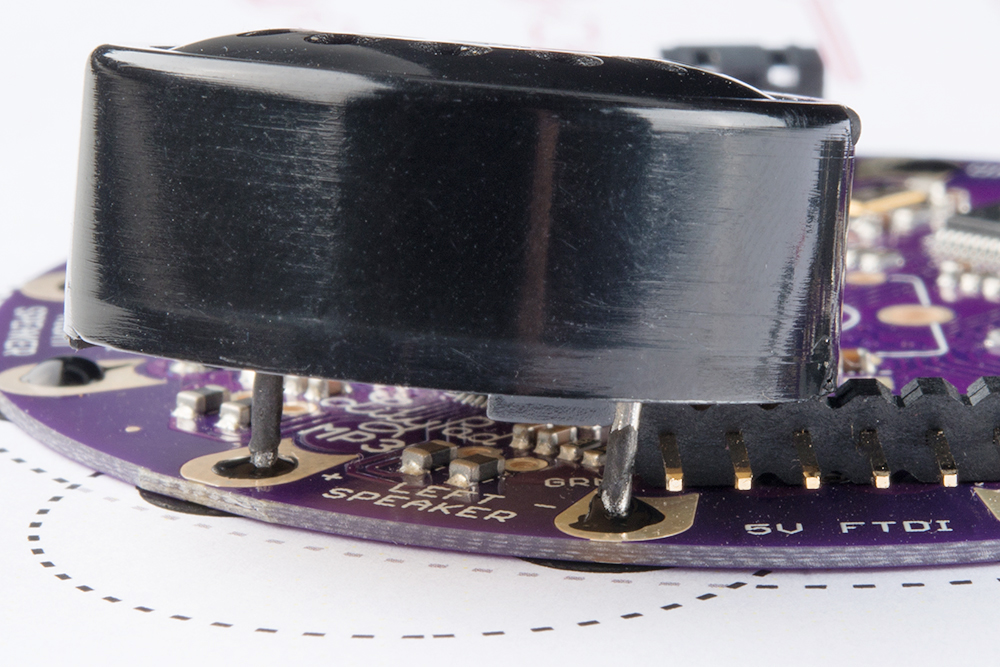
NOTE: The speaker will be a bit wobbly in the holes. Let the paint dry completely (a few hours) before touching the speaker again. You can complete the rest of the tutorial, but just be careful around the speaker!
IMPORTANT: Make sure that the pins from the speaker do not touch any of the pins labeled "5V FTDI" on the LilyPad board!
Add the Resistors
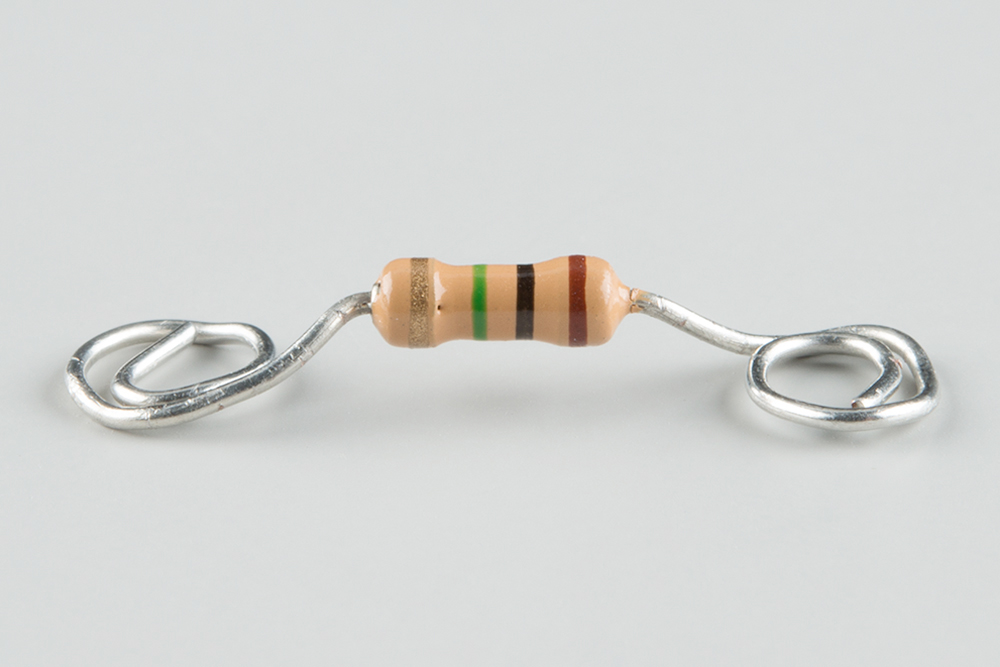
Using a set of pliers, tweezers, or your fingers, carefully roll the ends of two resistors to make little spirals.
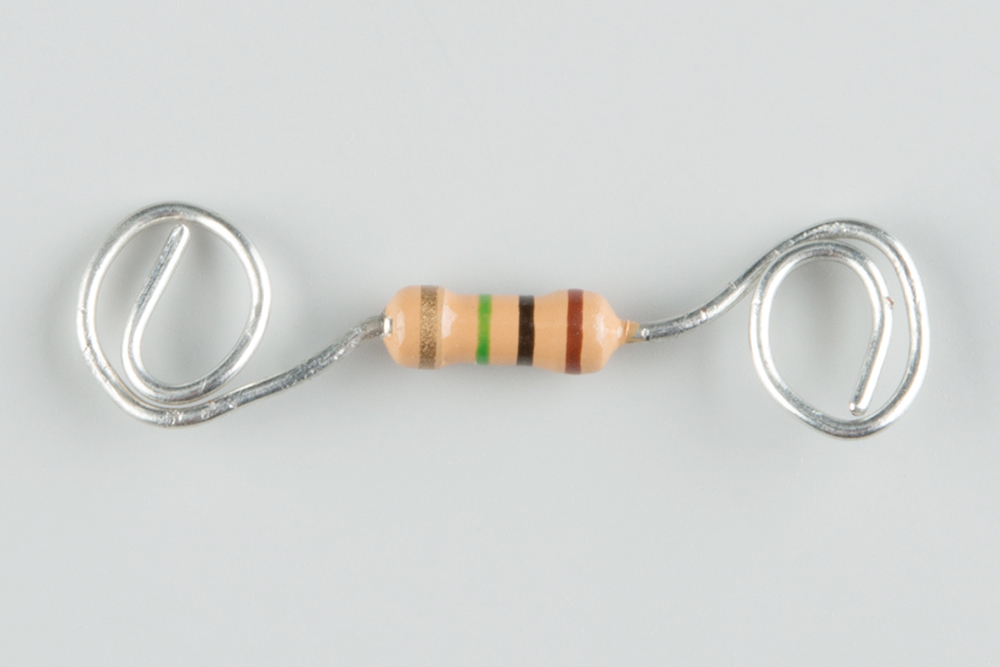
Bend the curled ends down, and then flatten them so that the resistor is elevated.
Find the resistor locations, which are marked in red on the printed cardstock. Add a drop of paint on each of the circular pads around the resistor locations.
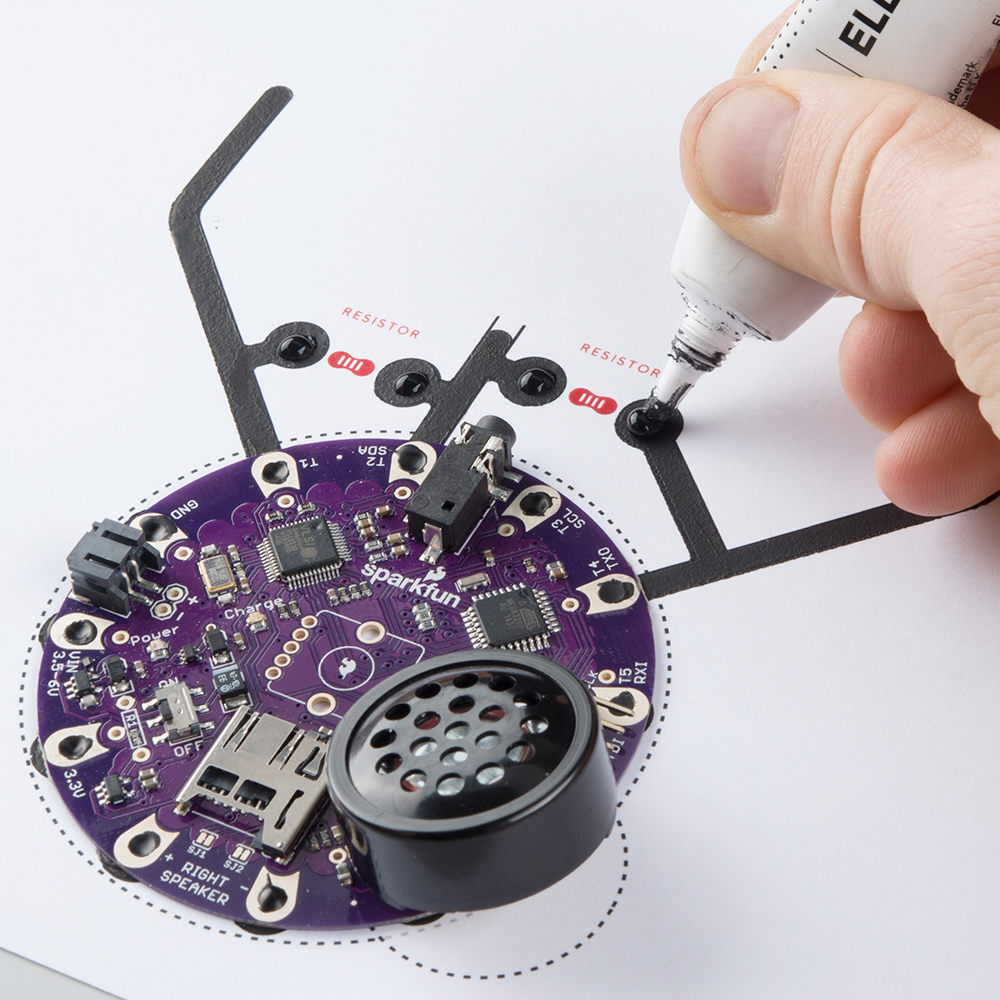
Place one resistor so that it connects the trace from T1 to the trace from T2 (these labels can be found on the LilyPad MP3 board). If you are using the printed cardstock, the location of the resistors are marked in red. Place the second resistor so that it connects the trace from T2 to the trace from T4.

Just like we did with the LilyPad board, we will want to add a drop of paint to each of the curled resistor leads so that they stay in place.

WAIT: at least 15 minutes for the paint to dry before moving on to the next step.