SIK Experiment Guide for the Arduino 101/Genuino 101 Board (Spanish)
This Tutorial is Retired!
This tutorial covers concepts or technologies that are no longer current. It's still here for you to read and enjoy, but may not be as useful as our newest tutorials.
 D___Run___
 xperimento 17: Usar una pantalla LCD
Introducción
En este experimento, aprenderá a usar una LCD. Una LCD (pantalla de cristal líquido) es una pantalla simple que puede mostrar comandos, segmentos de información o las lecturas del sensor; todo depende de lo que programe en la placa. En este circuito, aprenderá los aspectos básicos de la incorporación de una pantalla LCD en su proyecto.
Elementos necesarios
Necesitará los siguientes elementos:
- 1x placa de pruebas
- 1x placa Arduino 101 o Genuino 101
- 1x potenciómetro
- 1x pantalla LCD de 3,3 V
- 16x cables puente
¿No tiene el SIK?
Si está realizando este experimento y no dispone del SIK, le sugerimos que use estos elementos:


También necesitará una placa Arduino 101 O Genuino 101.

Arduino 101
DEV-13787
Genuino 101
DEV-13984Presentación de la pantalla LCD

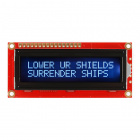
El SIK 101 incluye una pantalla de cristal líquido (LCD). Esta pantalla es similar a la que puede encontrar en el microondas o en el panel de su coche, o si es lo bastante mayor para recordarlo, el juguete Speak and Spell. Las pantallas LCD son una gran manera de visualizar datos o información de la placa 101 sin tener que conectarla a su portátil.
Esta pantalla LCD cuenta con espacios para un total de 32 caracteres organizados en una rejilla que contiene dos filas de 16 caracteres. La pantalla LCD se controla a través de una biblioteca que facilita su uso con la placa 101. El cableado puede parecer un poco abrumador, pero es un desafío que vale la pena.
**Consejo experto: cuando conecte los cables de la pantalla LCD, empiece por un lado de los pines de la pantalla LCD y vaya hacia el centro. Cuando llegue a un pin que no se va a usar, vaya al otro lado y repita el proceso. Este método ayudará a evitar que no se olvide accidentalmente de un pin o que coloque mal los cables. **
Conexión del hardware
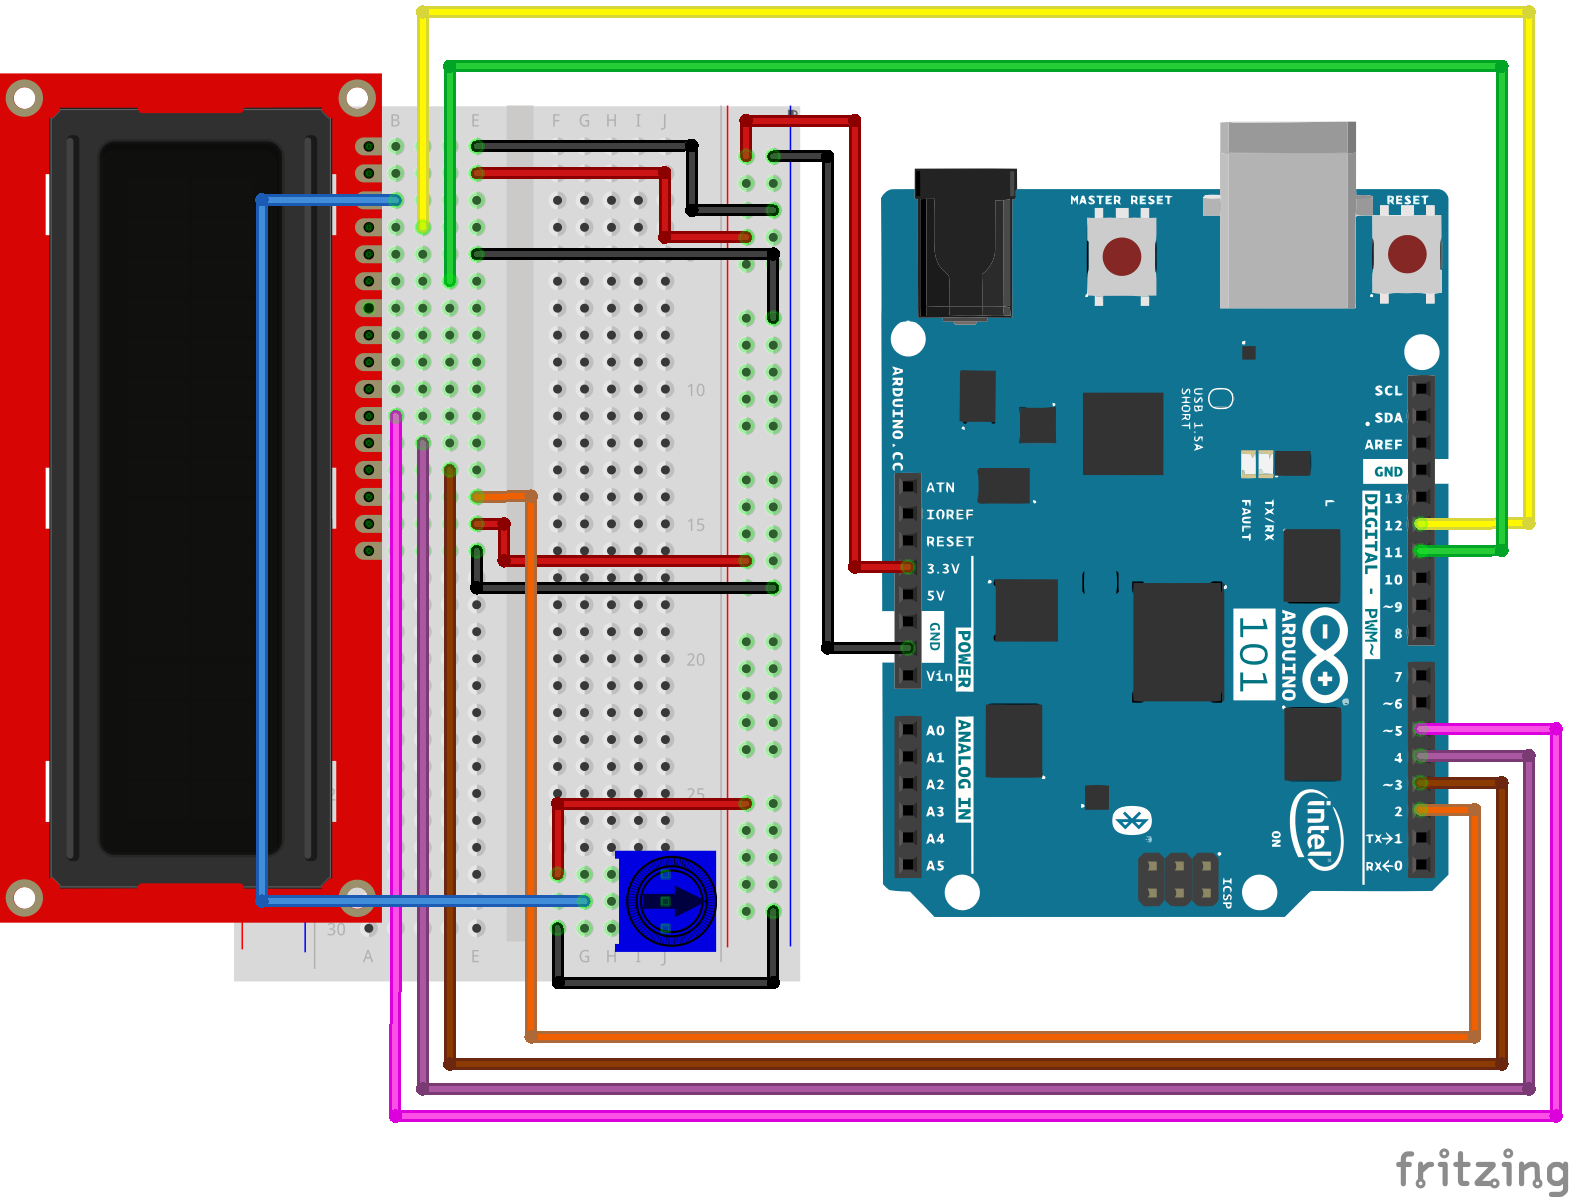
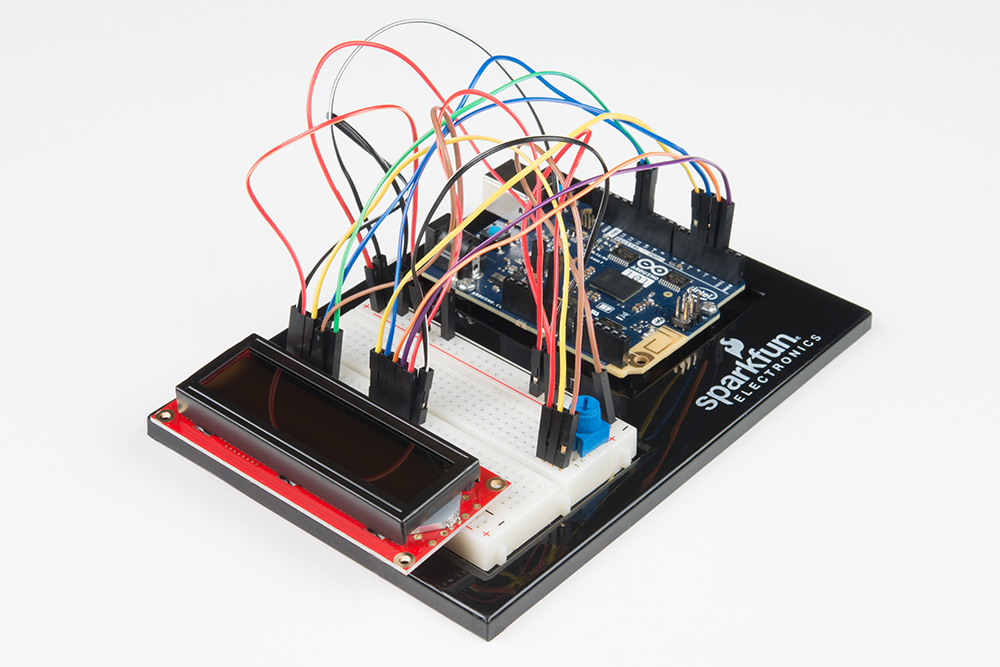
¿Está preparado para comenzar a conectar todo? Consulte el diagrama de cableado siguiente para ver cómo está conectado todo.
| Componentes polarizados | Preste especial atención a las marcas de los componentes que indican cómo colocarlo en la placa de pruebas. Los componentes polarizados solo se pueden conectar a un circuito en una sola dirección. |
Diagrama de cableado del experimento
Abrir el boceto
Abra el software IDE de Arduino en su ordenador. La codificación en el lenguaje de Arduino controlará el circuito. Abra el código del circuito 17; para ello, acceda a "101 SIK Guide Code" (Guía de códigos de SIK 101) que ha descargado y guardado en la carpeta "Examples" (Ejemplos) anteriormente.
Para abrir el código vaya a: File > Examples > 101 SIK Guide Code > Circuit_17 (Archivo > Ejemplos > Guía de códigos de SIK 101 > Circuito_17)
También puede copiar y pegar el siguiente código en el IDE de Arduino. Cárguelo y vea qué es lo que ocurre.
language:cpp
/*
SparkFun Inventor's Kit
Example sketch 17

LIQUID CRYSTAL DISPLAY (LCD)

  This sketch will show you how to connect an LCD to your Arduino
  and display any data you wish.

This sketch was written by SparkFun Electronics,
with lots of help from the Arduino community.
This code is completely free for any use.
Visit https://www.sparkfun.com/products/12060 for SIK information.
Visit http://www.arduino.cc to learn more about Arduino.
*/

// Load the LiquidCrystal library, which will give us
// commands to interface to the LCD:

#include

// Initialize the library with the pins we're using.
// (Note that you can use different pins if needed.)
// See http://arduino.cc/en/Reference/LiquidCrystal
// for more information:

LiquidCrystal lcd(12,11,5,4,3,2);

void setup()
{
  // The LiquidCrystal library can be used with many different
  // LCD sizes. We're using one that's 2 lines of 16 characters,
  // so we'll inform the library of that:

  lcd.begin(16, 2);

  // Data sent to the display will stay there until it's
  // overwritten or power is removed. This can be a problem
  // when you upload a new sketch to the Arduino but old data
  // remains on the display. Let's clear the LCD using the
  // clear() command from the LiquidCrystal library:

  lcd.clear();

  // Now we'll display a message on the LCD!

  // Just as with the Arduino IDE, there's a cursor that
  // determines where the data you type will appear. By default,
  // this cursor is invisible, though you can make it visible
  // with other library commands if you wish.

  // When the display powers up, the invisible cursor starts
  // on the top row and first column.

  lcd.print("hello, world!");

  // Adjusting the contrast (IMPORTANT!)

  // When you run the sketch for the first time, there's a
  // very good chance you won't see anything on the LCD display.
  // This is because the contrast likely won't be set correctly.
  // Don't worry, it's easy to set, and once you set it you won't
  // need to change it again.

  // Run the sketch, then turn the potentiometer until you can
  // clearly see the "hello, world!" text. If you still can't
  // see anything, check all of your connections, and ensure that
  // the sketch was successfully uploaded to the Arduino.
}

void loop()
{
  // You can move the invisible cursor to any location on the
  // LCD before sending data. Counting starts from 0, so the top
  // line is line 0 and the bottom line is line 1\. Columns range
  // from 0 on the left side, to 15 on the right.

  // In additon to the "hello, world!" printed above, let's
  // display a running count of the seconds since the Arduino
  // was last reset. Note that the data you send to the display
  // will stay there unless you erase it by overwriting it or
  // sending an lcd.clear() command.

  // Here we'll set the invisible cursor to the first column
  // (column 0) of the second line (line 1):

  lcd.setCursor(0,1);

  // Now we'll print the number of seconds (millis() / 1000)
  // since the Arduino last reset:

  lcd.print(millis()/1000);

  // TIP: Since the numeric data we're sending is always growing
  // in length, new values will always overwrite the previous ones.
  // However, if you want to display varying or decreasing numbers
  // like a countdown, you'll find that the display will leave
  // "orphan" characters when the new value is shorter than the
  // old one.

  // To prevent this, you'll need to erase the old number before
  // writing the new one. You can do this by overwriting the
  // last number with spaces. If you erase the old number and
  // immediately write the new one, the momentary erase won't
  // be noticeable. Here's a typical sequence of code:

  // lcd.setCursor(0,1);   // Set the cursor to the position
  // lcd.print("       "); // Erase the largest possible number
  // lcd.setCursor(0,1);   // Reset the cursor to the original position
  // lcd.print(millis()/1000); // Print our value

  // NEXT STEPS:

  // Now you know the basics of hooking up an LCD to the Arduino,
  // and sending text and numeric data to the display!

  // The LCD library has many commands for turning the
  // cursor on and off, scrolling the screen, etc. See:
  // http://arduino.cc/en/Reference/LiquidCrystal
  // for more information.

  // Arduino also comes with a number of built-in examples
  // showing off the features of the LiquidCrystal library.
  // These are locted in the file/examples/LiquidCrystal menu.

  // Have fun, and let us know what you create!
  // Your friends at SparkFun.
}
Código a tener en cuenta
#include<liquidcrystal.h></liquidcrystal.h>
Este segmento de código indica al IDE de Arduino que incluya la biblioteca de una pantalla LCD simple. Sin él, ninguno de los comandos funcionará, así que asegúrese de incluirlo.
lcd.print(“hello, world!”);
Esta es la primera vez que verá algo en la pantalla. Puede que sea necesario ajustar el contraste para que se vea correctamente. Gire el potenciómetro hasta que pueda ver claramente el texto.
lcd.clear();
Sí, lo ha adivinado. Este método se utiliza para aclarar los datos que se muestran en la pantalla LCD.
lcd.setCursor(0,1);
Si mira de cerca, observará que cada carácter tiene un pequeño cuadro alrededor y que estos cuadros están en una rejilla de 2x16. El primer número de este método se refiere a la columna (empiece a contar desde 0, somos conscientes de que hay que acostumbrarse) y el segundo número hace referencia a la fila. Por lo tanto, el valor 0,1 hace referencia a la primera columna y a la segunda fila.
Lo que debería ver
Inicialmente, debería ver las palabras "hello, world!" en la pantalla LCD. Recuerde que puede ajustar el contraste mediante el potenciómetro si no puede ver claramente las palabras. Si tiene problemas, asegúrese de que el código es correcto y vuelva a comprobar las conexiones. Consulte también la sección Solución de problemas a continuación.
Solución de problemas
La pantalla está en blanco o completamente iluminada
Juegue con el contraste girando el potenciómetro. Si se ajusta incorrectamente, no podrá leer el texto.
No funciona
Vuelva a comprobar el código, especialmente el que ha incluido en la biblioteca de LCD.
La pantalla parpadea
Vuelva a comprobar las conexiones en la placa de pruebas y la placa 101.