Si4707 Hookup Guide
 jimblom
Introduction
Weather-band radio is an awesome public service provided in the US, Canada, and Bermuda. With hundreds of transmitting stations dotting the country, weather radio acts as the "voice of NOAA" (National Oceanic and Atmospheric Administration). In addition to spouting out weather forecasts, weather radio also implements a messaging protocol for emergency weather alerts called SAME (Specific Area Message Encoding).
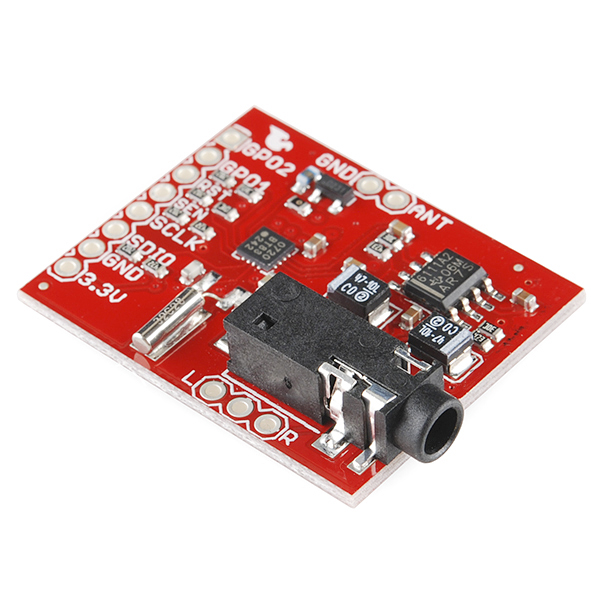
The Silicon Labs Si4707 is capable of both receiving weather radio broadcasts and decoding SAME messages. It's also able to check for 1050Hz alert tones. It's a unique chip, and we liked it so much we stuck it on a breakout board. In addition to the Si4707, the breakout also includes supporting passive components and a headphone stereo amplifier.
There are a variety of consumer-grade radio receivers with weather band capabilities built-in. But what's the fun in that? With the Si4707 you can make your own weather watching radio!
Required Materials
In this tutorial, we'll explain how to hook-up to the Si4707 breakout using the Arduino development platform. To follow along, you'll need these materials:
We've suggested the RedBoard for all of your Arduino needs, but any of the development boards should work.
You'll also need a listening device -- either headphones or speakers -- with a 3.5mm stereo jack connector. You want to hear what the radio has to say, don't you?!
Advanced (Optional)
If you'd like to add your own external antenna and/or connect a small speaker to the board, some of these will come in handy:
- A couple feet of wire - This is used to make a really basic antenna.
- Audio speaker - There are a variety of speakers out there including thin and PCB mount packages.
Required Tools
This assembly will require some simple soldering, so you'll need a soldering iron and a bit of solder.
Advanced (Optional)
If you're into the more advanced hookup, you'll need something to cut the jumper on the board. For that, a hobby Knife should be all you need.
Recommended Reading
This tutorial assumes some previous electronics knowledge to get along. If you're not familiar with these concepts, consider checking out our tutorials on the subject!
- How to Solder - You'll need some solder points somewhere between the breakout board and your Arduino.
- What is an Arduino? - Be familiar with Arduino. We'll be talking about it a lot in this tutorial.
- I2C Communication - This is the communication standard the Arduino uses to talk to the Si4707.
- How to Use a Breadboard - This guide will use a breadboard to connect between the Arduino and Si4707 breakout.
- Working With Wire - If you want to add an antenna, you'll need to cut and strip some wire.
So grab an Arduino and an Si4707 Breakout, follow along, and you'll be listening to the soothing robotic-weather-person voice in no time!