Sending Sensor Data Over WiFi
Contributors:
 ROB-24601
ROB-24601 
Step 1: Obtaining MAC Addresses
In order to communicate with any device over WiFi, we need to know its Media Access Control Address, or MAC address. There’s a short and simple Arduino sketch that will find the MAC address of each device, and this one should go in your drawer of super-useful Arduino utility sketches right next to your I2C sniffer.
/*
 * MAC Address Finder
 * Run this on each of your WiFi-enabled
 * boards to get their MAC addresses, so
 * you can plug them into your code,
 * allowing your components to connect
 * on power-up or after power-cycling
 * without the need for any intervention!
 *
 * Once you've uploaded the code, open
 * the Serial Monitor, hit the reset
 * button on your board, and write down
 * the MAC address.
 * (I use a label maker to put the MAC
 * address on the back of each board.)
 */

#include "WiFi.h"

void setup(){
  Serial.begin(115200);

}

void loop(){
  WiFi.mode(WIFI_STA);
  Serial.print("The MAC address for this board is: ");
  Serial.println(WiFi.macAddress());
  while(1){     // This holds the loop, so it doesn't
    }           // print the info a million times.
}
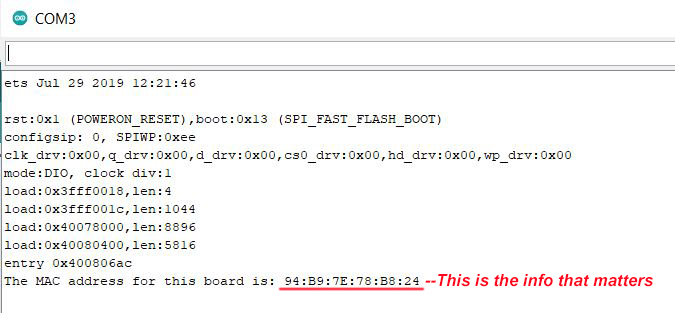
Once the code is uploaded, open a Serial Monitor, reset the board, and write down the MAC address.
Tip from the author:
When I was first starting to work with WiFi boards, I would find the MAC address, write it on a sticky note, then put that on each board. Of course I would then throw them all in my bag, go from my home workspace into SparkFun HQ and pull all the boards out, only to find that the sticky notes were all stuck to each other in the bottom of my bag. Useless! Since then I’ve been using a label maker to tag the back of each board. I would recommend against using a permanent marker on your boards for this since the MAC addresses can be changed.
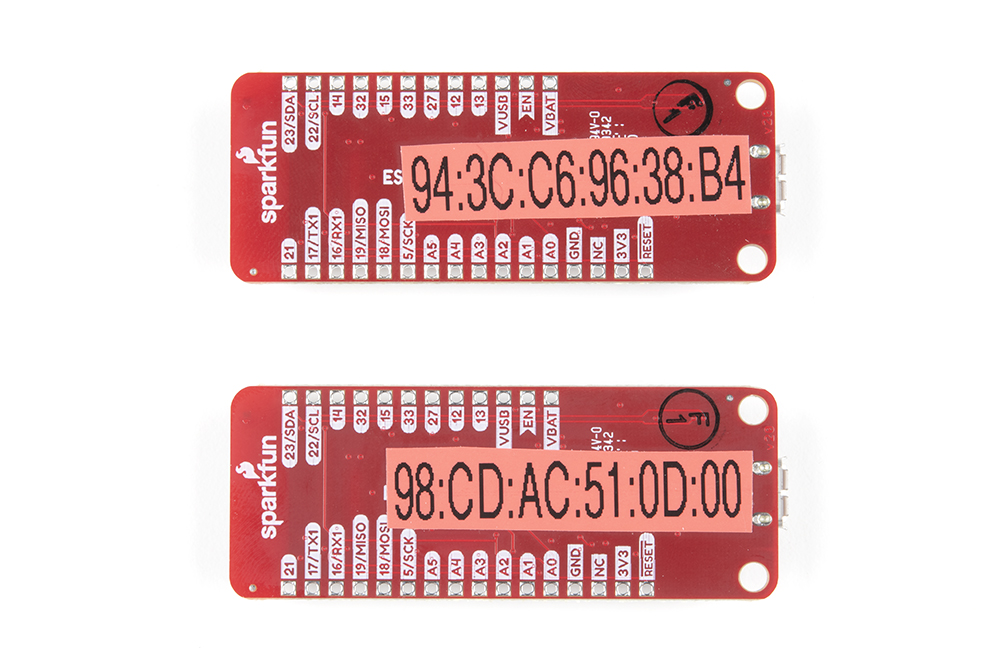 A label maker is a non-permanent solution to putting the MAC address on each board.
When I was first starting to work with WiFi boards, I would find the MAC address, write it on a sticky note, then put that on each board. Of course I would then throw them all in my bag, go from my home workspace into SparkFun HQ and pull all the boards out, only to find that the sticky notes were all stuck to each other in the bottom of my bag. Useless! Since then I’ve been using a label maker to tag the back of each board. I would recommend against using a permanent marker on your boards for this since the MAC addresses can be changed.
A label maker is a non-permanent solution to putting the MAC address on each board.