SD Cards and Writing Images
Formatting Your Card
We are going to start with formatting your SD card. This step is not strictly necessary, but it does help clean off your card. In some cases if something has gone wrong this will help clean up the mess instead of bring the mess with you.
Always be careful when doing this, it will erase everything on your card, so make sure you are OK losing everything on the card. Also, make sure you select the correct drive! Alternately the tools used to change partition size will also format any card or partition. If your card has been partitioned because it already has an image on it, see the last section on resizing and deleting partitions.
Windows
The SD Association has a formatter that is designed to work with both Windows and Mac that they recommend, you can try it or use the following directions - SD Card Formatter
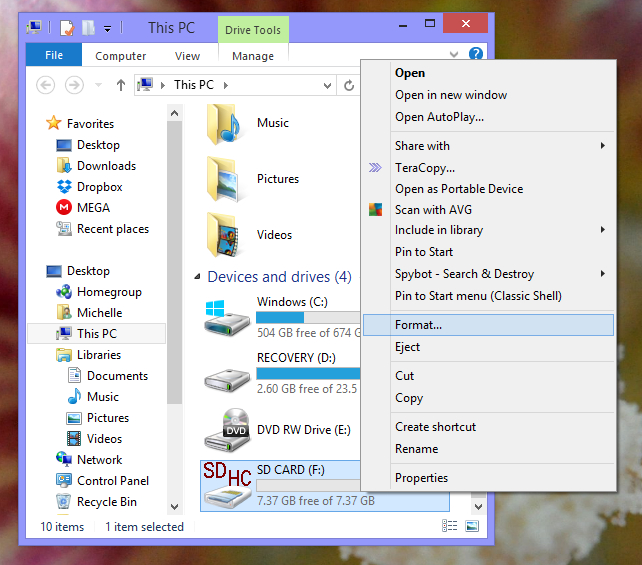
- Open "My Computer"
- Right click on the drive with the SD card
- Select "Format"
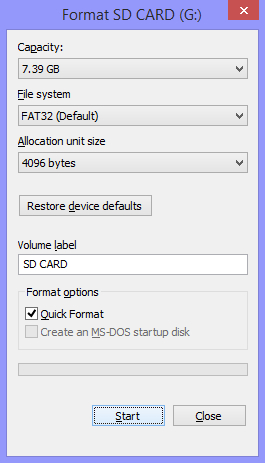
- Select your file system (FAT32 works fine)
- Feel free to name your card in "Volume Label"
- Quick Format is not quite as thorough but a bit quicker, either option is fine
- Select "Start"
Mac
The SD Association has a formatter that is designed to work with both Windows and Mac that they recommend, you can try it or use the following directions - SD Card Formatter.
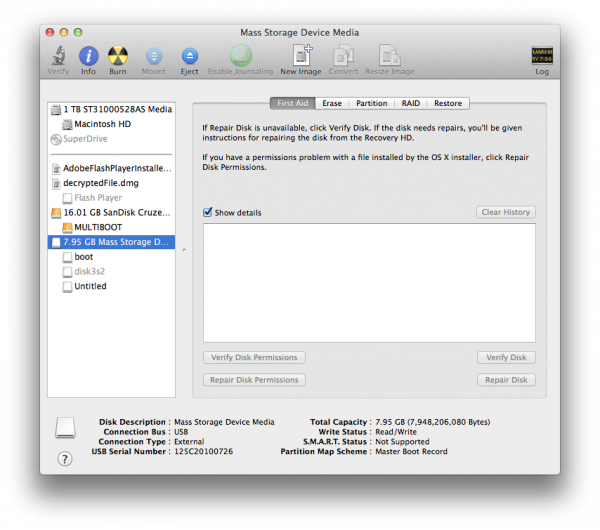
- Open the Disk Utility (Applications -> Utilities ->Disk Utility)
- Select the SD Card
- Select the "Erase" tab
- Select your file system - MSDOS(FAT)
- Feel free to name your card in the "Name" field
- Select "Erase"
Linux
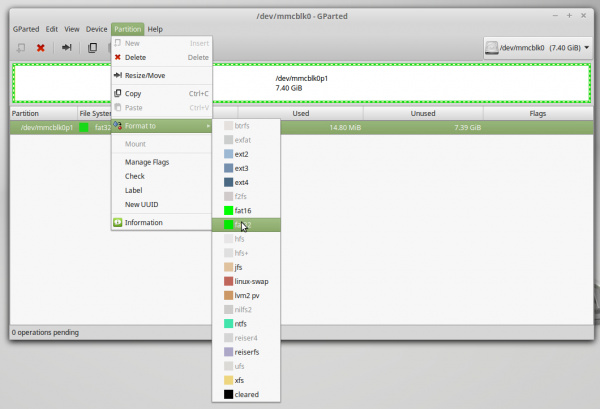
- Run Gparted (you may need to install it first using
sudo apt-get install gparted) - Select the correct device from the drop down menu on the top right
- Select Partition → Format to → fat32
- Click Apply


