SD Cards and Writing Images
 M-Short
Downloading and Installing the Image
Finally, this is what we've been waiting for. So, why can't you just copy the file onto the card? When you look at the SD card you actually don't see all the bits on the card, you just see the main storage area. There are other parts that allow the card the card to be bootable, and this is what needs to be written. While you can do that by hand and then add all the files you need, generally your files are released as an image that has all the information in it. This way you can make the disk bootable and add the files all in one easy step. Just like formatting your SD card, this will erase everything on it. Make sure you want to do this and you select the correct disk.
Downloading the image
Start by downloading the image you want to use, and don't forget to extract your image so you have a *.img file. Here are some files for a few common boards; notice there are often different downloads available. You will find different Linux distributions, Android images, and even different images depending on the display you want to use. Pick the one that best works for your application, and remember, you can always go back and pick a different one.
- Raspberry Pi (Noobs install is done differently follow the directions on the Raspberry page) - Downloads
- NVIDIA Jetson Nano Downloads
- PCDuino 3 - Downloads
- Acadia - Downloads
The Easy Way
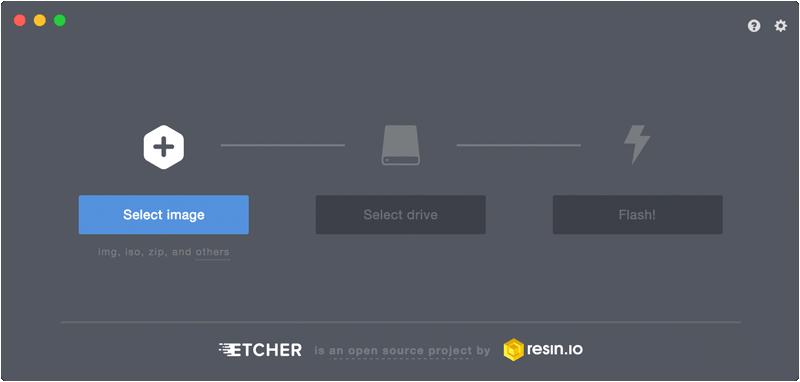
To install your own image on your card we recommend software called Etcher.
These guys have taken all the different steps needed and put them all in one piece of software to take care of everything. Download your image, then run the program, select your image, select your uSD card drive, and then hit flash. Etcher will flash the card, verify the install and unmount your card. Once it is done, remove your card and you are good to go.
The Hard Way - Windows
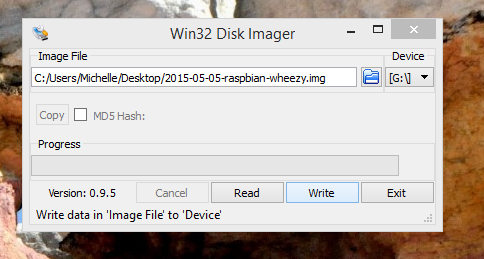
- Download and unzip Win32DiskImager
- Run Win32DiskImager.exe (you may need to run as Adminstrator)
- Select the drive of your SD card
- Click the folder icon and select the image you downloaded
- Click "Write" and wait until it is done
The Hard Way - Mac
- Run
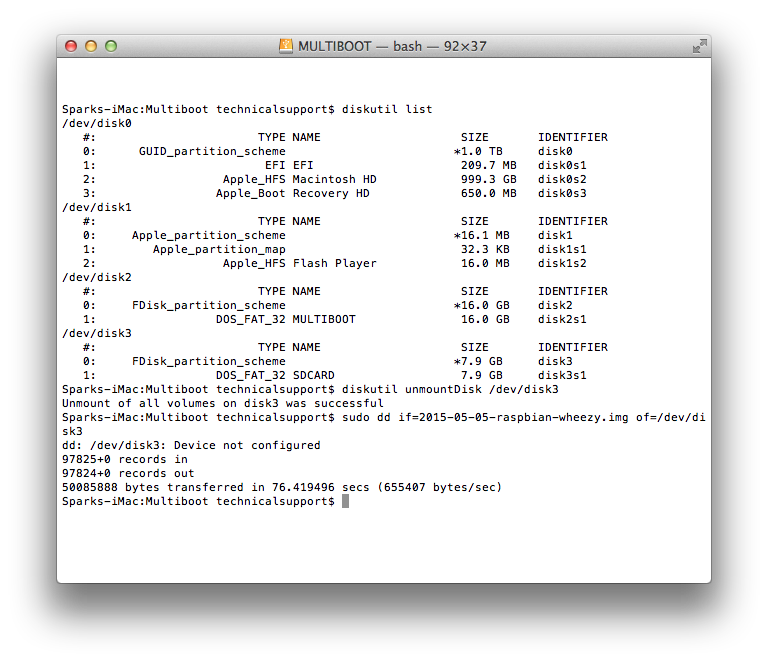
diskutil listto display all disks, find the correct disk - Run
diskutil unmountDisk /dev/disk4to unmount the disk (replace disk4 with the correct disk) - Run
sudo dd bs=1M if=your/file/here.img of=/dev/disk4(again replace disk4 with the correct disk, and add the correct path to your image) - Wait until it is done
The Hard Way - Linux
- Run
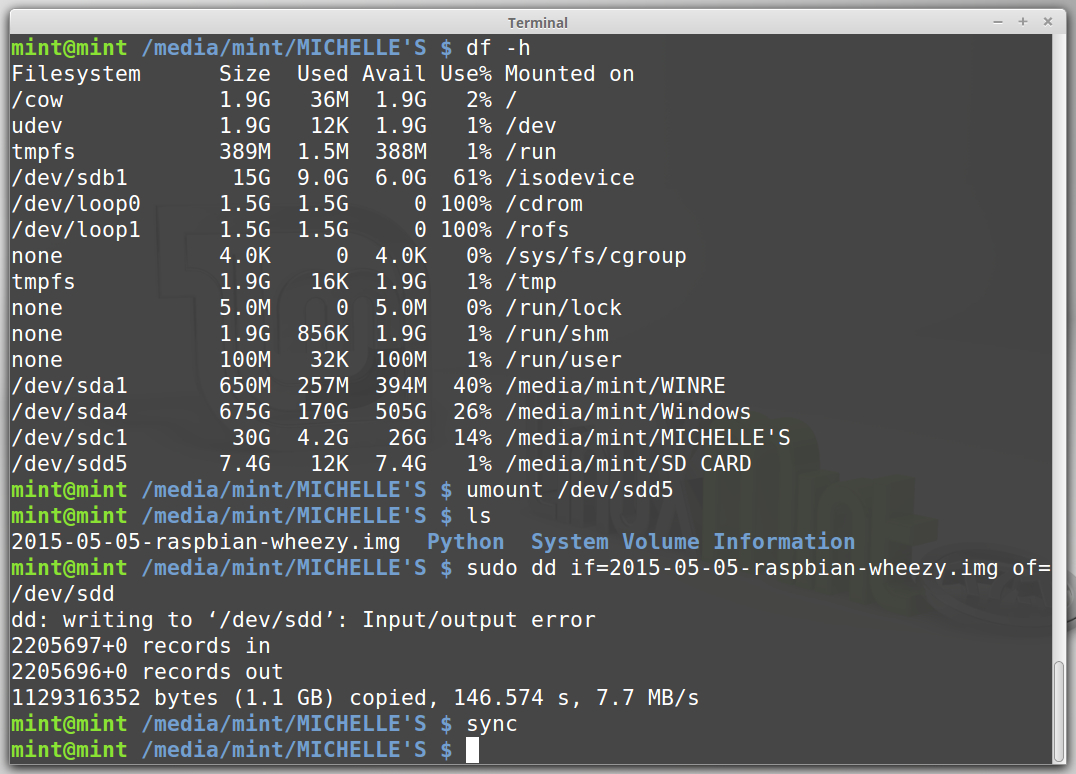
df-hto see what devies are mounted on your system, you may want to do this without the card in and then with the card in. - Take a look at the card name on the left column. There will most likely be a number at the end, this in the partition number. In the example below my card /dev/sdd has 1 partition (/dev/sdd5). You may also have more than 1 partition on your card, keep that in mind if you do.
- Unmount any partitions you see using the command
umount /dev/sdd5where /dev/sdd5 is the partition on your card. - Next run the following command to actually write to the card, keep in mind you will need to know where your image is and you will want to use the path to the card without any partition numbers on the end. You may or may not need to run this as "sudo" depending on your permissions
dd if=2015-05-05-raspbian-wheezy.img of=/dev/sdd(make sure to use the correct path to your file and your SD card) - Wait... this will take a few minutes, there is no status bar, but even on a live Linux distro this only took a couple of minutes.
- Run
sync(this will flush the write cache, and other fancy things)