Qwiic dToF Imager (TMF882X) Hookup Guide
Contributors:
 bboyho,
  Elias The Sparkiest
bboyho, Elias The Sparkiest 
Resources & Going Further
Now that you've successfully got your Qwiic dToF Imager up and running, it's time to incorporate it into your own project! For more information, check out the resources below:
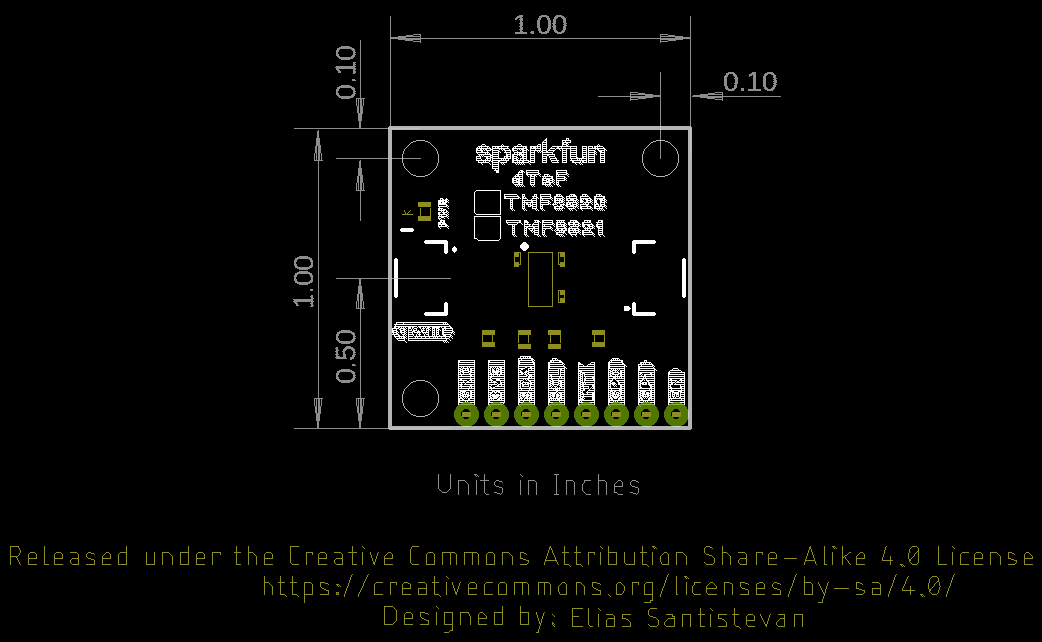
- SparkFun Qwiic dToF Imager - TMF8820
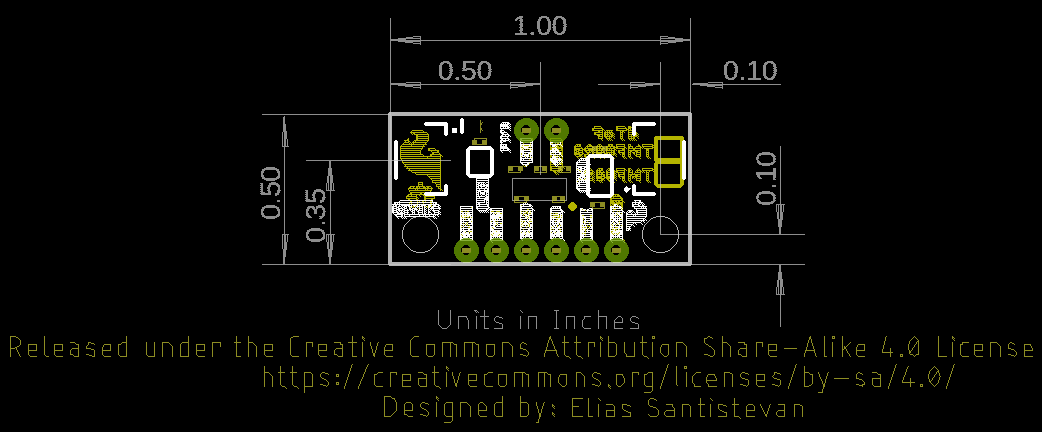
- SparkFun Qwiic Mini dToF Imager - TMF8820
- SparkFun Qwiic dToF Imager - TMF8821
- SparkFun Qwiic Mini dToF Imager - TMF8821
- TMF882X
- Arduino Library
- GitHub Hardware Repo
- SFE Product Showcase
Need some inspiration for your next project? Check out some of these other tutorials using sensors.
Experiment Guide for the Johnny-Five Inventor's Kit
Use the Tessel 2 and the Johnny Five Inventors kit to explore the world of JavaScript enabled hardware through 14 awesome experiments!
LilyPad Safety Scarf
This scarf is embedded with a ribbon of LEDs that illuminate when it gets dark out, making yourself more visible to vehicle and other pedestrians.
Analog MEMS Microphone Breakout - SPH8878LR5H-1 Hookup Guide
Get started with sound monitoring using the SparkFun analog MEMS microphone breakout board with Arduino!