Night Sky Halloween Costume
 Feldi
Feldi 
Introduction
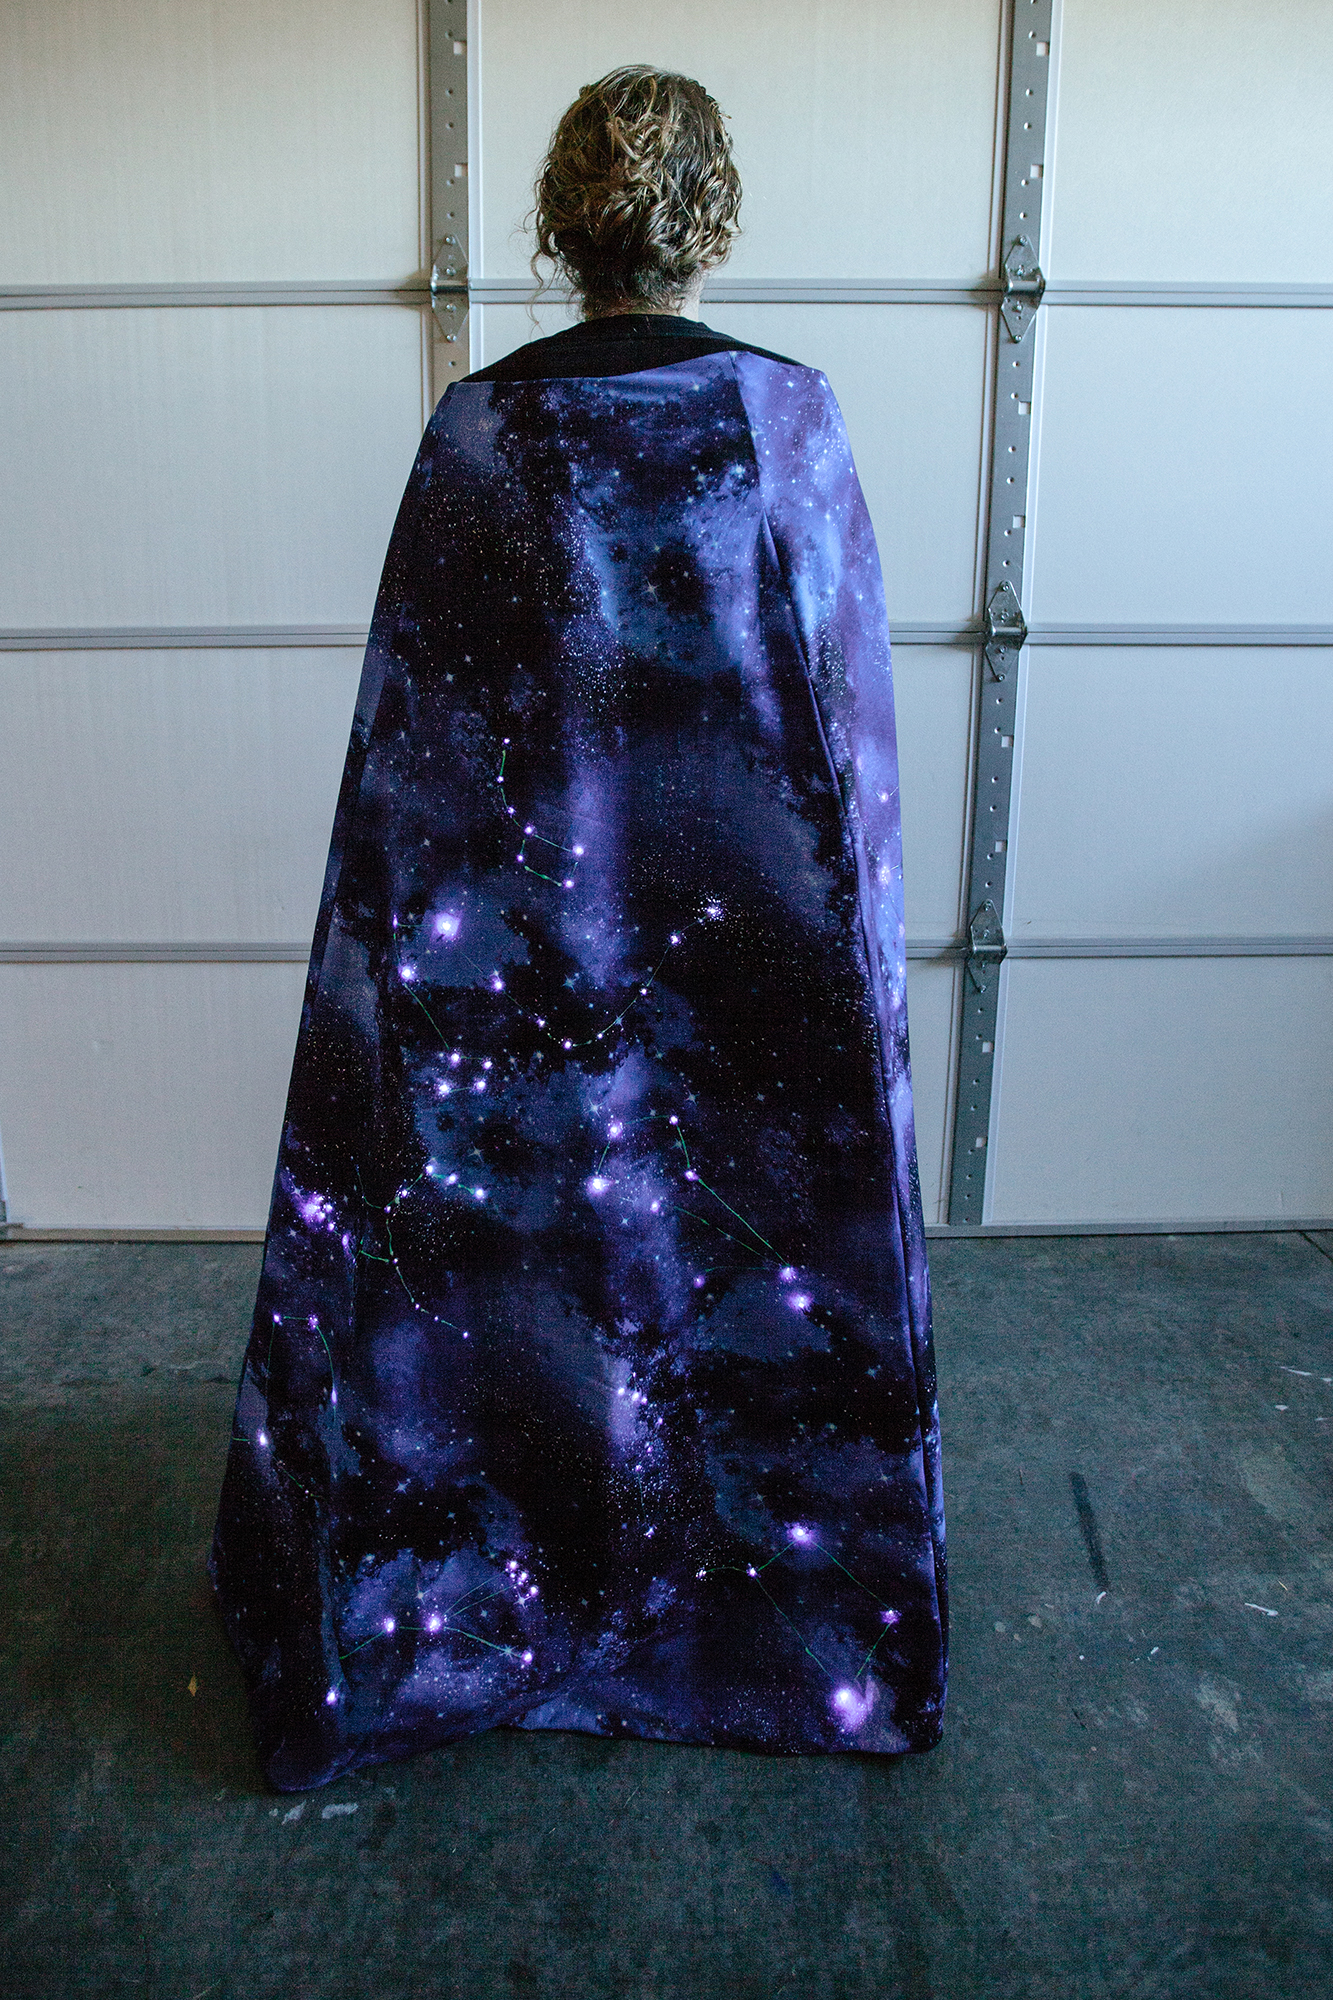
In this project, we’ll create a wearable costume using conductive thread to connect LilyPad LEDs to a LilyTiny, powered by LilyPad battery holders. Make your own by following the step-by-step instructions below.
Design and build time: 3-5 Weeks
Suggested Reading
If this is your first sewable electronics project, we recommend you read our LilyPad Basics tutorial.
Polarity
Series and Parallel Circuits
Insulation Techniques for e-Textiles
Planning a Wearable Electronics Project
Powering LilyPad LED Projects
LilyPad Basics: E-Sewing
Materials and Tools
Let's go over all of the things you'll need to sew your project together.
Items required for the Night Sky Costume:
You Will Also Need:
- Cape Pattern (or any garment pattern of your liking)
- Denim Fabric for Lining (yardage based on pattern requirements)
- Galaxy Printed Fabric (yardage based on pattern requirements)
- Sewing Machine
- Navy or Black Thread
- Hot Glue Gun w/ Extra Hot Glue Sticks
- Scissors
- Pins
- Sewing Needles
- Glow-in-the-Dark Puff Paint
- Iron-on Adhesive
- Clothing Iron
- Colored Pencils in White, Red, and Yellow
Understanding Your Circuit
In this project, you will be sewing several of the same circuit. The cape that we have made includes 10 circuits. Let's take a few minutes to understand what these look like and how they work before we get started.
Notice that the silver sew tabs on your LilyPad LEDs and battery holders are labeled either positive or negative. Many electronic components like these have polarity, meaning electric current can only flow through them in one direction.
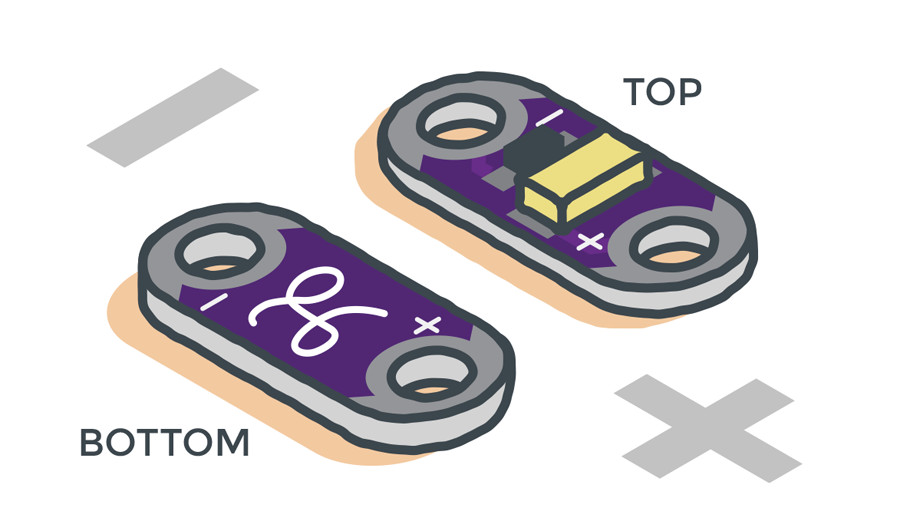
If hooked up incorrectly, they will not light up. Batteries are also polarized; they have a positive and negative side. Always check the labels on LilyPad pieces to make sure they are correctly oriented before sewing together a circuit.
The following diagram illustrates the circuit you will be following in order to add twinkling LEDs to your garment. The number of constellations will determine how many LEDs you will need, as well as how many circuits you will be building. I will be including 18 - 21 LEDs per circuit, meaning 6-7 LEDs per I/O pin, as seen below.
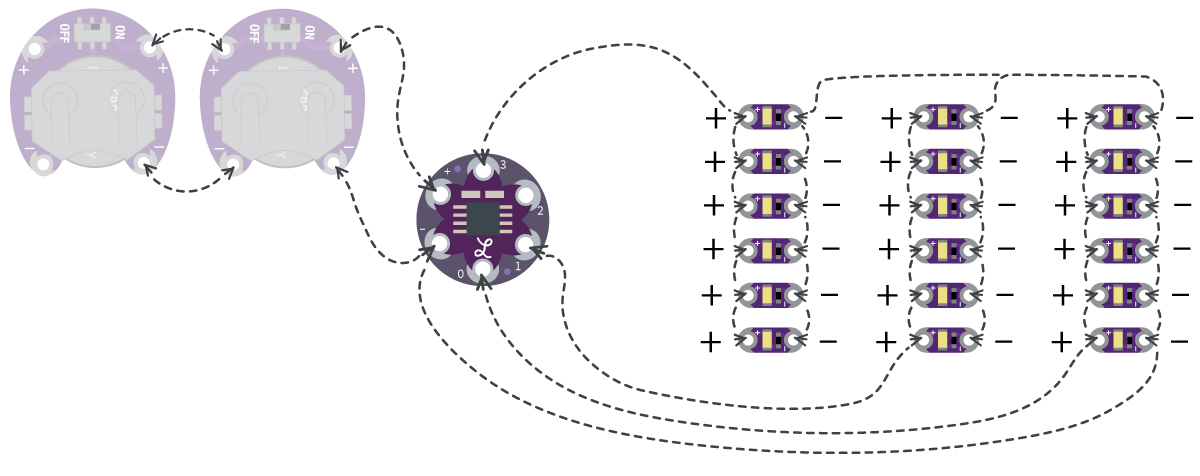
Notice how the LEDs have been grouped into three sets. No matter how many LEDs are included in your circuit, you will want to divide them into three groups as shown. The '-' tab of every single LED in your circuit connects to the rest with conductive thread, as well as the '-' tab on the LilyTiny and the '-' tab for power.
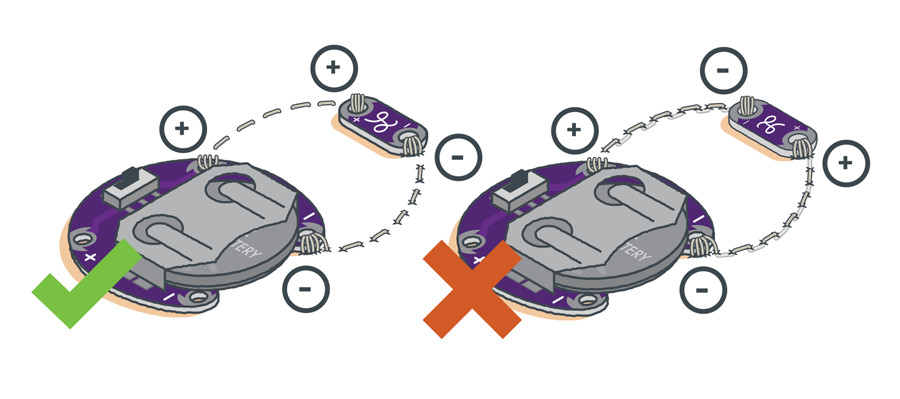
The '+' tabs will be treated differently. For each group of LEDs, you will connect all the '+' tabs inside that group together with conductive thread, and then connect them to either pins 0, 1, or 3 on the LilyTiny. We are not using pin 2 in this project as the pre-programmed animation is not ideal for the design. This circuit configuration is an example of LEDs in a parallel circuit. For power, you will need two LilyPad battery holders per circuit also wired in parallel in order to boost the longevity of power for a long night out. Connect the '+' tab of one of the battery holders to the '+' tab of the LilyTiny, and then the '-' tab of the same holder to the '-' tab of the LilyTiny. Then connect the '-' tab of the second holder to '-' of the first holder, and '+' on the second holder to '+' on the first holder.
Notice that the battery holder is dulled out in our circuit diagram. That is because it will lie on the opposite side of the fabric to LEDs and LilyTiny. The LEDs and LilyTiny should lie face-up on the backside of the fabric, or the side that will not be against your body. The battery holders should be on the other side of the liner, which will be against your body and remains exposed, allowing for access to replace batteries and switch on/off.
Preparing your Garment
Before we start sewing the circuits, there are a few steps we need to take to prepare our garment.
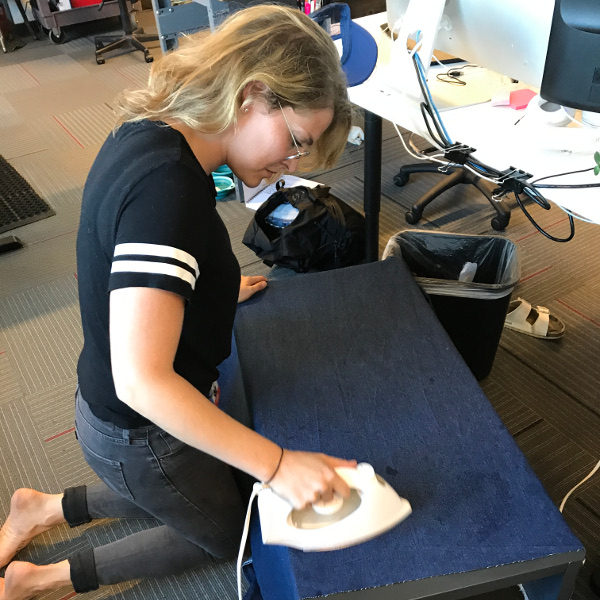
STEP 1:
Iron your fabric. Before cutting out the pattern it is important to remove creases and wrinkles.
STEP 2:
Following the pattern instructions, cut the lining out of the denim fabric. All LilyPad components will be sewn onto the lining. We are using denim because it is a heavier fabric with a strong structure, making it ideal for adding sewable electronics. A flimsier fabric will be much more difficult to work with.
Cut the outer layer of the garment from the cotton night sky fabric and set aside for later.

STEP 3:
Sew the lining together according to the pattern instructions.
STEP 4:
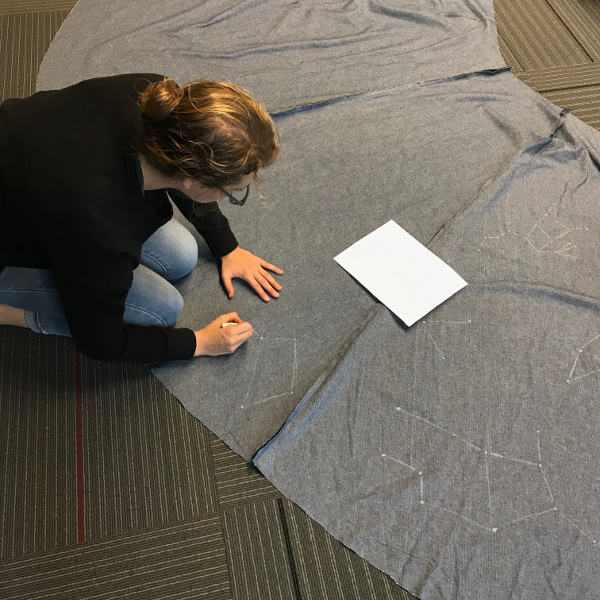
Download the design file provided.
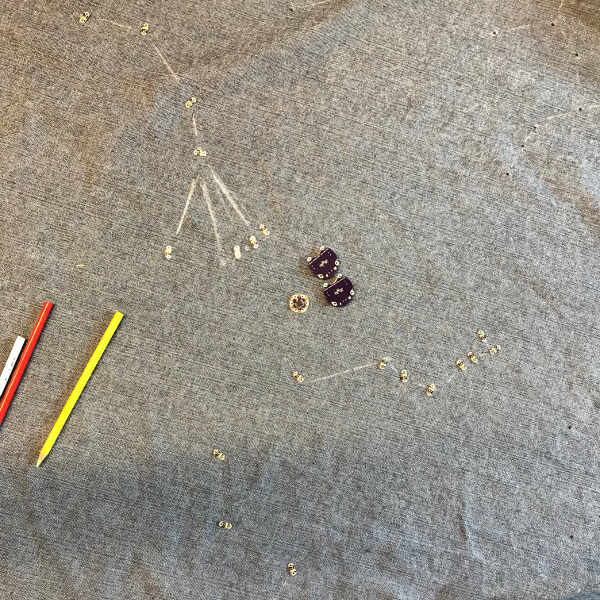
Using it as a guide, draw the constellations on the side of the lining that will not be against your body with a white colored pencil.
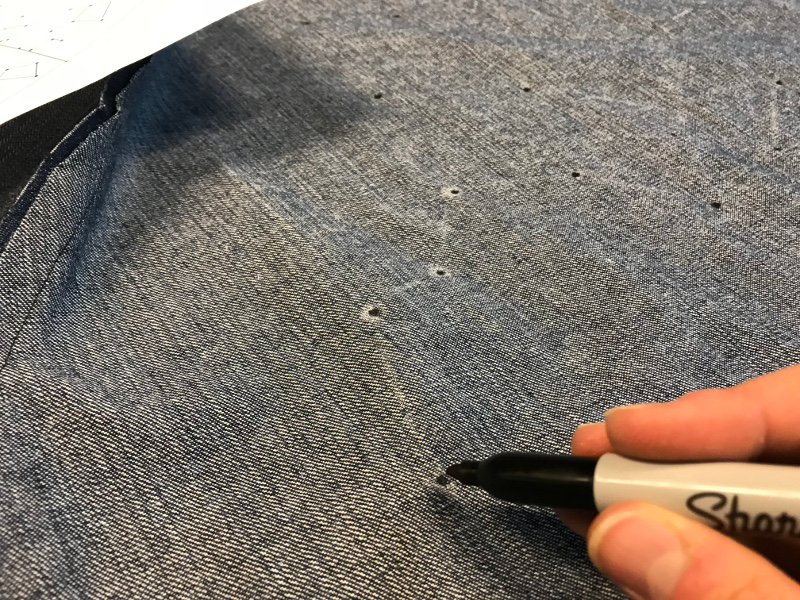
STEP 5:
Using a Sharpie, make a small dot on each star in the constellations you drew on the fabric. The white pencil tends to fade as you work, so these Sharpie dots will help you along the way.
Arranging Your Circuit
Each dot you marked with the Sharpie represents where a single LilyPad LED will live. Almost 200 LEDs have been included on our cape. That translates to 10 circuits. Count the number of dots you drew and divide that by 18-21 to figure out how many circuits you will be breaking the constellations into. It is OK if some circuits have a few more LEDs than others.
Do not worry about LEDs in a given constellation being part of separate circuits, as the wiring will be hidden upon completion.
While working on this project, we found it to be best practice to work on one circuit at a time. The following steps describe how to make a single circuit. Repeat until all the LEDs on your garment are sewn into a circuit.
STEP 6:
Find a set of 18-21 dots on your garment and place LilyPad LEDs over them. Place the LilyTiny somewhat centered among the LEDs and two LilyPad coin cell battery holders upside down, as they will ultimately be placed on the opposite side of the garment.
STEP 7:
Using the circuit diagram provided above and a white pencil, start to draw out the circuit design on the fabric. Keep in mind that traces cannot cross each other as that will cause a short.
When you have figured out the general arrangement of LilyTiny to LEDs, that will allow you to sew the circuit together as expressed in the diagram and start to hot glue the electronic components down in place. Make sure that the '+' and '-' tabs are arranged properly. The battery holders will live on the opposite side of the garment, so do not glue them down just yet but rather keep them in place for reference by leaving them upside down.
Then use a yellow colored pencil (or any color other than red) to draw a ground line connecting all '-' tabs according to the diagram.
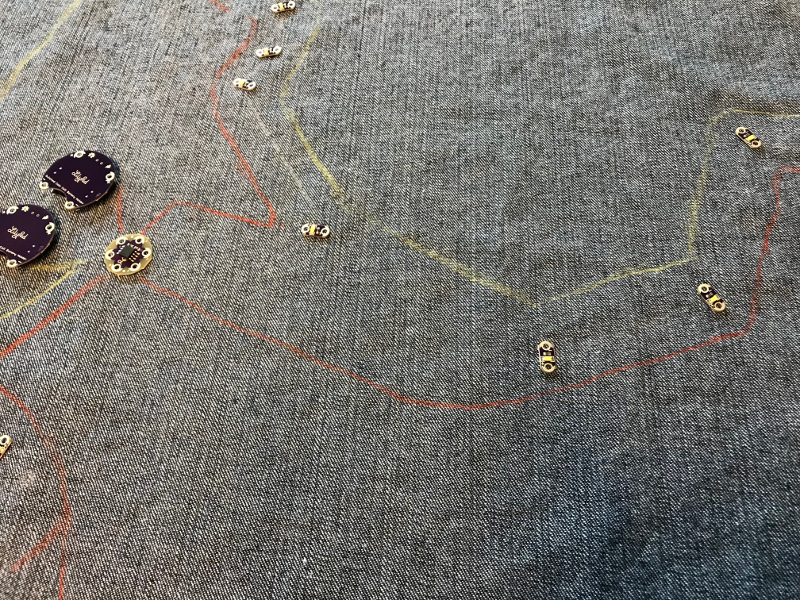
You will use these drawn lines as a guide on the sewing machine, so they should be straight and pass by all the sew tabs they will eventually be connected to.
Once the circuit has been drawn, flip the garment over and hot glue the two battery holders into place.
Stitching It Together
If you need help sewing with conductive thread, this tutorial covers the basics.
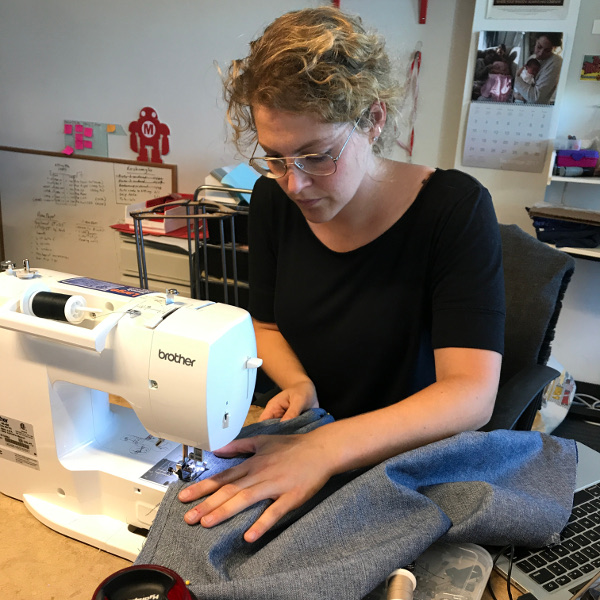
STEP 11:
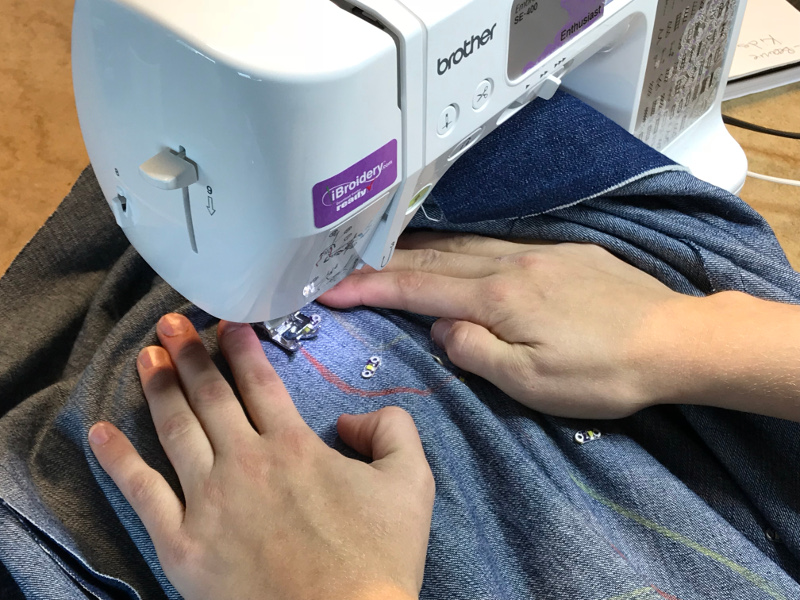
Place a bobbin of conductive thread into your sewing machine, keeping the regular sewing thread on top. Sew along the lines drawn with the two colored pencils. These will act like rails on a breadboard as we move forward. Leave long tails of thread at the beginning and end of each sewn path.
STEP 12:
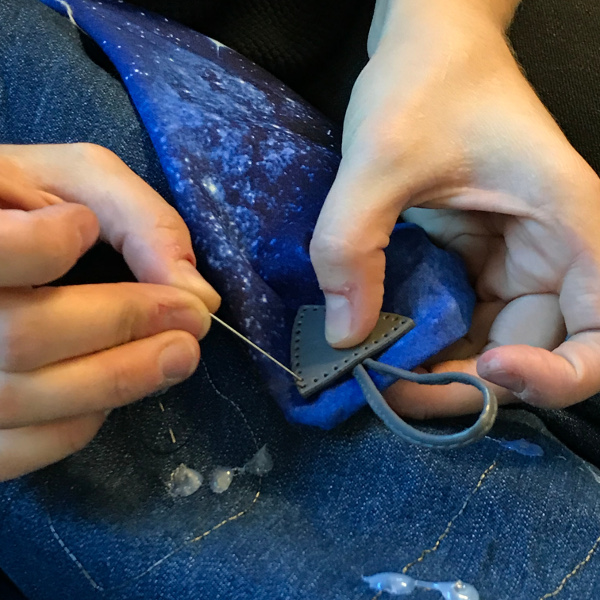
Connect the individual sew tabs on your components to the conductive thread paths that are acting as rails. For components near the end of the path, thread your needle with the conductive thread tail left at the end of the path and sew it around the tab. For the rest of the components, tie a new piece of conductive thread around the conductive thread on the rail, making sure it is secured tightly and that there is physical connection between the two threads. Then sew it around the sew tab of your component. In this step it is most important to make sure you are making strong connections. This usually means sewing over the tabs and knotting around the thread rails many times over. Also, do not forget to connect the battery holders on the opposite side of the fabric to the circuit!
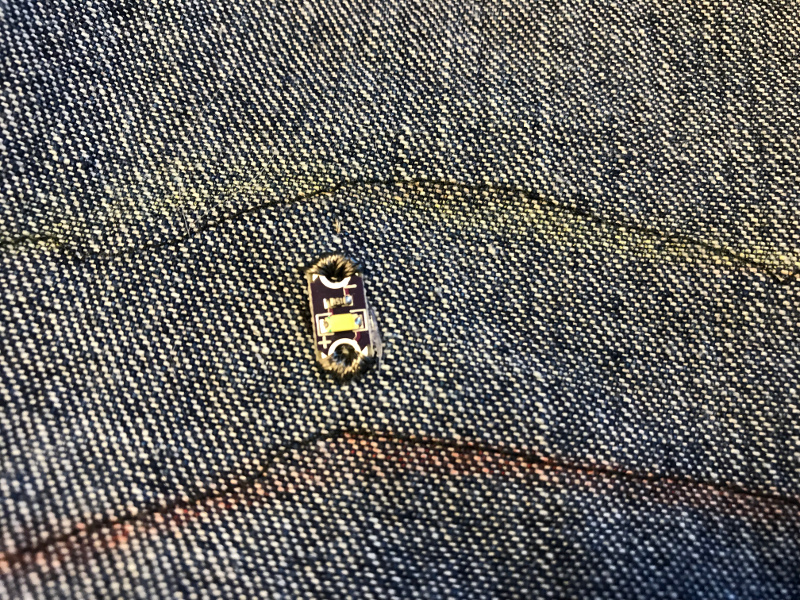
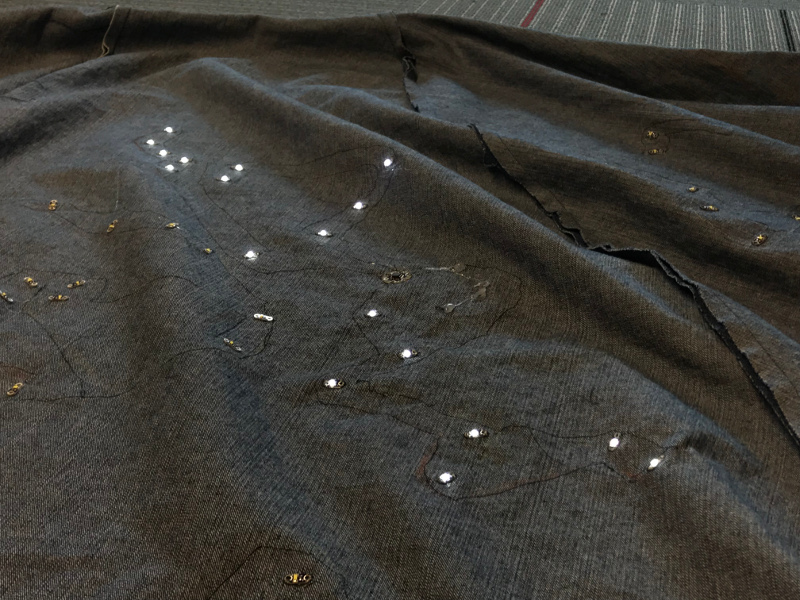
The components should look like this when the tabs have been sewn:
The opposite side of the fabric with the conductive thread rails should look like this:

Repeat until all components in a single circuit are connected according to the diagram via conductive thread.
STEP 13:
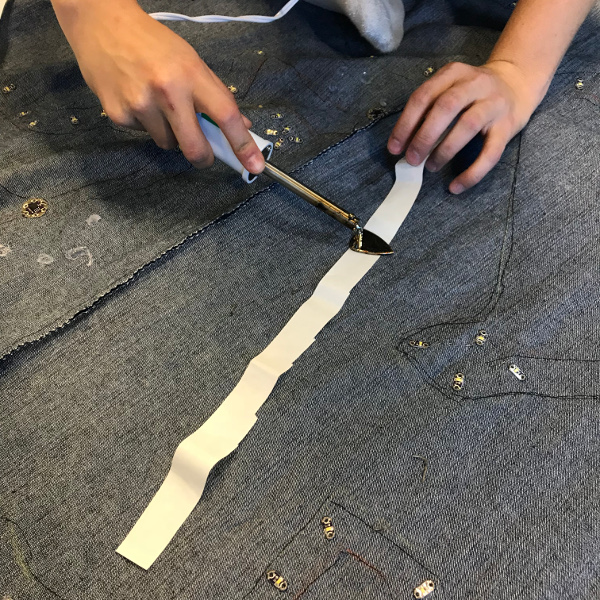
Conductive thread can fray and easily cause an unnoticeable short, especially around the tails left from sewing and knotting around your connections. In order to protect these connections and avoid unnecessary shorts, lay your garment out with the battery holders up. Cut down the tails around your connections, and then immediately add a dab of hot glue to keep it both secure and insulated.
 |
 |
STEP 14:
Once all of the loose thread has been either snipped away and/or insulated, you can test the circuit. Add batteries to the holders and switch them on. If an LED is not working, now is your time to figure out why and fix it. Issues usually include loose connections or shorts, and you may need to re-sew a component or two. Make sure to build in plenty of time for de-bugging your circuits.
Repeat steps 6--14 for the remainder of LEDs on your garment. We found that each circuit can take approximately 5--6 hours. So again, make sure you give yourself plenty of time to complete these steps.
Finishing the Garment
Once all your LEDs have been sewn into working circuits and you have tested/debugged them, you can finish sewing your garment together.
STEP 15:
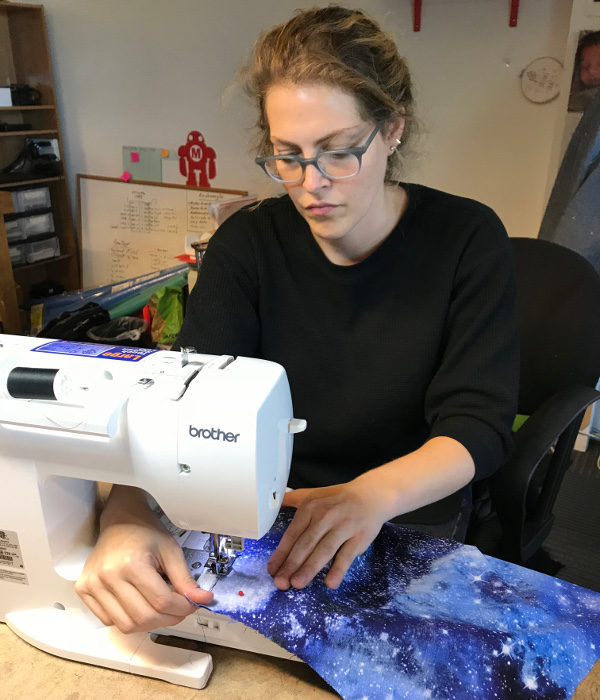
Remove the conductive thread from your sewing machine and replace it with regular thread. Sew together your cotton fabric for the outer layer of the garment according to the pattern.
STEP 16:
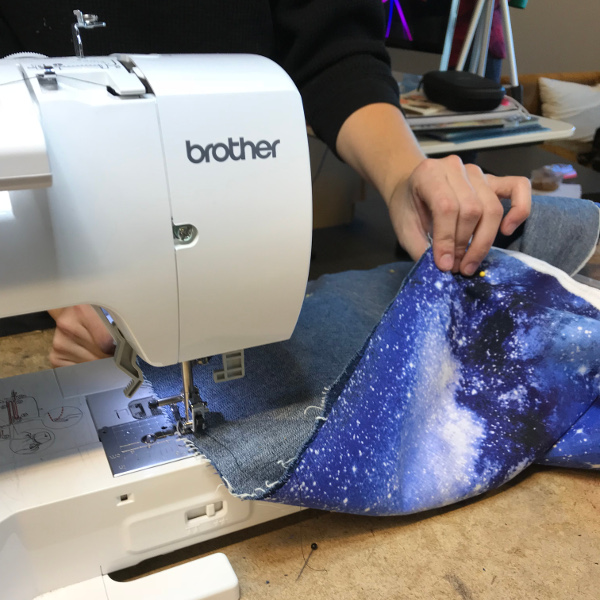
Sew the lining (with your circuits) with the outer cotton fabric. The battery side of the lining and the outer side of the cotton should be touching while you do this. The LED/LilyTiny side and wrong side of the cotton should be facing out --- kind of an inside out situation. Make sure you leave 6--12 inches of unsewn hem to bring the right side out later, as shown in step 19.
STEP 17:
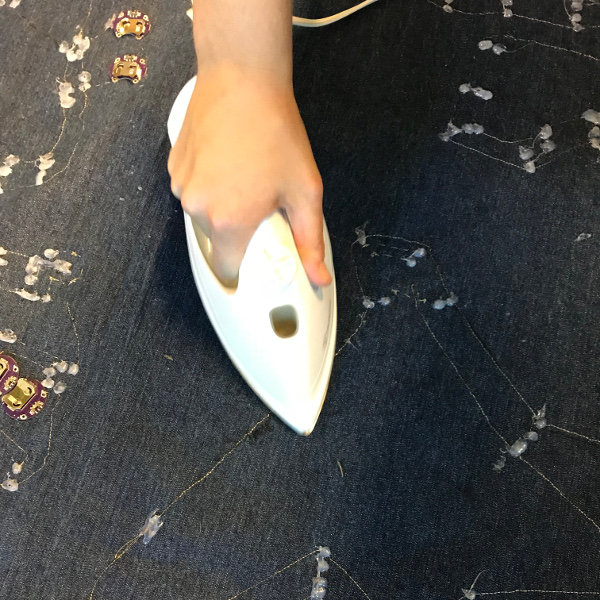
Lay out the garment flat, with the lining face up, and iron on double-sided, iron-on adhesive to the areas around your circuit.
STEP 18:
Peel the paper off the iron-on adhesive.
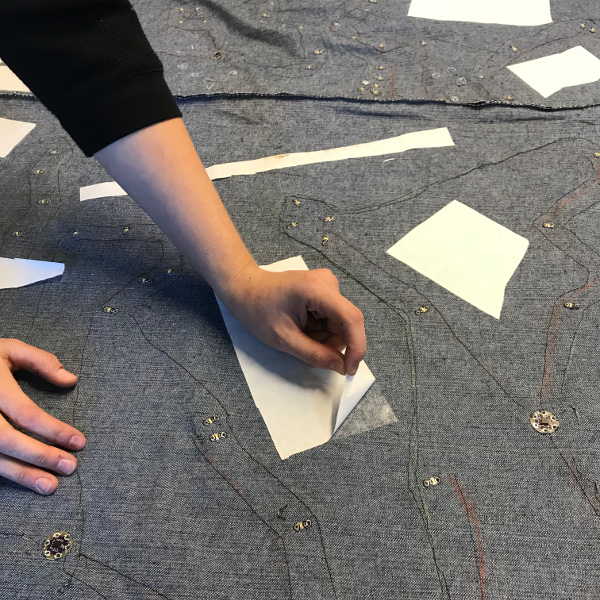
STEP 19:
Using the area of unsewn hem, pull the right side out from the inside so that the LEDs and LilyTinys will now be inside, and the battery packs will be outside. Once completed, your garment should be right side out, and the raw edges of fabric hidden inside.
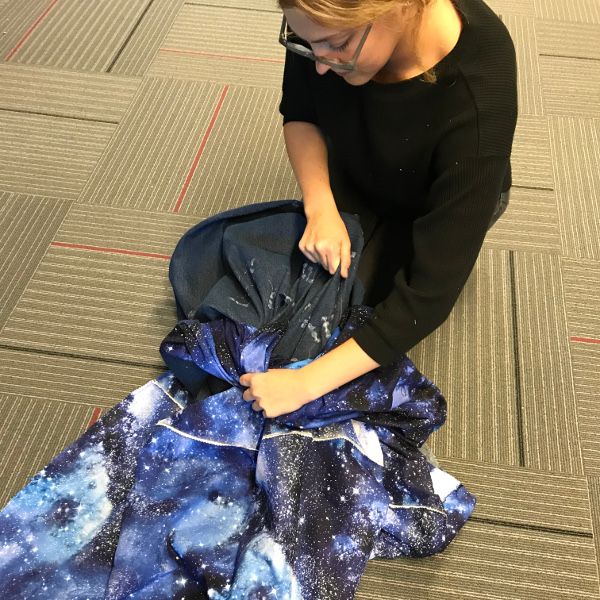
STEP 20:
Make sure the garment is fully right side out and begin to iron over the hems, making a clean, flat edge.
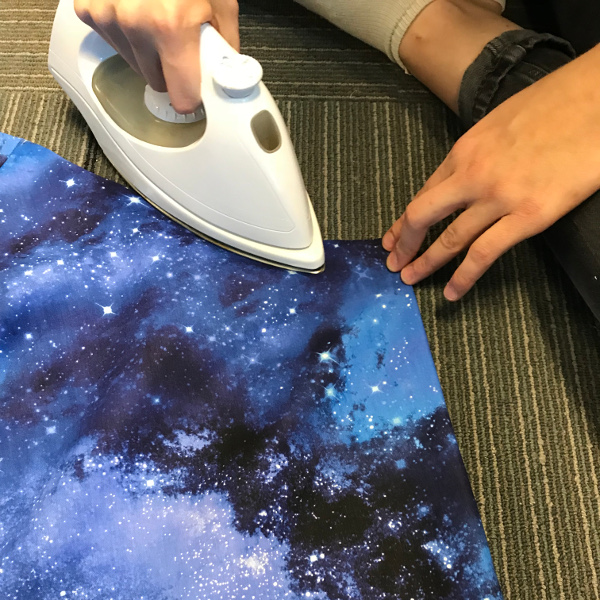
STEP 21:
Iron around your circuits to activate the iron-on adhesive against the cotton. This will keep the two fabrics from separating, thus making sure your LEDs can be visible at all times.
STEP 22:
Find the unsewn area on the hem. Fold the raw edges inward. Pin them together, and then sew along the edge.
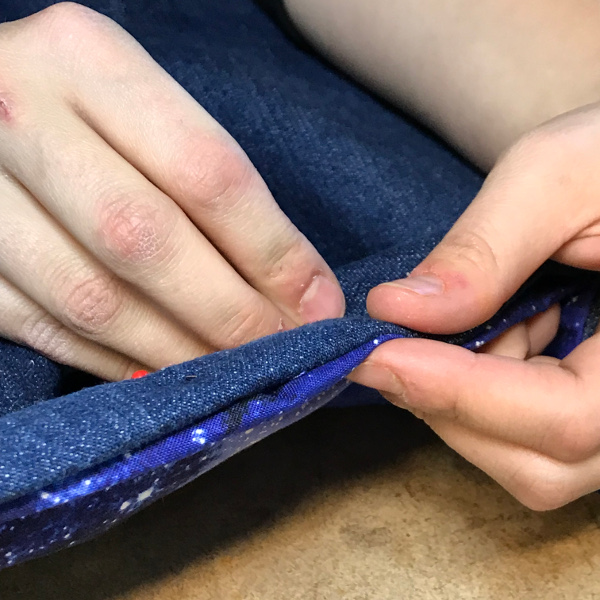
STEP 23:
Sew on any notions (i.e., buttons or clasps).
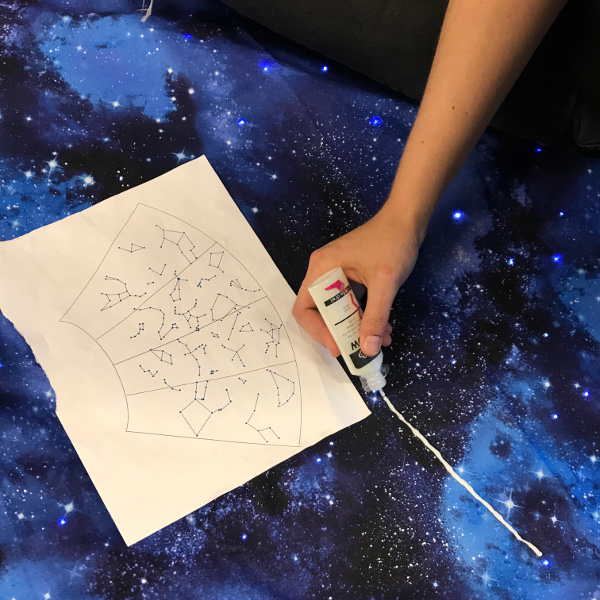
STEP 24:
Put batteries in all your battery holders and turn on all of the circuits. Lay the garment out with the cotton fabric side up. Using the constellation map, draw lines between stars using glow-in-the-dark puff paint.
STEP 25:
Leave it overnight to dry.
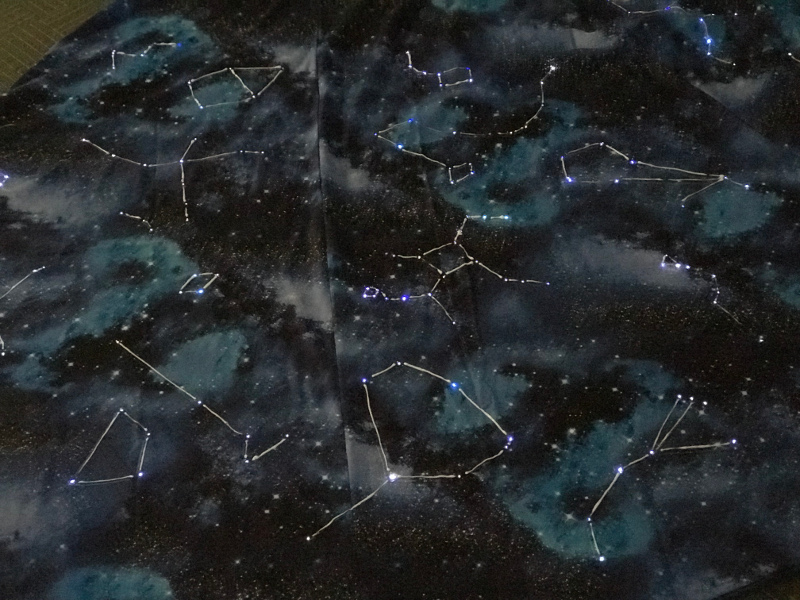
STEP 26:
Flip the cape over to the other side and cover all the conductive thread traces with the remainder of the puff paint. This will insulate all of your circuits and make the garment safer to wear. Let dry overnight.

STEP 27:
Once dry, turn on the switches for each battery holder to light up the LEDs.

STEP 28:
Put on the cape and enjoy!
Resources and Going Further
For more information related to the Night Sky Halloween Costume, check out the resources below:
These tutorials will guide you through concepts and advanced projects: