Twinkle Zodiac Constellation
 Feldi
Feldi 
Introduction
In this project, we’ll create a decorative embroidery hoop using conductive thread to connect LilyPad LEDs to a LilyTiny, powered by a LilyPad battery holder. Follow along by drawing your own design on a piece of fabric, or download and print one of SparkFun’s designs.
Design and build time: 1-2 Hours

Suggested Reading
If this is your first sewable electronics project, we recommend you read our LilyPad Basics tutorial.
LilyPad Basics: E-Sewing
Materials and Tools
Let's go over all of the things you'll need to sew your project together.
Items required for the Twinkle Zodiac Constellation:
You Will Also Need:
- Embroidery Hoop (size should matches the diameter of your pattern)
- Lightweight Navy Cotton Fabric
- Needle
- Scissors
- Shearing Scissors
- Silver Embroidery Floss
- White Chalk or Colored Pencil
- Printer and Paper
- Hot Glue
Planning Your Project
PLANNING
STEP 1
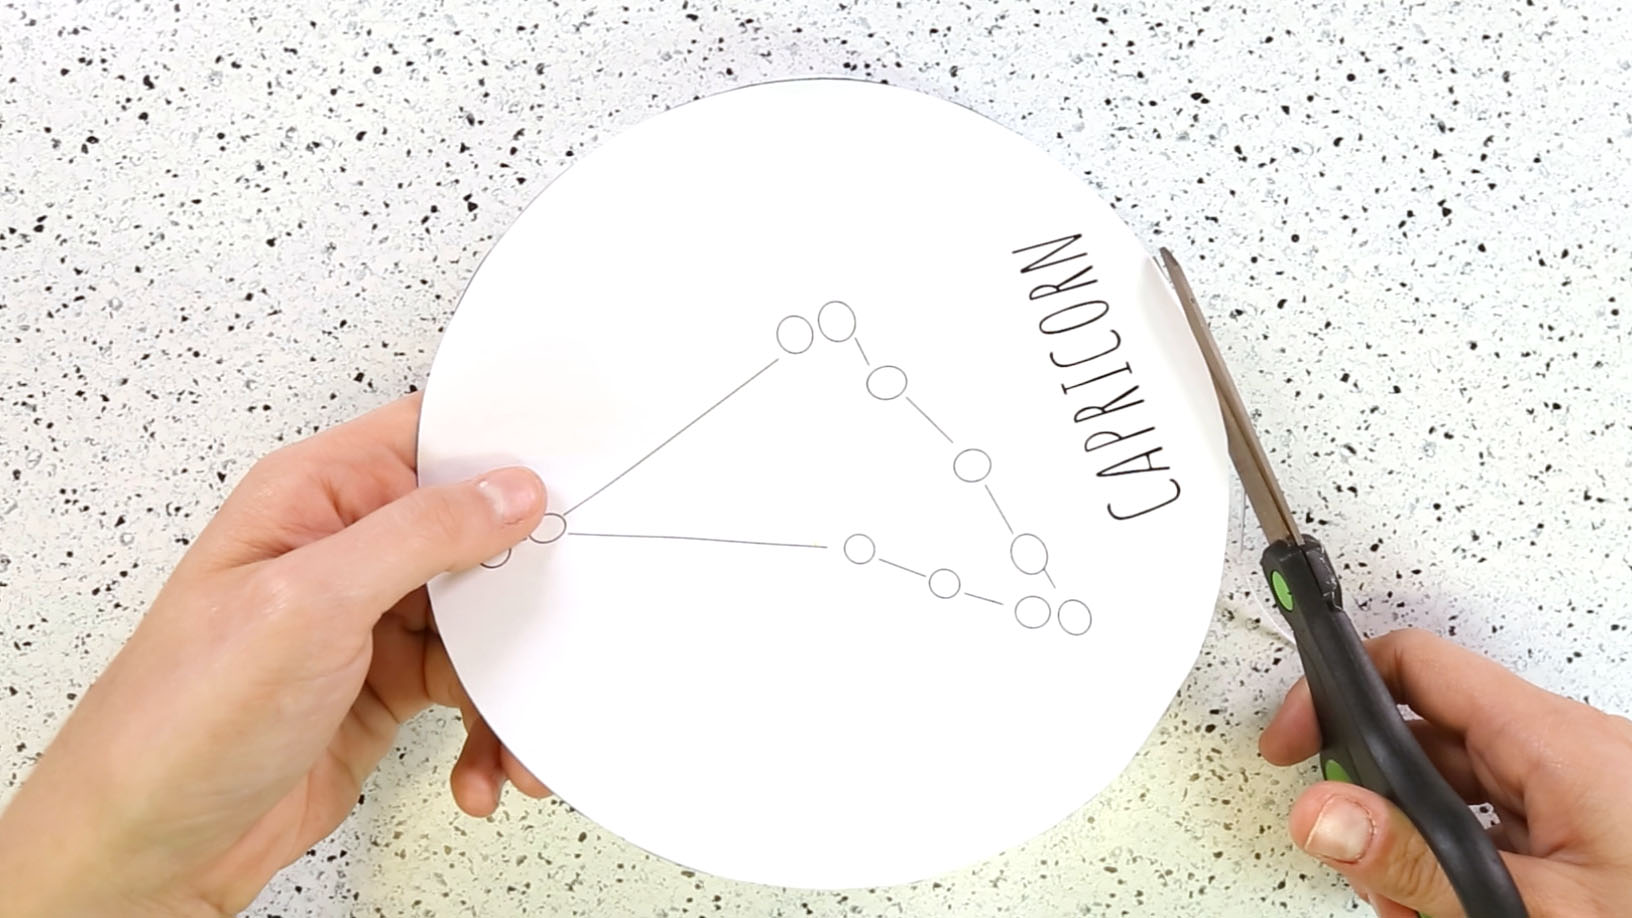
Download and print the provided embroidery pattern for the constellation(s) of your choice, and cut it out along the line with your regular scissors.
STEP 2
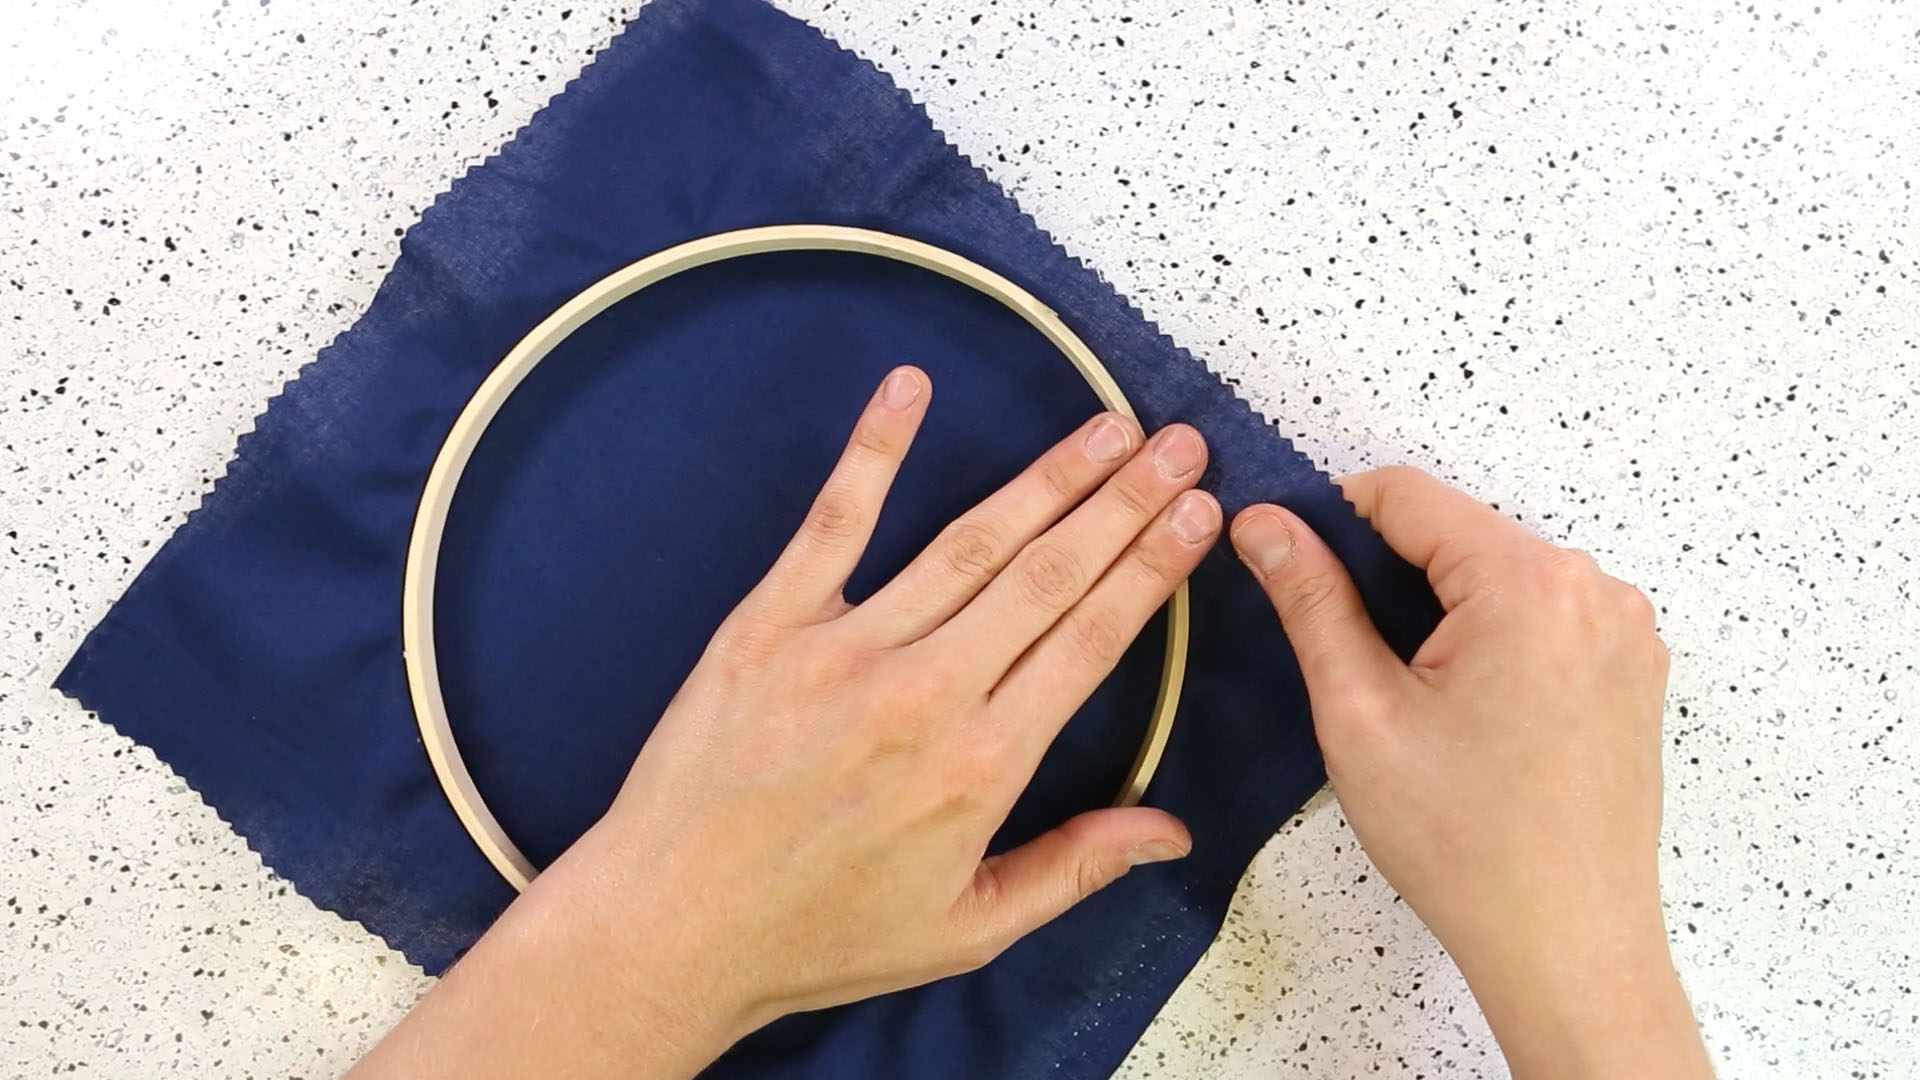
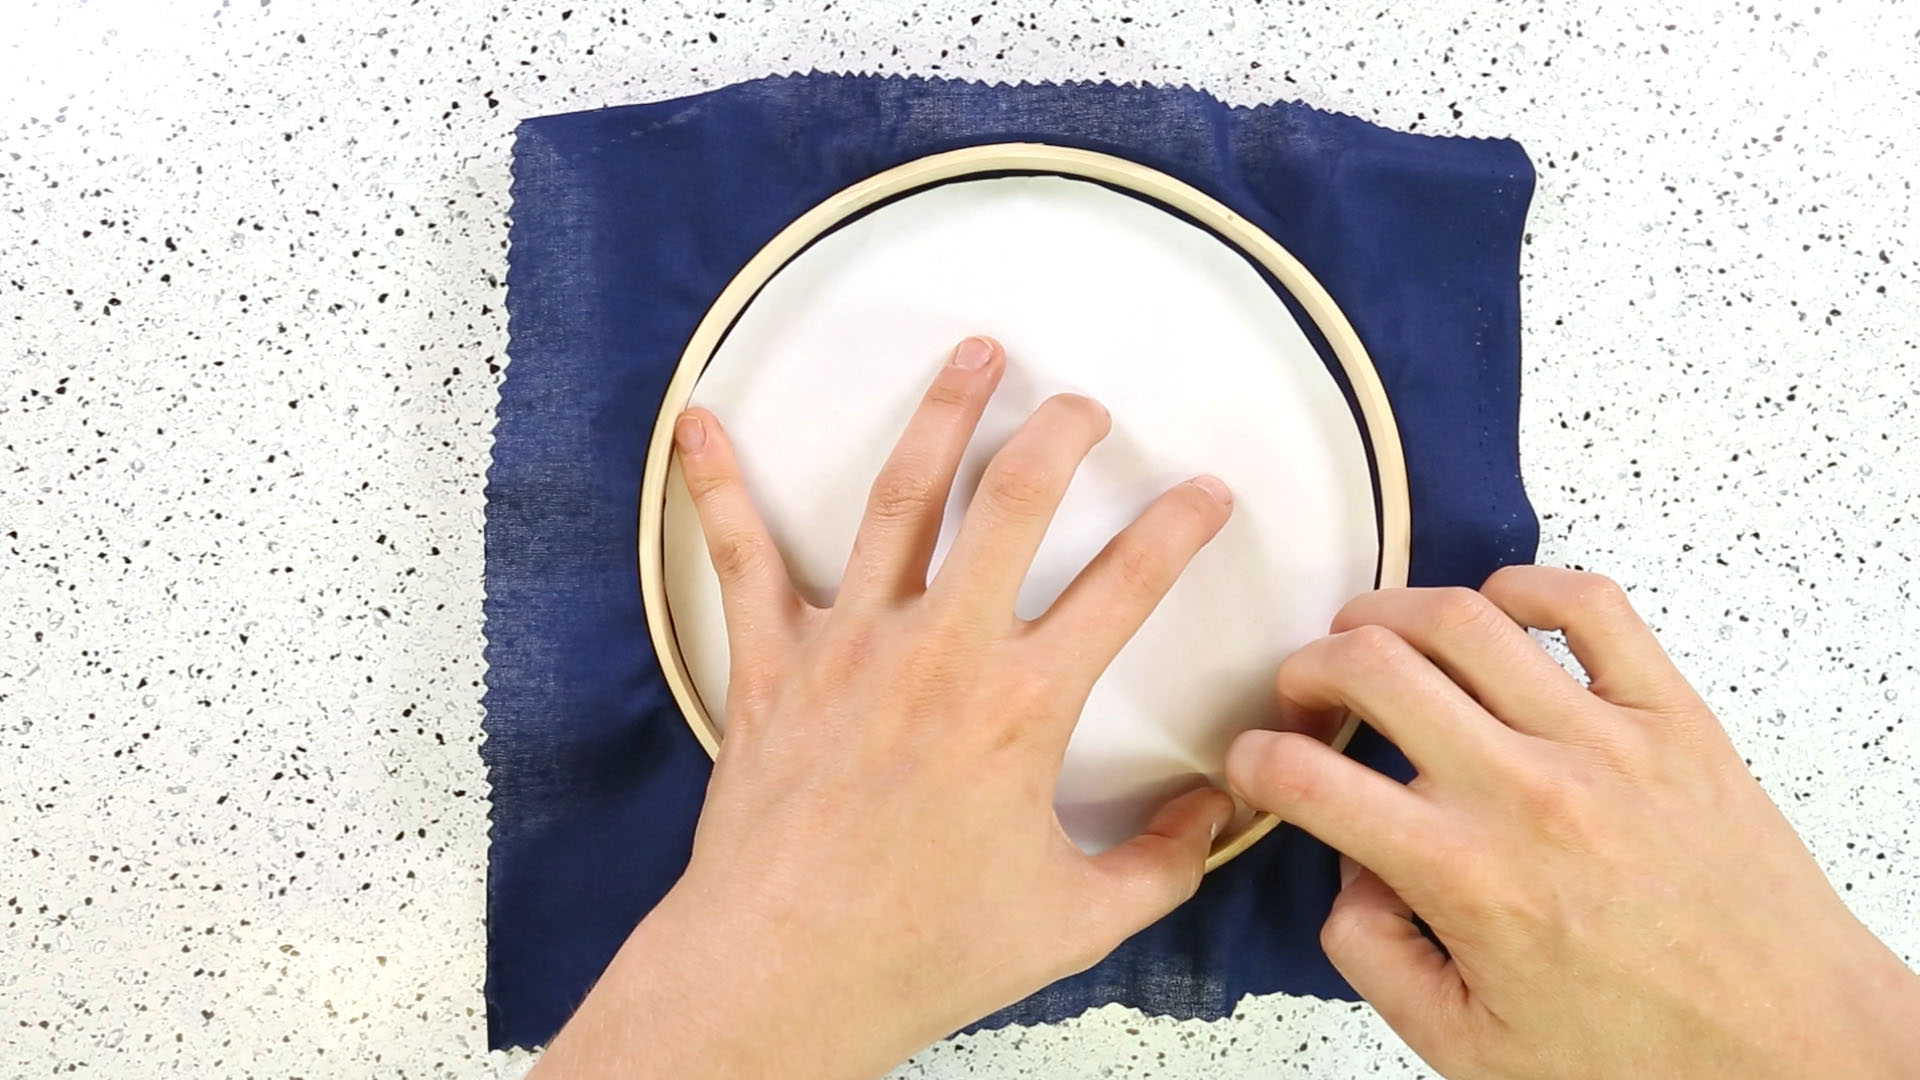
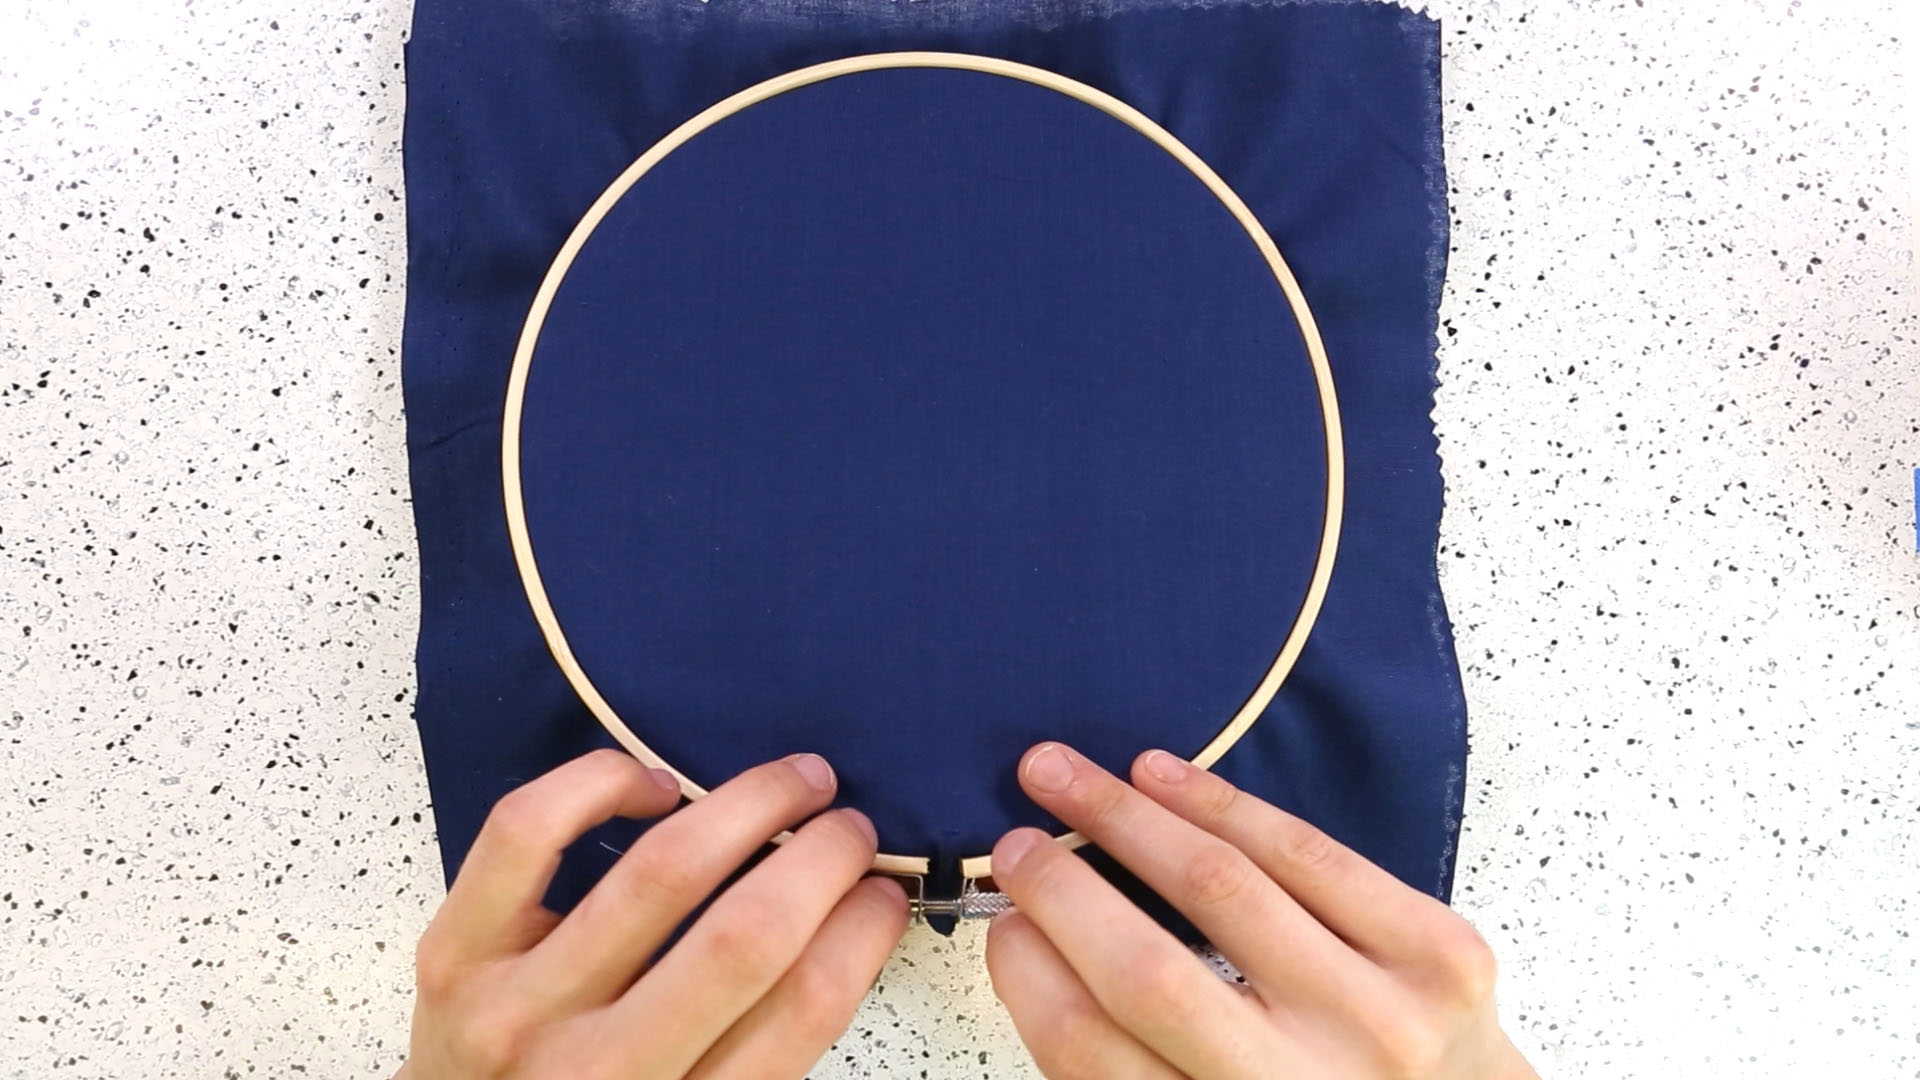
Use your shearing scissors to cut a swatch of fabric large enough to cover your hoop plus an inch or two. Then stretch it and place it between the hoops.
STEP 3
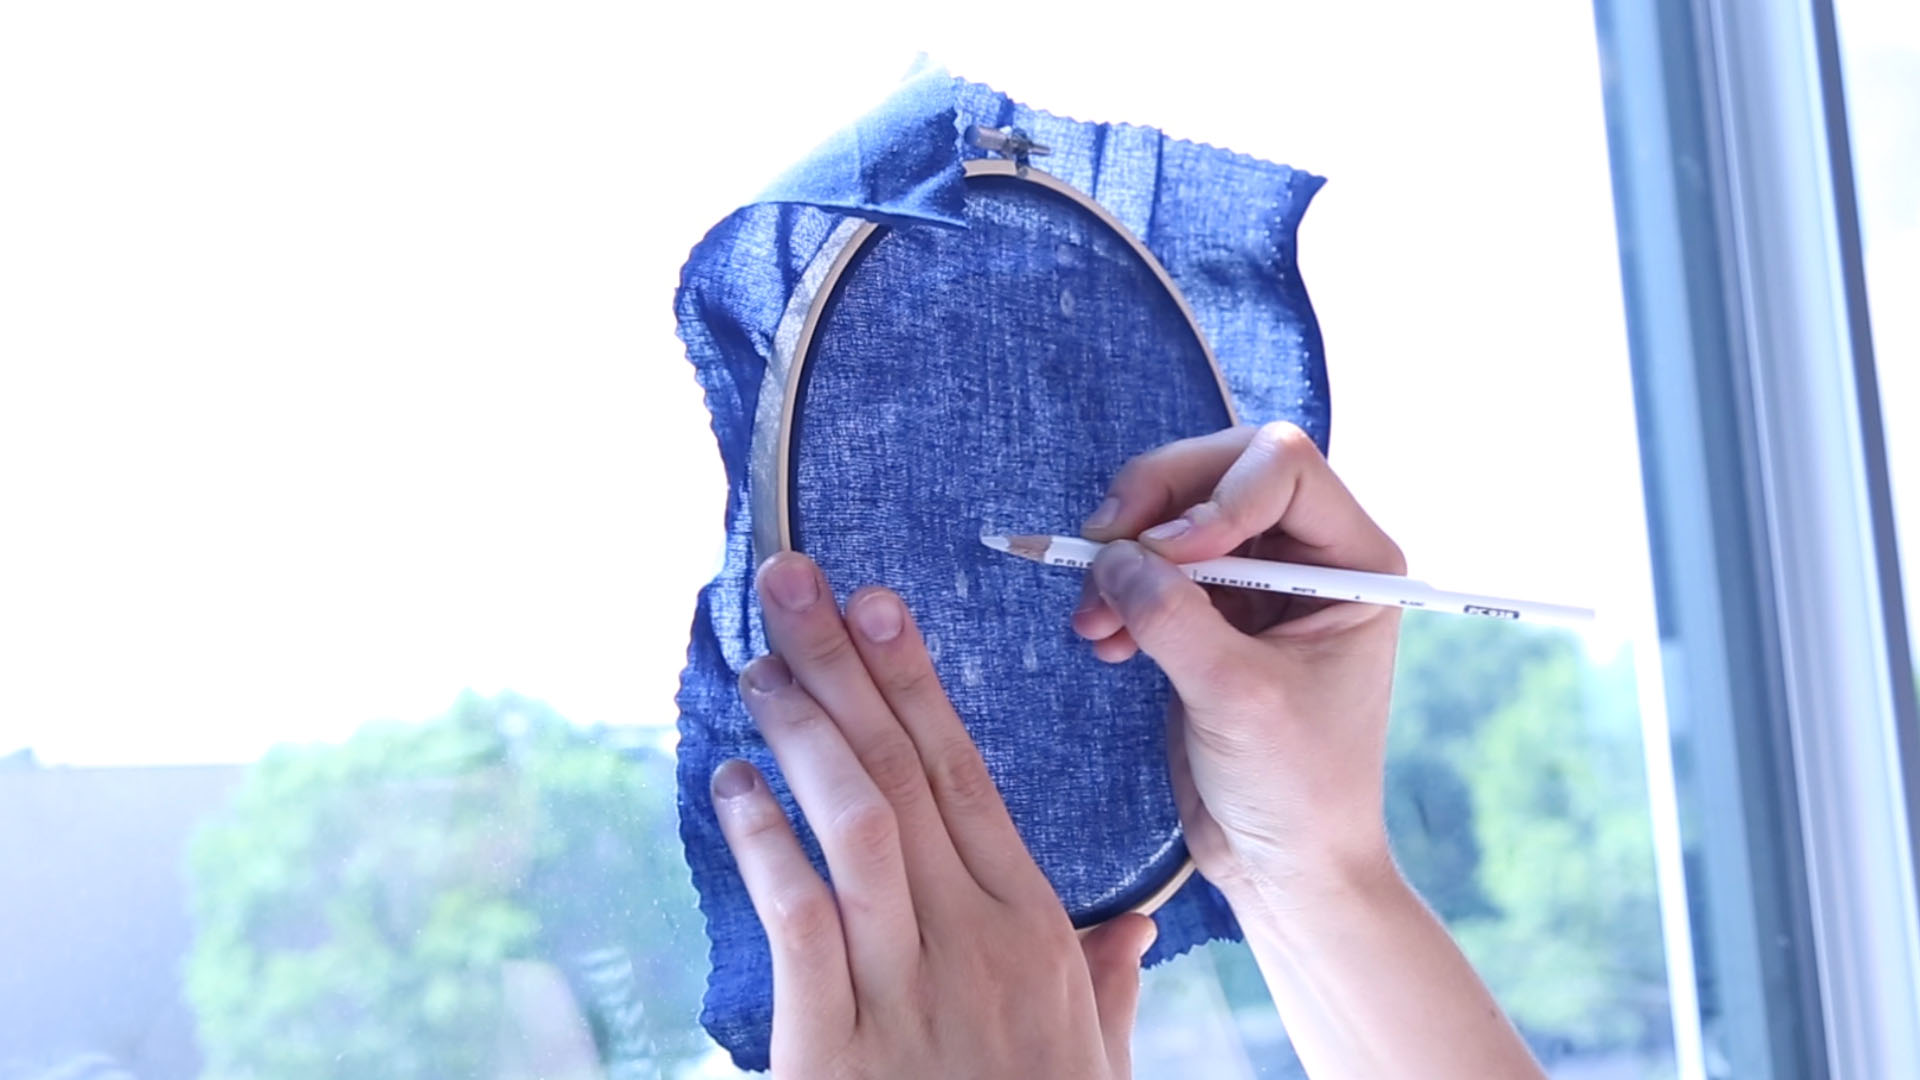
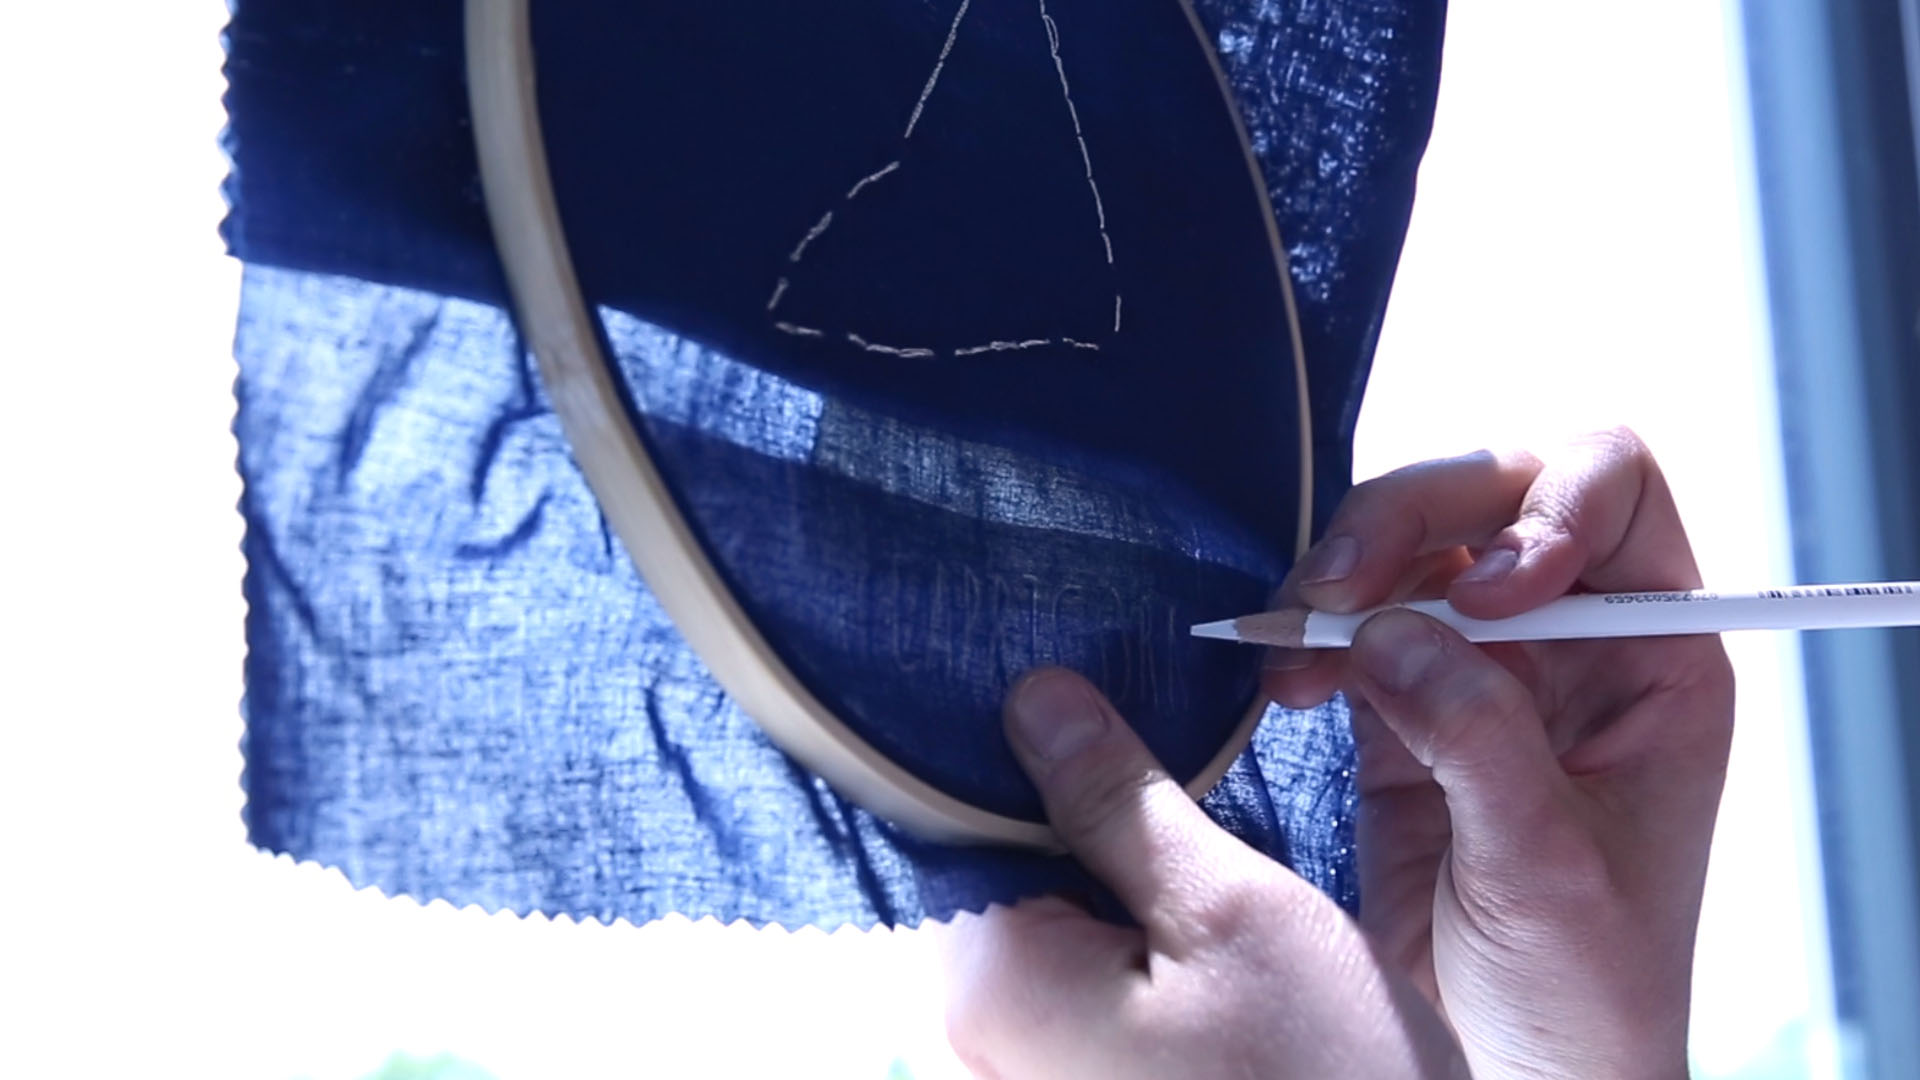
To trace your pattern, place it behind your stretched fabric.
Then bring it to a window or light, and mark all of the circles in your design.
Now you are ready to start adding LilyPad Components!
Understanding Your Circuit
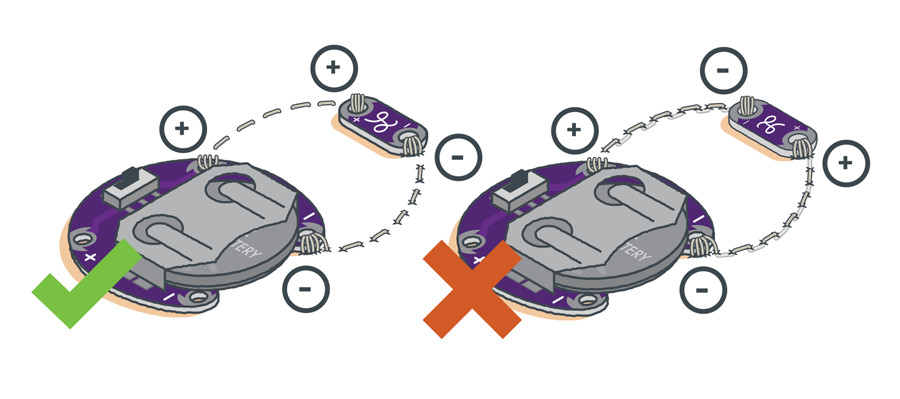
Before we put our parts to fabric, let's take a look at the LEDs and battery holder. Notice that the silver sew tabs are labeled either positive or negative. Many electronic components like these have polarity, meaning electric current can only flow through them in one direction.
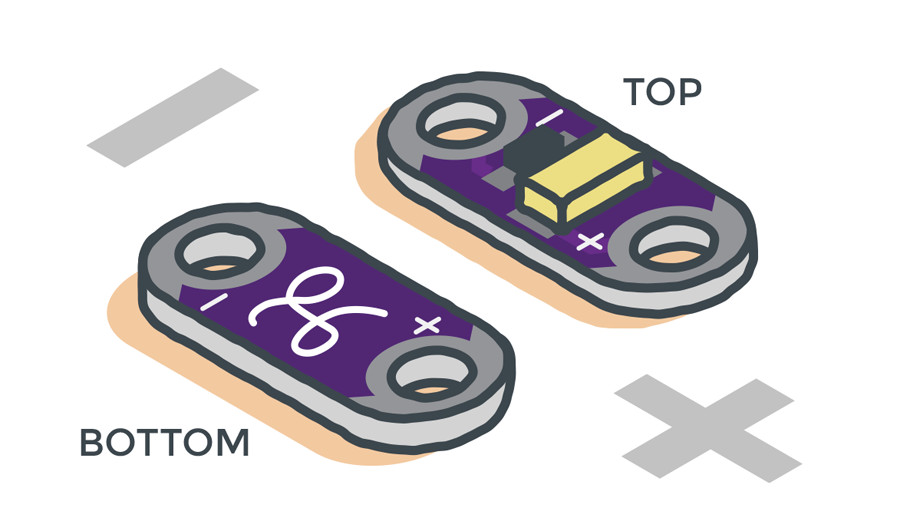
If hooked up incorrectly, they will not light up. Batteries are also polarized; they have a positive and negative side. Always check the labels on LilyPad pieces to make sure they are correctly oriented before sewing together a circuit.
The following diagram illustrates the circuit you will be following for your constellation hoop. Notice how the LEDs have been grouped into 3 sets. No matter how many LEDs are included in your design, you will want to divide them into three groups as shown. The '-' tab of every single LED in your constellation connects to the rest with conductive thread, as well as the '-' tab on the LilyPad Tiny and the '-' tab on the battery holder.
The '+' tabs will be treated differently. For each group of LEDs, you will connect all the '+' tabs inside that group with conductive thread, and then connect them to either pins 0, 1, or 3. We are not using pin 2 as the animation is not ideal for this design. This configuration is an example of LEDs in a parallel circuit. For power, you will also need to connect the '+' tab of the battery to the '+' tab of the LilyTiny.
Also, notice that the battery holder and LilyTiny are dulled out in our circuit diagram. That is because they will lie on the backside of your fabric with the LEDs on the top side.

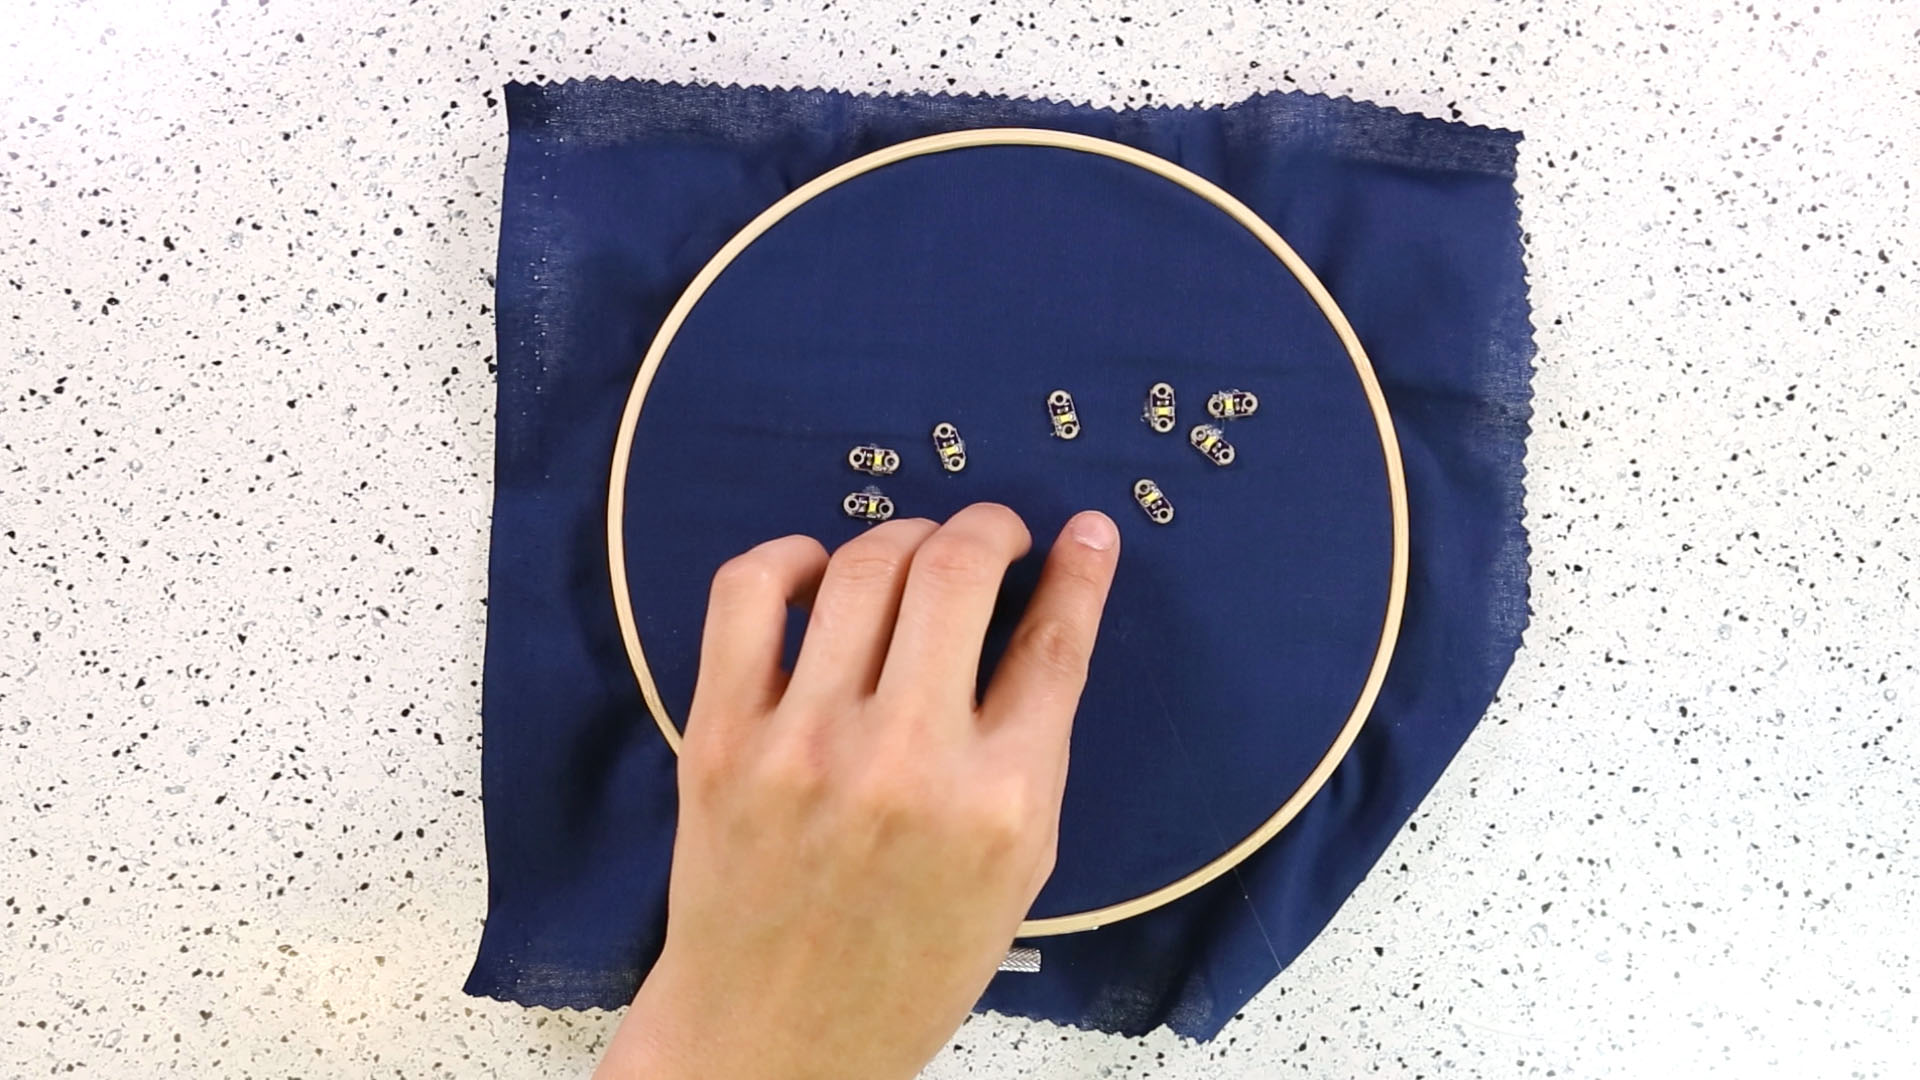
Arranging Your Circuit
Each circle you marked when tracing the pattern represents where a single LilyPad LED should go. These LEDs should be facing up as seen in the image below.
The LilyTiny and LilyPad Battery holder should both be positioned on the opposite side (or back side) as the LEDs. Make sure the components are facing away from the fabric. Please refer to the circuit diagram above for a detailed illustration.
Pins 0, 1, and 3, are connected to 3 LEDs in parallel. You can increase or decrease the number of LEDs in parallel attached to any given pin depending on your constellations pattern and component count. The maximum LEDs I have connected to a single pin for this project is 6.
Plot your LEDs, LilyTiny, and battery holder in an arrangement on the fabric that allows you to sew the parts together according to the circuit diagram provided above, and glue them down with hot glue.
Stitching It Together
If you need help sewing with conductive thread, this tutorial covers the basics.
STEP 1:
Cut a long piece of conductive thread and thread the needle with it. Tie a knot at the end. Begin to connect sewable tabs with the thread according to the circuit diagram provided above.

STEP 2:
When you are finished, making sure your fabric is taut. To test the circuit, pop a battery inside your holder and turn it on to troubleshoot. If any of your LEDs are not working, this is the time to figure out why and fix it based on information provided from the tutorial in the suggested reading.
If you are satisfied and your circuit works well, use hot glue or clear nail polish to seal knots and frayed thread to avoid shorts. For more information about insulation techniques for e-textiles, check out this tutorial.

STEP 3:
Use the shearing scissors to cut out a second piece of fabric, the same size as the first. With your hoop laying on a flat, clean surface, gently unscrew the the fastener at the top of the embroidery hoop and remove the outer circle. Place your second sheet of fabric directly on top of the piece of fabric with your LEDs, and stretch them together in the hoop.
STEP 4:
Turn the battery switch to the 'ON' position so that you can see the LEDs through the top piece of fabric. Using a straight edge and white pencil, begin to draw lines connecting each LED according the pattern.

STEP 5:
Cut a piece of silver embroidery floss and thread the needle with it. Turn the battery switch off and begin to sew the silver embroidery floss over the drawn lines using a backstitch. During this step, you will essentially sew the two pieces of fabric together. Make sure by this point that the circuit is working without any issues because you will not be able to make adjustments or access the LEDs after.

STEP 6:
Take your pattern and cut the bottom quarter (with the text) off. Then, loosen your hoop again and fold back the bottom most piece of fabric (the one with the electronics attached) where the text should go. Tighten the hoop back up with the fabric bent back like the picture below, and place the bottom part of you pattern behind the top sheet.

STEP 7:
Bring this to a window or other light source and trace the letters from the pattern. Then replace the folded piece of fabric back to the original position. Make sure to stretch the fabric again every time you loosen and tighten your hoop.
STEP 8:
Stitch over the letter traces using the silver embroidery floss.

STEP 9:
Make sure your fabric is nice and taut with your hoop. Once the fabric is tight in the hoop, cut away the excess fabric around the hoop.

STEP 10:
Turn the power on, hang up, and enjoy!
Resources and Going Further
These tutorials will guide you through concepts and advanced projects: