Night-Light Pennant with LilyMini ProtoSnap
 Gella
Gella 
Stitching It Together
If you need help sewing with conductive thread this tutorial covers the basics.
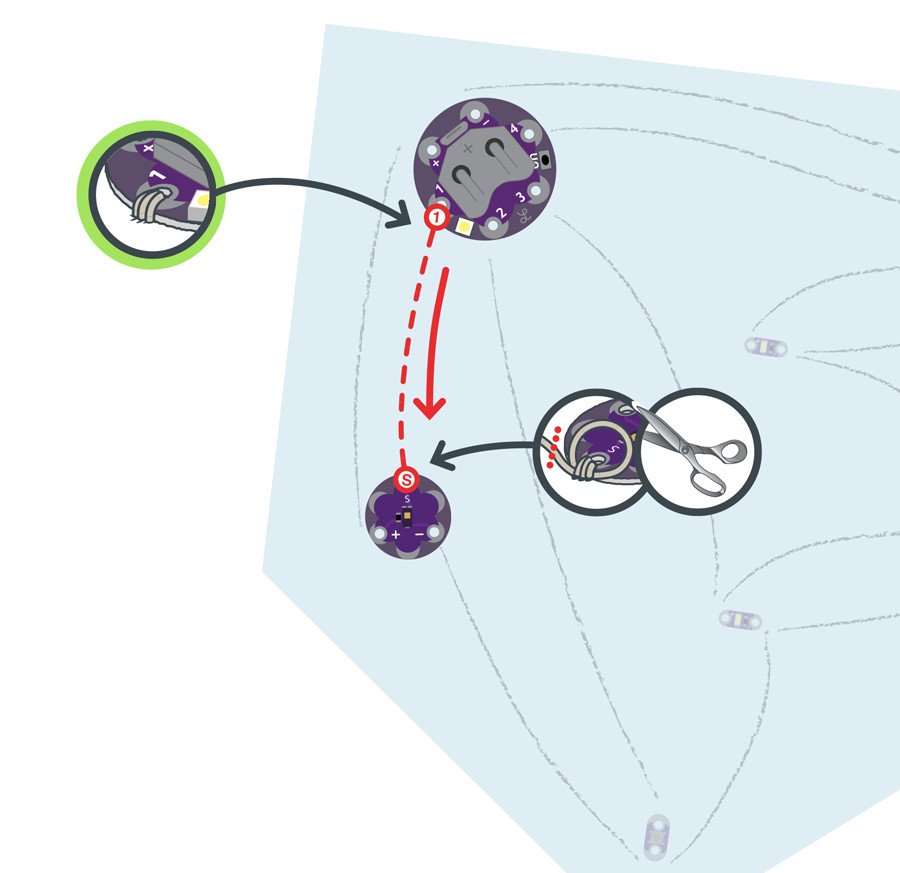
STEP 1:
We’ll begin by stitching a connection between the LilyMini and the LilyPad light sensor. The light sensor board has three connections: sensor (S), positive (+), and negative (–). Use conductive thread to connect Tab 1 on the LilyMini to the (S) tab on the light sensor with three loops at each tab. Don’t worry about connecting the + and - tabs; we’ll do that later.
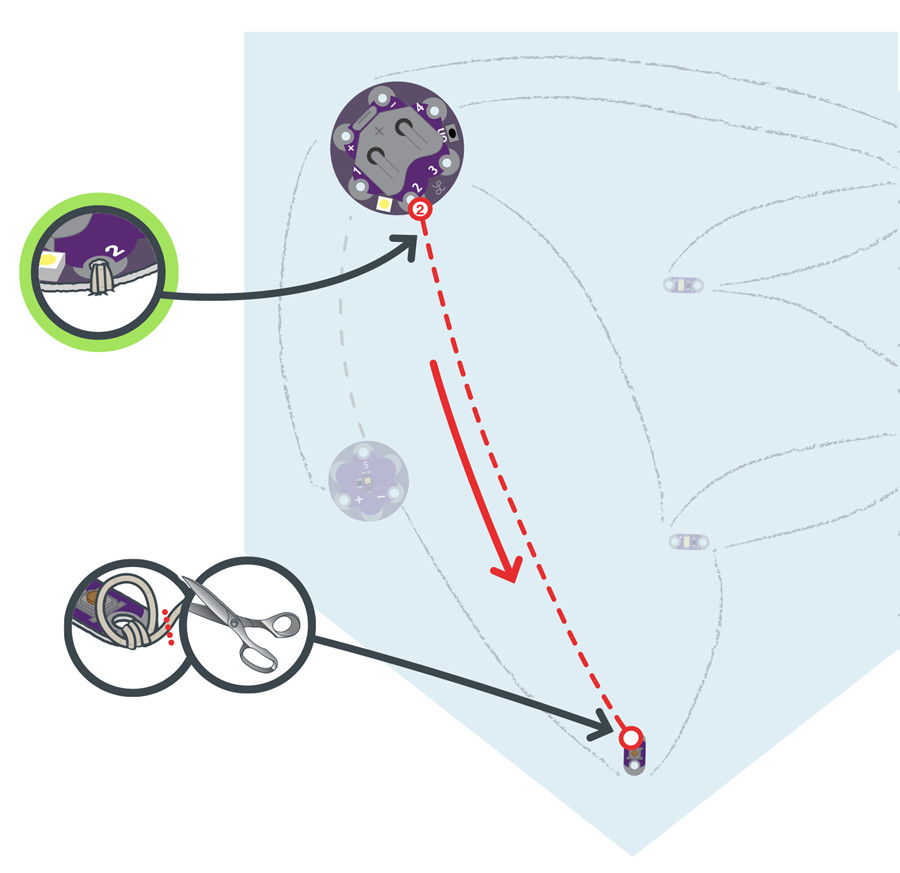
STEP 2:
Next, we’ll connect the LilyMini to the LilyPad Button Board. With a new piece of thread, sew three to four loops around Tab 2 of the LilyMini, and then continue stitching to connect one side of the button. Tie and cut.
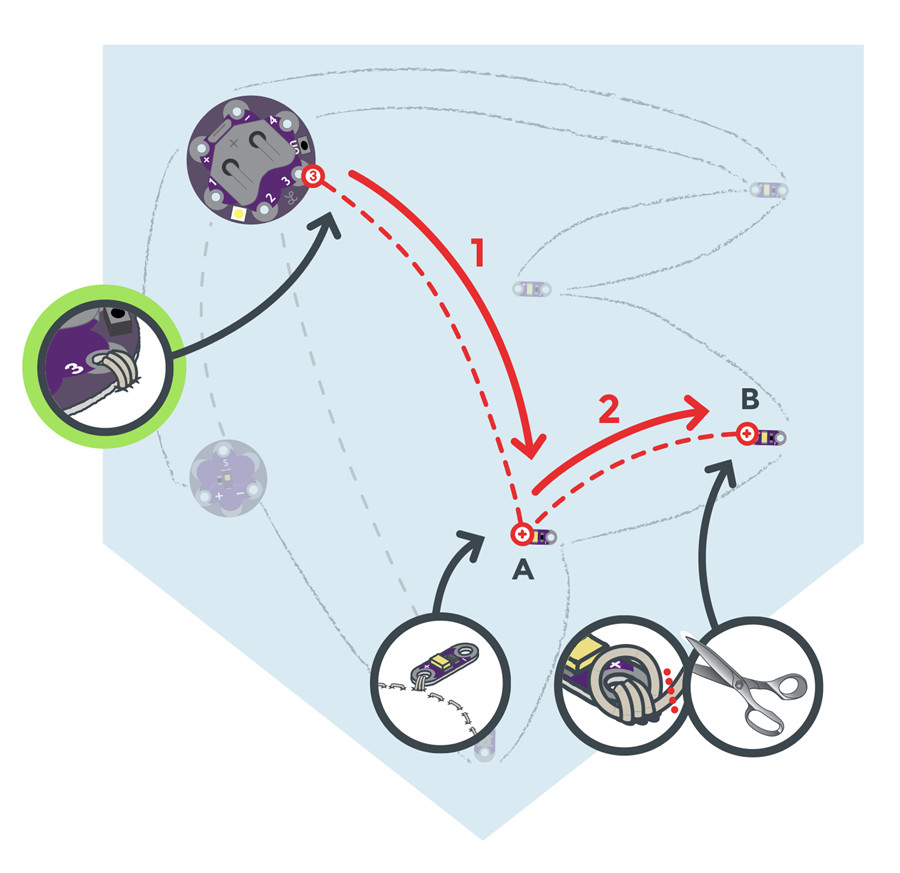
STEP 3:
Tab 3 on the LilyMini will connect to two LEDs: A and B. With a new piece of thread, connect Tab 3 to the positive (+) of LED A. Continue stitching to connect (+) of LED B, making three loops at each tab.
STEP 4:
We’ll repeat this process with a new piece of thread to connect Tab 4 on the LilyMini to the positive tabs of LEDs C and D.

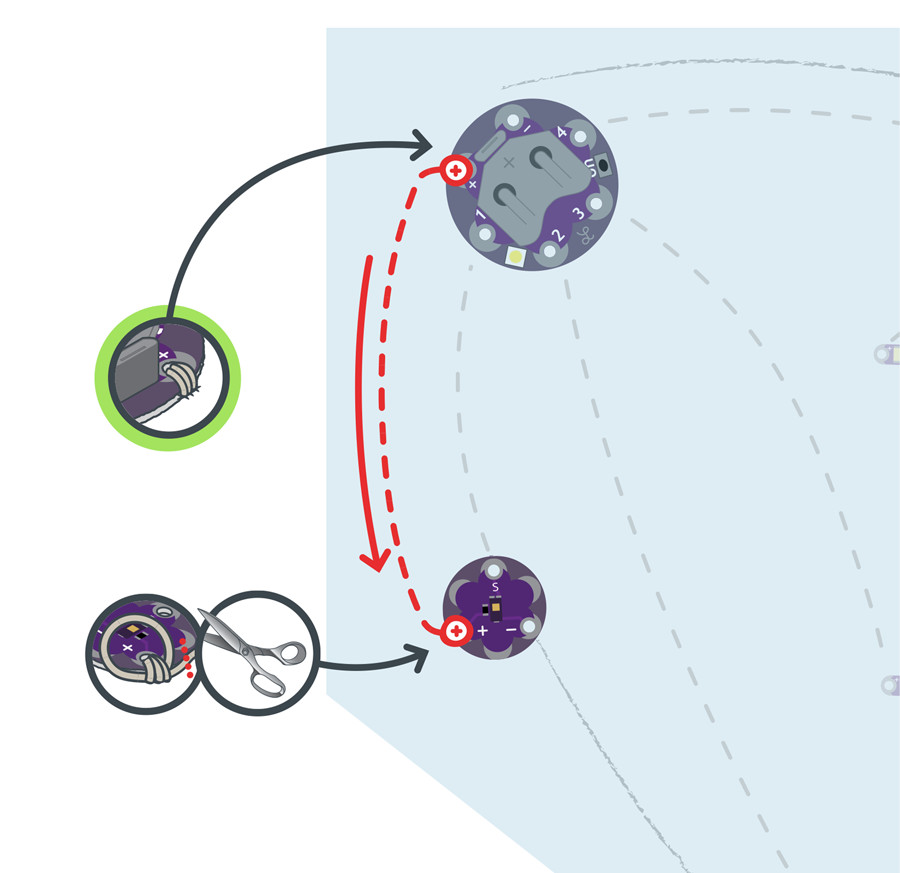
STEP 5:
With a new piece of thread, stitch the positive tab of the LilyMini to the positive tab (+) of the light sensor using three to four loops on each tab and a running stitch between. Tie, and cut.
STEP 6:
Finally, we’ll stitch all the negative connections together and back to the negative tab on the LilyMini. This will require a much longer piece of thread than in other steps – about 2.5 feet.
Begin at the negative (-) sew tab on the light sensor, and continue stitching along the outside edge of the project, connecting the negative tab of each piece (LEDs A, B, C, and D), ending at the negative (-) tab of the LilyMini.

After all the stitching is complete, turn the project over, and trim any loose thread tails before testing.