Night-Light Pennant with LilyMini ProtoSnap
 Gella
Gella Introduction
In this project we’ll control LEDs using the LilyMini ProtoSnap. With the code stored on the LilyMini, our projects can now have more advanced behaviors, and interactions are even reprogrammable. We'll sew the LilyPad components on a pennant shape and customize the theme and decoration.
Design and build time: 3 - 4 hours

This is Project 4 from the LilyPad Sewable Electronics Kit, take a look at the other projects in the kit:
- Project 1: Glowing Pin
- Project 2: Illuminated Mask
- Project 3: Light-Up Plush
Suggested Reading
If this is your first sewable electronics project, we recommend you read our LilyPad Basics tutorial.
LilyPad Basics: E-Sewing
For a primer on the LilyMini ProtoSnap, check out this detailed guide.
LilyMini ProtoSnap Hookup Guide
Materials and Tools
Let's go over all of the things you'll need to sew your project together.
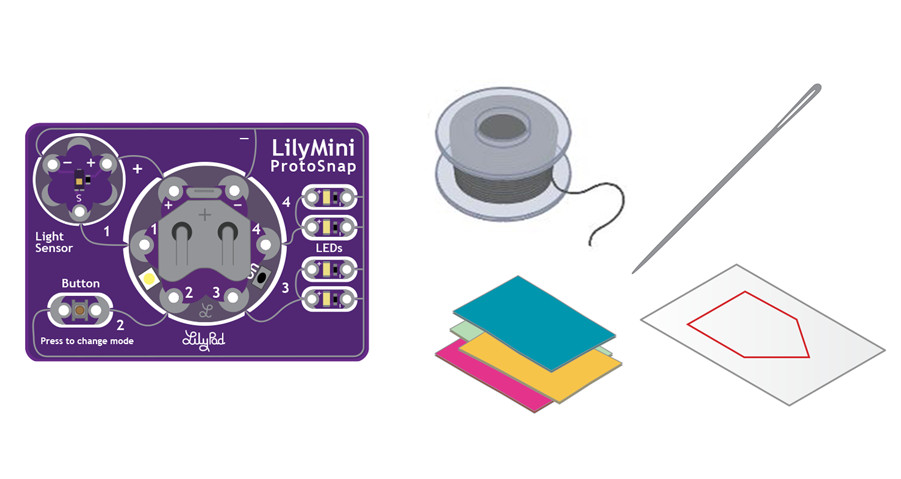
Items included in the LilyPad Sewable Electronics Kit:
- LilyMini ProtoSnap
- Conductive Thread
- Needle
- Pennant Template (1 piece) - see Planning Your Project for printable downloads
- Felt (one 9"x12" sheet of craft felt will make one pennant; use scraps of felt to add decorations)
- Embroidery or Sewing Thread
You will also need:
- Pen, marker, or chalk
- Scissors
- Hot glue gun (with extra glue)
- Optional: Craft supplies for decorating (feathers, sequins, buttons, etc.)
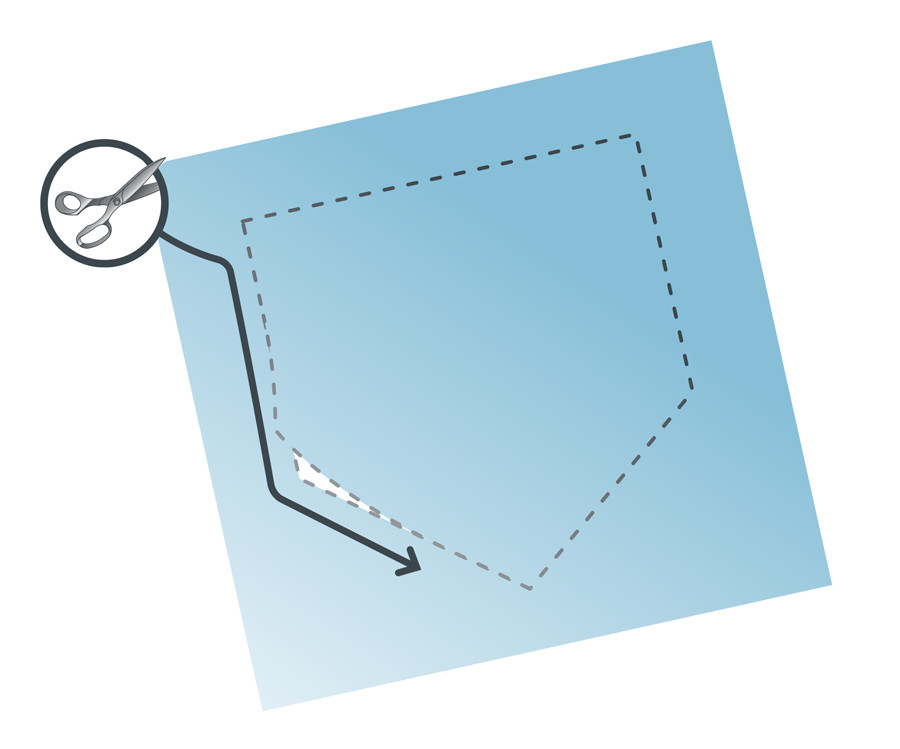
Planning Your Project
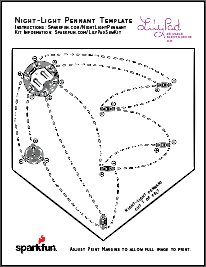
Follow along with the circuit diagram on the template, or design your own layout and shape on a piece of paper. Trace onto the felt, and cut. We’ll add the LilyMini and the pieces from the ProtoSnap to a customized pennant to hang on a wall or sew into a project.
Working With ProtoSnap
Like other LilyPad ProtoSnap boards, the LilyMini ProtoSnap has all of its pieces wired together, enabling you to test the circuit’s function before you sew.
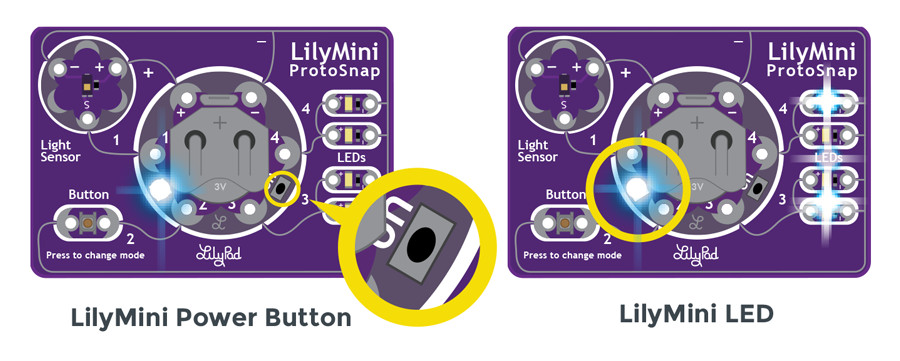
The LilyMini board has a small push button to turn it on/off, located between sew tabs 3 and 4. With the battery installed, press and release the button quickly to start up the LilyMini. The LED on the LilyMini (between sew tabs 1 and 2) will turn green when it is on and the battery has a charge, or it will turn red if the battery is getting low, then fade off. To power down the LilyMini, press the button again.
Once powered, the LEDs on the ProtoSnap should all be on, and the LilyMini’s LED will glow white (Mode 1). Press the LilyPad Button to cycle through modes, which use the light sensor to affect the behavior of the LEDs. Use your hand to cover the light sensor, and observe what happens to the two pairs of LEDs – when the light level is low, the behavior of the LEDs changes. Press the button again to switch to the next mode.
LilyMini ProtoSnap Modes
| Mode | Color | Behavior |
|---|---|---|
| 1 | White | All LEDs on. |
| 2 | Magenta | LEDs fade in and out in a breathing pattern. When the light sensor is covered, LEDs fade faster. |
| 3 | Cyan | LEDs off. When the light sensor is covered, LEDs will twinkle. |
Understanding Your Circuit
The LilyMini is a small computer that can store information and commands to control different sensors and boards connected to it. Programmable boards like the LilyMini are called microcontrollers. The LilyMini has been programmed in advance with a set of behaviors called code.
Outputs
Press the small button between tabs 3 and 4 to turn on your LilyMini on and off. Notice that in this circuit on the LilyMini LEDs behave in a different way. Unlike in our previous circuits, LEDs are not connected directly to the battery. These LEDs are connected to the LilyMini, which uses code to send power to each of its numbered tabs at different times – this is how the light patterns are created. The LEDs are outputs – components that receive information from a microcontroller and send it out into the world.

Other examples of outputs in circuits are motors, sound creators (such as a buzzer), and displays (e.g., monitors, LCD displays).
Inputs
The light sensor and button are inputs – components that gather information from the world and relay it to the microcontroller. The LilyMini reads information from the inputs connected to it and makes decisions in the code based on the values it receives. The LilyMini switches modes when the button is pressed. In modes 2 and 3, when the light value from the light sensor falls below a certain level, the LilyMini tells the LEDs to twinkle. When the light level rises again, the LilyMini tells the LEDs to return to the original behavior.

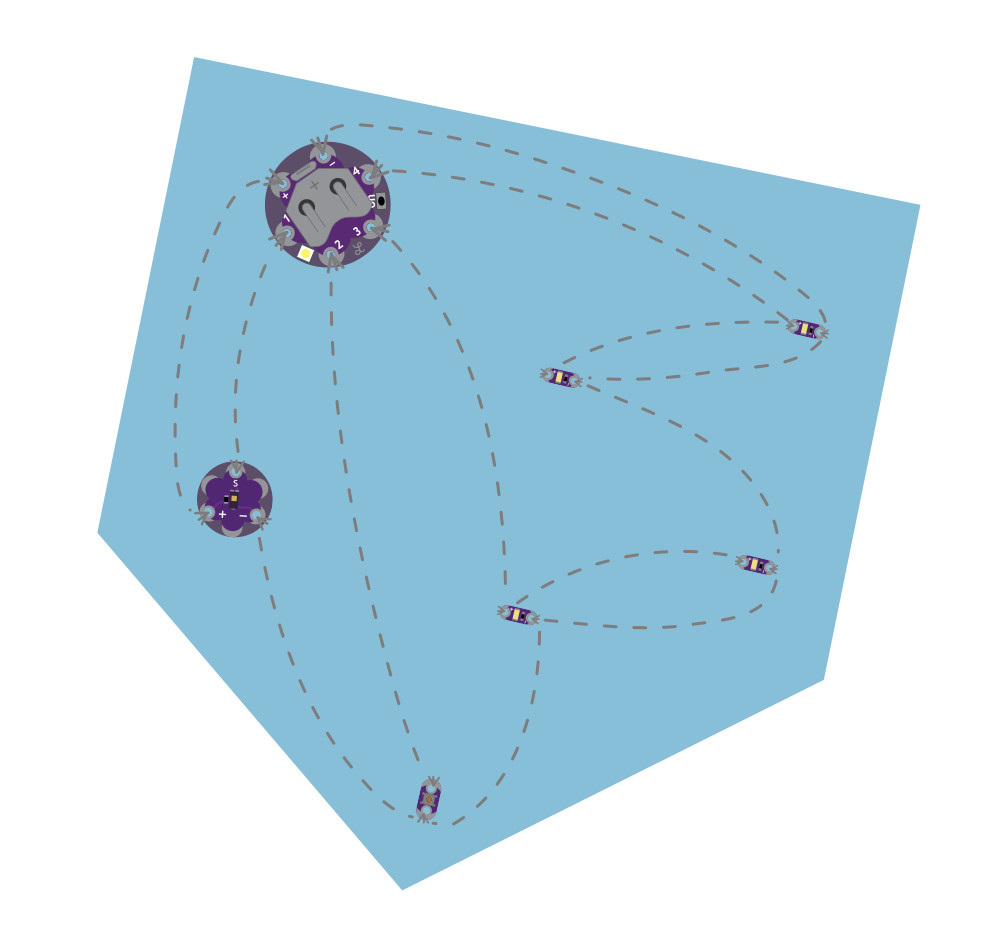
Arranging Your Circuit
Carefully snap the pieces of the ProtoSnap apart. Use a set of pliers or diagonal cutters if you are having trouble snapping the pieces apart.
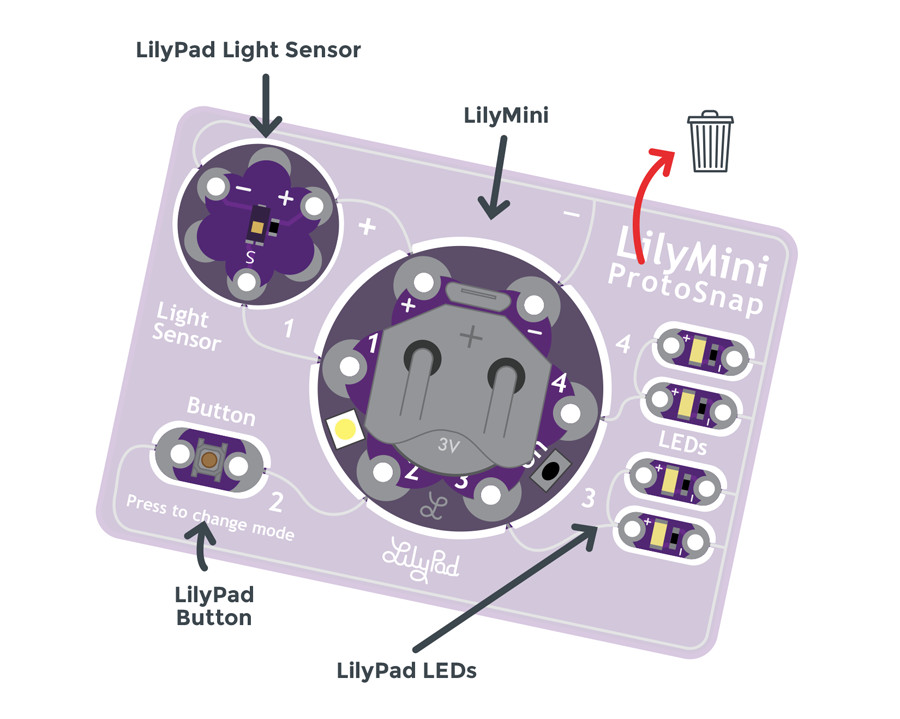
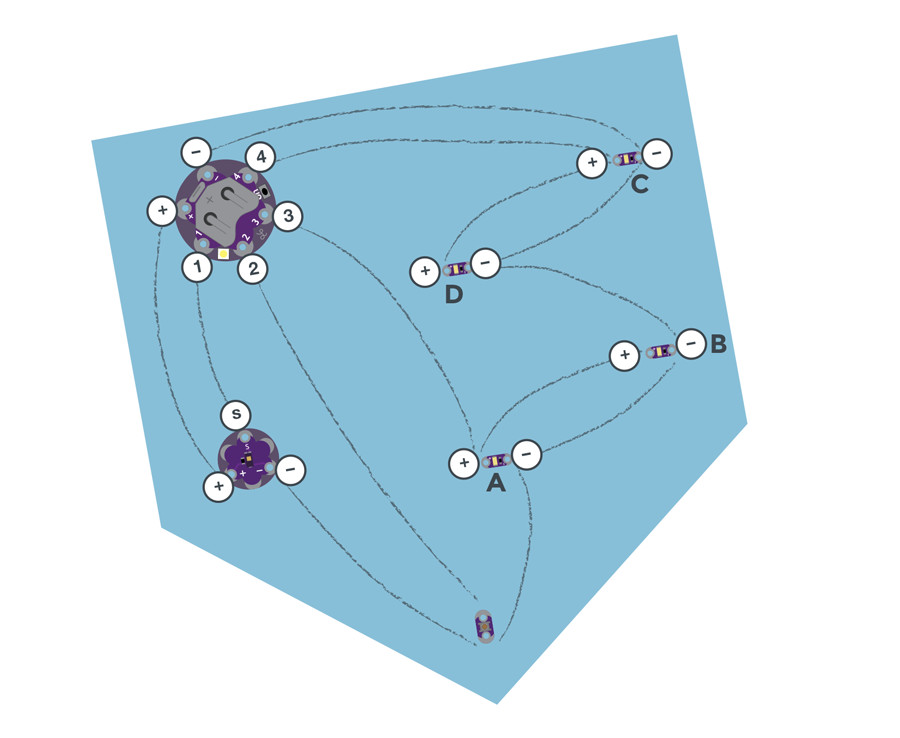
Discard the non-sewable pieces and scraps. You will end up with seven LilyPad pieces: the LilyMini with battery, four LilyPad LEDs, a LilyPad Button Board, and a LilyPad Light Sensor. We will be labeling the LEDs A, B, C, and D in the circuit diagram to help keep track of them while we stitch the circuit. LEDs A and B will be the first pair, and LEDs C and D will be the second pair.
Arrange the pieces on the felt according to the diagram (or your own custom design). Carefully securing each piece with a dab of glue. Double check the orientation of the LilyPad pieces against the diagram or template before gluing.
To help you plan your stitch lines, draw your circuit onto the felt with chalk or a washable marker.
Stitching It Together
If you need help sewing with conductive thread this tutorial covers the basics.
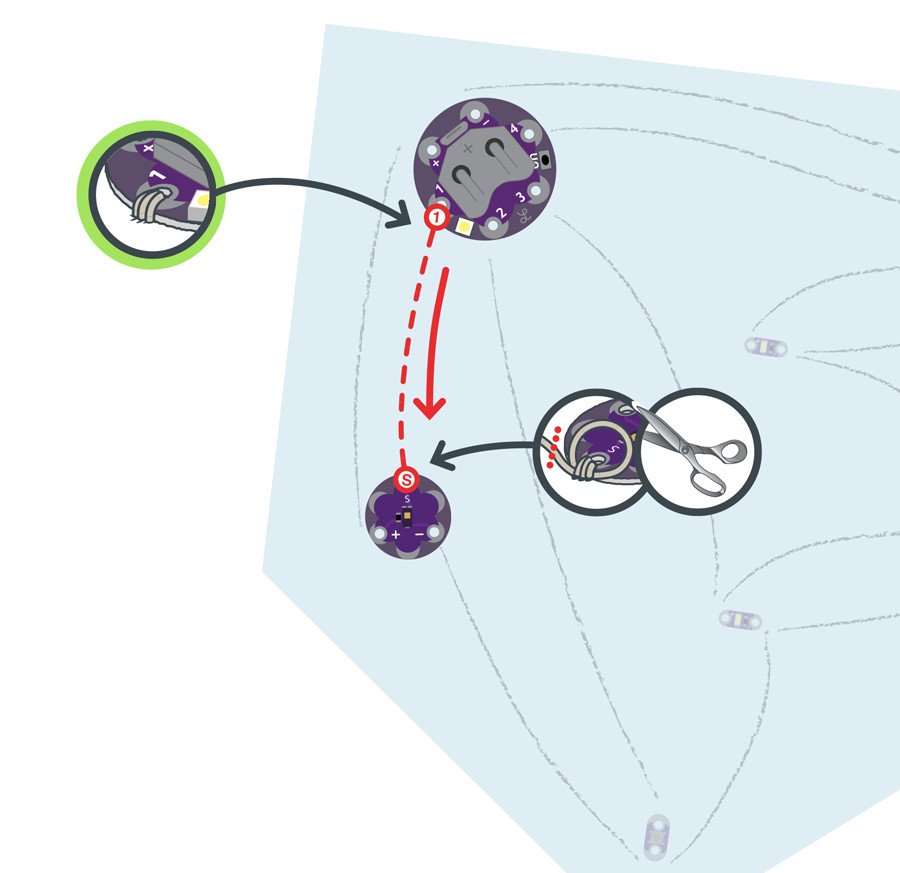
STEP 1:
We’ll begin by stitching a connection between the LilyMini and the LilyPad light sensor. The light sensor board has three connections: sensor (S), positive (+), and negative (–). Use conductive thread to connect Tab 1 on the LilyMini to the (S) tab on the light sensor with three loops at each tab. Don’t worry about connecting the + and - tabs; we’ll do that later.
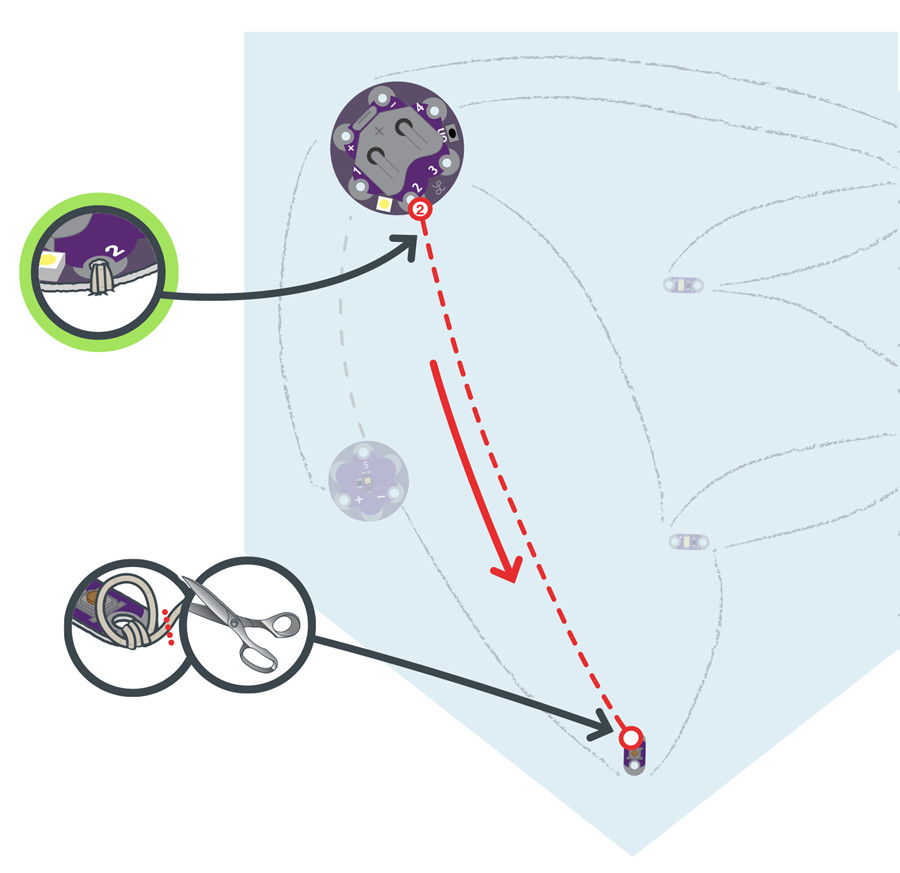
STEP 2:
Next, we’ll connect the LilyMini to the LilyPad Button Board. With a new piece of thread, sew three to four loops around Tab 2 of the LilyMini, and then continue stitching to connect one side of the button. Tie and cut.
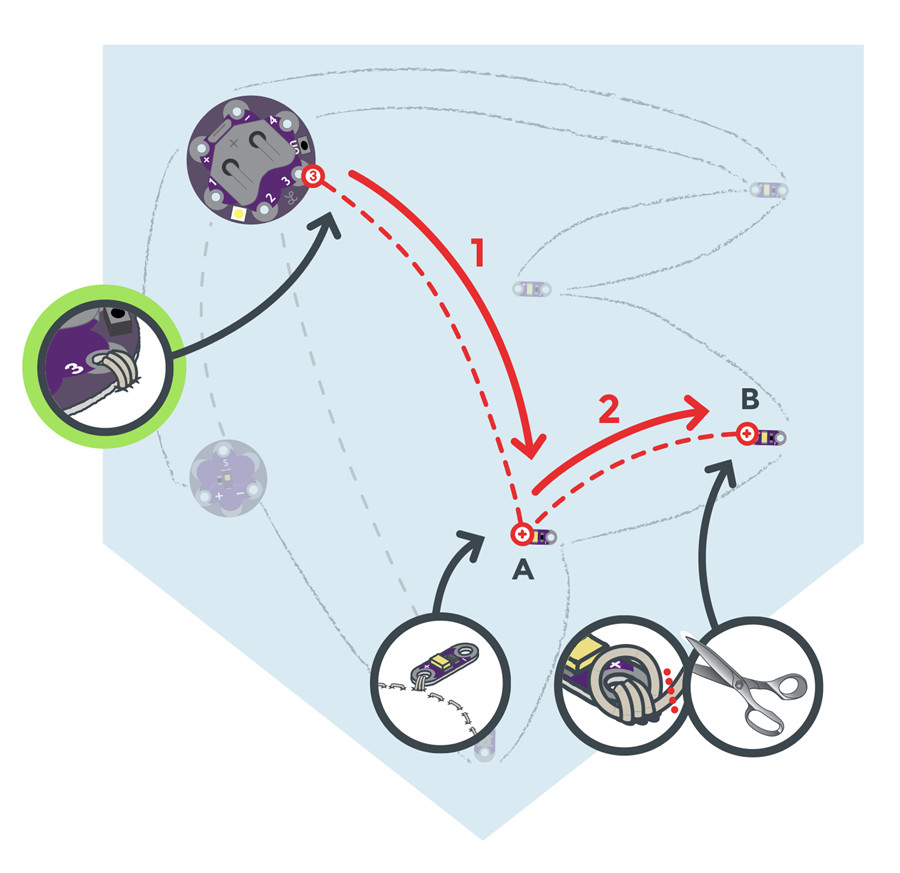
STEP 3:
Tab 3 on the LilyMini will connect to two LEDs: A and B. With a new piece of thread, connect Tab 3 to the positive (+) of LED A. Continue stitching to connect (+) of LED B, making three loops at each tab.
STEP 4:
We’ll repeat this process with a new piece of thread to connect Tab 4 on the LilyMini to the positive tabs of LEDs C and D.

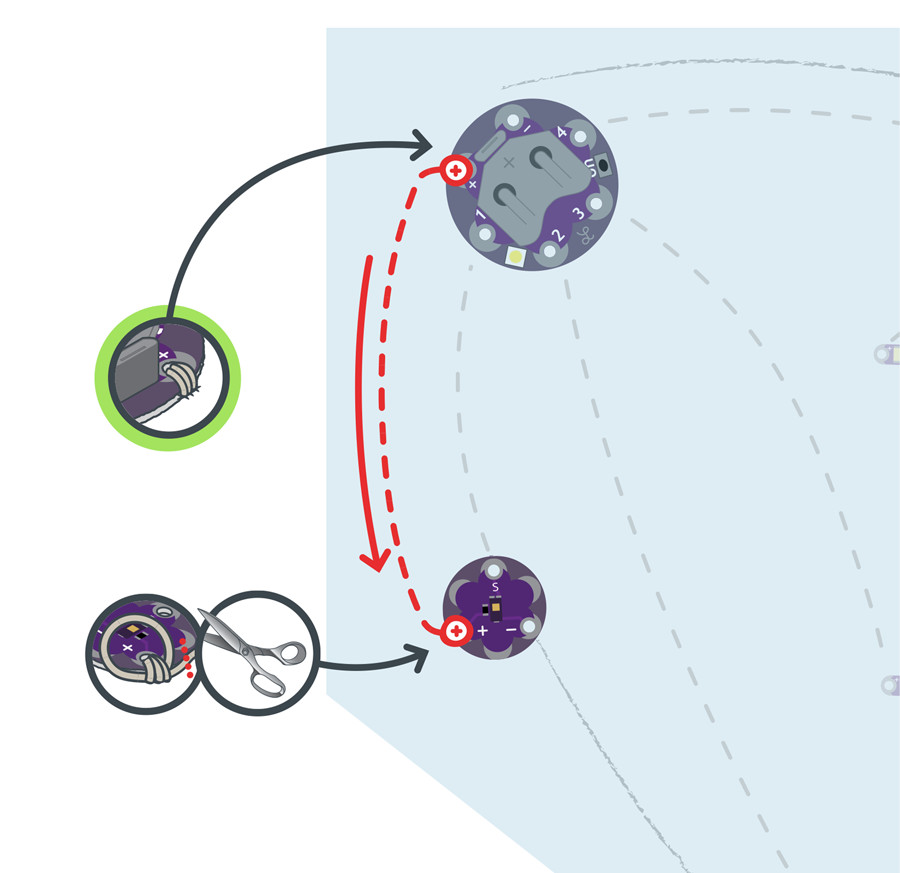
STEP 5:
With a new piece of thread, stitch the positive tab of the LilyMini to the positive tab (+) of the light sensor using three to four loops on each tab and a running stitch between. Tie, and cut.
STEP 6:
Finally, we’ll stitch all the negative connections together and back to the negative tab on the LilyMini. This will require a much longer piece of thread than in other steps – about 2.5 feet.
Begin at the negative (-) sew tab on the light sensor, and continue stitching along the outside edge of the project, connecting the negative tab of each piece (LEDs A, B, C, and D), ending at the negative (-) tab of the LilyMini.

After all the stitching is complete, turn the project over, and trim any loose thread tails before testing.
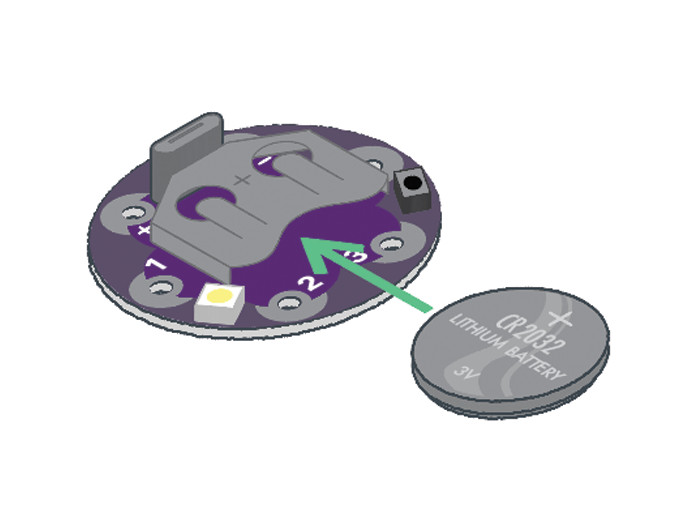
Installing Your Battery and Testing
Insert the coin cell battery into the LilyMini’s battery holder with the positive (+) side facing up. Press the power button on the LilyMini; all four LEDs should light up (Mode 1). Press the LilyPad button to switch between modes. Cover the light sensor in each mode to check the stitches are connecting to the sensor. If so, remove the battery and continue to the Finishing Touches section.
Troubleshooting
With any electronics project, there are times you will have to troubleshoot if your circuit isn't working. If your circuit isn't lighting up, try a new battery or check that your project is switched on. Check your sewing for any loose threads or ends that may be touching other parts of your circuit and causing a short circuit. Learn more about troubleshooting your project in the LilyPad Basics: E-Sewing tutorial.
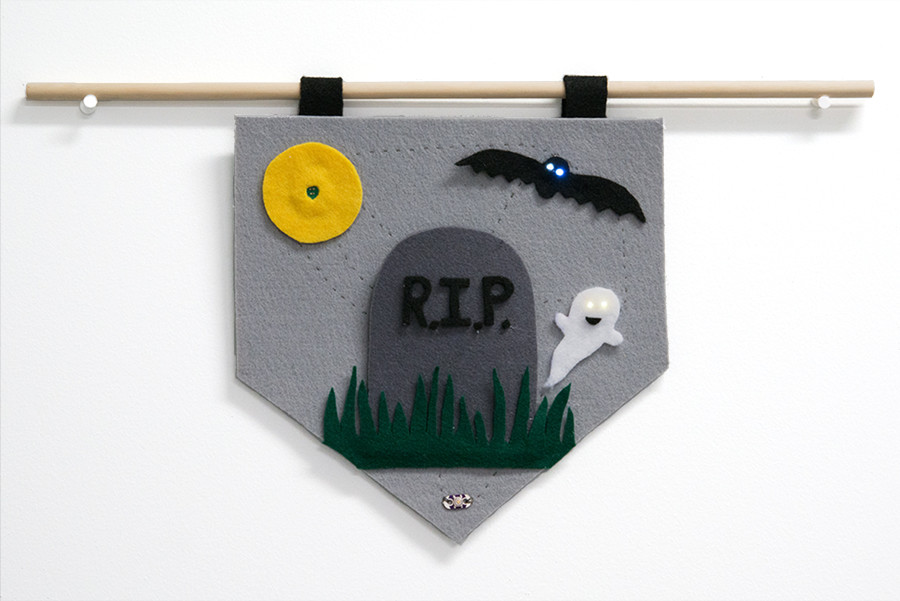
Finishing Touches
After checking the function of the circuit, it’s time to customize your pennant. Adding light-colored felt over the LEDs can hide the boards and diffuse the light. If covering the light sensor with a felt decoration, make sure to cut a hole above the sensor so it is not blocked/covered.
Here are a few examples of finished pennants with creative themes:


Resources and Going Further
These tutorials will guide you through more advanced projects and concepts: