Mini FET Shield Hookup Guide
This Tutorial is Retired!
This tutorial covers concepts or technologies that are no longer current. It's still here for you to read and enjoy, but may not be as useful as our newest tutorials.
 Joel_E_B
I Shall Call Him... Mini Me
The Mini FET Shield is an amazing little shield designed for the Arduino Pro Mini 3.3V 8MHz. If you've been using Arduino for some time, you may have noticed that one of the major limitations of the Arduino's digital I/O is the amount of current it can provide on each pin, which is about 40mA. That's enough current to light up a few LEDs or spin small DC motors, but to truly unleash your inner maker, you're going to need more juice to drive those really big projects.
Covered in this Tutorial
In this hookup guide, we'll go over how the Mini FET Shield functions, discuss some of the different ways you can assemble the shield, and break down some Arduino code to get you started using higher current peripherals on your mobile Arduino projects.
Required Materials
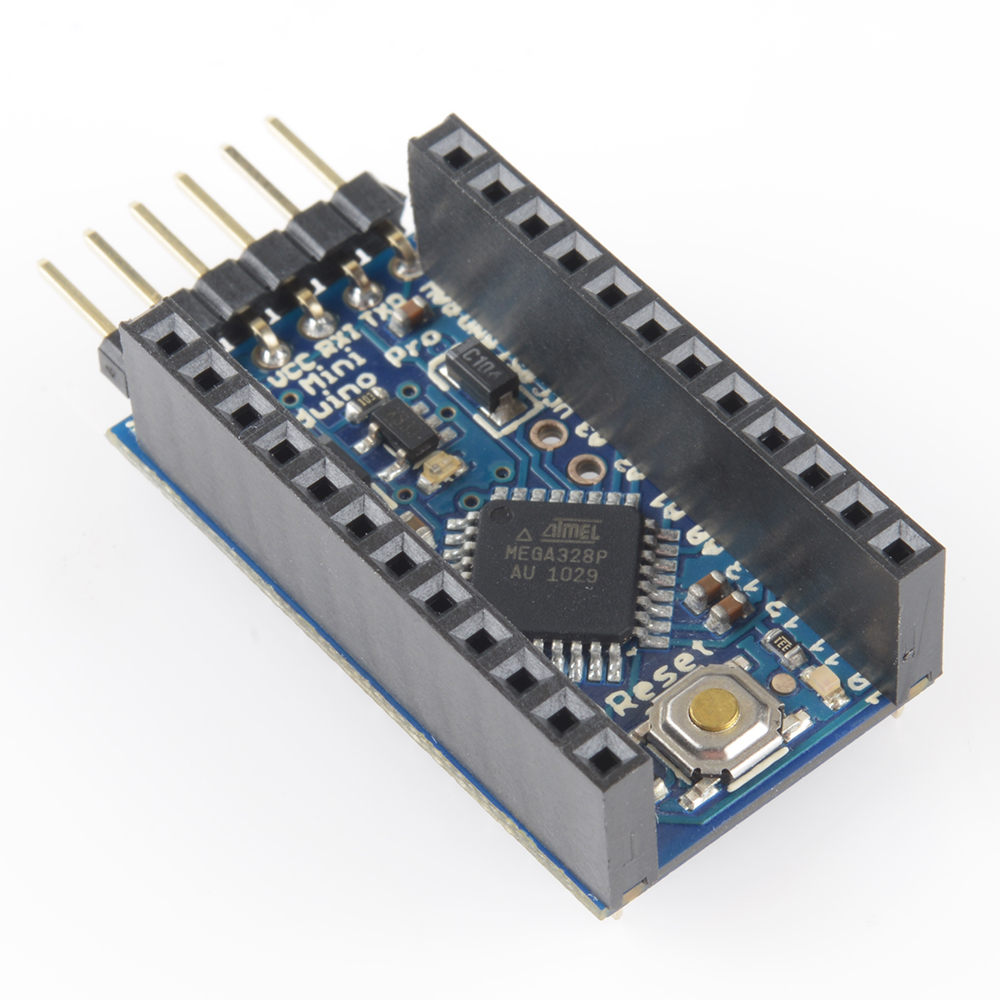
In order to use the Mini FET Shield, you will need an Arduino Pro Mini 3.3V 8MHz. Please note that shield only works with the 3.3V version of the Pro Mini and NOT the 5V version.
There will be various other parts listed throughout the tutorial. Each use case for the Mini FET Shield is unique, so all of the parts in this tutorial are merely used to demonstrate the shield's functionality and are by no means required.
Suggested Reading
Before you begin, make sure you are familiar with all these concepts and skills.
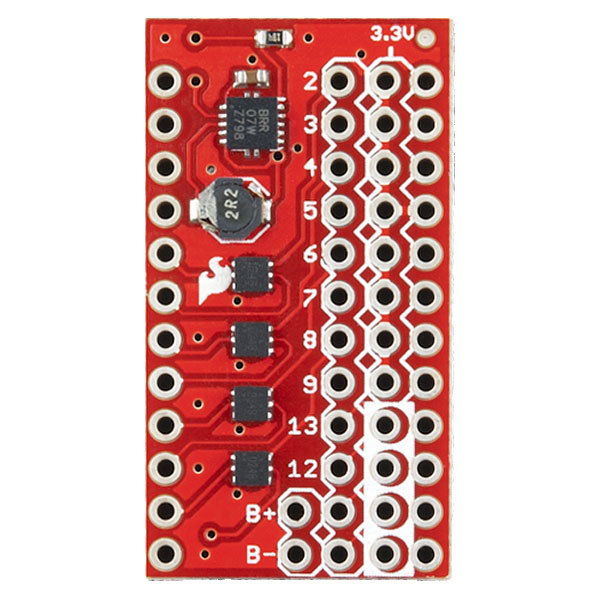
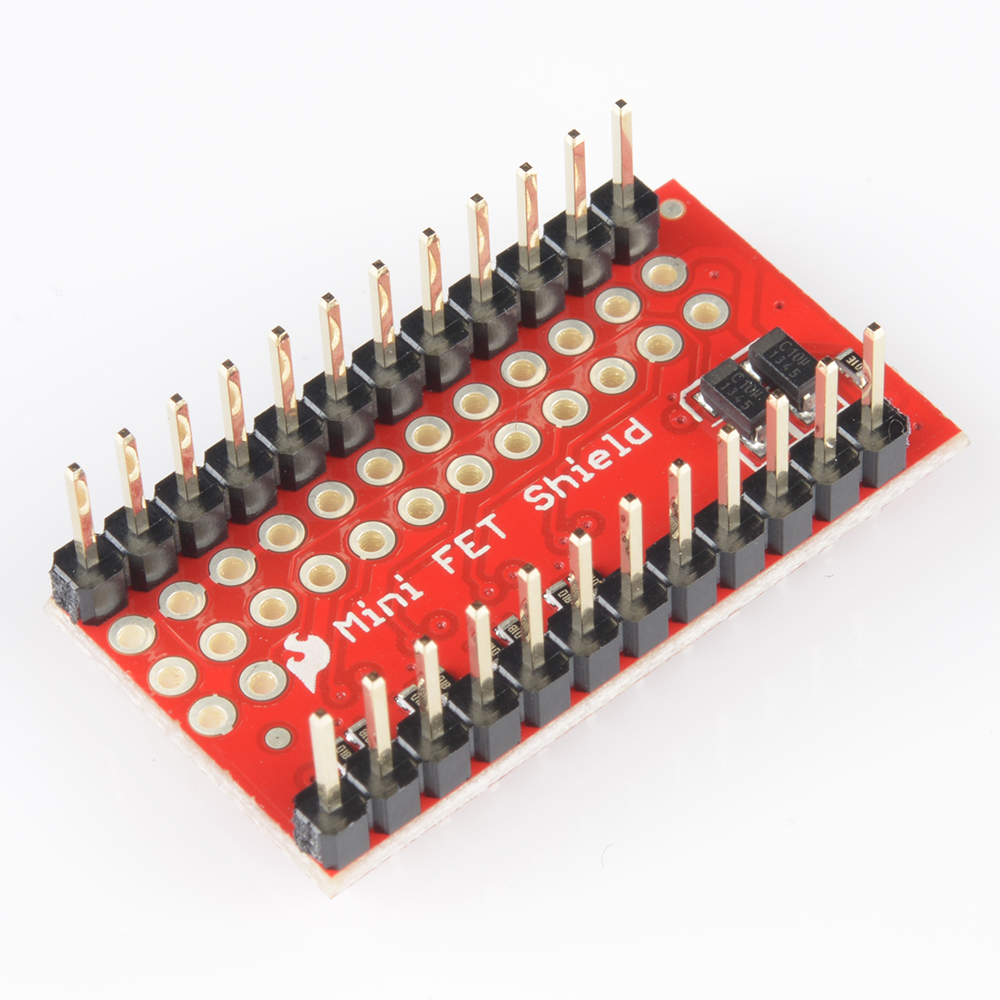
Board Overview
There's a lot happening on this tiny board. Let's break down each section and discuss in more detail how to use the Mini FET Shield.
Power
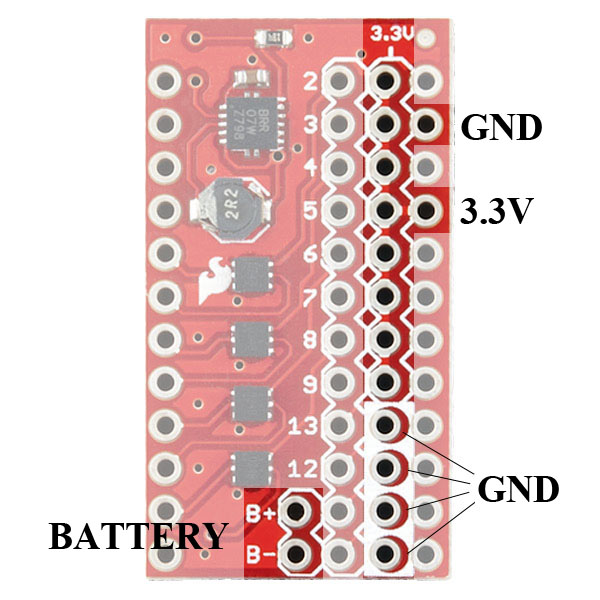
The Mini FET shield was designed with battery power in mind. On the shield, you'll notice the B+ and B-. Here, you can attach any battery between 1.8-5.5V, and the on-board regulator will regulate or boost it to 3.3V accordingly. This allows you to create mobile, battery powered projects that use AA, AAA, 9V, or LiPo batteries. It also provides a constant voltage to your devices, so motors and other peripherals will work at full force, even when the battery is nearing depletion.
The TPS61200 IC handles all the boosting/regulating. Keep in mind this IC is rated to deliver 600mA of output current. However, we've successfully put 2A through it. As always, be cautious about exceeding the maximum ratings for any device.
NOTE: This shield DOES NOT contain a battery charger. If you need to charge your battery, please see our charger offering.
The GND and 3.3V labeled on the right side indicate which pins are used to power the Pro Mini. Alternatively, if you chose to not use battery power for your project, you can power the shield through the Arduino Pro Mini. Note that because of this power scheme, this shield will only work with 3.3V Arduino Pro Mini and NOT the 5V Pro Mini.
Last, there is an 8-pin 3.3V rail (one for each MOSFET) and a 4-pin GND rail (one for the four remaining digital I/Os). These are conveniently placed next to the digital pins to allow buttons, motors, and other parts to be connected easily.
The MOSFETS
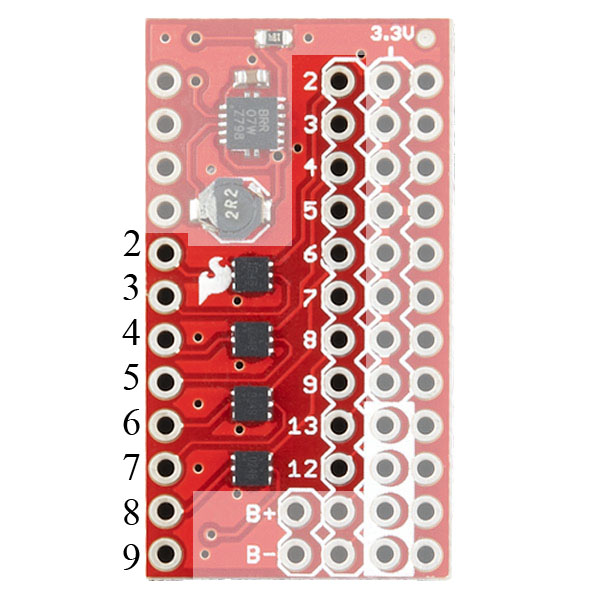
These FDMA1024NZs are the stars of the show. Each of these ICs contain two N-channel MOSFETs, which is a type of transistor, and each is connected to pins 2-9, leaving us with 8 FETs to control. Transistors work just like electronically controlled switches. Thus, in order to turn on each transistor, we must pull the associated pin HIGH. This will allow the current to flow from the 3.3V source through your peripheral, through the transistor, and to ground, thus completing the circuit. This will become clearer as we connect more parts in the next section.
Digital I/O
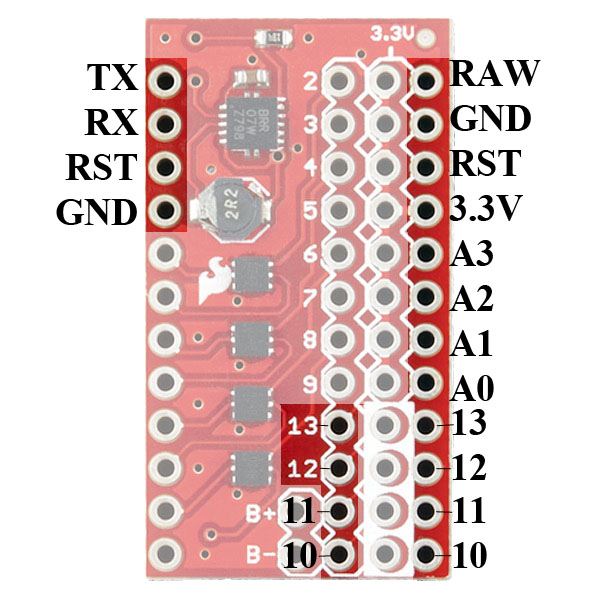
Finally, there are four leftover digital I/Os:** pins 10-13**. These can be used as inputs or outputs and have a GND bus next to them to easily connect buttons and switches. If you do decide to add some inputs to these pins, remember to configure your pins as INPUT_PULLUP to turn on the internal pull-up resistors on the Pro Mini.
The remaining pins are labeled for your convenience. These pins don't play a role in the function of the shield. However, you cam use a variety of headers, such as these stackable headers, to break out these pins, if you need. You can also solder wire directly to these pins.
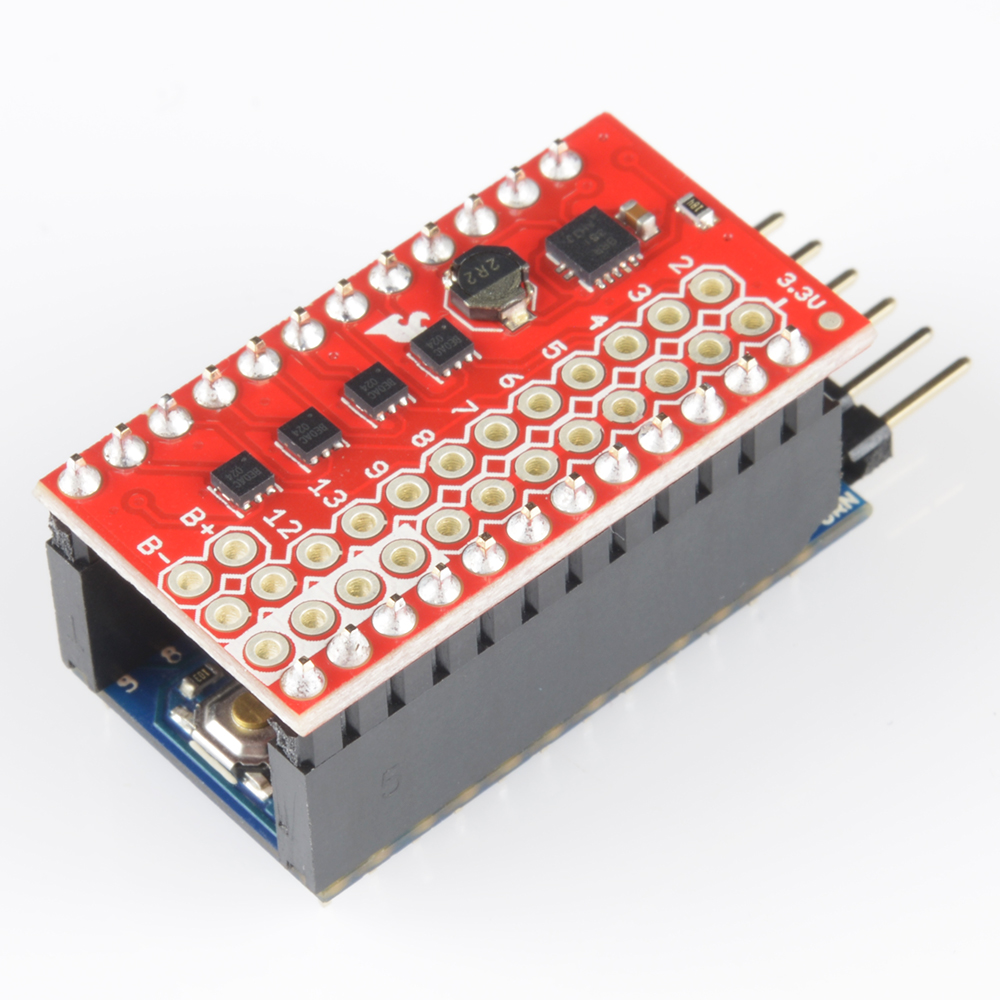
Assembly
There is no one, correct way to assemble the Mini FET Shield. It can have a variety of headers added to it to customize it for your project. However, the method we show here could be considered the "standard" assembly method.
Although this is a mini shield, it acts just like a full-sized Arduino shield. Many of the same tips and techniques covered in our Arduino shield tutorial can be applied to this shield, particularly the Installing Headers section.
We recommend using female headers on the Pro Mini, and straight male headers on the Mini FET Shield. Alternatively, you could use machine pin female headers and machine pin male headers. They're slightly more expensive, but they'll give you a better looking final product as well as a thinner overall package.
Start by soldering the female headers to the Pro Mini. You can also add some right-angle male headers to the Pro Mini's FTDI port.
Next, solder the male headers onto the shield. Make sure the side with the MOSFET ICs is the side facing up. You can use the female headers on the Pro Mini to hold the male headers in place while you solder, just like on a full-sized Arduino.
The two should mate together like so...
Power
Now, we need to figure out a way to power our stack. The simplest way is to just solder a right-angle JST connector directly to the B+ and B- pins. The positive and negative pins on all our LiPo batteries should line up with B+ and B- as long you solder the JST connector in the correct orientation, with the opening facing pins 8 and 9. You will also need to clip the headers on pins 8 and 9 as flush as you can if you go this route. Otherwise, the battery may not fit correctly.
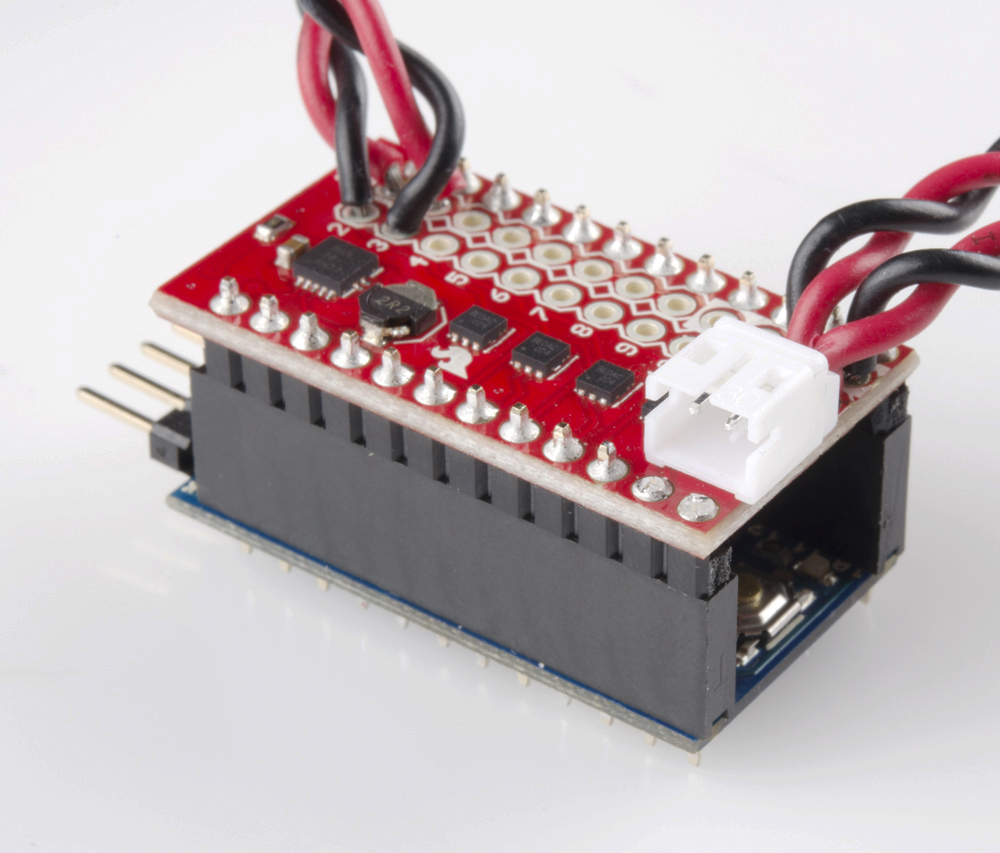
Other options include using one of our many battery holders and soldering it directly to the B+ and B- pins. If you want power and charging built into one device, you could use the Power Cell. Or, if mobile power isn't what you're after, you could just attach this female barrel jack to JST adapter to the JST on B+ and B- and power it from the wall. You could also clip off the JST altogether, and solder the barrel jack directly to the board.
Peripherals
Now comes the fun part, adding all the things we want to move, spin, light up, and turn on. This is where your project may differ the most from this example. Just keep a few things in mind as you add your devices:
- The Mini FET Shield can provide a lot more current than the Arduino alone, but, it too, has limitations. Each MOSFET within each IC is rated for 5A continuous drain current and 6A if it's pulsed. Exceeding these ratings may damage the shield or the other boards attached to it. Still, 5A is a lot of current for such a tiny board!
- The more devices you hook up, the more power draw you're going to have and the quicker the battery will drain. Also keep the capacity of your battery in mind as you plan out your project.
In this example, I'm going to hook up a laser and one of our many varieties of 3-12V motors* to the shield, as well as a button and switch to control them. I used some good ol' stranded wire to connect everything to the shield.
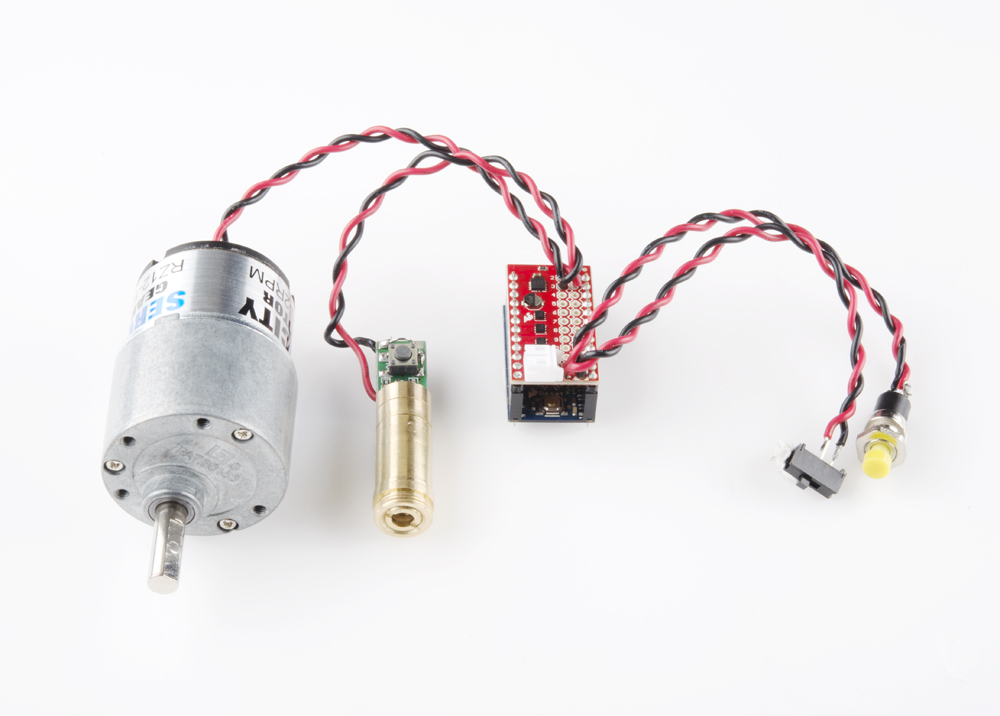
The connections in the picture above are as follows:
- Motor (+) → 3.3V
- Motor (−) → FET pin 2
- Laser (+) → 3.3V
- Laser (−) → FET pin 3
- Switch → pin 10 & GND
- Button → pin 11 & GND
*I later discovered that this particular motor does not draw a lot of current, about 10mA, which makes driving it with the Mini FET Shield a little on the overkill side. However, many DC motors will draw up to several hundred mA and will need to be driven by an external device.
Project Time
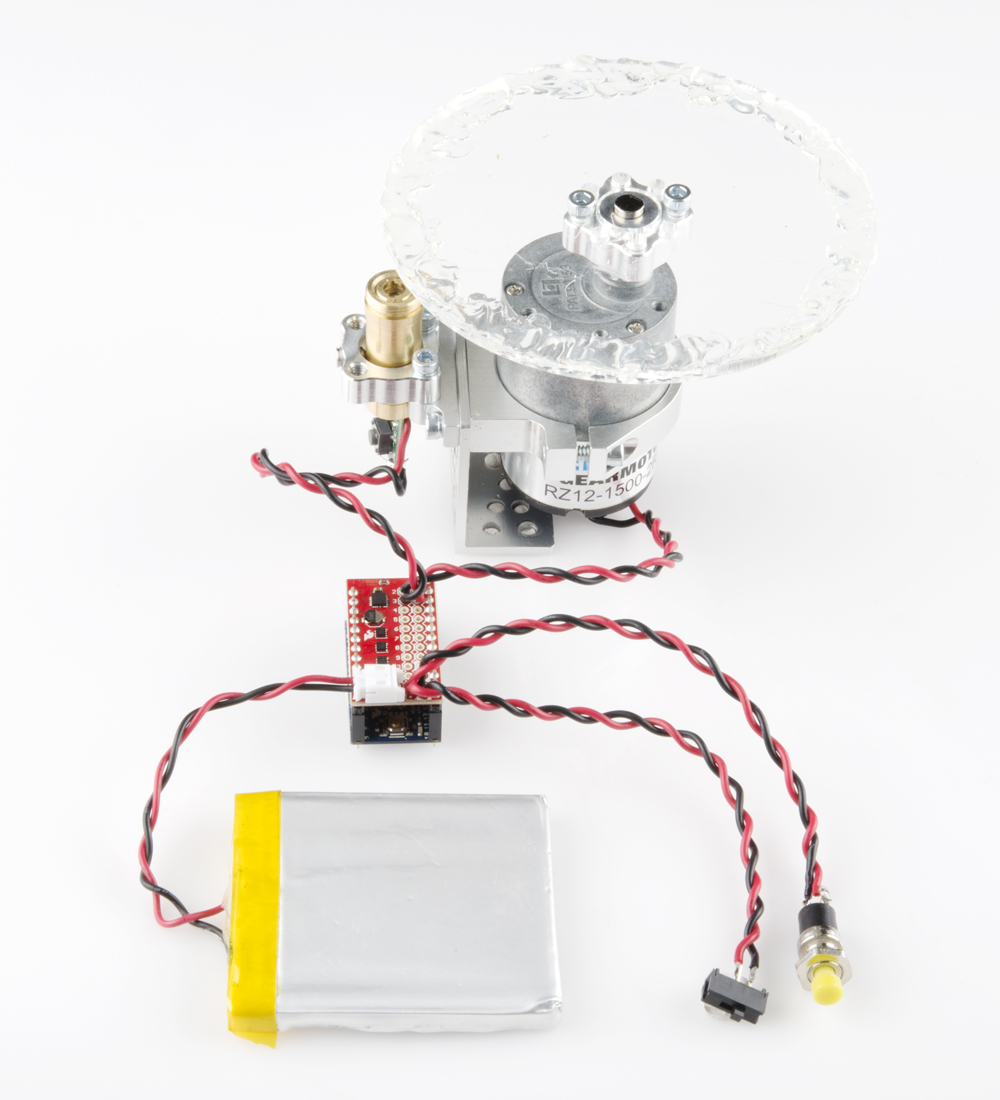
Now that we have all this hardware hooked up to the Mini FET Shield, what can we do with it? Well, for one, we can make a mobile light show!
Tools
To make a truly epic laser show, you'll need a hot glue gun and a few stick of hot glue. Also, if you don't already have some, you'll need a hex key to assemble the Actobotics parts and a slightly smaller hex key for the set screws.
Hardware
Along with all the parts we used in the Assembly section, you'll also need a LiPo battery, and some mounting hardware to hold everything in place. You can just use some angle brackets and some hot glue, or, if you want to get serious about your laser show, we've picked out some Actobotics parts to help you mount the motor and laser.
Going over building the mount is beyond the scope of this tutorial, but here's a picture for guidance.
Firmware
Every project needs at least a little bit of code to get it going. Here is a simple sketch that turns the laser on with the switch and spins the motor when the button is pressed. Upload the code onto the Pro Mini using a 3.3V FTDI Basic.
language:c
int motor = 2;//write HIGH to turn on
int laser = 3;//write HIGH to turn on
int swtch = 10;
int button = 11;


void setup() {

pinMode(motor,OUTPUT);
pinMode(laser,OUTPUT);
pinMode(swtch, INPUT_PULLUP);//internal pullup
pinMode(button, INPUT_PULLUP);//internal pullup

digitalWrite(motor, LOW);
digitalWrite(laser, LOW);
}

void loop() {

  if(digitalRead(button) == LOW)//spin motor when button is pressed
   digitalWrite(motor, HIGH);
  else
    digitalWrite(motor, LOW);

  if(digitalRead(swtch) == LOW)//turn laser on with switch
   digitalWrite(laser, HIGH);
  else
    digitalWrite(laser, LOW);

}
There is one downside to driving a motor with the Mini FET Shield. Unlike a traditional H-bridge, such as the IC found on our Ardumoto Shield, the FET can only turn the motor in one direction. If you need your motor to move in both directions, you may need to find a different solution.
With that, you should have a working project that utilizes the features of the Mini FET Shield.
Resources and Going Further
Thanks for reading. As usual, if you have any feedback, please visit the comments or contact our technical support team at TechSupport@sparkfun.com. Please enjoy these other product resources and SparkFun tutorials for your reading pleasure.
- MOSFET Datasheet - TPS61200
- Boost Converter Datasheet - FDMA1024NZs
- Arduino Pin Current Limitations
- Arduino Internal Pull-up Resistors
- Check out the original Mini FET Shield design over at IDEO LABS
- INA-169 Current Sensor Hookup Guide
- LED Light Bar Hookup Guide
- PicoBuck LED Driver Hookup Guide
- Motors and Selecting the Right One