Arduino Shields
This Tutorial is Retired!
Note: This tutorial is for reference only. Most of the shields covered in the "Shieldstravaganza" video series and section are no longer carried by SparkFun. For an updated version of this tutorial, follow the link below.
View the updated tutorial: Arduino Shields v2
 jimblom
Installing Headers (Preparation)
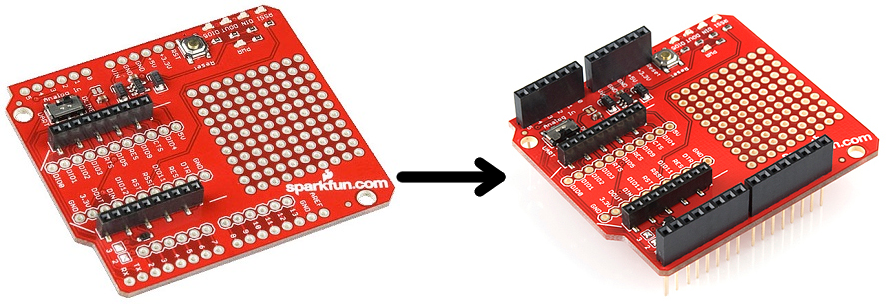
Many shields come without any headers attached. This keeps their final fate open to your interpretation (maybe you'd rather use straight male headers, instead of the usual stackable headers). The following pages will explain how you can turn your drab, header-less shield into a fully functional, ready-to-plug-in module.
Required Tools and Materials
Shield assembly requires soldering. Solder helps make a good, physical and electrical connection. Without solder, connection between shield and Arduino will be intermittent (at best). If this is your first time soldering, consider checking out our how to solder tutorial.
How to Solder: Through-Hole Soldering
You’ll need these parts in order to install headers on your shield:
- An Arduino shield - Any shield should do. All Arduino shields should have a standard Arduino footprint.
- 4 headers - The amount of pins on the headers depends on whether your shield has the newer R3 footprint, or the original Arduino layout.
- Original: (2) 6-pin and (2) 8-pin headers
- R3: (1) 6-pin, (2) 8-pin, and (1) 10-pin header
And these tools are required you'll need:
- Soldering iron - The most basic soldering iron should work (flavors include US or Europe).
- Solder - If you value your health, use unleaded solder. If you value your time, use leaded solder.
- A wet sponge - This'll keep your iron tip clean and shiny. Any wet sponge will do. Use the one included with the iron stand, or get a fancy brass sponge.
These tools are completely optional, but may make your life a bit easier:
- Soldering iron stand - This'll keep your soldering iron off your floor and out of your lap (ouch!).
- Third hand - If you're running out of hands and can't get a trusting family member to hold something for you, this'll do the job.
- Solder wick may come in handy if you need to remove solder from a joint.
Preparation
Before you start warming up that soldering iron, let's take some time to plan out the assembly process.
Do your headers match your Arduino shield?
From the inception of Arduino until some time in 2012, every Arduino had the same standard footprint: two 6-pin headers on one side, two 8-pin headers on the other. Lately, though, Arduinos have been transitioning to a new shield-header layout, called the R3 footprint. This layout has a 6-pin and 8-pin headers on one side, and an 8-pin and 10-pin on the other.

Make sure the headers you have match the pin-out of your shield! Also consider if your Arduino layout matches your shield's. R3 Arduinos should be reverse-compatible with shields of the older footprint, however, older Arduinos are not completely compatible with new shields of the R3 footprint (something about sticking 10 pins into an 8-pin header).
What kind of header should you use?
There are all kinds of headers, but there are only two that are recommended for installing on shields: stackable or male.
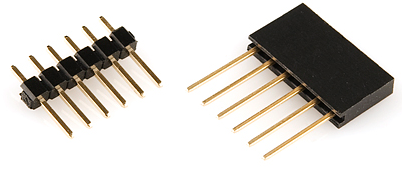
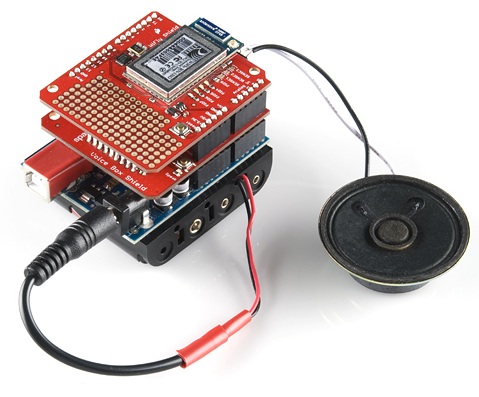
Stackable headers are especially great for stacking shields. They also maintain your ability to plug a jumper wire into any of the Arduino's pins. This tutorial will explain how to install stackable headers. Stackable headers are available in 6-pin, 8-pin, and 10-pin varieties, or you can buy the headers in packs for original or R3-type shields.
Simple, striaght male headers are also an option for connecting a shield to an Arduino. Male headers are beneficial in that they create a lower-profile stack when connected to an Arduino. If you plan to stuff your Arduino/shield combo into an enclosure, you may need to consider using male headers. This tutorial focuses on stackable header installation, check the Tips and Tricks section for male header assembly instructions.
Do not install female headers, right-angle male headers, swiss machine-pinned headers, round headers, or a variety of other headers that may exist out there. You really should only use headers that have straight, rectangular, male pins.
Now then, plug in and start warming up those soldering irons. It's time to get soldering!