Contributors:
 Pete-O
 Introduction
The Lumenati line of LED boards is designed to give your projects an edge in their lighting capacity. Based on the APA102C addressable LED, these LEDs employ a 2-wire communication protocol consisting of a clock line and a data line. While this requires one more wire than standard WS2812B addressable LEDs, the advantage is that the communication with the LEDs becomes somewhat timing independent, allowing you to run these directly off of a Raspberry Pi or other single-board computer that doesn't normally allow for a long, precicely-timed data stream without the use of additional hardware.
COM-14353
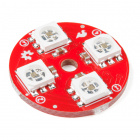
The SparkFun Lumenati 4-pack is a coin-sized board equipped with four APA102C LEDs surrounding the outer edge.
Retired
COM-14357
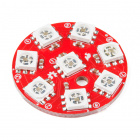
The SparkFun Lumenati 8-pack is a coin-sized board equipped with seven APA102C LEDs surrounding the outer edge of the board, …
Retired
COM-14358
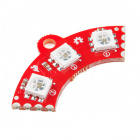
The SparkFun Lumenati 90R is a small quarter-circle board equipped with three APA102C LEDs and a single mounting position.
Retired
COM-14359
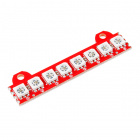
The SparkFun Lumenati 8-stick is a small board equipped with eight APA102C LEDs in a row and two mounting positions.
Retired
COM-14360
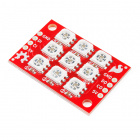
The SparkFun Lumenati 3x3 is a small, rectangular board equipped with nine APA102C LEDs arranged in a 3x3 array.
Retired
COM-14452
The SparkFun Lumenati 90L is a small quarter-circle board equipped with three APA102C LEDs and a single mounting position.
Retired
Heads up! If you are looking for a smaller version of the Lumenati? Check out the LuMini's!
DEV-14779
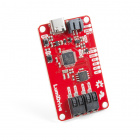
With the SparkFun LumiDrive you will be able to control and personalize a whole strand of APA102s directly from the board its…
COM-14966
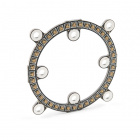
The two inch version of the SparkFun LuMini LED Ring, packed with 40 individually addressable LEDS, each capable of producing…
COM-14967
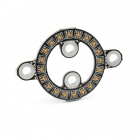
The one inch version of the SparkFun LuMini LED Ring, packed with 20 individually addressable LEDS, each capable of producing…
Required Materials
To get started, you're going to need a control system. Either a Raspberry Pi or Arduino will suffice for our examples, but really anything that has GPIO can be made to work.
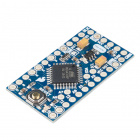
DEV-11113
SparkFun's minimal design approach to Arduino. This is a 5V Arduino running the 16MHz bootloader.
DEV-13975
The SparkFun RedBoard combines the simplicity of the UNO's Optiboot bootloader, the stability of the FTDI, and the shield com…
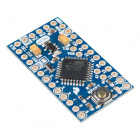
DEV-11114
SparkFun's minimal design approach to Arduino. This is a 3.3V Arduino running the 8MHz bootloader.
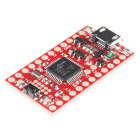
DEV-13664
If you’re ready to step your Arduino game up from older 8-bit/16MHz microcontrollers, the SparkFun SAMD21 Mini Breakout is …
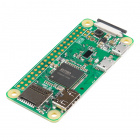
DEV-14277
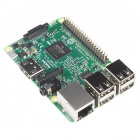
The Raspberry Pi Zero W is still the Pi you know and love, but at a largely reduced size of only 65mm long by 30mm wide and s…
DEV-13825
Everyone knows and loves Raspberry Pi, but what if you didn't need additional peripherals to make it wireless. The Raspberry …
Retired
The APA102C addressable LEDs on the Lumenati boards operate natively with 5V logic, so it will save you trouble to choose a controller that can give you 0-5V, but it can be made to work with 3.3V logic with the use of a level translator.
BOB-12009
The SparkFun bi-directional logic level converter is a small device that safely steps down 5V signals to 3.3V AND steps up 3.…
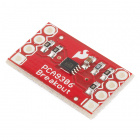
BOB-11955
This is a breakout board for the PCA9306 dual bidirectional voltage-level translator. Because different parts sometimes use d…
Retired
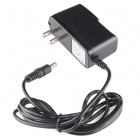
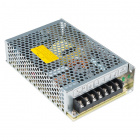
You will also need a power 5V power supply to run your controller and new lights. Each APA102C can draw as much as 60mA when red, green and blue are all full-on, so you'll want to have something a little beefy. We've chosen a wall adapter capable of 2.5A, which should be plenty for our demonstration. But if you've got a bigger project in mind, check out the Mean Well 5V/20A supply.
TOL-13831
This is a high-quality switching 'wall wart' AC to DC 5.1V 2,500mA USB Micro-B wall power supply manufactured specifically fo…
TOL-12889
This is a high quality switching 'wall wart' AC to DC 5V 2000mA Barrel Jack wall power supply manufactured specifically for S…
Retired
TOL-14098
This is a 100W single output switching power supply from Mean Well. This power supply is extremely reliable and able to outpu…
Retired
Tools
Lastly, you are going to need a few tools. A soldering iron, some solder, wire and a wire stripper should do. Maybe also some tweezers if you're not comfy with having your fingers close to the tip of a soldering iron.
TOL-14456
This adjustable-temperature soldering iron is a great tool for when you don't want to break the bank but need a reliable iron…
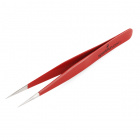
TOL-10603
You can tell by our large assortment of tweezers that we here at SparkFun are way into picking up tiny things. To make sure w…
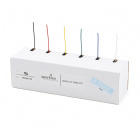
PRT-11375
There is nothing quite as essential as a neatly organized assortment of colored wire on your workbench. This pack of Hook-Up …
TOL-09163
This is your basic tube of unleaded (Pb-free) solder with a no clean, water soluble resin core. 0.031" gauge and 15 grams
TOL-14762
These are your basic, run-of-the-mill wire strippers from Techni-Tool with a comfortable grip making them an affordable optio…
Retired
Suggested Reading
We're tried to make this hookup guide as simple as possible, but you may be lacking some basic information that could help your understanding as we go forward. For more info, check out these tutorials...
Installing an Arduino Library
How do I install a custom Arduino library? It's easy! This tutorial will go over how to install an Arduino library using the Arduino Library Manager. For libraries not linked with the Arduino IDE, we will also go over manually installing an Arduino library.
Logic Levels
Learn the difference between 3.3V and 5V devices and logic levels.
How to Solder: Castellated Mounting Holes
Tutorial showing how to solder castellated holes (or castellations). This might come in handy if you need to solder a module or PCB to another PCB. These castellations are becoming popular with integrated WiFi and Bluetooth modules.
Raspberry Pi SPI and I2C Tutorial
Learn how to use serial I2C and SPI buses on your Raspberry Pi using the wiringPi I/O library for C/C++ and spidev/smbus for Python.


