Contributors:
 El Duderino
,
 PaulZC
 Introduction
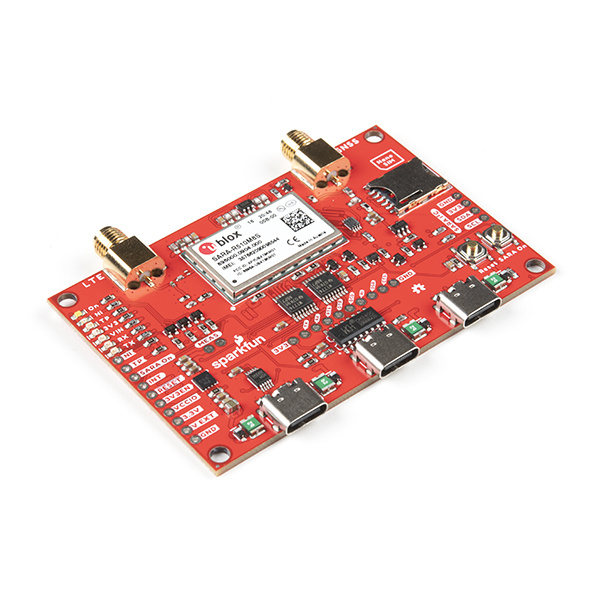
The SparkFun LTE GNSS Breakout - SARA-R5 provides a robust development tool for the SARA-R510M8S LTE-M module from u-blox.
GPS-18031
The SARA-R5 LTE GNSS Breakout is a robust development tool for the u-blox's impressive SARA-R510M8S LTE-M / NB-IoT module. Pe…
The u-blox SARA-R510M8S module is a secure cloud LTE Cat M1, LTE Cat NB2 solution based on u-blox's UBX-R5 cellular chipset with an integrated u-blox M8 GNSS receiver chip and separate GNSS antenna interface. This breakout routes all of the functional pins on the R510M8S module to user interfaces (USB or plated-through hole) so you can take full advantage of all of the features available on this impressive LTE/GNSS module.
The SARA-R5's UART interface can be configured into one of five variants, providing connectivity over one or two UARTs. A separate USB port provides access to the SARA's trace log for diagnostic purposes. This breakout provides access to all three serial interfaces (UART1, UART2 and SARA Diag) via separate USB-C connections. All eight 3.3V serial signals are available on a 0.1"-pitch breakout header.
The breakout ships with a Hologram SIM card. If you prefer to use your own SIM card, please check that your chosen service provider offers LTE-M coverage for your area before purchasing.
Required Materials
In order to follow along with this tutorial you'll need the following items to use with the LTE GNSS Breakout - SARA-R5.
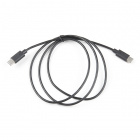
The primary interface for this breakout is over USB-C so you'll need at least one USB-C cable:
CAB-16905
1 Meter USB Type C to Type C cable USB 2.0 data transfer capabilities.
CAB-15425
These 0.8m cables have minor modifications that allow them to be plugged into their ports regardless of orientation on the US…
CAB-14743
USB C is fantastic. But until we have converted all our hubs, chargers, and ports over to USB C this is the cable you're goin…
CAB-15424
These 2m cables have minor modifications that allow them to be be plugged into their ports regardless of orientation on the U…
For those who prefer to use the LTE GNSS Breakout with our u-blox SARA-R5 Arduino Library, you'll need an Arduino development board:
WRL-15663
The SparkFun ESP32 Thing Plus is the next step to get started with Espressif IoT ideations while still enjoying all the ameni…
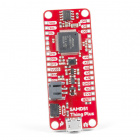
DEV-14713
With a 32-bit ARM Cortex-M4F MCU, the SparkFun SAMD51 Thing Plus is one of our most powerful microcontroller boards yet!
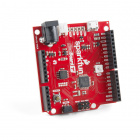
DEV-14812
If you’re ready to step up your Arduino game from older 8-bit/16MHz microcontrollers, the SparkFun RedBoard Turbo is a form…
DEV-15444
The RedBoard Artemis takes the incredibly powerful Artemis module from SparkFun and wraps it up in an easy to use and familia…
Note: The LTE GNSS Breakout runs at
3.3V logic and requires some hardware modifications to work with an Arduino and the u-blox SARA-R5 Library. Read on to the
Hardware Assembly section for detailed instructions.
The breakout requires a pair of antennas, one for the LTE module and another for the GNSS receiver. The options below work with the LTE GNSS Breakout:
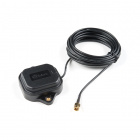
GPS-15192
The ANN-MB-00 GNSS multi-band antenna is extremely unique from other GNSS/GPS antennas in that it is designed to receive both…
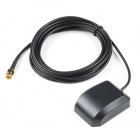
GPS-14986
This exceptional GPS/GNSS antenna is designed for both GPS and GLONASS reception.
CEL-16432
Molex LTE/5G Cellular External Antennas are designed for 2G/3G/4G/5G modules and devices.
Note: The SMA connections are standard polarity: the connector on the LTE GNSS Breakout is female, the antenna connection needs to be standard male. Antennas with reverse-polarity connectors are not suitable for the LTE GNSS Breakout.
Suggested Reading
If you aren't familiar with the following concepts you may want to check out these tutorials before continuing.
Serial Communication
Asynchronous serial communication concepts: packets, signal levels, baud rates, UARTs and more!
Installing an Arduino Library
How do I install a custom Arduino library? It's easy! This tutorial will go over how to install an Arduino library using the Arduino Library Manager. For libraries not linked with the Arduino IDE, we will also go over manually installing an Arduino library.
Logic Levels
Learn the difference between 3.3V and 5V devices and logic levels.


