LoRaWAN with ProRF and The Things Network
 Nick Poole
 Programming Your Node
Note: This example assumes you are using the latest version of the Arduino IDE on your desktop. If this is your first time using Arduino, please review our tutorial on installing the Arduino IDE. If you have not previously installed an Arduino library, please check out our installation guide.
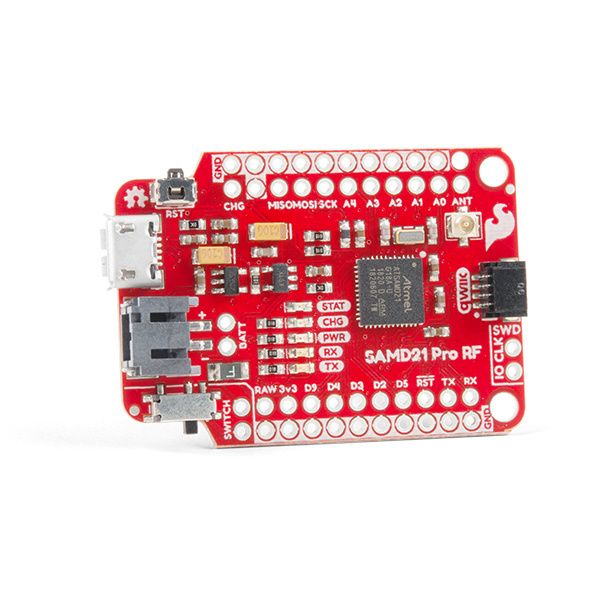
We developed the Pro RF to be a small, lightweight LoRaWAN™ node. All you need to do is close two solder jumpers on the bottom of the board (labeled LoRaWAN™) to connect the extra GPIO required by the LoRaWAN™ library. With that done, let's get started!
Get the LMIC-Arduino Library
For this example, we're going to use a library written by Matthijs Kooijman which is a modified version of "IBM's LMIC (LoraMAC-in-C)" library. You can download it through the Arduino Library Manager. It's currently called "IBM LMIC Framework" in the Arduino Library Manager, but that may change to "LMIC-Arduino" in the next release. Or you can download and manually install it from the GitHub Repository.
Once you have the library installed, you may need to edit the LMIC configuration file. Find your Arduino libraries folder and navigate to ...IBM_LMIC_framework/src/lmic/, you should find a file called config.h here, open it in any text editor and find the lines where CFG_us915 is defined. It should look like this:
language:c
//#define CFG_eu868 1
#define CFG_us915 1
// This is the SX1272/SX1273 radio, which is also used on the HopeRF
// RFM92 boards.
//#define CFG_sx1272_radio 1
// This is the SX1276/SX1277/SX1278/SX1279 radio, which is also used on
// the HopeRF RFM95 boards.
#define CFG_sx1276_radio 1
Since we're using the 915MHz radio module, you need to make sure that the line #define CFG_us915 1 is not commented out and that the line #define CFG_eu868 1 is, by prepending // as shown above. Same goes for the radio type, we want #define CFG_sx1276_radio 1 and not #define CFG_sx1272_radio 1. With those changes made, save the config.h file and return to the Arduino IDE.
Edit the Example Code
With the library installed, you should now have the example code in your Examples menu. Let's start with File>Examples>IBM LMIC framework>ttn-abp, this is the "ABP" or "Activation By Personalization" example code. In order to make it work with your application you'll need to copy in some keys from the Device Overview page on your TTN Console, so flip back to the browser tab with the Device Overview page loaded up.
You'll notice that, by default, the Network Session Key and App Session Key fields are obscured for security reasons. You can click the eye icon to show the code before copying it. Also, it will be easier to copy this into the example code if you click the <> button to show the codes in "C style".
You will need to copy three separate numbers into your example code from this page: the Network Session Key, the App Session Key, and the Device Address. Here's a diagram explaining which field on this page corresponds to which constant in the example code:

You will also need to replace the pin mapping portion of the code, which correlates the pin definitions used by the lmic library with the physical connections on the Pro RF. Find the section labeled // Pin mapping and replace with the following:
// Pin mapping
const lmic_pinmap lmic_pins = {
    .nss = A5,
    .rxtx = LMIC_UNUSED_PIN,
    .rst = 4,
    .dio = {7, 10, 11},
};
With these constants replaced in your example code, you can upload it to your Pro RF and watch for data to come pouring in!
Watch for Data
The example code is designed to send the string "Hello, World!" once every minute. This is actually a pretty large string for LoRaWAN™ and you shouldn't allow the example code to run all day because it will eventually violate TTN's Fair Usage Policy. But don't worry too much about it, you can send a string the size of "Hello, World!" over 600 times in 24 hours before violating the policy.
To see the data arriving from your device, click on the Data tab in your device console. You should see a field labeled Application Data and after a minute or so, you'll hopefully see your first packet come through:
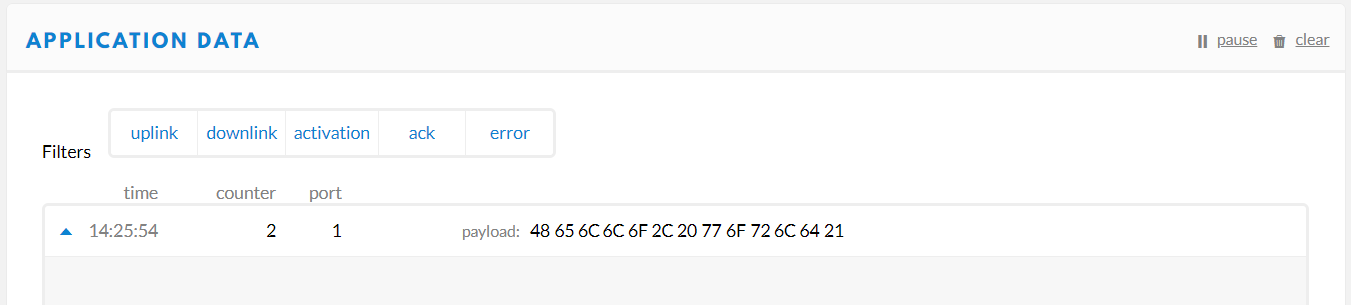
Congratulations! You just sent your first LoRaWAN™ packet to The Things Network, your node device is working!