LoRaWAN with ProRF and The Things Network
 Nick Poole
Registering Your Node
Before you can program your first node, you'll need to register a device on The Things Network. Registering allows the network to generate the necessary keys which you'll then place in your code so that the network recognizes your device.
Once you've logged into the console, you'll be presented with a screen like this:
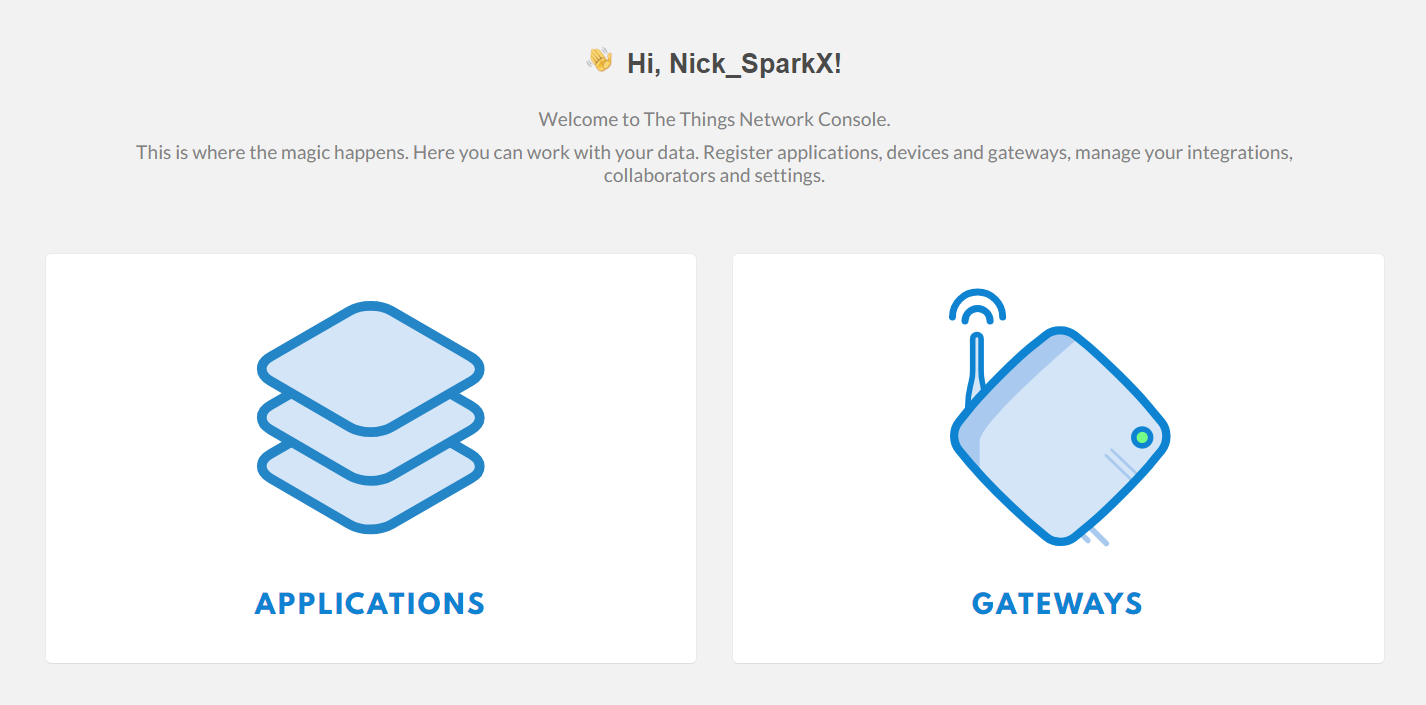
You'll notice that there's no option to just add a node, that's because The Things Network needs to know what application to associate with your device. Therefore, you'll need to start by creating an application. Clicking on the Applications button will take you to a page that looks like this:

This would usually be a list of all your applications, but The Things Network very helpfully recognizes that you don't have any applications yet and suggests that you add one. You can add an application either by clicking that link or clicking on "add application" in the upper right corner. Both of those links will take you to this page:
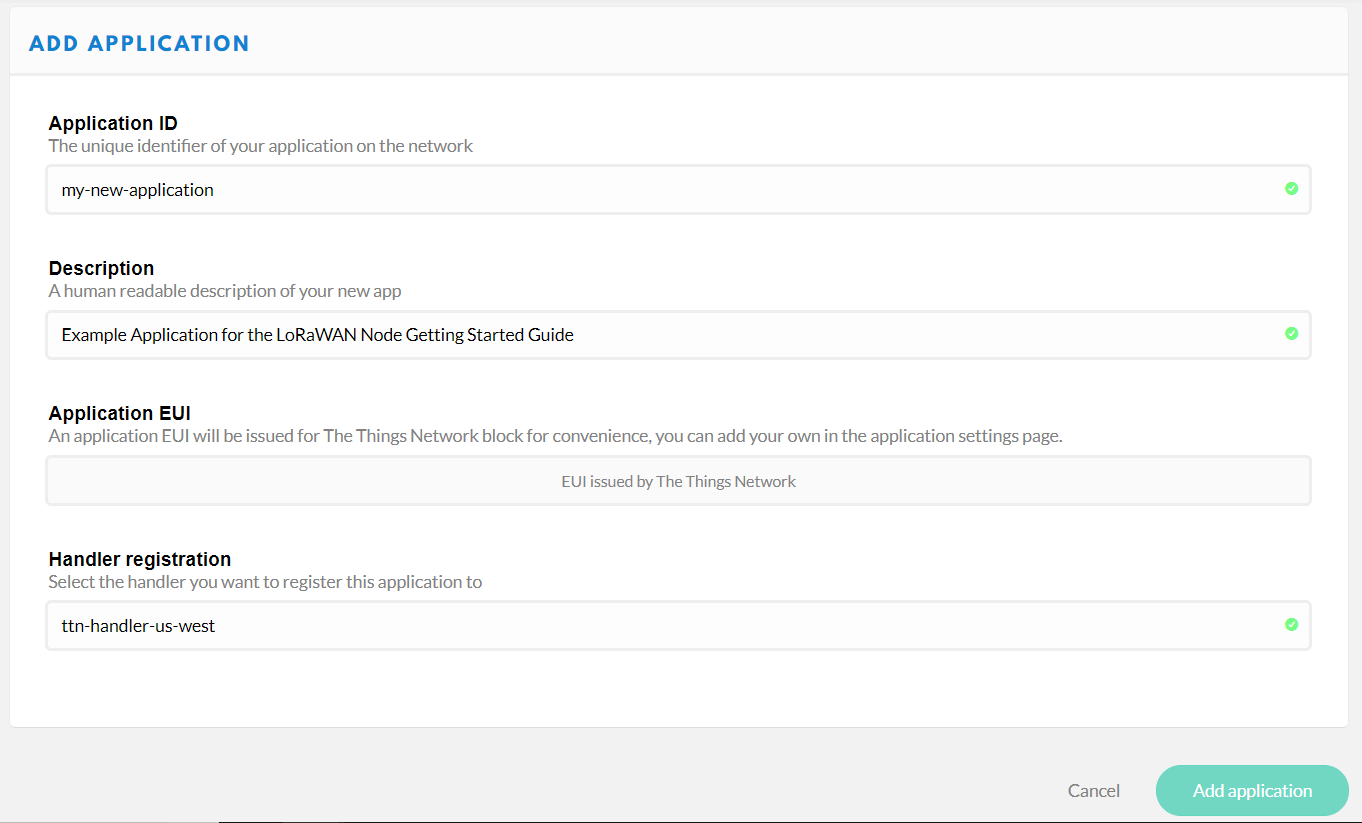
Give your application an Application ID; this is the name that The Things Network will use to distinguish it from the other applications. It can only contain lowercase letters, numbers, and dashes. The description field is for humans, so take a moment to write a sentence about what your app does. In this case, I've just written that it's an example application. The EUI will be issued by the network, so there's no need to type anything there. Finally, select the handler that you want your application to be registered to. Essentially, these are instances of the network server in different physical locations around the world. All applications will talk to all network servers, but to minimize latency, it's best to select the handler closest to your gateway. I'm in Colorado, so I chose "ttn-handler-us-west," which I assume is in California somewhere. Click the Add Application button and you'll be taken to your freshly generated application console.

Now that you've created an application, you can register a device to it. Scroll down to the Devices section of the application page and you will see your current device count (which is none) as well as options to register a device and to manage devices. Click on register device.
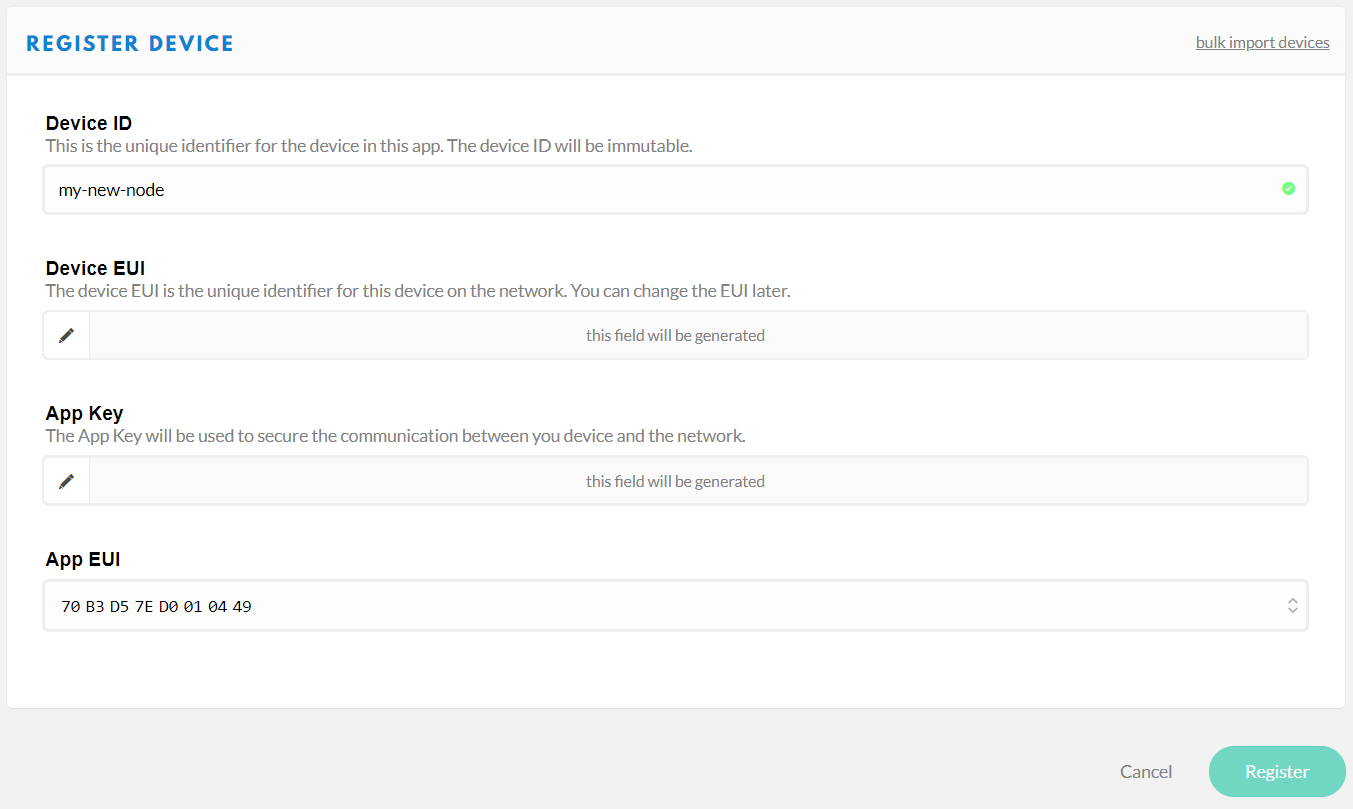
This form is pretty similar to the Register an Application page, but you have a little less to do. Give your device a Device ID, the same rules apply as did with the Application ID. Then click the little crossed arrows beside the Device EUI field, this lets TTN know that you want them to generate an EUI for you. Now just click on the Register button at the bottom of the form.
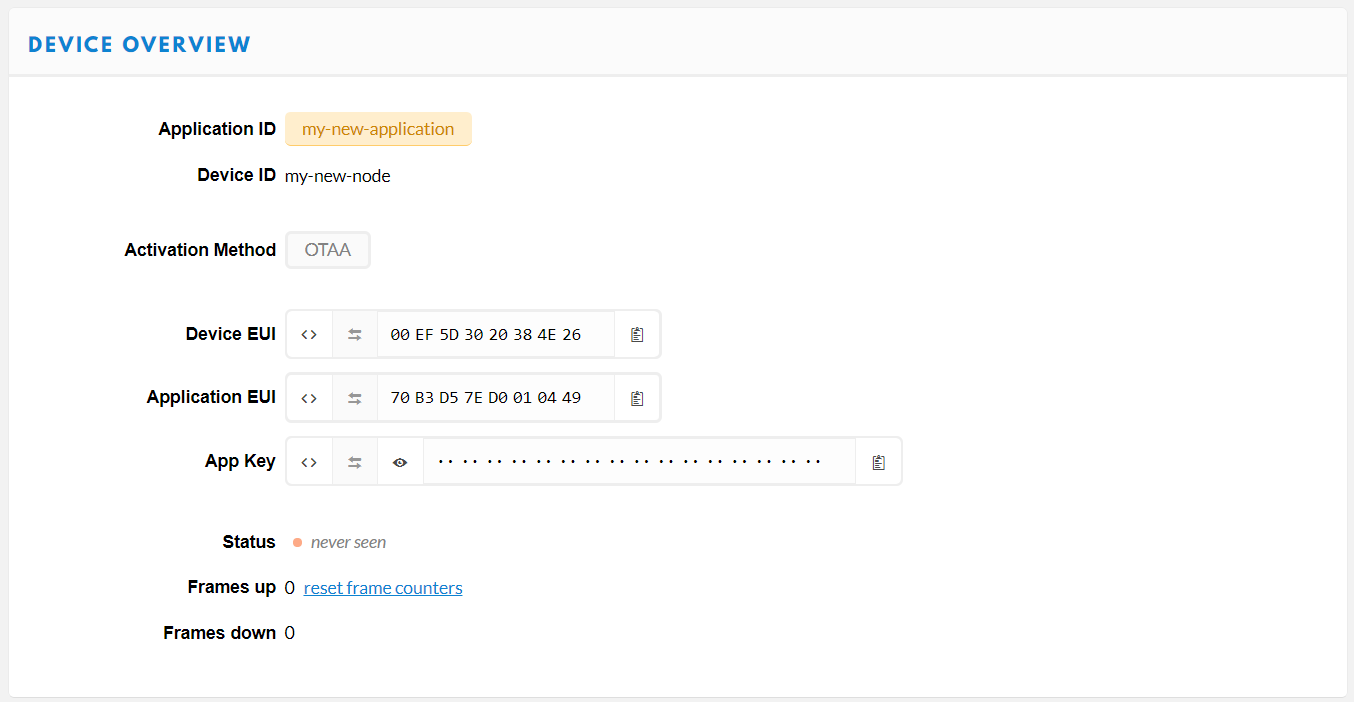
And now you've been taken to your brand new device console. Under the section labeled Device Overview you'll notice the Application ID and Device ID that you set earlier. Under Activation Method it will likely say "OTAA," which stands for Over The Air Activation. This is a secure, transportable method of activating LoRaWAN devices, whereby the device uses a known application key to request new session keys whenever it wants to join the network. This is the preferred method for activating a production device, but for prototyping it's usually easier to hard code the session keys into your device. In order to do this, we'll need to set the activation method to "ABP" or Activation By Personalization. To do this, click on the Settings tab in the upper right-hand corner of the device page and you'll be taken to the device settings menu. Partway down the page you should find an option to change the activation method.
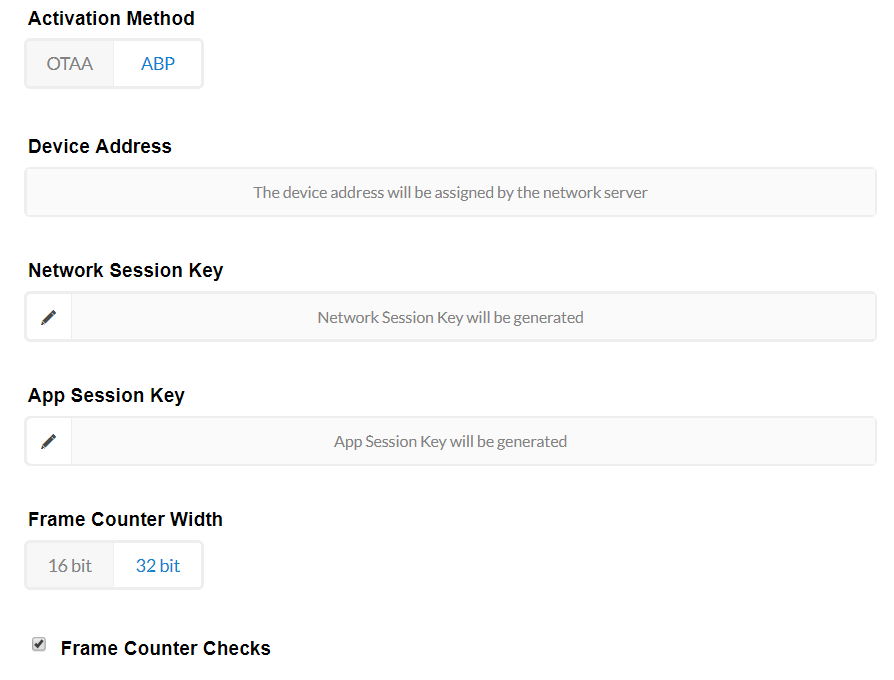
Click on "ABP," and then save your settings. When you return to the Overview page, you should now see some extra fields in the Device Overview:
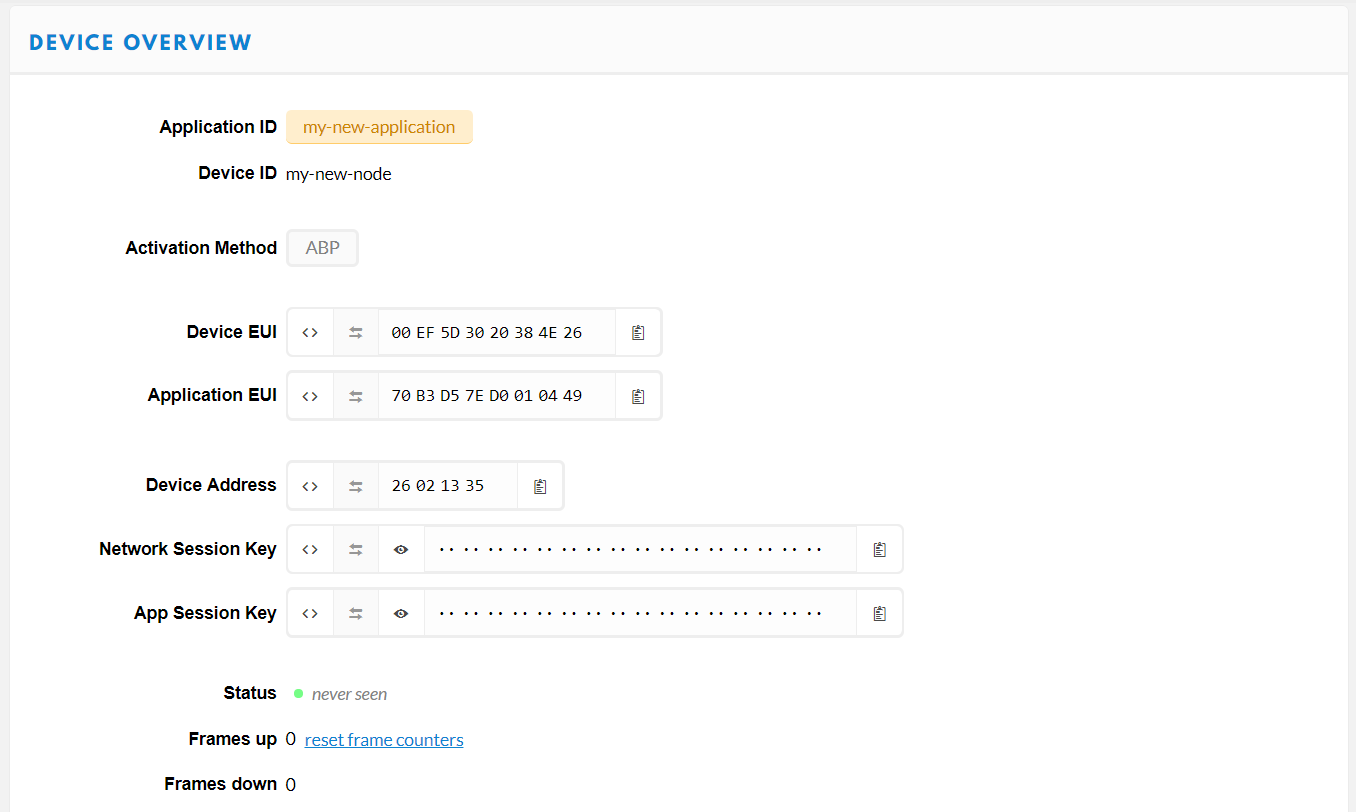
We'll need these numbers to program your Pro RF so leave this page up on your browser and let's open up the Arduino IDE. It's time to program the node!