LoRaWAN with ProRF and The Things Network
Example: IFTTT Integration
As an example of how to use Integrations, let's set up an IFTTT integration with our example application.
If you've never used IFTTT, go ahead and create an account. IFTTT is a pretty cool platform that allows you to combine services from around the web to automate all kinds of tasks. These combinations of services are called "recipes" and they take the form of "If This happens, then make That happen," and in our case, the This will be new data arriving in our application. First, head over to your TTN Application Console and click on the Integrations tab and then click "add integration".
Find the "IFTTT Maker" integration in the list. It looks like this:
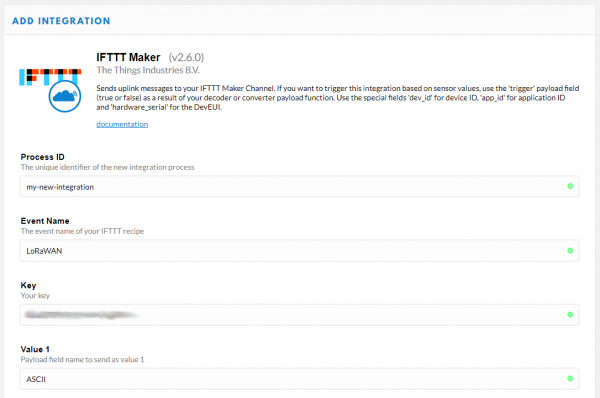
Clicking on that block will take you to the "Add Integration" form for this integration. The form has 6 fields:
Process ID -- This is a name that TTN will use to keep track of this integration. You can name it whatever you want, I'm calling mine "my-new-integration".
Event Name -- This is the name of the IFTTT "recipe" that you want to trigger whenever the application receives new data. Go ahead and name this something, just remember what you named it so we can call your IFTTT recipe the same thing.
Key -- This is your IFTTT Key. You can find this by going to the Maker Webhooks page on IFTTT and clicking on the Documentation button.
Value 1, Value 2, and Value 3 -- IFTTT Webhooks allow you to pass up to 3 values to your IFTTT recipe. In this case, let's pass our decoded payload to IFTTT. To do this, we put the name of the property that we want to pass into the Value field, so type "ASCII" into Value 1.
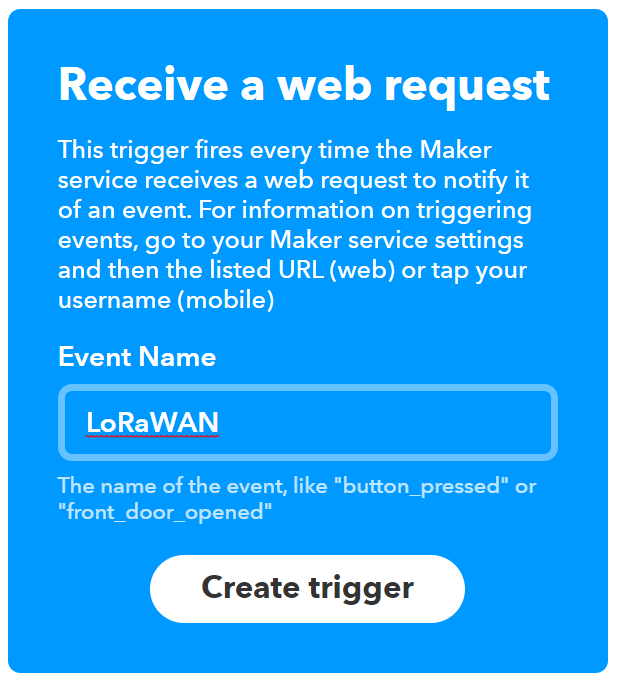
Alright, take note of the Event Name that you set, click the Add integration button and let's hop over to IFTTT. Get to the New Applet page and click on the +This in If +This Then That. You should now be looking at a list of all the services that IFTTT has triggers for... it's a lot. Click the "Webhooks" service and choose the Receive a Web Request trigger. This is where you'll enter the Event Name that we chose earlier when setting up the integration on TTN.
Click on Create Trigger and you'll be brought back to the Make an Applet page. Now click on +That to add an action for the trigger we just created. There are all kinds of triggers available for IFTTT, but let's do something simple for the purpose of this tutorial. Click on the Email service and select the Send Me an Email action. This will send you an email at the address that you used to sign up for IFTTT every time that new data comes in on your TTN application. You can even edit the body of the email. Notice that Value 1, Value 2, and Value 3 are ingredients in the email. Wherever you see that ingredient, it will be replaced with the appropriate value. In our case, Value 1 will be replaced with the value of ASCII. Click on Create Action and then Finish to start your new applet running.
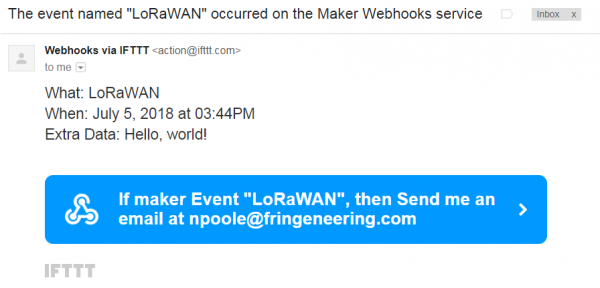
Now open up your email and plug in your Pro RF. After a few minutes, you should get an email from IFTTT!
Pretty. Darn. Cool.


