Logging Data to Google Sheets with the Tessel 2
 D___Run___
Firmware: Logging with IFTTT
Now that you have been logging data locally and then physically transferring it to your computer and then into Google Sheets, it is now time to simplify the process using IFTTT and the Maker Channel.

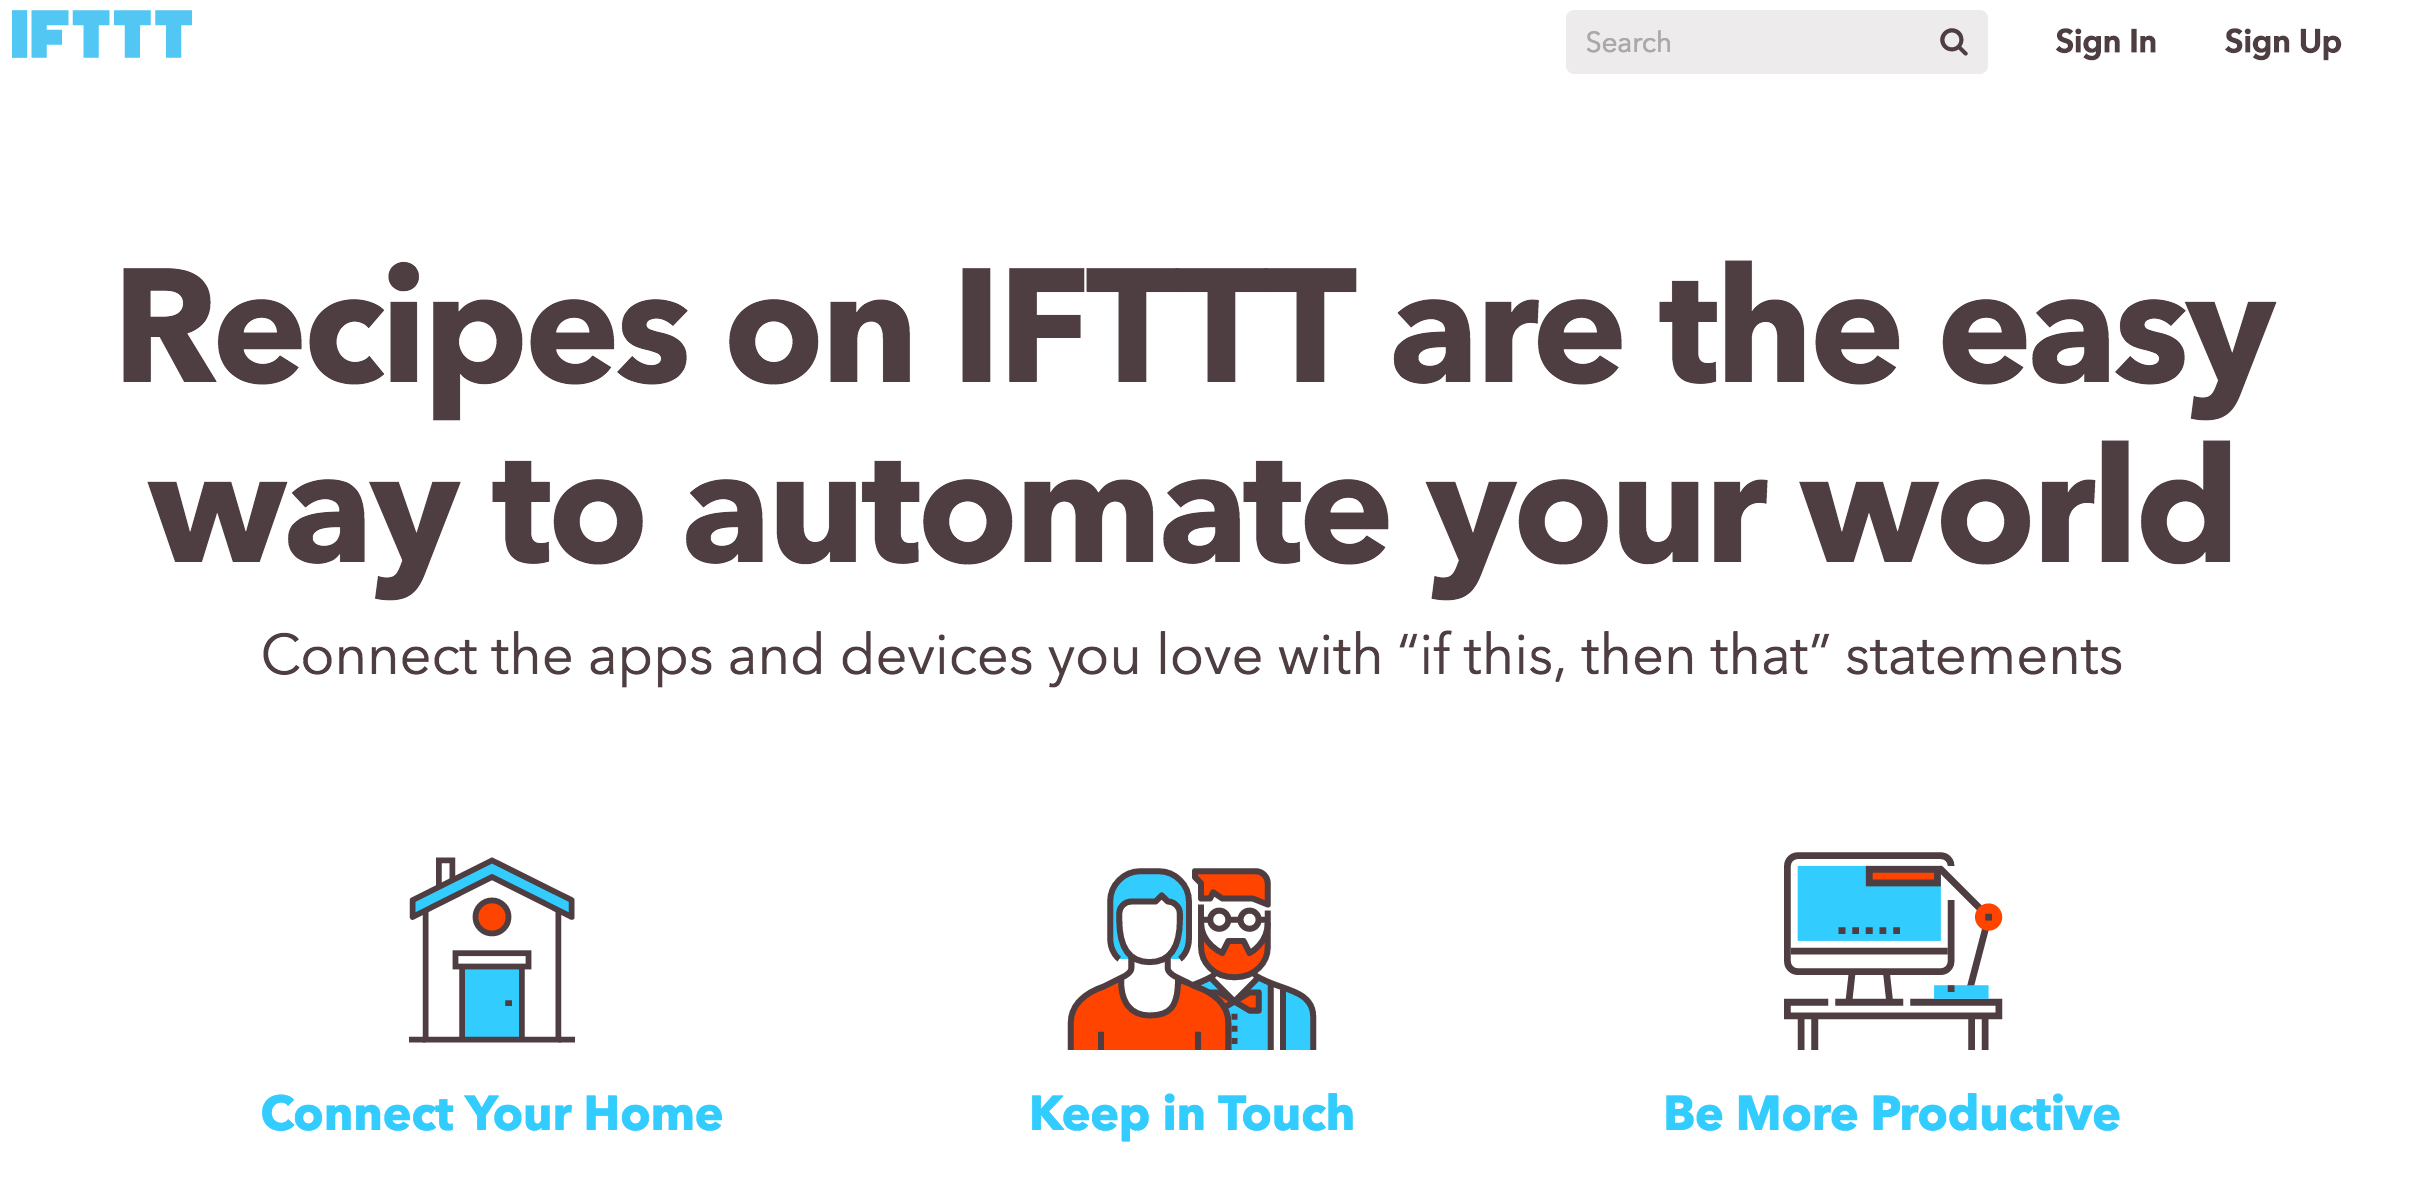
If you have never heard of If This Then That (IFTTT), it is a simplified software and web automation tool. It allows you, the user, to build what are called recipes, which consist of two channels, or services, and a trigger. Basically, as the name implies, if (this happens) then (do something). The things that happen or do something are different connected web apps such as Google Drive, Slack, Twitter and Facebook -- or even your Android phone. IFTTT allows you to connect all of these services in a simple way to harness the web to do work for you!
The Concept
This project is going to use IFTTT to do a lot of the work that we physically had to do in the File System version of this project. We will connect the Tessel 2 and its data to a Google Sheet using the IFTTT Maker Channel to send the data to sheets and populate the sheet in real time. Let's take a deeper dive into how this works!
The IFTTT Maker Channel works through making web requests. Web requests are essentially a way for you to ask a server for information. We can use this to our advantage and make a statement through making a request. Let's look at an example to make this a little clearer. Here is a web request URL used by the Maker Channel:
https://maker.ifttt.com/trigger/{event}/with/key/hhpANc1sDCoGpQ0-DfnbR_6g2WKLxwKSYvZDIRVGz5I?value1=123&value2=hello&value3=world
Let's break this into chunks and make sense of it.
The first part probably looks familiar to you: https://maker.ifttt.com/. This is the domain (ifttt) with a subdomain of maker. This is the structure of all websites. If you want to navigate to Google, you type www.google.com (google is the domain).
The second part is a little trickier. It looks like this: /triger/{event}/with/key/. This is stating a category of the domain (trigger) and a subcategory, which is {event}, and other subcategories of /with/key. These are all used to categorize what is happening. Basically we are causing a trigger with a name of {event} followed by the key.
The string of random numbers and letters is a private and unique key, the one used to start the trigger. It is assigned to you when you sign up for the Maker Channel. This allows for unique and safe events to be triggered without someone accidentally triggering someone else's project.
The final part of this puzzle is the query string ?value1=123&value2=hello&value3=world. A query string is the part of a URL that allows a request to look for specific data. Again, this is us making a statement through asking a question because we know what the server is looking for in terms of the questions asked. The Maker Channel allows us to send up to three different variables in this way, and they are named value1, value2 and value3. These values can be a string, a number, a Boolean state ... as long as it is data, you can store it in one of these three buckets. The query string starts with a question mark (?), and each query value is separated by an ampersand (&).
Phew, that is a lot to take in! The good thing is that IFTTT does a lot for us, and there is also a Node.js module to help us on the code side of things. Let's build the recipe first!
The IFTTT Recipe
Open a new browser window, and navigate to https://ifttt.com.
If you haven't signed up for IFTTT, you can do so at this point. Don't worry; we will wait for you.
Once you have signed up, you can start to build a recipe. You can start by clicking on the "Channels" menu button at the top of the page and then searching the channels for "Maker."

When you find the Maker Channel, select it. You will end up on the landing page for the Maker Channel. To use the Maker Channel, you have to connect your IFTTT account to it. Cclick on the 'Connect' button.
Once your account is connected you will be assigned a key. This key will be really important as we start to use the Maker Channel. You can always come back to your account to copy and paste the key, but you can also copy and paste it into a text document for now.
Now, let's create a recipe! Click on the 'Create Recipe' Button, and you will be confronted with the fun 'If This Then That' interface. The 'This' is a hyperlink. Click on it.

Search for and find the Maker Channel again, and select it. You only have one option in terms of triggers for the Maker Channel, to make a web request. Select that trigger.

From here, you name your trigger. We named ours 'DataLog'.
When you accept a name, you will then get to select the 'That' of your recipe.
Search for 'Google Drive' for your 'That' event (it should be one of a few options).

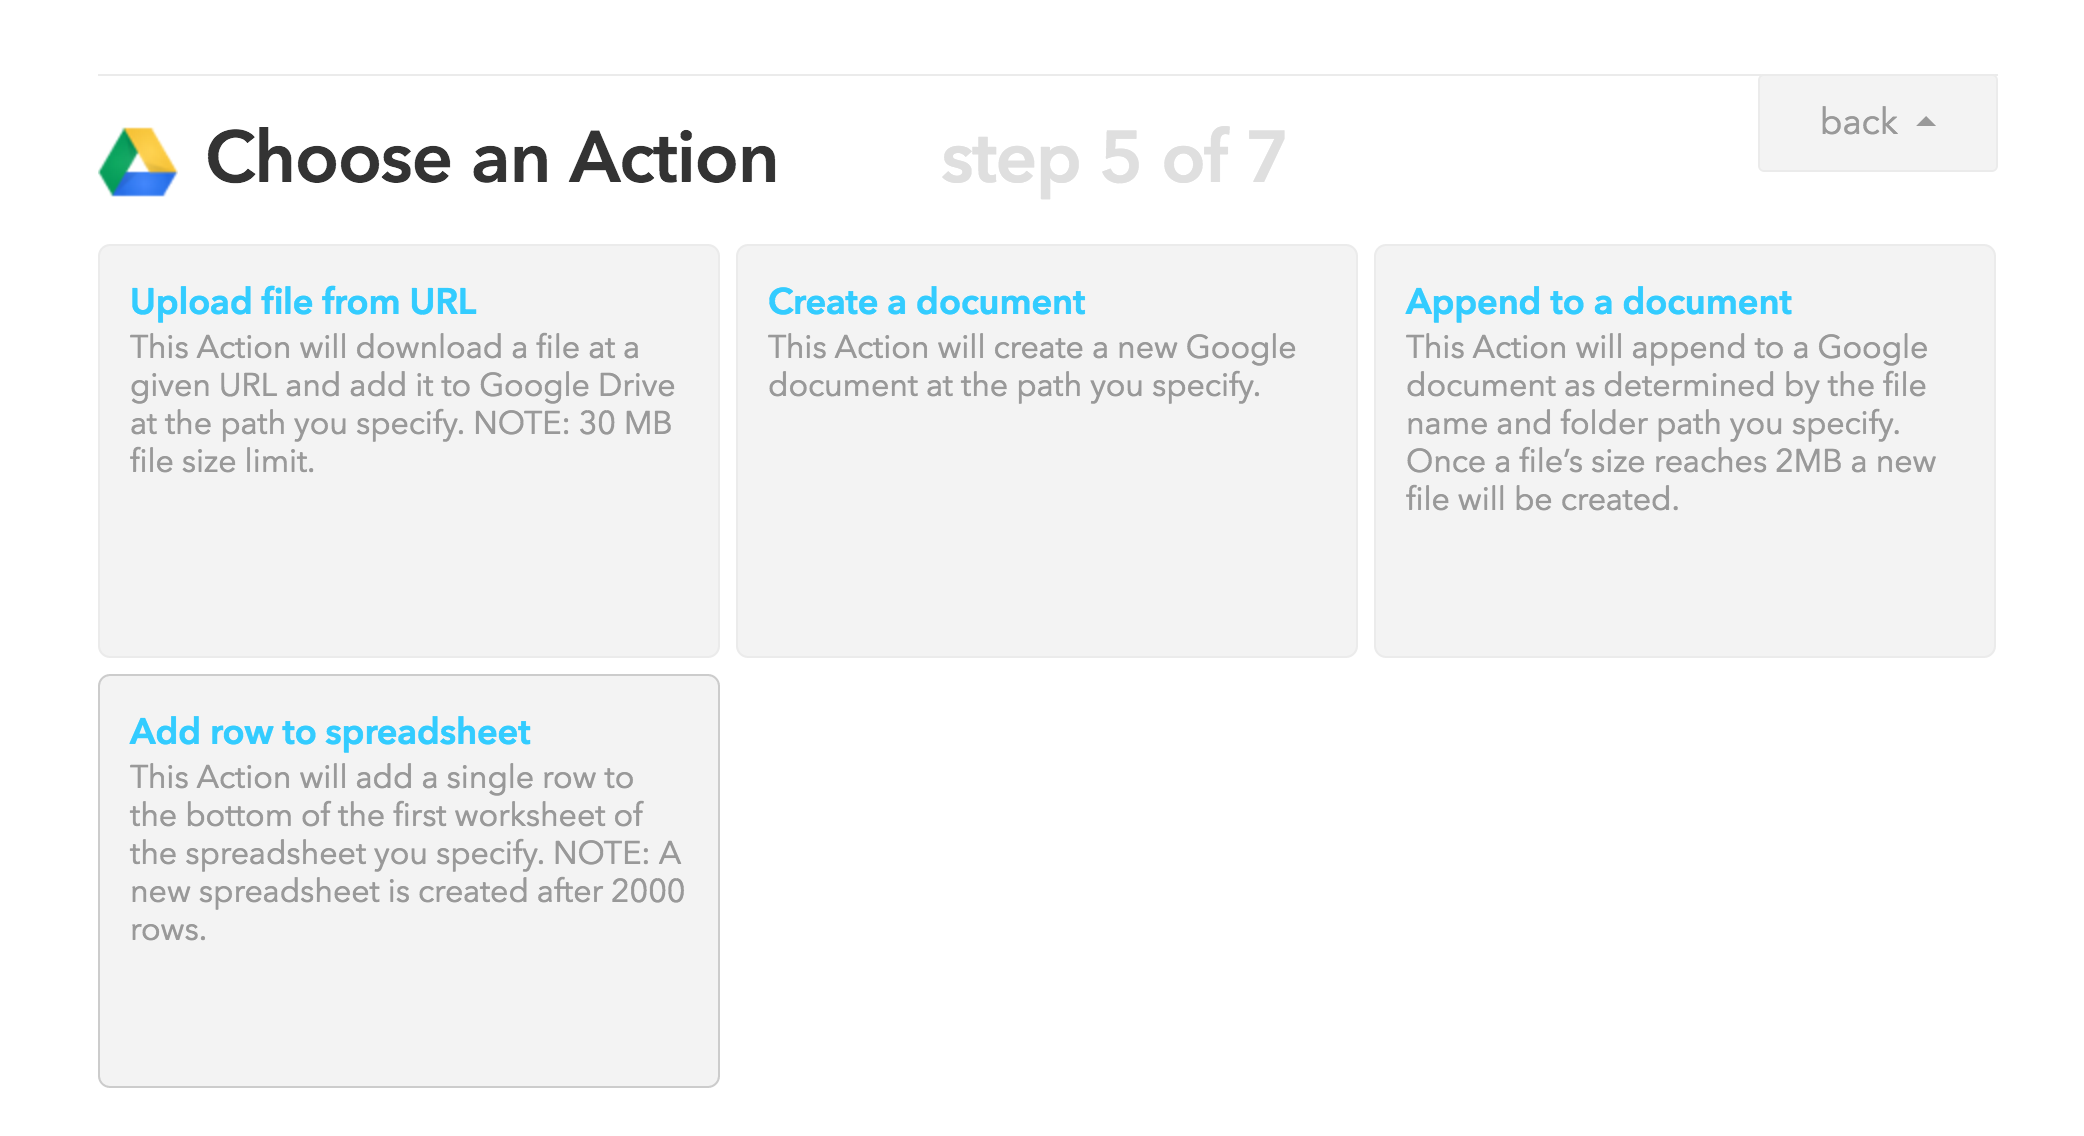
Unlike the Maker trigger, where you only had a single option, the That for Google Drive has a number of options. You want to select the 'Add Row to Spreadsheet' option.
Ok, we are almost done! This next step allows you to name your spreadsheet and do some formatting of what the different columns of data will be. We will make a slight modification to the standard format by removing the event name from the rows, as this would be redundant and useless information for this example.

With that, the recipe is complete, and you should now be looking at an overview page.
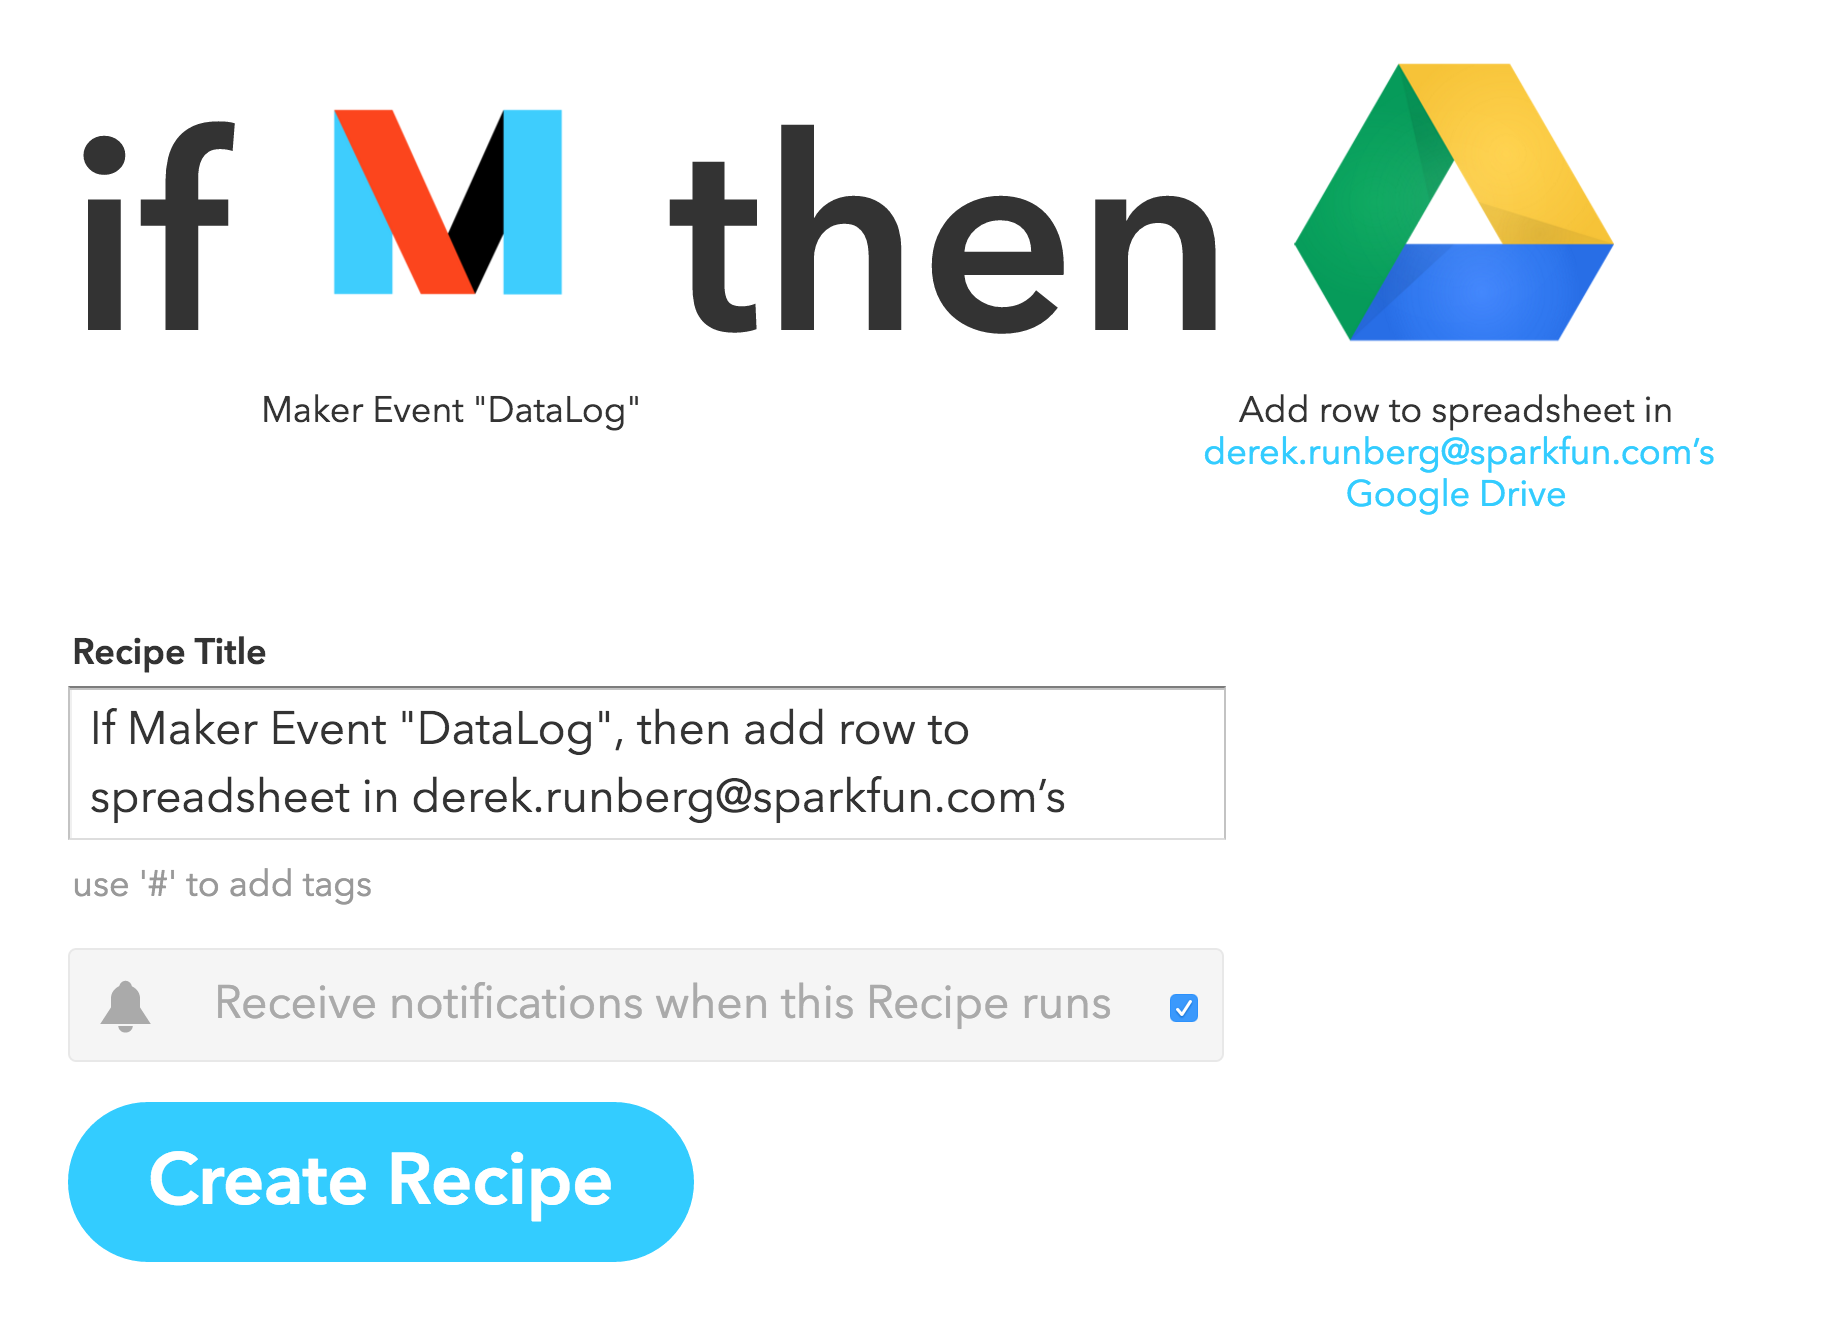
This page will be accessible to you any time you come back to your IFTTT account under your recipes. You can then modify it as needed later on. Bam! You are done with your first IFTTT recipe! Now, let's write some code to put it to good use.
The Code
How are we going to integrate JavaScript with IFTTT?
You may have guessed it -- there is module for that!
We will be using the node-ifttt-maker module to make it as easy as possible to make web requests from the Tessel 2. First thing, we have to install the module into our project directory. If you haven't done so already, open up your terminal and navigate to your loggerProject directory. To install the module, type the following command:
npm install node-ifttt-maker
At this point, you don't need to install any other modules, as we have already installed johnny-five and tessel-io with our preflight check. You can now create a script for this project by typing the following into the terminal prompt:
touch iftttLog.js
With the file created, go ahead and open it in your text editor and type -- or copy and paste -- the following code into the file:
language:javascript
var five = require('johnny-five');
var t2 = require('tessel-io');

var IFTTT = require('node-ifttt-maker');

var ifttt = new IFTTT('<YOUR MAKER KEY>');

var board = new five.Board({
  io: new t2()
});

var temp, humidity;
const interval = 5;
board.on('ready',()=>{
  var atmos = new five.Multi({
    controller: 'BME280',
    freq: (interval*60000)
  });


  atmos.on('data', ()=>{
    temp = this.thermometer.fahrenheit;
    humidity = this.hygometer.relativeHumidity;

    var reqInfo= {
      event: 'gardenLog',
      method: 'GET',
      params: {
          'value1': temp,
          'value2': humidity,
       }
    }

  ifttt.request(reqInfo, (error)=> {
      if (err) {
        console.log(error);
      }
      else {
        console.log('---OK---');
      }
    });
  });
});
Make sure you save this file!
Open up your terminal window, and navigate to the project folder for this project to deploy the script to your Tessel 2. Type the following command to do so:
t2 run iftttLog.js
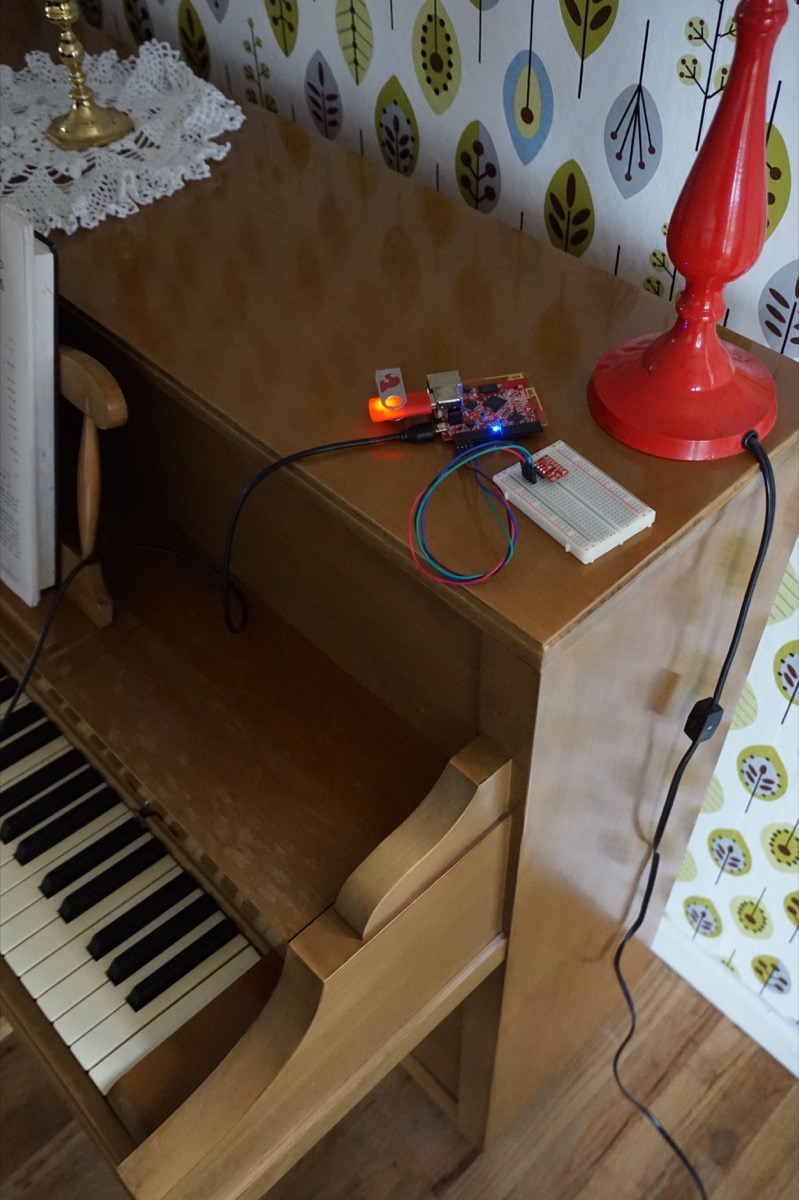
If everything is set up correctly, you should be greeted with the REPL prompt, and, in five minutes, you should get a ---OK--- logged. This should repeat every five minutes. Make dinner, sit back and crack open a cold one, or play a video game for a while to build up a few logs.
While you are building up a body of data in the ethers of your Google Drive, let's take a closer look at the code that you just ran.
Code to Note
language:javascript
var IFTTT = require('node-ifttt-maker');
var ifttt = new IFTTT('<YOUR MAKER KEY>');
As with all Node.js modules, you need to require the node-ifttt-maker module. You then create an ifttt object of the IFTTT class, and you pass your maker key as a string to this. This is really nice because you only need to include your key once, and only once.
  language:javascript
  var reqInfo= {
  event: 'pianoLog',
  method: 'GET',
  params: {
      'value1': temp,
      'value2': humidity,
      }
   }
The Johnny-Five code is all the same from the previous version of this project. The main difference between the two scripts is what happens in the atmos.on() method. In this script, we create an object that contains all of the IFTTT web request information. This includes the event name as a string (pianoLog) and the method for making the request (do not change this from GET). It also includes the three parameters we want to log as value1, value2 (You can pass up to 3 values using the IFTTT Maker channel, for this example with are only using 2). We define each of these as the two variables temp and humidity, and they will be updated with those variable values each time the data event is fired. Building the object in this way will keep the actual request method cleaner and allows for a more straightforward way of defining things.
  language:javascript
  ifttt.request(reqInfo, (error)=> {
      if (err) {
        console.log(error);
      }
      else {
        console.log('---OK---');
      }
  });
The actual ifttt.request() method is pretty simple. You pass the reqInfo object that you just defined previously and then a callback that we use for error checking. If there is an error, it will log the error to the console, otherwise it logs ---OK--- to the console and the web request was successful!
Viewing Your Data in Sheets
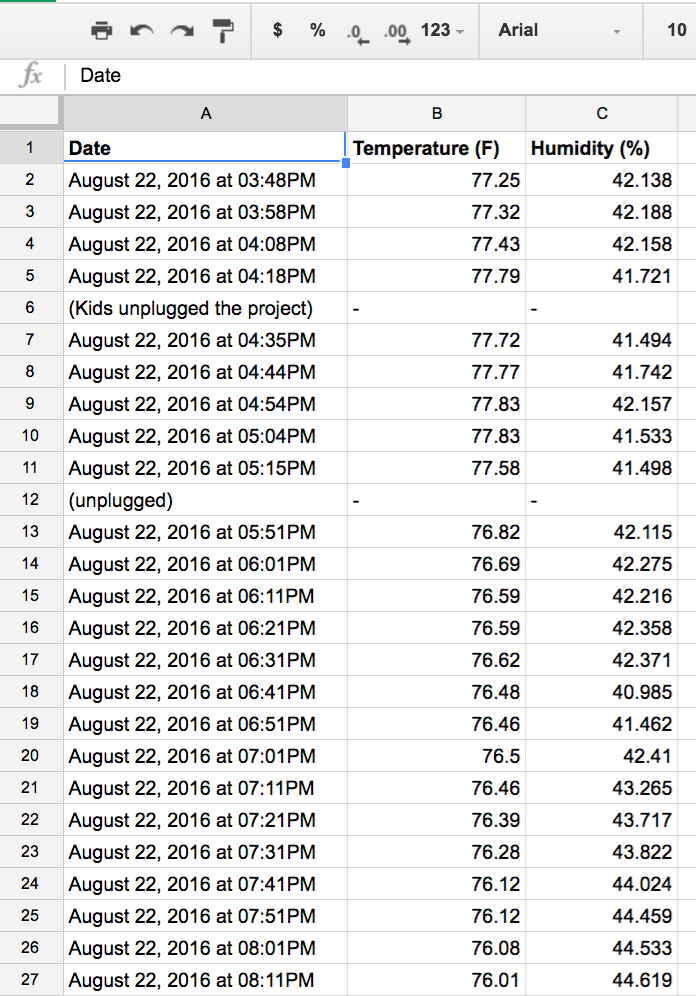
You can now navigate to your Google Drive. In your Drive, you should now have a folder that is called IFTTT. Navigate to IFTTT, and open the Maker folder inside of that. You should now have a Sheets document named pianoLog or whatever you named your event.
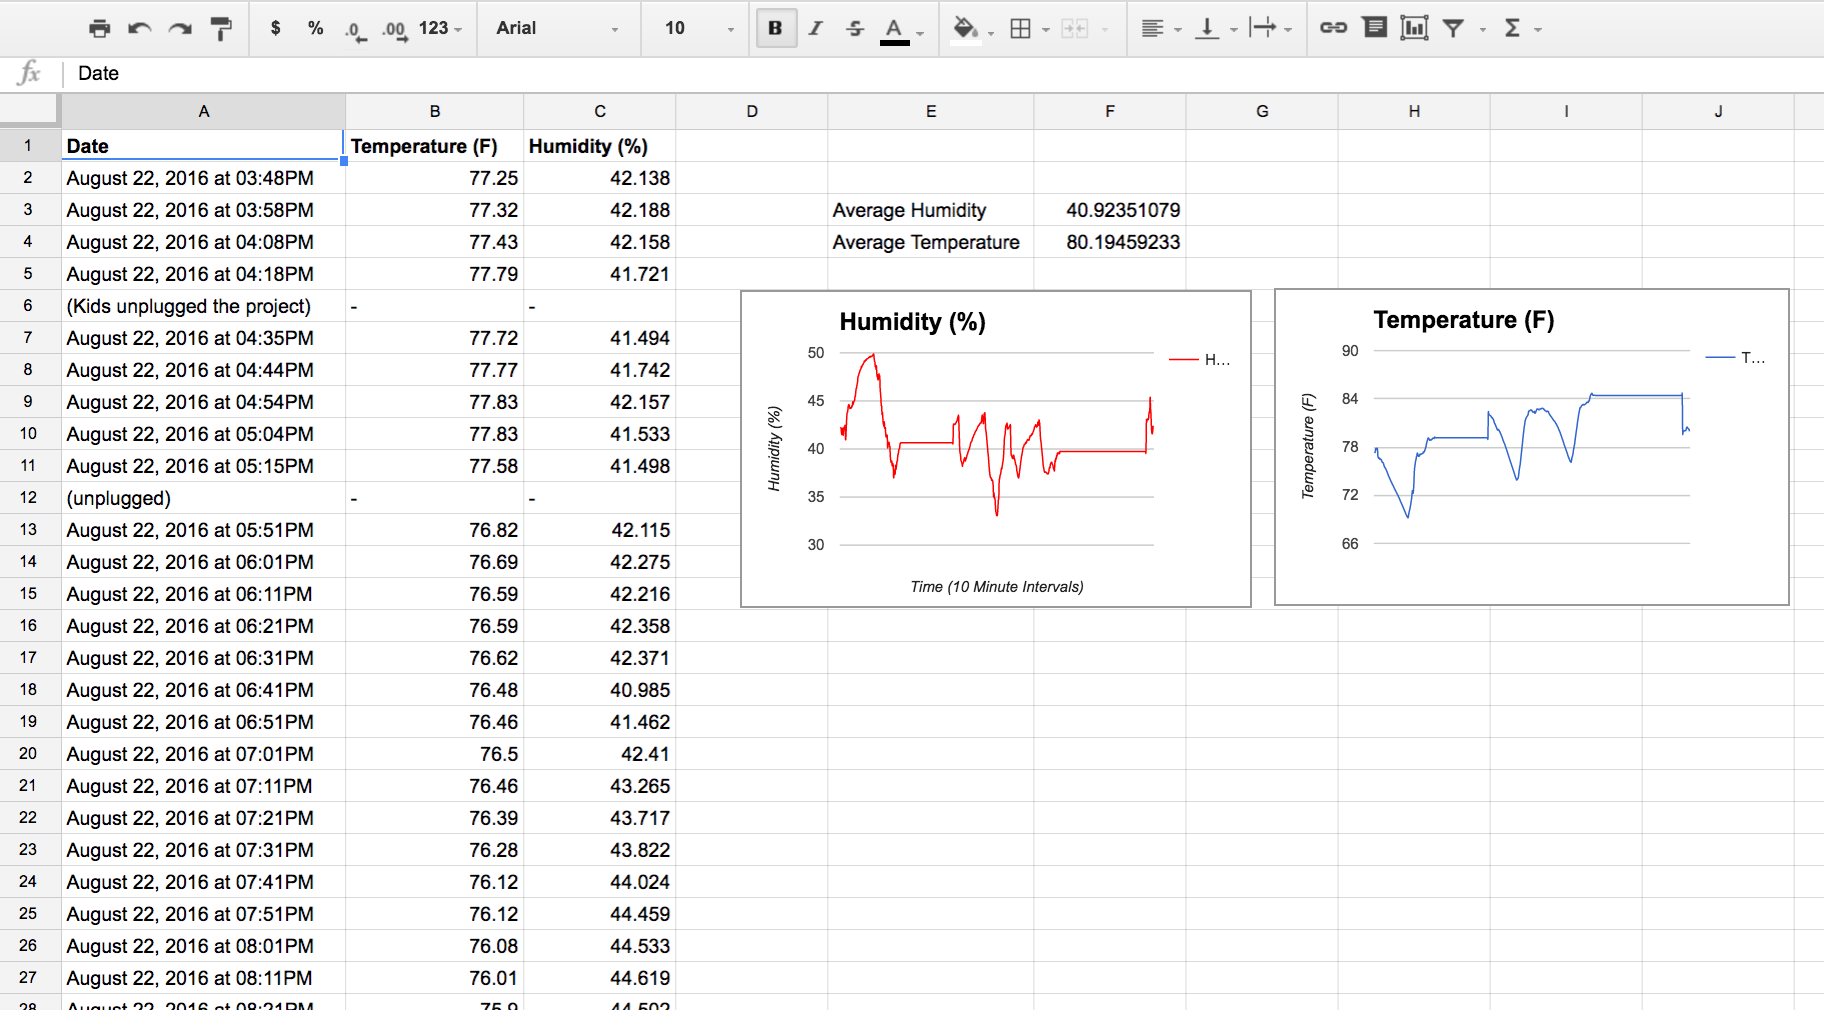
Open your pianoLog sheet, and your logs should be visible in the spreadsheet similar to the following screen capture (with the exception of my notes where my kids decided to be smart and unplug the project):
You can now go through a similar process of graphing. This is similar to the USB drive method of logging in terms of graphing this data or using other analysis tools. Here is a the graph of my data over a few days of logging the data.