Logging Data to Google Sheets with the Tessel 2
 D___Run___
Building the Circuit
Despite your method for logging the data, your circuit will be the same, with the exception of adding a USB storage device to one of the USB ports on the Tessel 2 for the offline method.
Build the BME280 Circuit
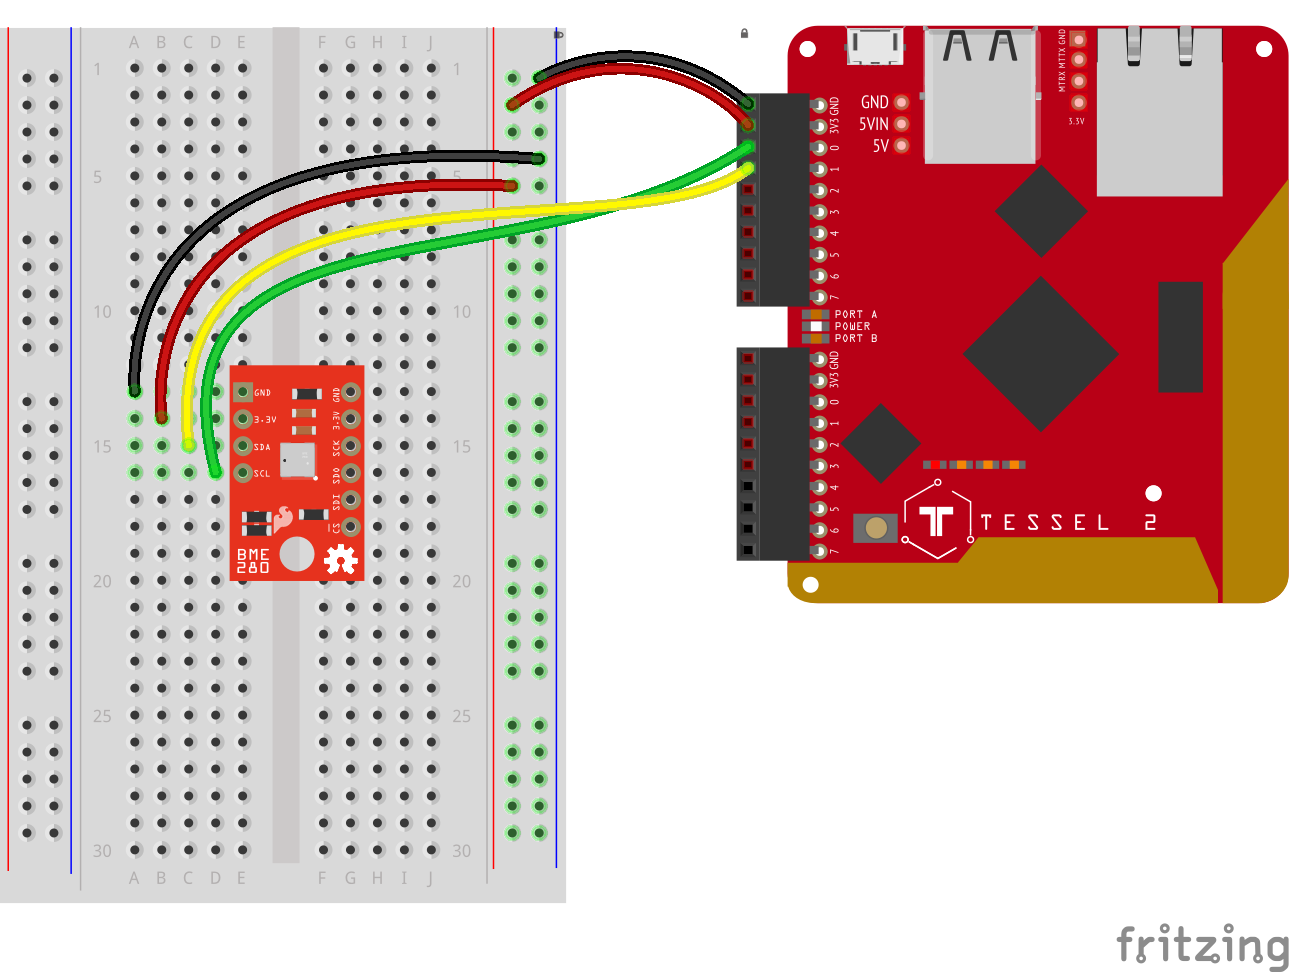
This circuit is faily simple. Attach the BME280 breakout board to the breadboard so that it spans the center notch. Connect the BME280's SCL (clock) pin to Tessel's Port A, Pin 0. Connect the SDA (data) pin to the Tessel's Port A, Pin 1. Connect 3.3V to the Tessel's 3.3V pin and GND to GND.
Testing the BME280
Before we move on to the larger project, let's take a second to test the BME280 to make sure it's up and running. From the command line, create a new file called bmeTest.js by typing the following command:
touch bmeTest.js
Open your favorite code editor, and navigate to your bmeTestjs file to edit it. Type—or copy and paste—the following JavaScript code into your bmeTest.js file:
language:javascript
var Tessel = require("tessel-io");
var five = require("johnny-five");
var board = new five.Board({
  io: new Tessel()
});

board.on("ready", () => {
  var monitor = new five.Multi({
    controller: "BME280"
  });

  monitor.on("change", function() {
    console.log("thermometer");
    console.log("  celsius      : ", this.thermometer.celsius);
    console.log("  fahrenheit   : ", this.thermometer.fahrenheit);
    console.log("  kelvin       : ", this.thermometer.kelvin);
    console.log("--------------------------------------");

    console.log("barometer");
    console.log("  pressure     : ", this.barometer.pressure);
    console.log("--------------------------------------");

    console.log("altimeter");
    console.log("  feet         : ", this.altimeter.feet);
    console.log("  meters       : ", this.altimeter.meters);
    console.log("--------------------------------------");
  });
});
To Deploy Code Over WiFi:
- Connect your Tessel to the same WiFi network as your computer t2 wifi -n[SSID] -p[PASSWORD]`
- Make sure that your Tessel is provisioned and shows up in your list of Tessels using t2 list. See the Hardware Installation and Setup for how to provision your Tessel if it doesn't show up in your list.
- Deploy your code using the
--lantag. Example: t2 run mycode.js --lan
Type—or copy and paste—the following into your terminal:
t2 run bme.js
What You Should See
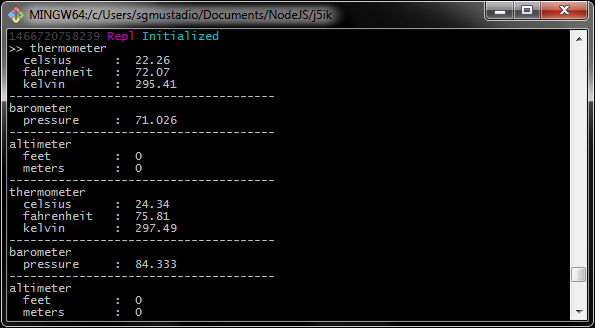
This is going to print a lot of data to your console, very quickly—so quickly that you likely won't be able to make sense of it! Go ahead and exit the program by typing Command-C or Control-C. This will stop the script so you can read the output.
Code to Note
Once the board has emitted the ready event, hardware inputs are ready for interaction, so the first thing that occurs is an instantiation of a Multi object. Multi objects represent two or more components, usually sensors, that are packaged together and exposed via a single register. Multi and IMU (Inertial Measurement Unit) boards that combine multiple movement sensors like accelerometers, gyroscopes, etc.) are very similar; the latter is used for non-motion-related packages.
language:javascript
var monitor = new five.Multi({
  controller: "BME280"
});
Now that we have a monitor Multi instance, the next thing to do is register an event handler to be invoked whenever changes are detected in the sensor readings:
language:javascript
monitor.on("change", function() {
  // ...
});
Within that handler, we're logging all of the relevant data properties for this multicomponent package:
language:javascript
console.log("thermometer");
console.log("  celsius      : ", this.thermometer.celsius);
console.log("  fahrenheit   : ", this.thermometer.fahrenheit);
console.log("  kelvin       : ", this.thermometer.kelvin);
console.log("--------------------------------------");

console.log("barometer");
console.log("  pressure     : ", this.barometer.pressure);
console.log("--------------------------------------");

console.log("altimeter");
console.log("  feet         : ", this.altimeter.feet);
console.log("  meters       : ", this.altimeter.meters);
console.log("--------------------------------------");
... which is a lot of data and will likely overwhelm the terminal, so be ready to type Command-C or Control-C to end the program.
OK, everything works! Let's now explore how to log all of this data!