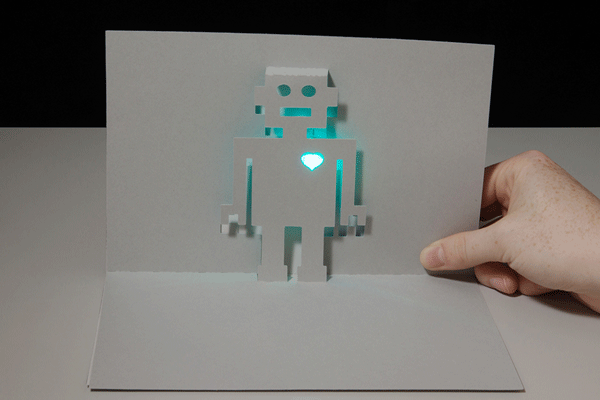
LED Robot Pop Up Card
Contributors:
 Gella
Gella
Gella 
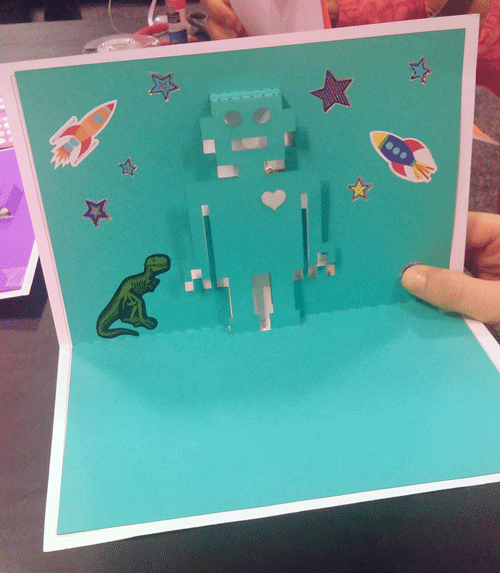
Step 7: Decorate and Customize
After assembling, use a marker or stickers to indicate where the button should be pressed on the top layer. Add extra decorations and embellishments to make your project unique!