Jetson Nano + Sphero RVR Mash-up (PART 2)
Example 1: JetBot Camera Test
To get your feet wet with Jupyter Notebooks and make sure things are up and running on the Jetson Nano itself we are going to do a quick camera test using the Leopard camera mounted on the RVR.
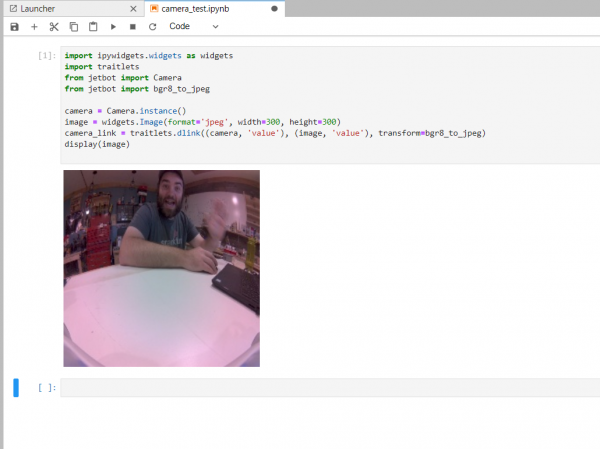
You can open the Camera_Test.ipynb Notebook from the RVR directory you just downloaded. Once it opens make sure you are running it with a Python3 Kernel and click the run button for the code cell.
If all goes well, you should see a live camera feed from the camera on the front of your Jetson Nano RVR Bot. Awesome! The camera works on your robot and our next step is getting this up and moving like a real robot!
If you are having trouble getting the camera feed to work consecutive after shutting down a kernel and trying to rerun it, we recommend opening the terminal window and running the following command to reset your camera...
sudo systemctl restart nvargus-daemon
Code to Note
If you have programmed a JetBot before or even created a program in Python this code shouldn't be anything new to you. We start out by importing the required Python packages for using both the Jupyter Notebook Widgets as well as the JetBot Camera.
language:python
import ipywidgets.widgets as widgets
import traitlets
from jetbot import Camera
from jetbot import bgr8_to_jpeg
Once everything is imported we instantiate a camera object and an image widget. We set the size and format of the image widget at this time.
language:python
camera = Camera.instance()
image = widgets.Image(format='jpeg', width=300, height=300)
Finally we create a digital link between the input of the camera frame and the output of the image widget. This makes piping complex data from something like a camera to a basic output like displaying that image in Notebooks much much simpler.
language:python
camera_link = traitlets.dlink((camera, 'value'), (image, 'value'), transform=bgr8_to_jpeg)
Once that link is made we display the image with the display() function.
language:python
display(image)
