Jetson Nano + Sphero RVR Mash-up (PART 2)
 D___Run___
 Introduction
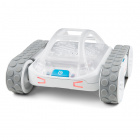
Welcome to the second part of our two part tutorial around mashing up two robotics kits; our SparkFun JetBot AI Kit v2.1 Powered by Jetson Nano and our SparkFun Advanced Autonomous Kit for Sphero RVR into a single robot project.

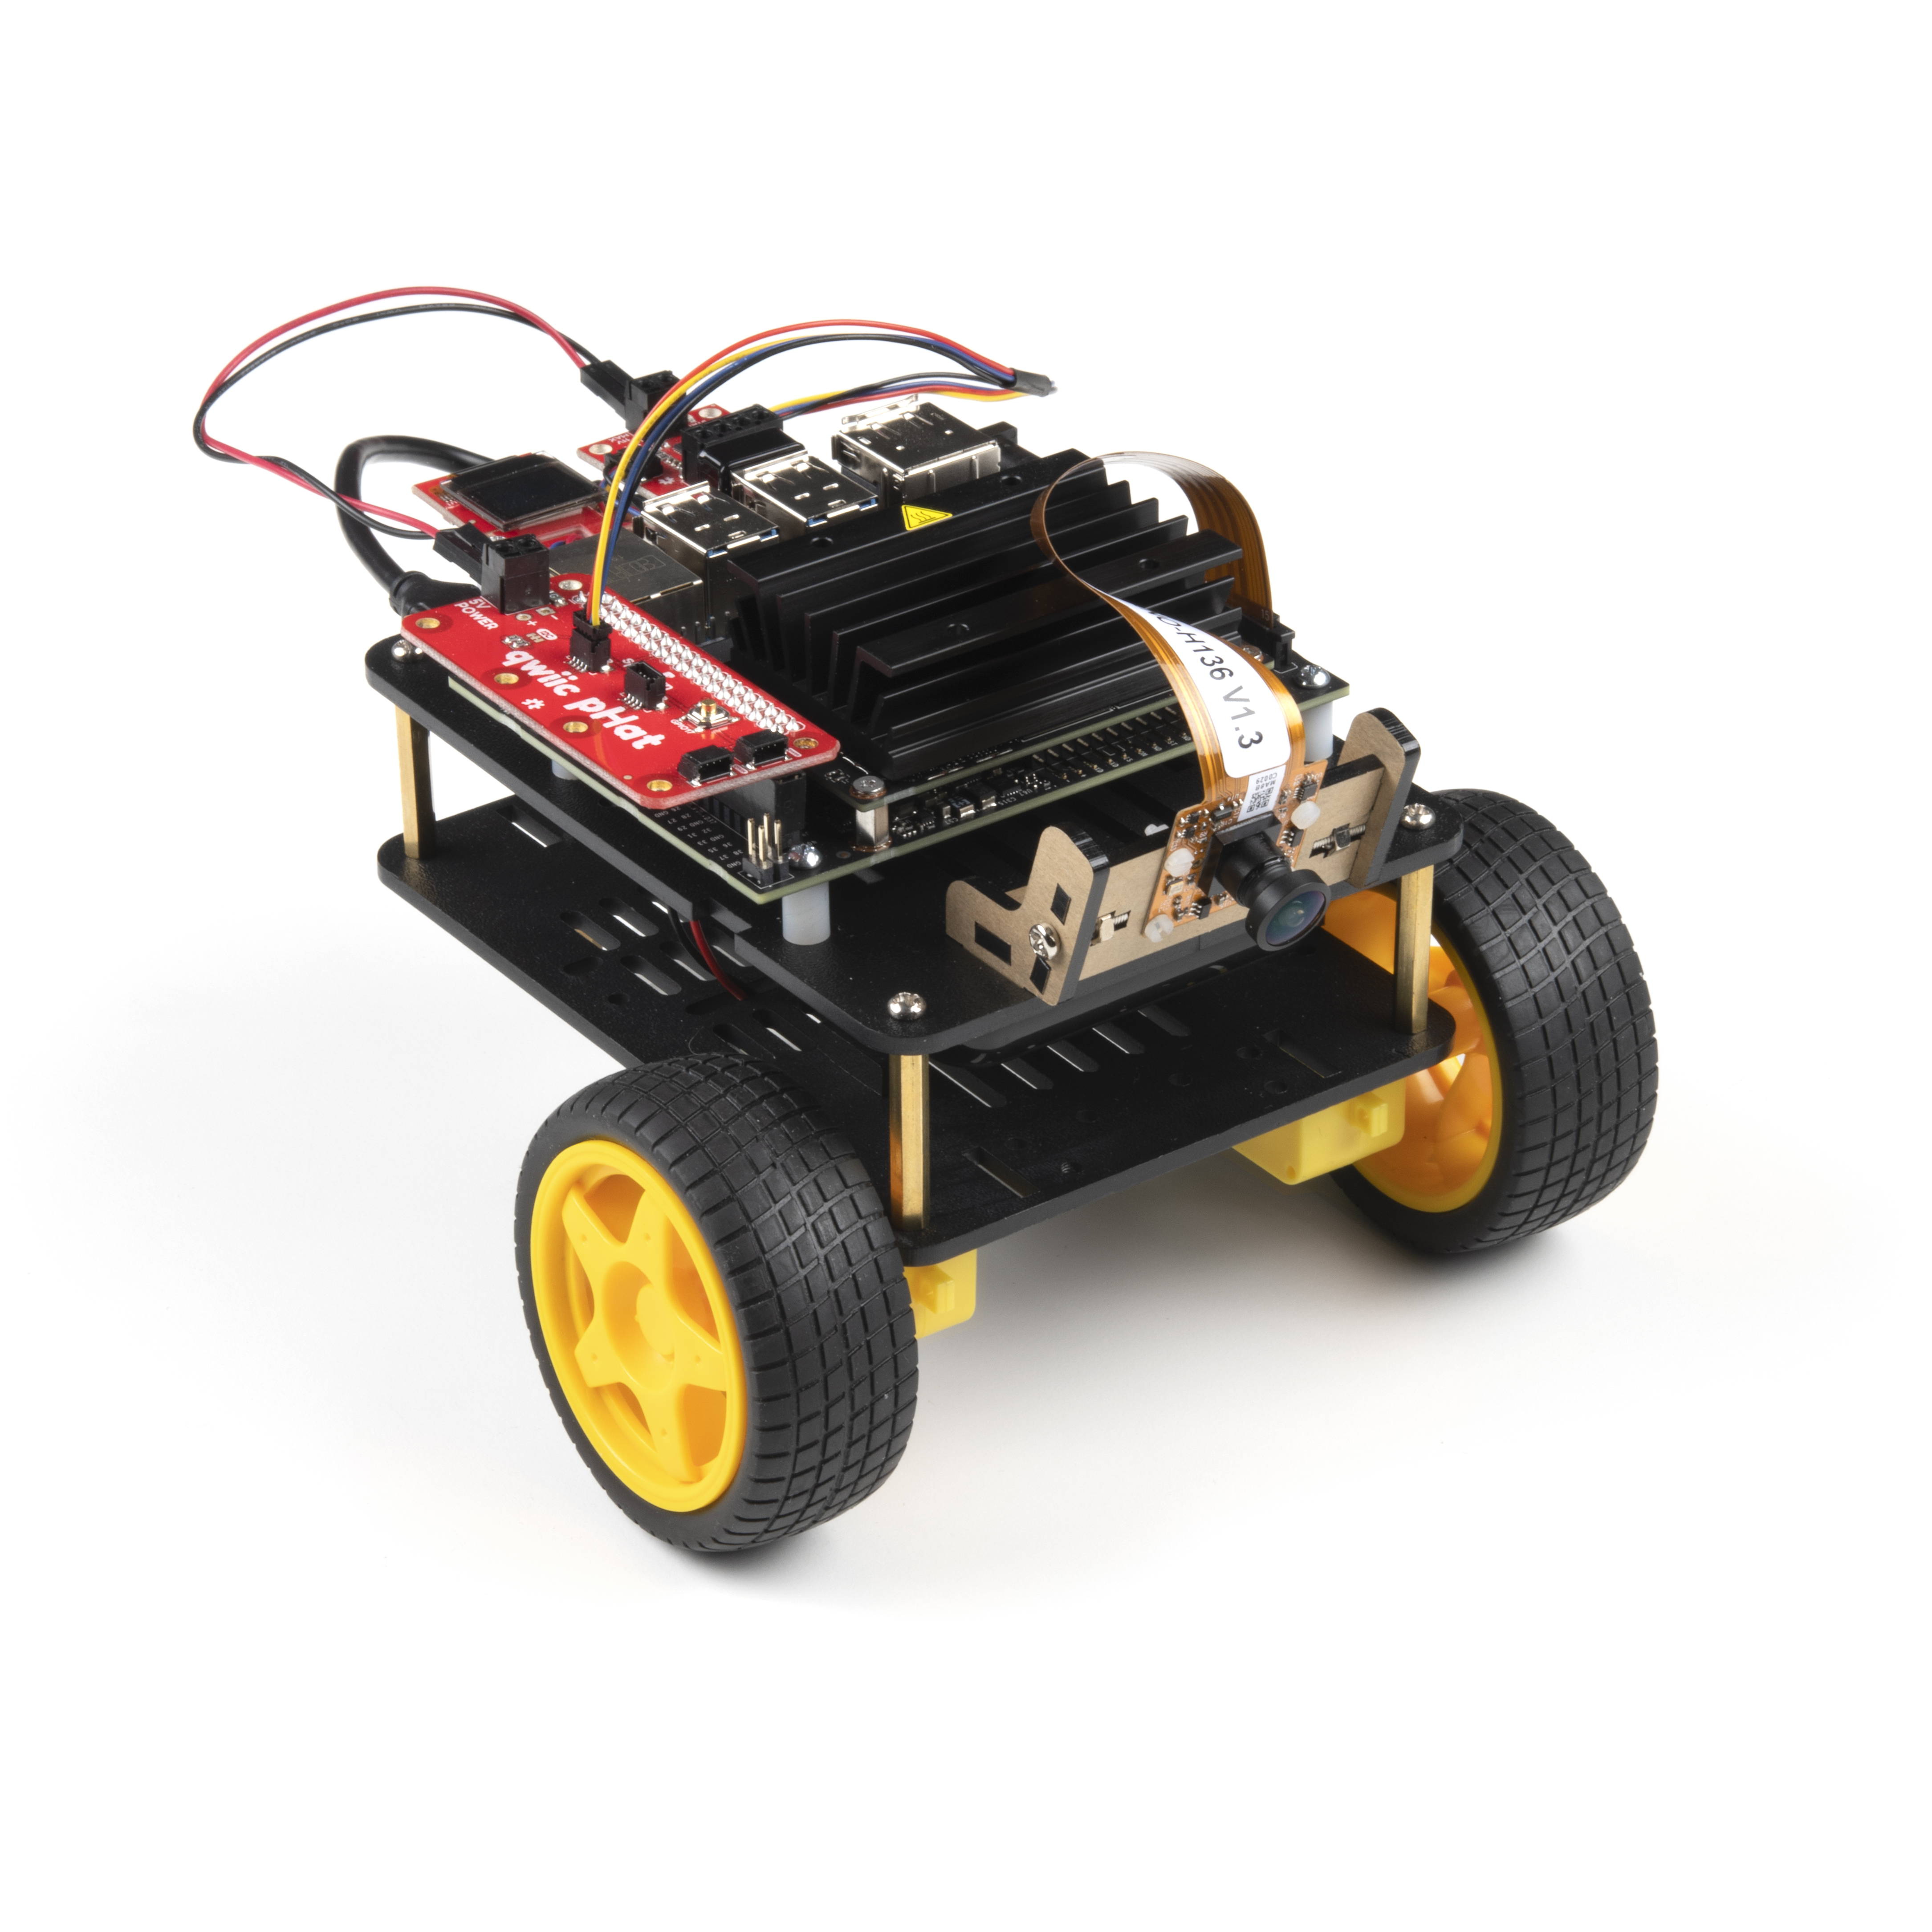
In the first tutorial we assembled the robot from parts and pieces from the two kits on top of a Sphero RVR, using it as our driving base and offloading the computation and control to the NVIDIA Jetson Nano. As a recap here are the steps we took to get this far:
- Mounted the Jetson Nano on the standard topper plate for the RVR.
- Combined and assembled the Qwiic pHAT and Qwiic OLED on the Jetson Nano.
- Mounted and hooked up the camera.
- Add the microSD card with the JetBot image and Edimax WiFi Adapter to the Nano.
- Added a battery and powered up the NVIDIA Jetson Nano.
If you have not yet built up your own, or are curious about any of these steps please refer back to the hardware assembly tutorial for this project.
Jetson Nano + Sphero RVR Mash-up (PART 1)
Hardware Overview
This tutorial is the software-focused second of a two part series. You can find all of the required hardware and our assembly of the robot in part 1 found here.
But, you will need a few things to get up and running in this software tutorial as well!
An initial setup of the Jetson Nano will require the following:
- Keyboard and Mouse
- HDMI Cable
- Monitor / TV with HDMI
- Laptop / computer on your WiFi network
On top of hardware requirements, you will need to connect to a WiFi network that you have the SSID and password for. You will be downloading software to your NVIDIA Jetson Nano as well as controlling and programming the robot through your browser using Jupyter Notebooks, so WiFi connection and a separate laptop is a must.
JetBot Image Introduction
If you have owned or have built up a JetBot in the past you know that it is a robotics platform for learning machine learning through tabletop robotics. NVIDIA made it easy by creating a Linux image that you burn to a microSD card. Build your robot and go!
If you have started with the JetBot with one our kits, you are good to go, we will be using our JetBot image for this build with no additional modifications to the core image. The heart of JetBot that makes it so easy to get started is the JetBot itself turns into a server on wheels. It hosts its own content and example code through a framework called Jupyter Notebooks.
If you do not have a version of our image on a microSD card you can find instructions on how to create your own here:
Getting Starting with the JetBot Image
Once you have your JetBot image burned and installed on the NVIDIA Jetson Nano, you will need to do an initial setup to get the Jetson Nano onto your WiFi network. To do this you will need to add a keyboard and mouse to the USB ports on your Jetson Nano and connect a monitor (or TV) to the HDMI port.
Now boot up your Jetson Nano. It should output all of the terminal boot sequence for a Linux computer and then present you with a desktop user login. Click on JetBot as the user and the password for the user is jetbot.
Once you login you should see a desktop available to you. In the upper right corner select the WiFi Network icon and select the wireless network that you would like to connect to. A dialog box will appear and enter the password for your network and “connect”.
Once the Jetson Nano connects to the WiFi network an IP address and other network information should be displayed on the Qwiic OLED on the bot.
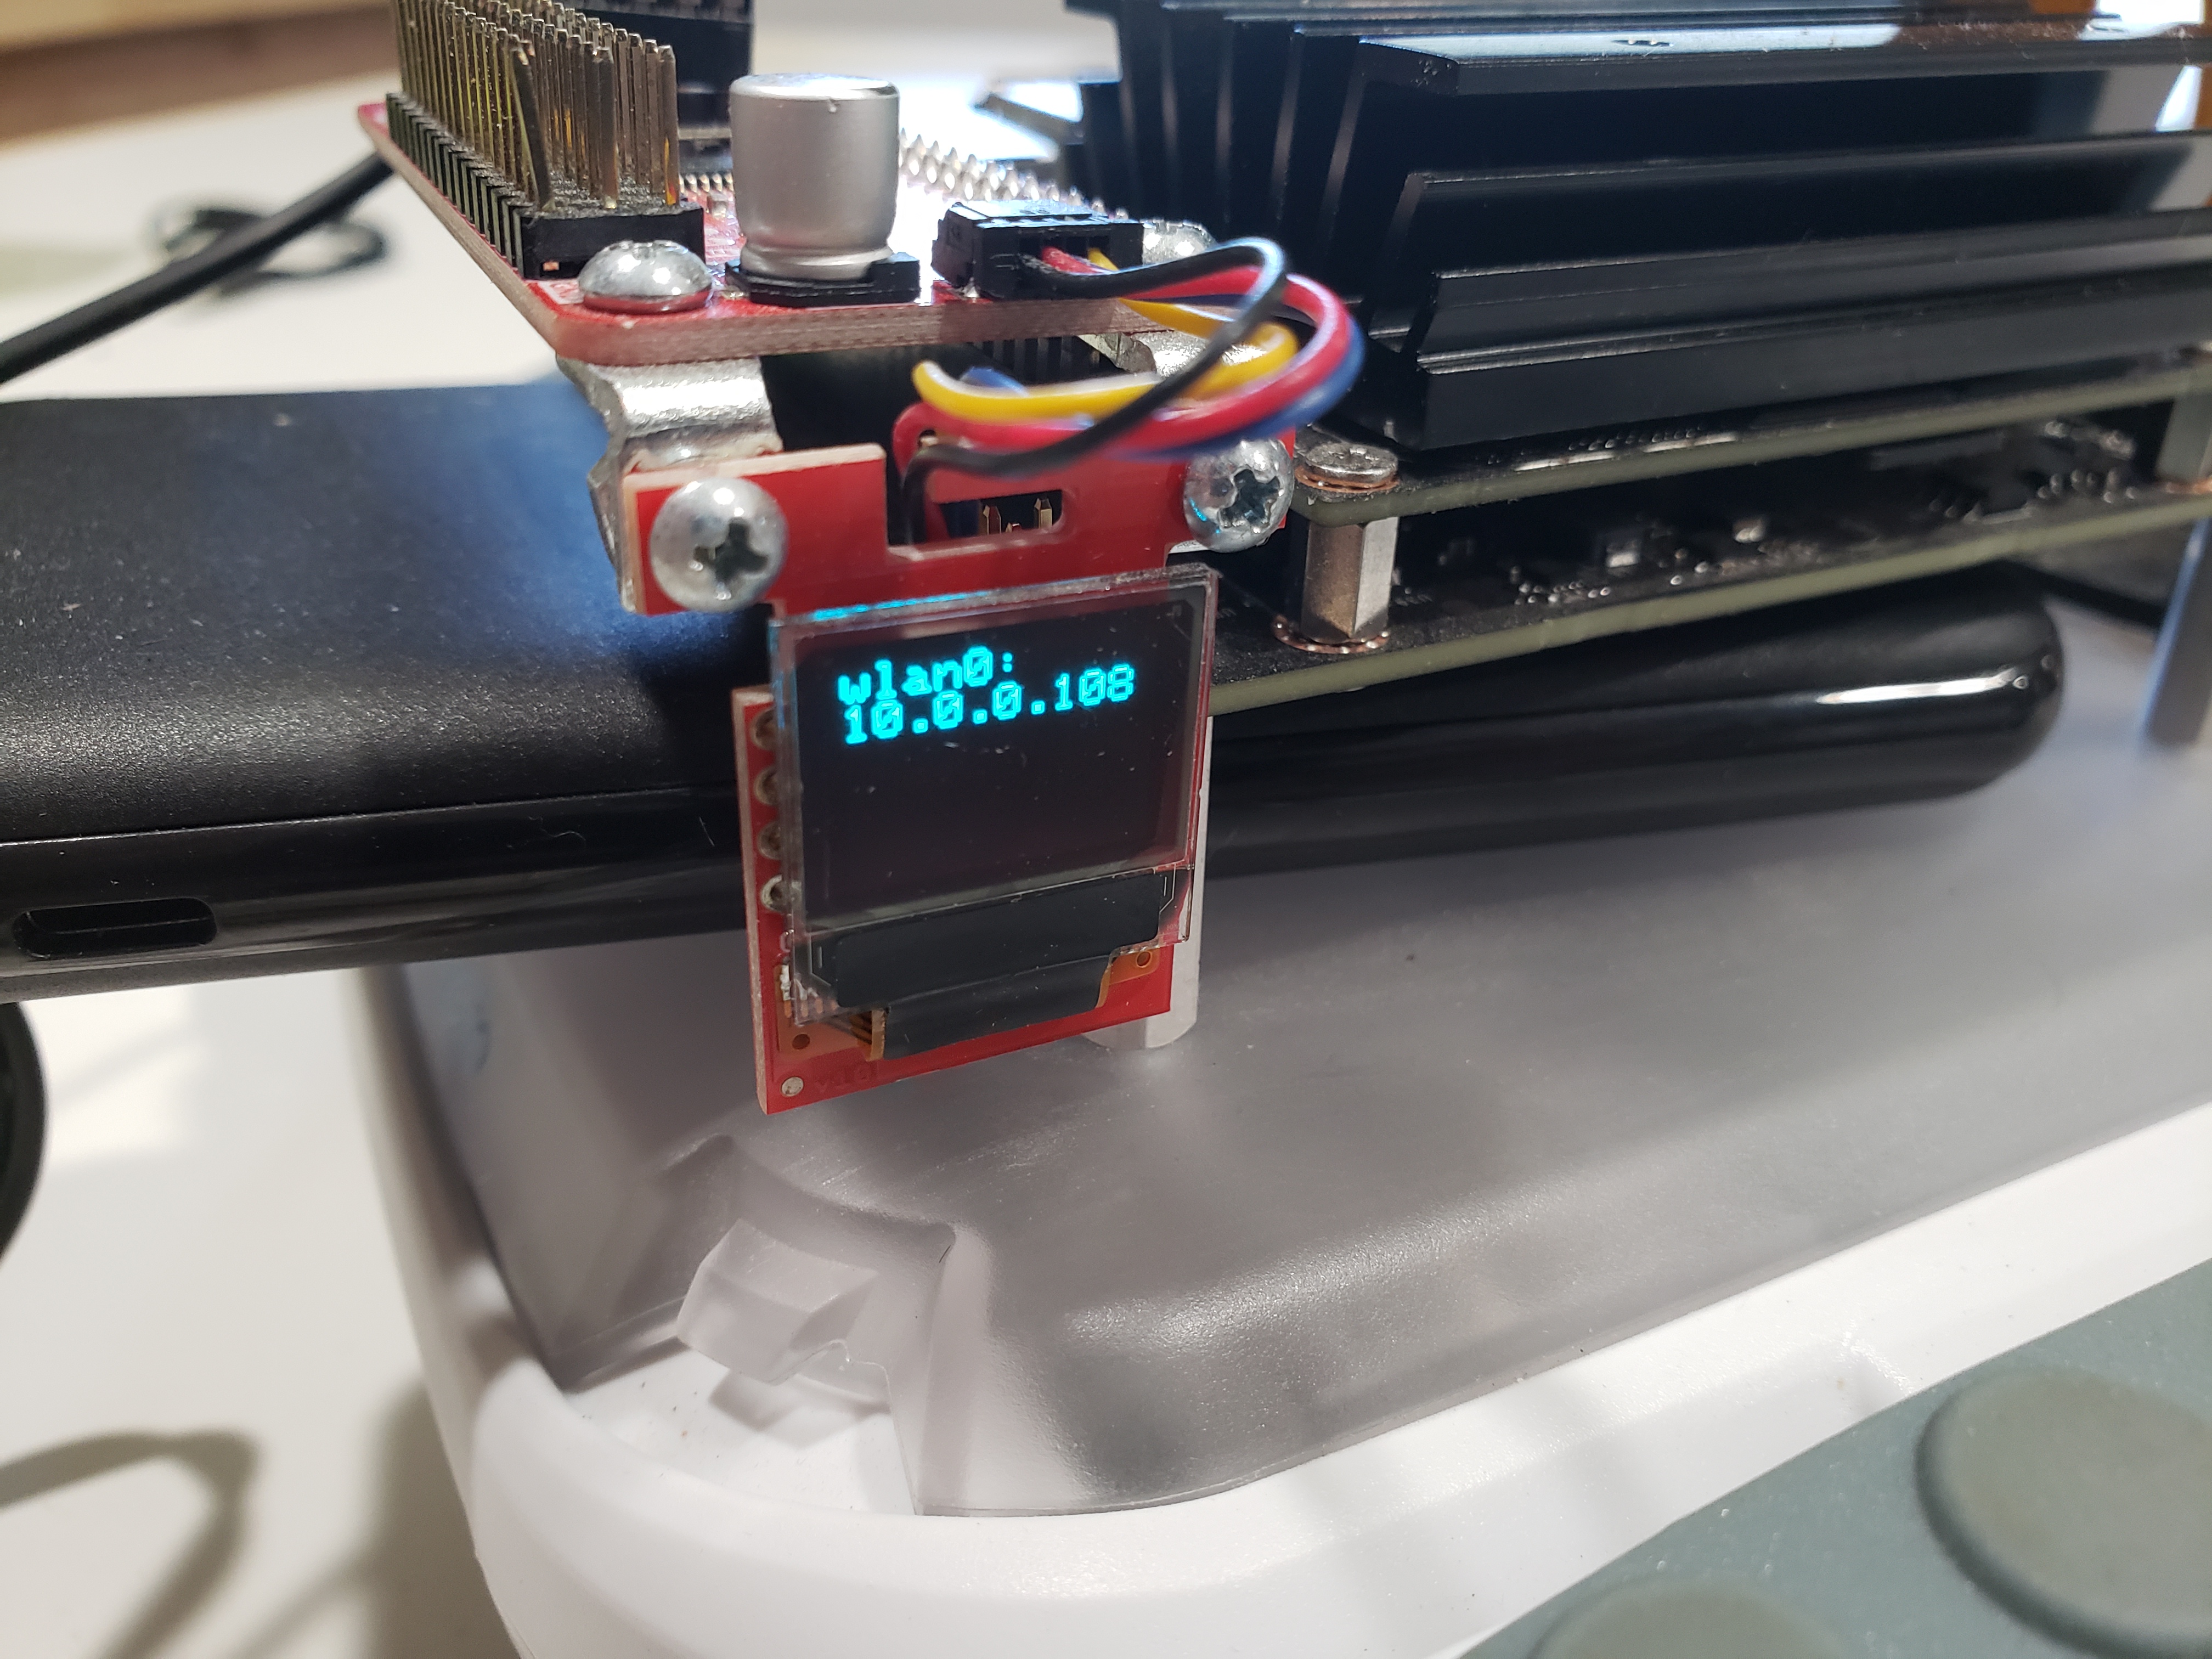
Before disconnecting the keyboard, mouse and monitor make sure you can complete the next step. Once you can access Jupyter Notebook you can disconnect everything and run the Jetson Nano completely headless through the Jupyter Notebook server being served at the IP address on the OLED display attached to the pHAT through our Qwiic system.
Jupyter Notebooks
On a separate computer connected to the same SSID / Network as the JetBot, open a browser window and navigate to the IP address printed on the OLED display of your bot on port 8888...[IP_ADDRESS:8888].
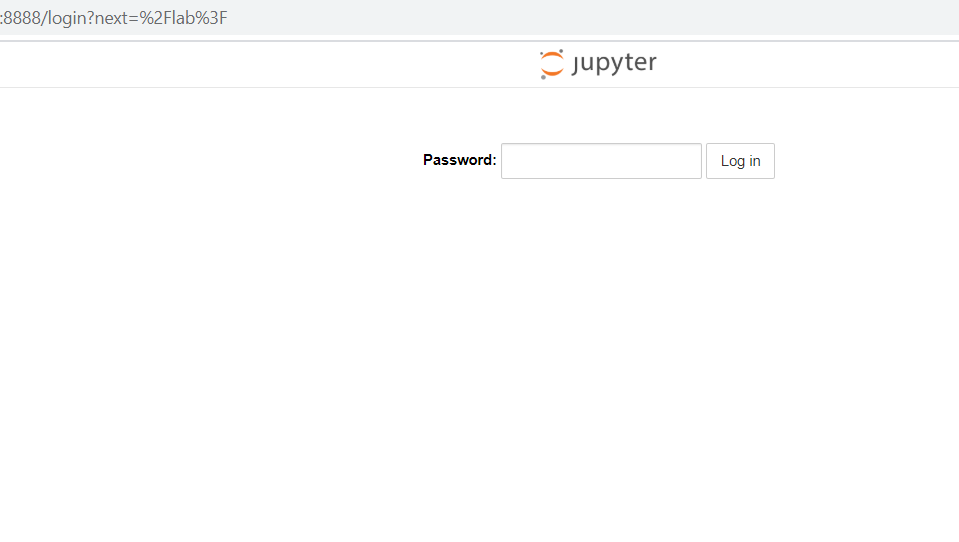
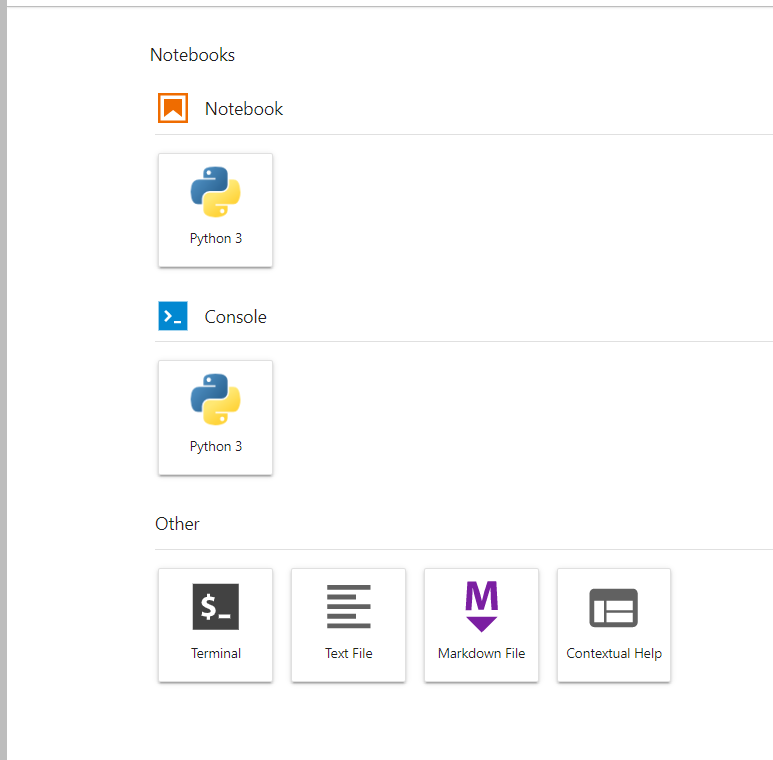
A Jupyter Notebooks logo should appear and then a login page asking for a password. The password is jetbot. Jupyter Notebooks will open in the browser and you will be presented with something similar to the following screen capture.
Introduction to Using Jupyter Notebooks
If you have never used Jupyter Notebooks before it is a pretty handy platform for both creating and using programming documentation for an end user. It also works as a great place to test our proof of concepts or if you are looking for a utilitarian way to develop and use dashboards for Python projects with out building something from the ground up.
Jupyter Notebooks are usually used as a learning tool where you can embed tutorial or instructional content alongside Python code users can step through as they read and that same code executes right there on the system that is hosting it.
In terms of a single board computer like the NVIDIA Jetson Nano, that means that you can write code to interact with the camera, sensors, machine learning algorithms, etc. and play around with the code without needing to run it directly on the Nano itself or even through a command line interface.
In fact, advanced users can use Jupyter Notebooks to create dashboards, control panels and graphic visualizations for their projects to keep them easy to use and interact with. All of this to say that all of the JetBot documentation is hosted through this system, enabling you to run programs and interact with your JetBot while it is free to move about the room.
Updating Firmware on the Sphero RVR
Before we dig into getting the Jetson Nano controlling the Sphero RVR we need to take care of some house cleaning first. We need to make sure that the firmware is up-to-date on your RVR. If you have been working with our Raspberry Pi based Autonomous topper kits, you have already gone through the process before and are good to go. If this is your first time programming something to control the RVR other than using your phone or tablet app interface, you will need to update the firmware!
In our collaboration with Sphero, they made it abundantly clear that it was imperative for users to perform this action before connecting a single board computer like the NVIDIA Jetson Nano to the RVR. So, before you proceed any further, please be sure to connect your Sphero RVR to the Sphero EDU App to update the firmware.
Important: Update Your Firmware to Unlock Your RVR
First things first, you must connect your RVR to the EDU App before connecting it to a development board (e.g. Raspberry Pi, Arduino, or micro:bit), in order to ensure that it has the most up-to-date firmware.
You can always check back on the Sphero SDK firmware update page for firmware version updates or, if you want Sphero to do all the legwork, add yourself to Sphero's updates email list to get notifications about all of the stuffs. Sphero will always try to keep things backwards compatible, but there are instances where it will be imperative that they repair something that simply won't align with previous versions of the firmware, since Sphero doesn't want that getting in the way of your fun.
|
|
Sphero EduProgram all Sphero Robots |
The [HACKED] Sphero RVR SDK
With this project being a mash-up of two different projects we cannot assume that we can just use the JetBot API and have it work with the Sphero RVR out of the box! The RVR has its own Python libraries that we need to use because the Jetson Nano is not just controlling motors directly as it is on a JetBot, but sending instructions to the RVR to then move the motors over a UART connection. You can learn more about the details of the SDK at Sphero SDK webpage as well as the GitHub repo for the SDK itself.
So, we need to install the Sphero SDK on the Jetson Nano. But wait, not just the Sphero RVR SDK! One that has been modified for use with the NVIDIA Jetson Nano.
The Python libraries for the Sphero RVR assume that you are using a Raspberry Pi and can be found here. They are an exceptional collection of classes and methods to control your RVR, read sensors, and communicate with other devices that our friends over at Sphero created! The original API specifies the directory path for the proper serial port / UART port name on a Raspberry Pi, but not a NVIDIA Jetson Nano!
So, we had to make some minor changes to the SDK to point it to the correct UART for use with the SparkFun Servo pHAT combined with the NVIDIA Jetson Nano. It was no real feat of hacker magic here; the only changes we made to our fork of the SDK was to take an instance of the UART path of /dev/ttyS0 which is the path for the UART pin on the Pi header for the the Raspberry Pi to /dev/ttyTHS1 which is the path for the same pin, but on the NVIDIA Jetson Nano. In all, this was in four different places throughout the SDK.
Downloading and Installing the [HACKED] SDK
We forked the official Sphero SDK to make the UART directory path changes and you can download it and install the SDK from Jupyter Notebooks on your NVIDIA Jetson Nano by following these simple instruction:
- Open a terminal window in Jupyter Notebooks by selecting File > New > Terminal. This will open up a familiar bash looking terminal for you… essentially this is a fancy SSH connection to your Jetson Nano.
- Download the [Hacked] SDK by running to following command:
sudo git clone https://github.com/d1runberg/sphero-sdk-raspberrypi-python.gitand type the passwordjetbot - Move into the SDK repository with
cd sphero-sdk-raspberrypi-python - Install the SDK using the following command:
sudo python3 setup.py install - Change Read write permissions of the UART connection by typing the following command:
sudo chmod 660 /dev/ttyTHS1.
Hardware Test
Now that the SDK is installed on your NVIDIA Jetson Nano and we have permission to read and write to the UART, it is now time to test it to make sure that your NVIDIA Jetson Nano can communicate with the RVR and send it commands via the SDK in a Python script.
A Quick Hardware Check
Before we go and test out the SDK there are a few things that we want to double check...
- Double check the 4 pin UART rainbow cable is hooked up properly with power, ground and RX / TX aligned correctly both to the RVR as well as the pHAT
- The RX/TX switch on the pHAT is set to “RVR”
- Battery is hooked up the the NVIDIA Jetson Nano via the USB-C Connector on the pHAT
An initial SDK Test
Lucky for us the SDK comes with a number of example scripts that we can use to test the SDK. From the terminal window in Jupyter Notebooks execute the following command:
Navigate to the example directory for driving…
cd sphero-sdk-raspberrypi-python/getting_started/observer/driving/
Run the basic command drive example:
sudo python3 drive_raw_motors.py
Your RVR should drive back and forth and pivot a bit if all is successful.
If you have an error or nothing seems to work try out the following troubleshooting tips..
- Make sure you are using
sudoto run the script! - Use
lscommand to list the contents of the directory you are in and make sure the script you are trying to run is there any you have spelled everything correctly. - Double check that you have installed the SDK and possibly repeat the process if needed.
Download Example Jupyter Notebook
To make it easier for you to get up and running with some example code we have created a few example programs in the form of Jupyter Notebooks.
To download and add these Notebooks to your RVR JetBot open up a terminal window in Jupyter Notebooks by selecting File > New > Terminal.
Navigate to your Notebooks directory by typing the following…
cd /desktop/Notebooks
Then download the Examples Notebooks from the GitHub repository by typing the following command:
git clone https://github.com/d1runberg/RVR-JetBot-Example.git
Once the repository has been cloned you can then navigate to the Examples Notebooks using the file manager in Jupyter Labs. To keep things as clean and simple as possible for you, each of our example Notebooks are just a single code pane with no markdown or extra text. We will walk through this code here, but you should only need to run a single code snippet from each Notebook.
Example 1: JetBot Camera Test
To get your feet wet with Jupyter Notebooks and make sure things are up and running on the Jetson Nano itself we are going to do a quick camera test using the Leopard camera mounted on the RVR.
You can open the Camera_Test.ipynb Notebook from the RVR directory you just downloaded. Once it opens make sure you are running it with a Python3 Kernel and click the run button for the code cell.
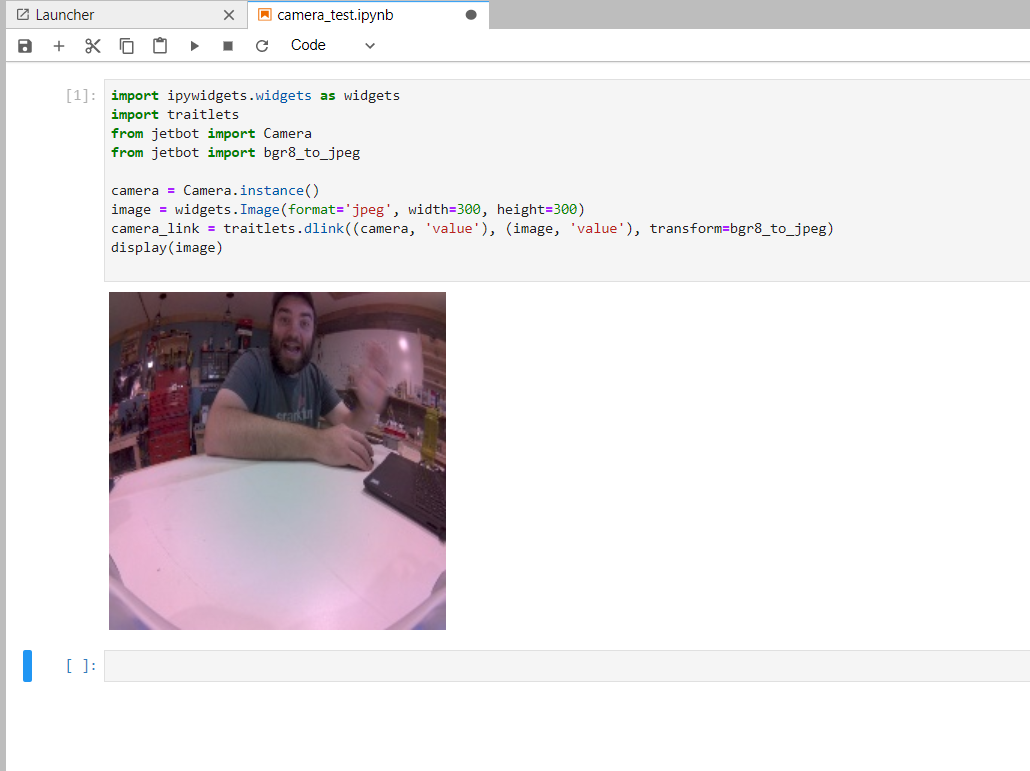
If all goes well, you should see a live camera feed from the camera on the front of your Jetson Nano RVR Bot. Awesome! The camera works on your robot and our next step is getting this up and moving like a real robot!
If you are having trouble getting the camera feed to work consecutive after shutting down a kernel and trying to rerun it, we recommend opening the terminal window and running the following command to reset your camera...
sudo systemctl restart nvargus-daemon
Code to Note
If you have programmed a JetBot before or even created a program in Python this code shouldn't be anything new to you. We start out by importing the required Python packages for using both the Jupyter Notebook Widgets as well as the JetBot Camera.
language:python
import ipywidgets.widgets as widgets
import traitlets
from jetbot import Camera
from jetbot import bgr8_to_jpeg
Once everything is imported we instantiate a camera object and an image widget. We set the size and format of the image widget at this time.
language:python
camera = Camera.instance()
image = widgets.Image(format='jpeg', width=300, height=300)
Finally we create a digital link between the input of the camera frame and the output of the image widget. This makes piping complex data from something like a camera to a basic output like displaying that image in Notebooks much much simpler.
language:python
camera_link = traitlets.dlink((camera, 'value'), (image, 'value'), transform=bgr8_to_jpeg)
Once that link is made we display the image with the display() function.
language:python
display(image)
Example 2: Teleoperation
With the NVIDIA Jetson Nano and the Sphero RVR now communicating and functioning properly it is now time to work on integrating the RVR SDK library into a few of the JetBot examples that come on the JetBot image with a few changes. Again, we have already made a few of these changes and saved them in the RVR Examples Notebooks. This example looks at controlling the motors of the RVR and driving it remotely using a few buttons and a live video feed from the camera.
Before running this example make sure that you shutdown the previous camera test example by opening the list of all Kernels that are running and click “Shutdown” next to any other Kernels that are running. We do this because only one Python Notebook can be using the camera at a time.
Open the remote_drive.ipynb and run the script.
After a moment an interface should appear with a live video feed and a few buttons for direction driving. You should be able to click on a given button and the robot will either pivot in that direction or drive forward / reverse. Note that the RVR doesn’t continually drive, but will stop after about two seconds. This is part of the RVR SDK that has a timeout for any driving functions after 2 seconds.
Go ahead and play and drive your RVR around… chase your cat, your kids, or sneak up on your mom!
But, wait... My RVR moves when I press the button and then stops after a bit?!
Yes, this is completely normal and is a built in timeout programmed into the RVR SDK that when you run a motor, it will only run for 2 seconds before stopping!
Code to Note
Like our other script we import all of the required packages. Note that we have added the Sphero RVR SDK to the import list in this script.
language:python
import os
import sys
import time

import ipywidgets.widgets as widgets
from IPython.display import display
import traitlets

from jetbot import Camera
from jetbot import bgr8_to_jpeg

from sphero_sdk import SpheroRvrObserver
Like Example 1 we instantiate the camera object and the image widget. In addition to that we also instantiate the RVR object and then send a command to the RVR to wake up and be ready to accept other commands.
language:python
camera = Camera.instance()

image = widgets.Image(format='jpeg', width=300, height=300)

rvr = SpheroRvrObserver()
rvr.wake()
Again, we link the camera feed to the image widget for telepresence of what our bot is seeing.
language:python
camera_link = traitlets.dlink((camera, 'value'), (image, 'value'), transform=bgr8_to_jpeg)
Next, to be able to control our robot in a telepresence type project we need inputs to be able to tell the robot to go one direction or another. We do this through creating an interface of button widgets in Jupyter Notebooks. We define those buttons below.
language:python
# create buttons
button_layout = widgets.Layout(width='100px', height='80px', align_self='center')
stop_button = widgets.Button(description='stop', button_style='danger', layout=button_layout)
forward_button = widgets.Button(description='forward', layout=button_layout)
backward_button = widgets.Button(description='backward', layout=button_layout)
left_button = widgets.Button(description='left', layout=button_layout)
right_button = widgets.Button(description='right', layout=button_layout)
We then display all of our buttons and our live camera feed.
language:python
# display buttons
middle_box = widgets.HBox([left_button,image, right_button], layout=widgets.Layout(align_self='center'))
controls_box = widgets.VBox([forward_button, middle_box, backward_button,stop_button])
display(controls_box)
The buttons have event handlers attached to them, meaning that we can attach a function to run when the button is pressed. We define those functions here.
language:python
def stop(change):
    rvr.raw_motors(
       left_mode=0,
       left_speed=0,  # Valid speed values are 0-255
       right_mode=0,
       right_speed=0  # Valid speed values are 0-255
    )


def step_forward(change):
    print("fire")
    rvr.raw_motors(
        left_mode=1,
        left_speed=64,  # Valid speed values are 0-255
        right_mode=1,
        right_speed=64  # Valid speed values are 0-255
    )
    time.sleep(.5)
    rvr.raw_motors(
        left_mode=0,
        left_speed=0,  # Valid speed values are 0-255
        right_mode=0,
        right_speed=0  # Valid speed values are 0-255
    )

def step_backward(change):
    rvr.raw_motors(
        left_mode=2,
        left_speed=64,  # Valid speed values are 0-255
        right_mode=2,
        right_speed=64  # Valid speed values are 0-255
    )
    time.sleep(.25)
    rvr.raw_motors(
        left_mode=0,
        left_speed=0,  # Valid speed values are 0-255
        right_mode=0,
        right_speed=0  # Valid speed values are 0-255
    )

def step_left(change):
    rvr.raw_motors(
        left_mode=2,
        left_speed=128,  # Valid speed values are 0-255
        right_mode=1,
        right_speed=128  # Valid speed values are 0-255
    )
    time.sleep(.25)
    rvr.raw_motors(
        left_mode=0,
        left_speed=0,  # Valid speed values are 0-255
        right_mode=0,
        right_speed=0  # Valid speed values are 0-255
    )

def step_right(change):
    rvr.raw_motors(
        left_mode=1,
        left_speed=128,  # Valid speed values are 0-255
        right_mode=2,
        right_speed=128  # Valid speed values are 0-255
    )
    time.sleep(.25)
    rvr.raw_motors(
        left_mode=0,
        left_speed=0,  # Valid speed values are 0-255
        right_mode=0,
        right_speed=0  # Valid speed values are 0-255
    )
Finally, we attach our defined functions to their constituent button events.
language:python
forward_button.on_click(step_forward)
backward_button.on_click(step_backward)
left_button.on_click(step_left)
right_button.on_click(step_right)
stop_button.on_click(stop)
Operation and Closing
With that you can now drive your RVR + Nano bot around remotely through Jupyter Notebooks. As you play around with this example as a starting point think about how you can add more to your dashboard in terms of sensor values or controlling different parts of RVR... maybe an option to change the colors of the LEDs when you click a button?
Example 3: Machine Learning and Collision Avoidance
Our last example that we are going to tackle is putting Jetson Nano to good use and leverage the Machine Learning capabilities!
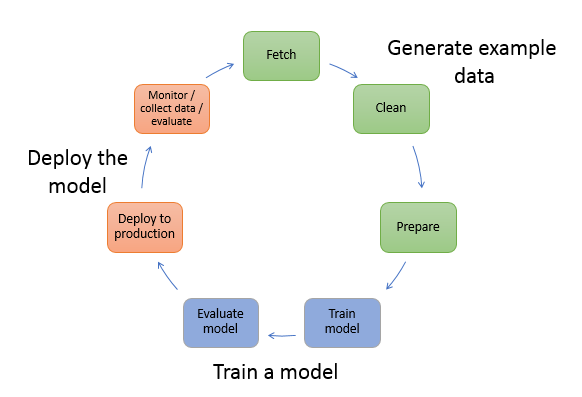
We are going to go through an entire workflow of collecting data using the camera on your bot and if the bot is “blocked” or “Free”. We will then train that model and have your bot use that model to have your RVR avoid objects, edges and other perils in real time. In essence, we are building a safety bubble around our robot with which it will avoid objects that come within that bubble.
This example will take running a couple of different programs, one for each step of the workflow and they are all housed in the Collision Avoidance directory.
Data Collection
Open the directory using the Notebooks files manager. You should see three Notebooks and open the data_collection.ipynb. Once opened, run the Notebook and it should display a live feed of your bot's camera and a simple interface of buttons and text boxes.
We will use this interface to collect camera images of the bot being “blocked” or free. The process works as follows:
- Pick up your robot while the script is running and place it in a situation where it is “blocked”, or about 2-3 inches away from running into an object.
- Click the “Blocked” button. This will capture the image and save it to a directory of images called blocked. The number next to the button should increment by 1.
- Move your bot to a different location and situation where it is blocked and click "Blocked". Again, incrementing the number.
- Repeat this process to collect about 100 or so unique blocked images trying to get as much variation of objects, colors and lighting qualities as possible.
- Repeat the process for the “Free” button as well by placing the robot in a situation where it would be free to drive forward, capture the image, move and repeat for about 100 images.
Code to Note
As with most Python programs we start out by importing the needed packages. This program is no exception! We import a number packages to build our UI inside of Jupyter Notebooks as well as gaining access to our OS.
The packages to really pay attention to here are the the Camera and brg8_to_jpeg packages, which if you did the first example to test your camera, will be familiar.
We also import the uuid package which is used to produce unique and random strings for us to use as file names of our images.
language:python
import os
import traitlets
import ipywidgets.widgets as widgets
from IPython.display import display
from jetbot import Camera, bgr8_to_jpeg
from uuid import uuid1
With the packages imported we can now define and instantiate a few objects. First of all our camera object and we set the image width and height to 224 pixels each as well as setting the frame rate to 10fps. We set it to a lower fps here because we are just capturing still images and don't need a highly responsive video feed. It helps with reducing lag the further you are away from your WiFi router.
Next, we define the image widget which is in JPEG format with the same 224 x 224 size as our camera object.
language:python
camera = Camera.instance(width=224, height=224, fps=10)

image = widgets.Image(format='jpeg', width=224, height=224)  # this width and height doesn't necessarily have to match the camera
With both objects created and defined we then link them together using the Jupyter Notebooks traitlet.dlink() method. This saves us a lot of other programming to pipe the output of the camera and display it in the UI. It also allows us to apply a transform to change the output of the image into something displayable.
language:python
camera_link = traitlets.dlink((camera, 'value'), (image, 'value'), transform=bgr8_to_jpeg)
We will be capturing images of both "Blocked" and "Free" situations. These images will be stored in their own directories within a "dataset" directory. So, we define the path strings here!
language:python
blocked_dir = 'dataset/blocked'
free_dir = 'dataset/free'
We then use the "try/except" statement to catch if we have already created the directories as these next functions can throw an error if the directories exist already
language:python
try:
    os.makedirs(free_dir)
    os.makedirs(blocked_dir)
except FileExistsError:
    print('Directories not created becasue they already exist')
With our dataset directories created we can now define some UI bits and pieces. We define a few buttons to use to trigger the capture of an image as well as define where to save that image (either in the "Free" or "Blocked" directory). We also create and define two text widgets to display how many images are in each of the two directories.
language:python
button_layout = widgets.Layout(width='128px', height='64px')
free_button = widgets.Button(description='add free', button_style='success', layout=button_layout)
blocked_button = widgets.Button(description='add blocked', button_style='danger', layout=button_layout)
free_count = widgets.IntText(layout=button_layout, value=len(os.listdir(free_dir)))
blocked_count = widgets.IntText(layout=button_layout, value=len(os.listdir(blocked_dir)))
Next, we define a few functions for saving the images, building their file names and defining their directory path.
language:python
def save_snapshot(directory):
    image_path = os.path.join(directory, str(uuid1()) + '.jpg')
    with open(image_path, 'wb') as f:
        f.write(image.value)

def save_free():
    global free_dir, free_count
    save_snapshot(free_dir)
    free_count.value = len(os.listdir(free_dir))

def save_blocked():
    global blocked_dir, blocked_count
    save_snapshot(blocked_dir)
    blocked_count.value = len(os.listdir(blocked_dir))
Finally, we attach the functions we just defined as callbacks. We use a 'lambda' function to ignore the parameter that the on_click event would provide to our function because we don't need it.
language:python
free_button.on_click(lambda x: save_free())
blocked_button.on_click(lambda x: save_blocked())
With everything we defined, connected and functional we then display all of the widgets and start the live interface using the display() function!
language:python
display(image)
display(widgets.HBox([free_count, free_button]))
display(widgets.HBox([blocked_count, blocked_button]))
With that you now have a data collection tool for collecting images for computer vision training on your RVR and Jetson Nano. This is a great script to save and keep close by for future projects as it is the basis of defining objects or situations in machine learning.
Think of it this way; this example has two situations: free and blocked. You could expand this code to categorize objects. So, you could define a baseball, a can of soup and your cat. You would then just expand the code to include three options as well as renaming the directories. You can then collect images of those objects for your robot to respond to!
Training the Model
With all of our images (data) collected it is now time to create and train the model on our Jetson Nano. This is one of the things that makes the NVIDIA Jetson Nano special; it is both what you use to run a model, but also the GPU that you use to train it. You don't need to do all of your training in the cloud or on an expensive desktop machine.
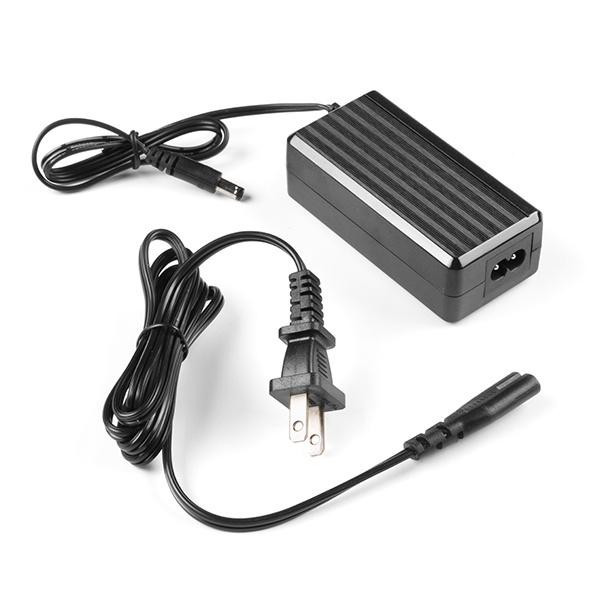
One thing we do recommend here is that you switch how you power your Nano to an outlet power based 5V/4A power supply during the training process. We have done training on the battery, but it is not ideal and technically out of spec for the process.
With the power supply swapped out, open up the model_trainiing.ipynb Notebook from the file manager in Jupyter Notebooks. This program will do very little in terms of outputting any information for you, so be patient. When you run this script you will see a few outputs that state that the Nano is downloading a few things, which is fine.
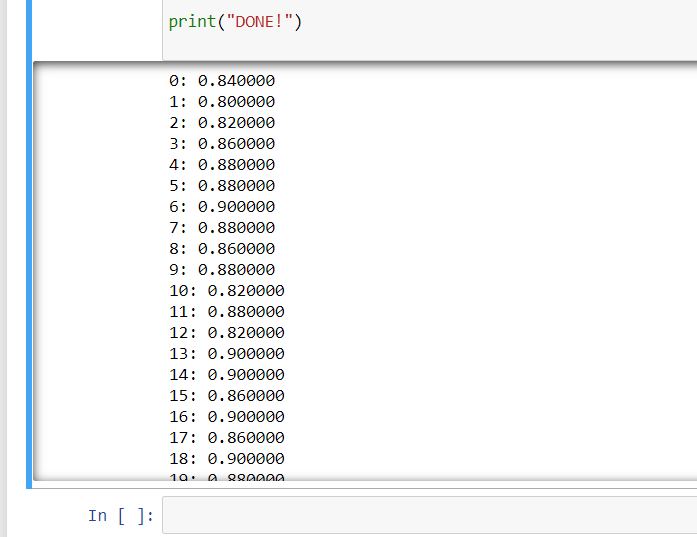
Once all of the errors are cleared the script will start training epochs, 30 of them. When each epoch is complete you will see a report printed out giving an accuracy level of the epoch test. Once the training is complete you will see it print “DONE!” and you will also see that a final model file is created in the project directory named “XXXX”.
Code to Note
This Python script is a little boring when it comes to output in Jupyter Notebooks, but it is probably the most important and pivotal part in this whole project. This script creates the machine learning model that our robot will use to define if it is "Blocked" or "Free".
We start out by importing a number of Python packages which includes a number of packages for torch and torchvision. These are packages for doing machine learning and building models like the one we are doing here. Essentially, each step we take in the process of building our model requires its own package.
language:python
import torch
import torch.optim as optim
import torch.nn.functional as F
import torchvision
import torchvision.datasets as datasets
import torchvision.models as models
import torchvision.transforms as transforms
First up is defining our dataset that we will be training our model against. We define the dataset by pointing it to a specific ImageFolder that we have created called dataset. We then apply a number of transforms to our images to get everything to correct size and format.
language:python
dataset = datasets.ImageFolder(
    'dataset',
    transforms.Compose([
        transforms.ColorJitter(0.1, 0.1, 0.1, 0.1),
        transforms.Resize((224, 224)),
        transforms.ToTensor(),
        transforms.Normalize([0.485, 0.456, 0.406], [0.229, 0.224, 0.225])
    ])
)
Once our dataset is defined and in the correct format it is now time to split that dataset in two. The first dataset in our training set and the second set are the sets we will be testing our model against. We define both of those here as well as the parameters for each DataLoader.
language:python
train_dataset, test_dataset = torch.utils.data.random_split(dataset, [len(dataset) - 50, 50])

train_loader = torch.utils.data.DataLoader(
    train_dataset,
    batch_size=16,
    shuffle=True,
    num_workers=4
)

test_loader = torch.utils.data.DataLoader(
    test_dataset,
    batch_size=16,
    shuffle=True,
    num_workers=4
)
Once our datasets have been defined and loaded we can further define our model we are looking to use. For this we will be using the alexnet model that is pre-trained and that we are looking for our two defined situations we have defined as "Free" and "Blocked". If we had more than these two we would need to change the last number in torch.nn.Linear(model.classifier[6].in_features, 2) to whatever the number of outcomes we were looking for!
language:python
model = models.alexnet(pretrained=True)
model.classifier[6] = torch.nn.Linear(model.classifier[6].in_features, 2)
We then define the number of epochs or how many times to train our model. For this first go we are running 30 epochs, you can adjust this up or down as you refine your model. We are also defining the file name for our model that we are creating as a file called best_model.pth.
language:python
NUM_EPOCHS = 30
BEST_MODEL_PATH = 'best_model.pth'
best_accuracy = 0.0
Now, for each epoch we run the training against all of our images in our training loader and then test the model against the data in our test loader. For each epoch you will see the printout of the epoch number and the accuracy level of the model. This will change as the number of epochs are ran with only the highest accuracy model being saved as our best_model.pth file.
language:python
for epoch in range(NUM_EPOCHS):

    for images, labels in iter(train_loader):
        images = images.to(device)
        labels = labels.to(device)
        optimizer.zero_grad()
        outputs = model(images)
        loss = F.cross_entropy(outputs, labels)
        loss.backward()
        optimizer.step()

    test_error_count = 0.0
    for images, labels in iter(test_loader):
        images = images.to(device)
        labels = labels.to(device)
        outputs = model(images)
        test_error_count += float(torch.sum(torch.abs(labels - outputs.argmax(1))))

    test_accuracy = 1.0 - float(test_error_count) / float(len(test_dataset))
    print('%d: %f' % (epoch, test_accuracy))
    if test_accuracy > best_accuracy:
        torch.save(model.state_dict(), BEST_MODEL_PATH)
        best_accuracy = test_accuracy

print("DONE!")
Like the data collection script, this script is universally useful when it comes to situational and object detection for your robot! Keep this script handy to modify as you modify your data collection script. The only thing you would really need to change in this script would be changing the final number in this line of code...
model.classifier[6] = torch.nn.Linear(model.classifier[6].in_features, 2)
Instead of 2, you would change it to how many different categories you are collecting. So for our three examples of baseball, cat and can of soup, that number would be 3.
Deploying the Model
With our data collected and our machine learning model created it is now time to put it all together and see if our bot can drive around and use the model to avoid objects. From the Object Avoidance project directory open the live_demo.ipynb file and run it.
After a bit the code should execute and your robot should start driving about. In the Notebook you should see the live feed from the camera as it drives around. In your code the Jetson Nano is taking each frame of the camera and evaluating whether the bot is “Blocked” or "Free". If you place something in front of your bot it should turn to the left and avoid that object. This should work for instances that you took photos of “Blocked” and “Free”, so if you never took a picture of a ledge or edge of a table as “Blocked” the robot will not think it is blocked and run off of the edge!
We recommend starting your bot out in a safe place where there are few obstacles. If the model is not performing to your expectations, that is OK, ours didn’t either! Stop the live demo and collect more images of “Blocked” and “Free” scenarios and then retrain the model using the same process that you have gone through.
Code to Note
Now, we are going to bring everything together in terms of our Python script. While that is awesome and the end all, be all goal of this whole project, it does get messy and complicated. Let's dive in and take a look at what this looks like.
First off, like always we are importing the required packages to make everything work. This includes packages for using the OS, all of our Jupyter Notebook widgets, machine learning and computer vision functionality as well the RVR SDK. Fewww... it's a lot of modules!
language:python
import os
import sys

import torch
import torchvision
import cv2
import numpy as np
import traitlets
from IPython.display import display
import ipywidgets.widgets as widgets
from jetbot import Camera, bgr8_to_jpeg
import torch.nn.functional as F
import time

from sphero_sdk import SpheroRvrObserver
from sphero_sdk import Colors
from sphero_sdk import RvrLedGroups
Before we forget about the simple stuff, we instantiate the RVR as an observer and then send the command to wake it up!
language:python
rvr = SpheroRvrObserver()
rvr.wake()
Next we are going to get our machine learning model setup and ready to use. Like in our training we define the model to use as Alexnet, but this time it is not pre-trained. We state that we are looking for two defined features ("Free" and "Blocked") and that we will be using our training model that we created "best_model.pth".
language:python
model = torchvision.models.alexnet(pretrained=False)
model.classifier[6] = torch.nn.Linear(model.classifier[6].in_features, 2)

model.load_state_dict(torch.load('best_model.pth'))
We then define a function for transforming an image that we will be capturing from the camera frame and getting it into the proper format to be run through our machine learning model.
language:python
def preprocess(camera_value):
    global device, normalize
    x = camera_value
    x = cv2.cvtColor(x, cv2.COLOR_BGR2RGB)
    x = x.transpose((2, 0, 1))
    x = torch.from_numpy(x).float()
    x = normalize(x)
    x = x.to(device)
    x = x[None, ...]
    return x
We then create and define a number of our Jupyter Notebook widgets for us to interface with. This includes our JetBot camera here as well as the image widget and a slider to display the probability of an image being "Blocked" or "Free" in real time. Like before, we then link the camera and image together so we can simply display the camera view and then we display everything at once using the display() function.
language:python
camera = Camera.instance(width=224, height=224)
image = widgets.Image(format='jpeg', width=224, height=224)
blocked_slider = widgets.FloatSlider(description='blocked', min=0.0, max=1.0, orientation='vertical')

camera_link = traitlets.dlink((camera, 'value'), (image, 'value'), transform=bgr8_to_jpeg)

display(widgets.HBox([image, blocked_slider,bat_slider]))
We define the update() function that we will be using as a callback function. This function is what ties all of this together in terms of the application and logic behind the robot avoiding being "Blocked". First off, on change the function takes the new image data that it is passed and processes it through the preprocess function we created before. Once processed, we plug that into our model. The output of the model function is then run through a softmax function to normalize it to build a probability distributions (a sum total of 1).
We then define the probability of the image as "Blocked" as the first value in the model. The value of the probability slider is then set to that value.
Using that value we use a basic if statement to evaluate it against a probability of 50%. If the probability is less than 50% then the robot drives straight forward with its lights set to green. If it is higher than 50% the robot LEDs turn red and it pivots to the left.
language:python
def update(change):
    global blocked_slider
    x = change['new']
    x = preprocess(x)
    y = model(x)

    y = F.softmax(y, dim=1)

    prob_blocked = float(y.flatten()[0])
    blocked_slider.value = prob_blocked

    if prob_blocked < 0.5:
        rvr.raw_motors(1,64,1,64)
        rvr.led_control.set_all_leds_color(color=Colors.green)
        #forward
    else:
        rvr.raw_motors(2,128,1,128)
        rvr.led_control.set_all_leds_color(color=Colors.red)
        #left
    time.sleep(0.001)
To start the function look we call the update() function now, before basing it off of the observe() callback method of the camera.
language:python
update({'new': camera.value})  # we call the function once to intialize
We finally attach the update() function to the camera.observe() method to be called each time there is a new image value (which is roughly 30 times per second)!
language:python
camera.observe(update, names='value')  # this attaches the 'update' function to the 'value' traitlet of our camera
Fewwww... we now have a fully functional robot that is using Machine Learning to navigate the world around it! Now it is time for you to explore the Sphero SDK a little more indepth and make this program your own! We drive around and change color, but there are a number of other functional parts to the robot you can use as well as a whole suite of sensors on the RVR we haven't even put to use yet. Be sure to explore more and build on this foundational project!
Resources and Going Further
This project only scratches the surface in terms of what this robot is capable of both in terms of the Sphero RVR, but also the Nvidia Jetson Nano.
If you are reading this tutorial and haven't picked up hardware you can find both the Sphero RVR and the Nvidia Jetson Nano here:
Sphero RVR - Programmable Robot
ROB-15304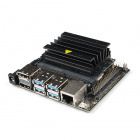
NVIDIA Jetson Nano Developer Kit (V3)
DEV-16271If you are looking for a great place to start with machine learning on the Nvidia Jetson Nano, but not quite ready for a fully built out robot, check our the Deep Learning Institute kit which is a great introduction to the Nano and gets you everything you need to get started.
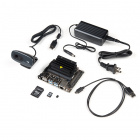
SparkFun DLI Kit for Jetson Nano
KIT-16308Check out the full Python SDK documentation for the Sphero RVR for fully harnessing the sensors, actuators and control provided to you through the SDK.
With these few examples on integrating the JetBot and the Sphero RVR together into a single project you are well on your way to building a rather sophisticated autonomous robot. To take the robot to the next level take a look at our hookup guide for our Pi based kits for the RVR. These give examples for integrating GPS and distance sensors into the project build.
Advanced Autonomous Kit for Sphero RVR Assembly Guide
Our Qwiic Python library github repo has a growing list of Qwiic sensors and boards that are supported in Python and work with the NVIDIA Jetson Nano. If you are looking to integrate them into Jupyter Notebooks take a look at this guide that gives some example code.
Working with Qwiic on a Jetson Nano through Jupyter Notebooks
If you are looking for another JetBot example to try your hand at using this build, I am currently working on the road following examples found on the JetBot GitHub repository.