Introduction to the Raspberry Pi GPIO and Physical Computing
Python Overview and Reading in Sensor Data
The Raspberry Pi Foundation has specifically selected Python as the main language for Raspberry Pi because of its ease of use, power, versatility, and open-source mentality. Python comes pre-installed on Raspbian, so you can load an IDE like Thonny and quickly start coding.
If you've never coded in Python before, be sure to check out our tutorial on Coding in Python...it will get you up and running with variables, operators, objects, data structures, and much more. It will be important to have a basic understanding of Python to interact with the GPIO, so knowing variables, functions, operators, and classes is good, even if you just understand them at a high level and can't write them yourself!
Using gpiozero to Interact With GPIO
We want to dip our toes into the world of physical computing with the world of Raspberry Pi, and one way to do this is to learn to interact with the GPIO. There's a fantastic Python library called gpiozero that makes it quite easy to interact with the GPIO, and it already comes pre-installed on Raspbian.
In Python, libraries and functions used in a script must be imported by name at the top of the file, so you can either import the entire libray,
import gpiozero
or you can import just a component or two:
from gpiozero import Button
You'll need to set the GPIO pins you're using on the Pi to the respective component chosen with gpiozero. For example, if you have hooked up an LED to pin number 17 on the Pi, you could refer to it a multitude of ways with this Python library (remember how the GPIO pins can have many names?)
led = LED(17)
led = LED("GPIO17")
led = LED("BOARD11")
If you wanted to hook up an LED to pin 17 and a ground pin (along with a current limiting resistor), you could blink the LED simply with the code below. It imports the LED component from the library, as well as pause. After letting the board know what pin the LED is connected to, it will call that LED to blink, and then pause.
from gpiozero import LED
from signal import pause

red = LED(17)

red.blink()

pause()
Using a breadboard and wires, you can practically hook up anything to the GPIO and interact with it through gpiozero.
Using the Qwiic Way to Interact With GPIO
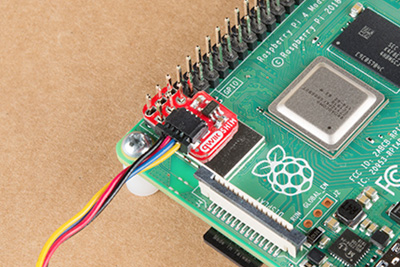
For our project, we want to hook up a Qwiic sensor to the Raspberry Pi, so we'll actually use the Qwiic SHIM included in the kit. We can just align the Qwiic SHIM with Pin 1 on the GPIO header, and slide it in. We don't need to assign which pins we're using - the SHIM is aligned with Pin 1 - but we do need import other libraries that are necessary for the additional atmosphere sensor.
With your Qwiic SHIM mounted on your Pi it should look like this:
 |
 |
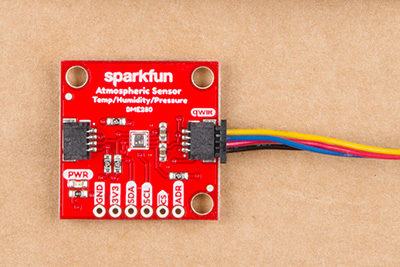
| Qwiic SHIM mounted on a Pi 4. | Your sensor on the other end of the Qwiic Cable. |
sudo pip install sparkfun-qwiic-bme280
Now, we can import the BME280 libary, as well as a time and system libary to read in some basic temperature values. We'll need to ensure that the BME280 set to a variable, connected to the system, and then begin running the sensor like we would with Arduino.
The library that's important here is the qwiic_bme280. As you can see, the sensor itself will be set to mySensor the for the duration of the function, so whenever you see mySensor."something", it is calling an instance variable unique to each instance.
import qwiic_bme280
import time
import sys

def runExample():

    print("\nSparkFun BME280 Sensor + Raspberry Pi Example \n")
    mySensor = qwiic_bme280.QwiicBme280()

    if mySensor.isConnected() == False:
        print("The Qwiic BME280 device isn't connected to the system.",
            file=sys.stderr)
        return

    mySensor.begin()

    while True:
        print("Humidity:\t%.3f" % mySensor.humidity)

        print("Pressure:\t%.3f" % mySensor.pressure)

        print("Altitude:\t%.3f" % mySensor.altitude_feet)

        print("Temperature:\t%.2f" % mySensor.temperature_fahrenheit)

        print("")

        time.sleep(1)
Challenge: How might you change the code above to only print the temperature if it exceeds 80 degrees Fahrenheit? (Hint: Remember your operators!)