Internet of Things Experiment Guide
Experiment 3: Appliance Controller
Now that we've logged data and pushed some physical buttons to make virtual things happen, it's time to make physical things happen when something virtual happens. OK, that's a mouthful, but in essence, we're going to turn on and off home appliances (120 VAC) from anywhere in the world (assuming we have an internet connection).
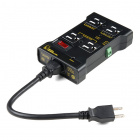
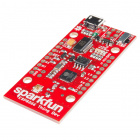
To make this work, we'll have an IFTTT applet send an HTTP request to ThingSpeak to log a value in a data channel. Our ESP8266 Thing Dev Board will poll the ThingSpeak data channel for new values. If it finds one, it will trigger the normally OFF outlets of the IoT Power Relay on and then send a request to ThingSpeak to clear the data channel.
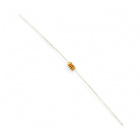
Parts Needed
(*Everything else for the PowerSwitch Tail II version of project is still the same.)
Hardware Hookup
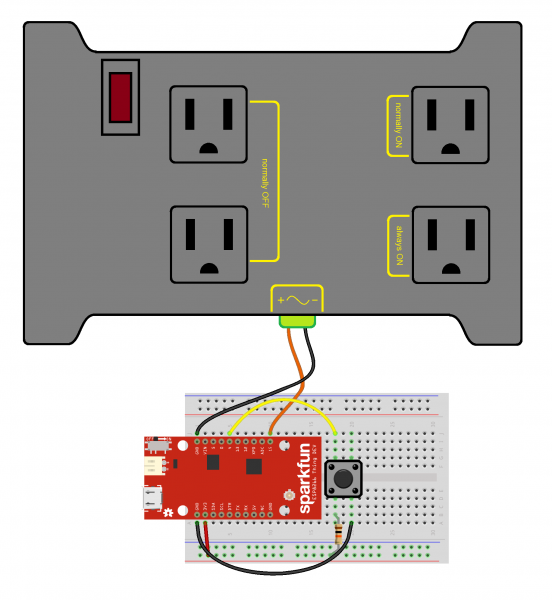
Connect one button and the IoT Power Relay to the Thing Dev as shown:
Create a ThingSpeak Data Channel
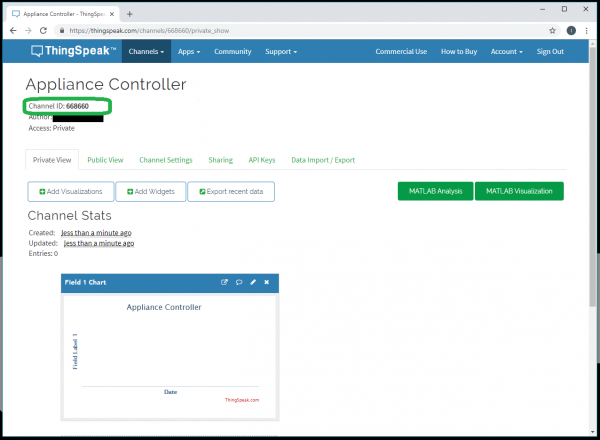
Head to ThingSpeak, and create a new channel. Name it Appliance Controller, and name Field 1 something appropriate (e.g., "Control"). On the channel dashboard, copy down the CHANNEL_ID, as we'll need it later.
Get Your API Keys
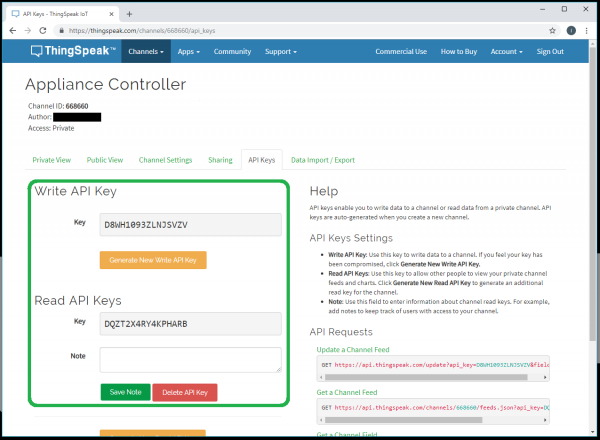
From your channel's dashboard, click on the API Keys tab. Copy down the WRITE_API_KEY and READ_API_KEY. We'll need those later, too.
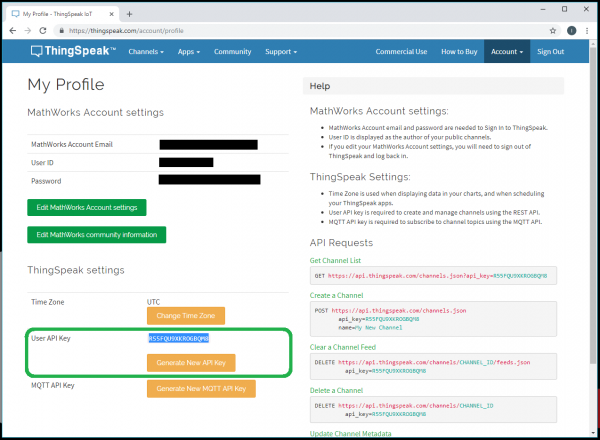
We'll also need our ThingSpeak Account API Key, as that's used to make delete requests to the data channel. In the top-right corner of ThingSpeak, click Account > My Account. Copy down the API Key found there. We'll refer to this key as the \<THINGSPEAK_ACCOUNT_API_KEY>.
Create IFTTT Applet
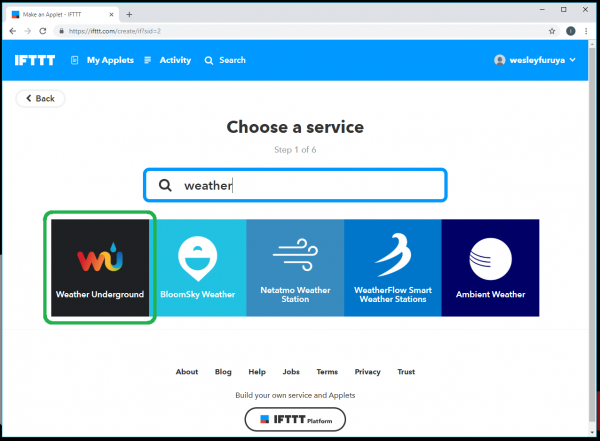
Navigate to IFTTT and create a new applet. For this section, search for weather.
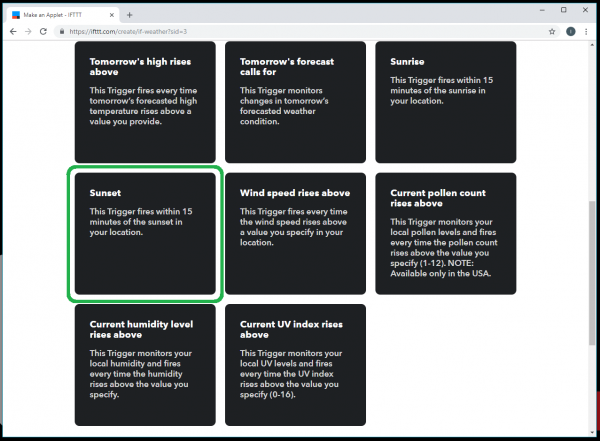
You'll be asked to connect the Weather Underground channel. Follow the prompts to set your location to the nearest city. After that, select Sunset as the trigger.
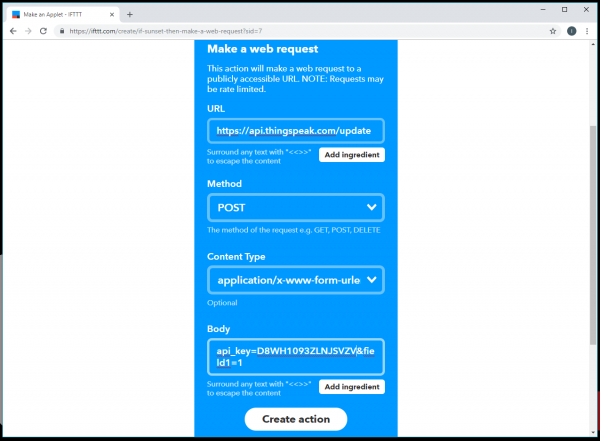
For that, search for and select the Webhooks channel. Select Make a web request. Fill out the form with the parameters listed below, making sure to replace \<WRITE_API_KEY> with your ThingSpeak Write API Key.
- URL: https://api.thingspeak.com/update
- Method: POST
- Content Type: application/x-www-form-urlencoded
- Body: api_key=\<WRITE_API_KEY>&field1=1
Click Create action and Finish.
Arduino Code
With our channel and applet configured, let's make some firmware to run on our ESP8266 Thing Dev. Copy in the code below, changing the parameters in the WiFi and Channel parameters section as noted.
language:c
/**
 * IoT Kit - Appliance Controller
 * Author: Shawn Hymel (SparkFun Electronics)
 * Date: November 11, 2016
 *
 * Set up an IFTTT applet to send an HTTP request to ThingSpeak
 * on a specific event, such as the sun setting. This sketch
 * monitors the channel and turns the attached appliance on or
 * off as requested before clearing the channel. A manual
 * override button can also toggle the appliance.
 *
 * Connections:
 *   Thing Dev | Button | PowerSwitch Tail II
 *  -----------|--------|---------------------
 *        4    |    A   |
 *       15    |        |       1 (+in)
 *      GND    |        |       2 (-in)
 *
 * Development environment specifics:
 *  Arduino IDE v1.6.5
 *  Distributed as-is; no warranty is given.
 */

#include <ESP8266WiFi.h>
#include "ThingSpeak.h"

// WiFi and Channel parameters
const char WIFI_SSID[] = "<YOUR WIFI SSID>";
const char WIFI_PSK[] = "<YOUR WIFI PASSWORD>";
unsigned long CHANNEL_ID = <YOUR THINGSPEAK CHANNEL ID>;
const char * READ_API_KEY = "<YOUR THINGSPEAK READ API KEY>";
const char * ACCOUNT_API_KEY = "<YOUR THINGSPEAK ACCOUNT API KEY>";

// Channel data definitions
const int CHANNEL_ERROR = 0;
const int APPLIANCE_ON = 1;
const int APPLIANCE_OFF = 2;

// Remote site information
const char HTTP_SITE[] = "api.thingspeak.com";
const int HTTP_PORT = 80;

// Pin definitions
const int LED_PIN = 5;
const int BTN_PIN = 4;
const int PST_PIN = 15;

// Global variables
WiFiClient client;
int appliance_state = 0;

void setup() {

  // Set up pins
  pinMode(LED_PIN, OUTPUT);
  pinMode(PST_PIN, OUTPUT);
  digitalWrite(PST_PIN, LOW);

  // Connect to WiFi
  connectWiFi();

  // Initialize connection to ThingSpeak
  ThingSpeak.begin(client);

  // For debugging
  Serial.begin(9600);

  // Send clear request to channel (start fresh)
  if (!clearChannel()) {
    Serial.println("Error connecting to ThingSpeak API");
  } else {
    Serial.println("Connected and listening!");
  }
}

void loop() {

  int val = -1;
  int btn;
  int last_btn = HIGH;
  unsigned long timestamp;
  unsigned long delay_time;

  // See if there was something posted to our channel
  val = ThingSpeak.readIntField(CHANNEL_ID, 1,READ_API_KEY);

  // If there is data on our channel, act on it and clear it
  if ( val > 0 ) {

    // If the value is a 1, turn on appliance
    if ( val == APPLIANCE_ON ) {
      Serial.println("Turning appliance on");
      appliance_state = 1;
      digitalWrite(PST_PIN, appliance_state);

    // If the value is a 2, turn off appliance
    } else if ( val == APPLIANCE_OFF ) {
      Serial.println("Turning appliance off");
      appliance_state = 0;
      digitalWrite(PST_PIN, appliance_state);
    }

    // Clear the data channel
    if ( !clearChannel() ) {
      Serial.println("Error: Could not clear channel!");
    } else {
      Serial.println("Channel cleared");
    }

    // Wait at least 15 seconds before polling the channel again
    delay_time = 15000;

  // No data. Try again later.
  } else {
    delay_time = 5000;
  }

  // Wait the required time before polling again
  timestamp = millis();
  while ( millis() < (timestamp + delay_time) ) {

    // Look for a falling edge on the button to toggle appliance
    btn = digitalRead(BTN_PIN);
    if ( (btn == LOW) && (last_btn == HIGH) ) {
      delay(30);
      if ( digitalRead(BTN_PIN) == LOW ) {
        appliance_state ^= 1;
        digitalWrite(PST_PIN, appliance_state);
      }
    }
    last_btn = btn;
    delay(1);
  }
}

// Attempt to connect to WiFi
void connectWiFi() {

  byte led_status = 0;

  // Set WiFi mode to station (client)
  WiFi.mode(WIFI_STA);

  // Initiate connection with SSID and PSK
  WiFi.begin(WIFI_SSID, WIFI_PSK);

  // Blink LED while we wait for WiFi connection
  while ( WiFi.status() != WL_CONNECTED ) {
    digitalWrite(LED_PIN, led_status);
    led_status ^= 0x01;
    delay(100);
  }

  // Turn LED off when we are connected
  digitalWrite(LED_PIN, HIGH);
}

// Send HTTP DELETE request to clear the channel
bool clearChannel() {

  // Attempt to make a connection to the remote server
  if ( !client.connect(HTTP_SITE, HTTP_PORT) ) {
    return false;
  }

  // Make an HTTP DELETE request
  client.print("DELETE /channels/");
  client.print(String(CHANNEL_ID));
  client.println("/feeds HTTP/1.1");
  client.print("Host: ");
  client.println(HTTP_SITE);
  client.println("Accept: */*");
  client.println("Accept-Encoding: gzip, deflate");
  client.println("Connection: close");
  client.println("Content-Type: application/x-www-form-urlencoded");
  client.println("Content-Length: 24");
  client.println();
  client.print("api_key=");
  client.println(ACCOUNT_API_KEY);

  return true;
}
Run It!
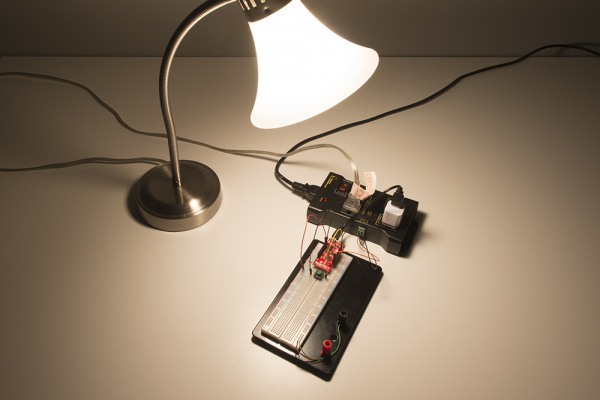
Save and upload the code to the Thing Dev Board. Plug in the IoT Power Relay to an outlet, and plug an appliance (e.g., a lamp) into one of the normally OFF outlets of the IoT Power Relay. Now, just wait for sunset (if you don't want to wait for sunset, you can modify the IFTTT applet to trigger earlier; try the Challenge below).
Challenge
Download the IFTTT App for your smartphone. See if you can create an IFTTT applet that allows you to remotely turn a device on and off from your smartphone using the DO button.


