Interactive Smart Mirror
 Shawn Hymel
Introduction
In a recent episode of The Fellowship of the Things, we constructed a smart mirror that displays weather data discreetly in the lower right corner. The idea is that while you performed morning tasks like brushing your teeth, putting on makeup, shaving, etc., you could glance at the weather for the day.
While the idea of sticking an LCD behind a one-way mirror is nothing new, we wanted to make ours more interactive. This version of the smart mirror uses an APDS-9960 Gesture Sensor so you can simply wave your hand to change the display.
Required Materials
For this build, you will need some electronics:
Additionally, you will need the following:
- 2.4" LCD
- Shadowbox
- Mirrored Window Film
- Window Film Installation Kit
- Foam Mounting Tape
- Cardboard
- Spray paint (optional)
- Masking tape (optional)
- Styrofoam to raise the LCD
- Pins or screws to mount the electronics
Suggested Reading
Before getting started, you may find some of the tutorials below helpful.
Hardware Hookup
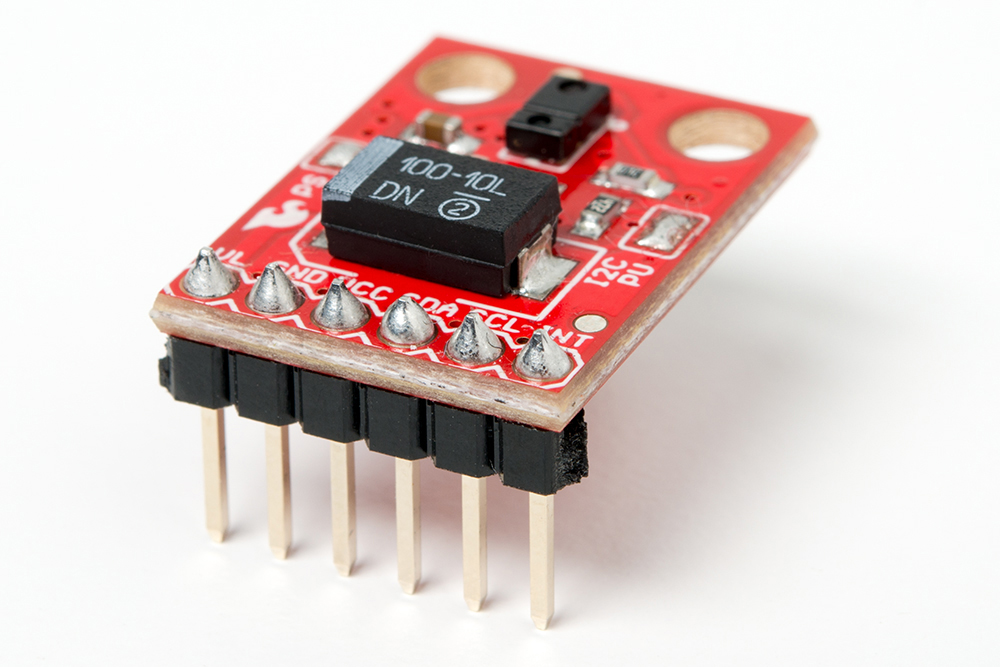
Prepare the APDS-9960
Solder headers to the APDS-9960 board.
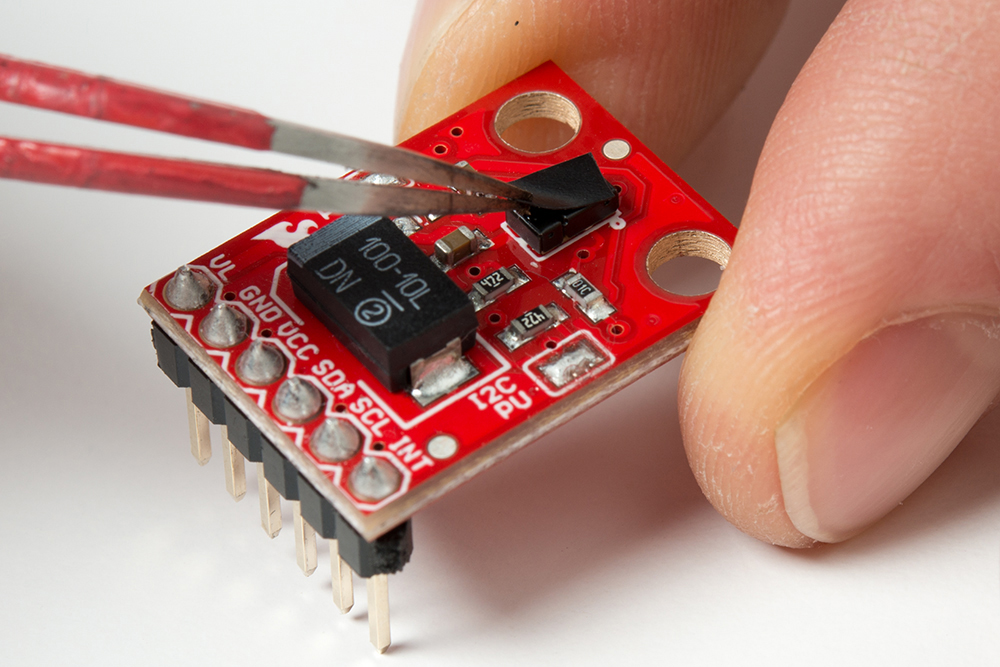
Because we cannot keep the APDS-9960 on the inside of the shadowbox (the IR light does not pass through the window very well), we recommend painting the sensor board to match the shadowbox frame. This part is optional; you don't have to paint the board if you don't want to.
If you want to paint the board, first cover the sensor with a small piece of electrical or masking tape.
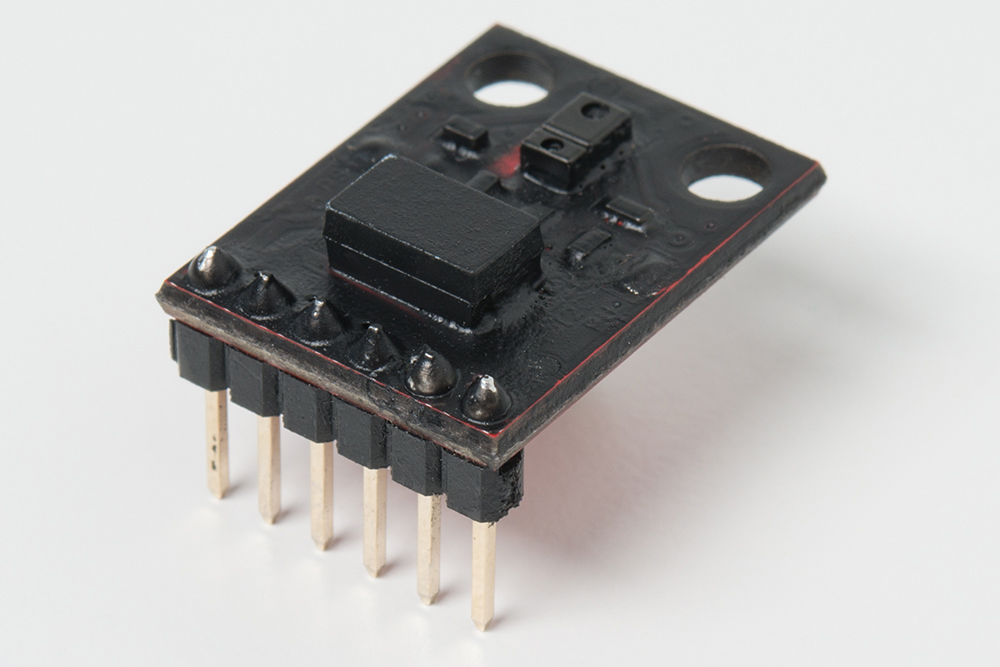
Carefully apply some spray paint to the board and remove the tape.
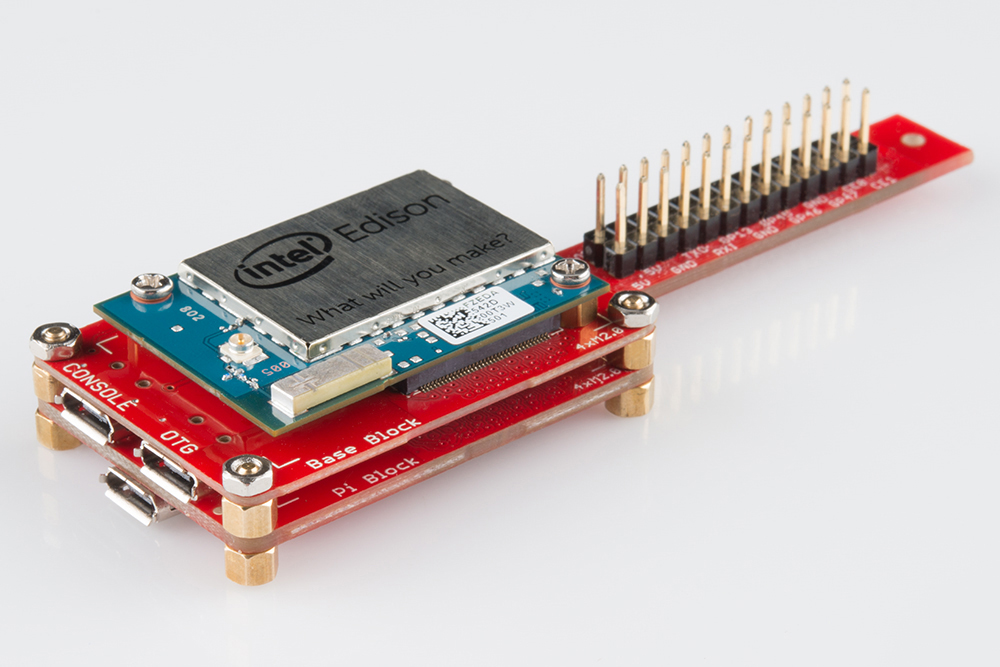
Make the Block Stack
Using the Edison Hardware Pack, attach the Edison to the Base Block.

Attach the Base Block to the Pi Block. Secure them in place using screws and standoffs.
Make the Connections
Any ILI9341-controlled LCD should work. If you use the Adafruit 2.4" LCD, you will need to solder the following jumpers on the back of the board closed: IM1, IM2, and IM3 (these allow us to communicate to the LCD via SPI).

Using about 6 inches of wire, solder the LCD to the Pi Block. Cut and strip the ends off 4 female jumper wires and solder the bare ends to the Pi Block. Refer to the Fritzing diagram on where to make the connections:
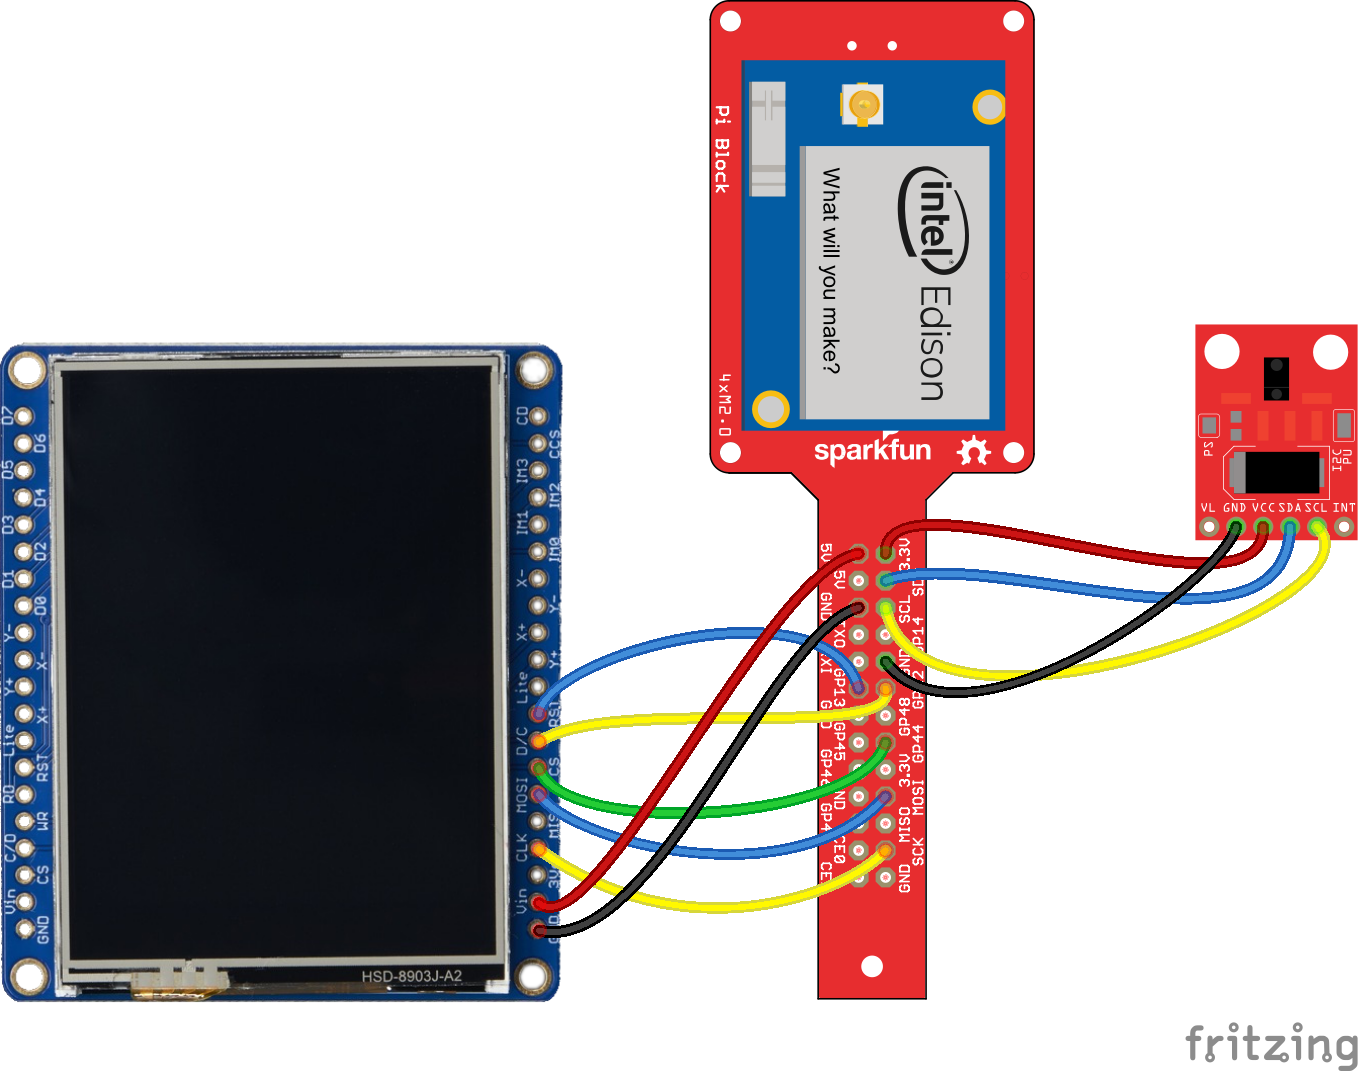
You should have the female ends of the jumper wires available to plug into the APDS-9960.

Assemble the Mirror
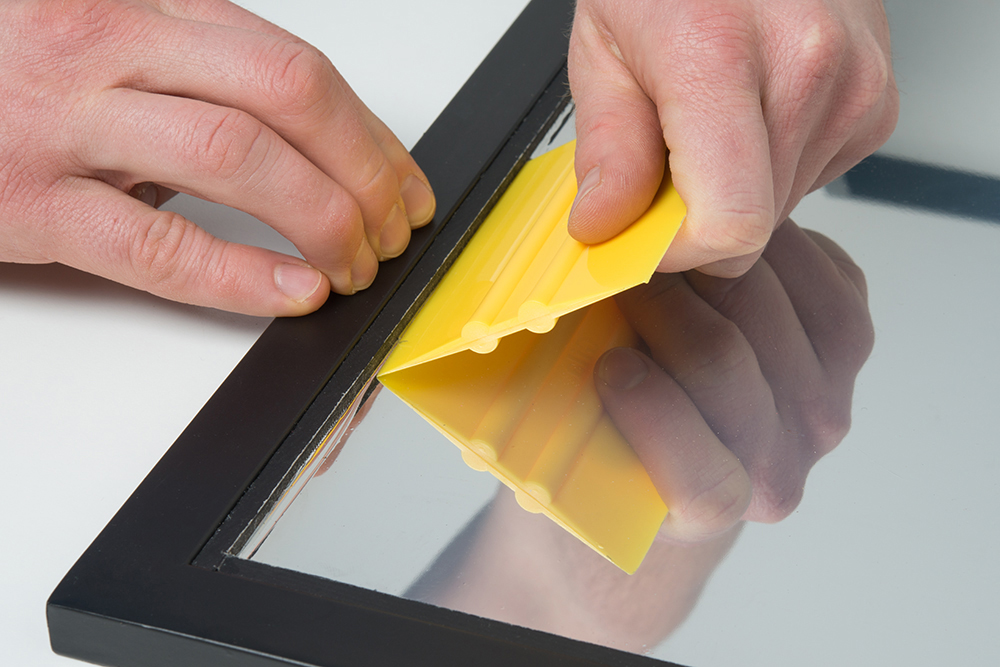
Attach the Film
Follow the directions in the window film installation kit to carefully spray, cut, and adhere the film to the inside of the shadowbox's window.
Attach the Inside Electronics
Choose in which corner you want the LCD to go (we chose bottom-right). We recommend putting a few sheets of Styrofoam, wood, etc. to push the LCD up against the window when closed. We also wrapped the Styrofoam with electrical tape to hide the white color.
You can attach the Edison Block stack and LCD using screws, nails, etc. We used pins so we could move the LCD around if we wanted (also, our shadowbox has a soft foam backing). For now, leave the APDS-9960 hanging out of the shadowbox.

Note that we will wait to attach the APDS-9960 until the Edison has been programmed.
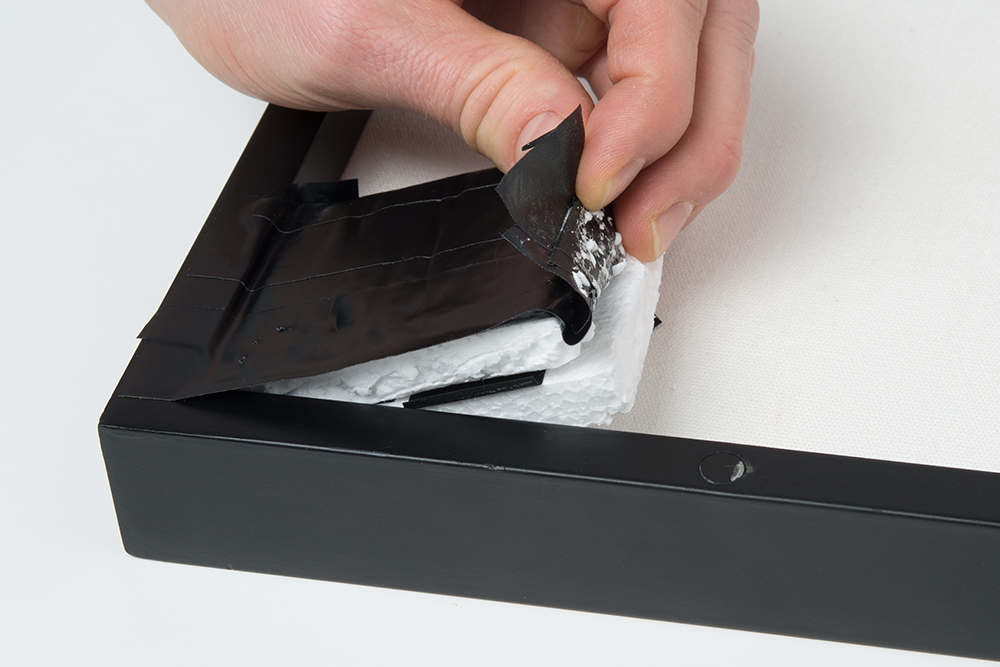
Line the Window with Backing
Since we plan to have cables coming out of the shadowbox, we want to try and prevent as much light as possible from getting through to the window (with the exception of the LCD).
Cut a piece of cardboard (or other opaque material) to cover the shadowbox's window. From that, cut out the section where the LCD will poke through.
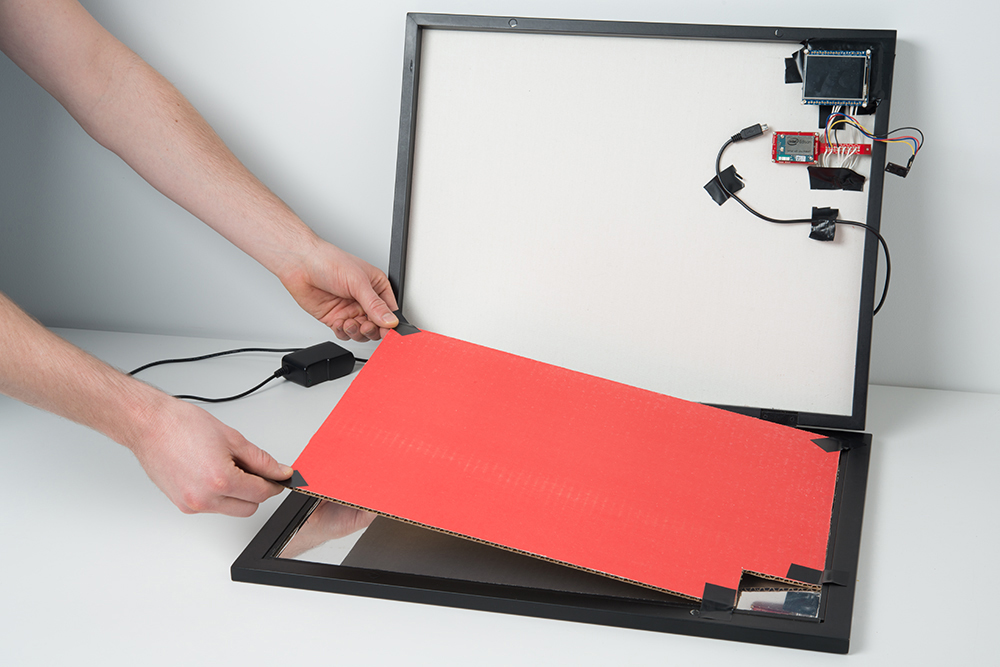
The cardboard can be attached with tape, if you so desire.
Install UPM Modules
Flash and Configure the Edison
If this is your first time using the Edison, it is recommended that you update to the latest firmware and connect to WiFi.
Build MRAA
MRAA is Intel's set of libraries used to control the low-level hardware. Because UPM relies on MRAA, we need to install it first.
Connect to the Edison over a Serial Terminal or SSH. Once logged in, enter the following commands to download MRAA:
wget https://github.com/intel-iot-devkit/mraa/archive/master.zip
unzip master.zip
mv mraa-master mraa
Then, build MRAA with:
cd mraa
mkdir build
cd build
cmake ..
make
Install the newly built libraries, and update the pkg-config path, which is needed by UPM.
make install
export PKG_CONFIG_PATH=$PKG_CONFIG_PATH:/usr/local/lib/pkgconfig
Build ili9341 and apds9960 in UPM
Next, we need to download a custom version of UPM and install the ili9341 and apds9960 modules.
cd ~
wget https://github.com/ShawnHymel/upm/archive/smartmirror.zip
unzip smartmirror.zip
mv upm-smartmirror upm
Prepare to build:
cd upm
mkdir build
cd build
cmake ..
Build and install the ili9341 module:
make ili9341
cd src/ili9341
make install
Build and install the apds9960 module:
cd ../..
make apds9960
cd src/apds9960
make install
Other Dependencies
With the UPM modules installed, we can work on writing the actual code. That does mean we need to install a few more dependencies, though.
Other Node Libraries
We need one more library for our code. Luckily, we can install it through npm:
cd ~
npm install xml2js
NTP
We will want our Edison system time to be up-to-date. To do that, we will rely on an NTP service to regularly poll an Internet-connected server for the most accurate time.
Open the package manager file with:
vi /etc/opkg/base-feeds.conf
Press 'i' to start typing, and enter the following:
src/gz all http://repo.opkg.net/edison/repo/all
src/gz edison http://repo.opkg.net/edison/repo/edison
src/gz core2-32 http://repo.opkg.net/edison/repo/core2-32
Press 'esc', and enter ':wq' to save and exit. Update the package manager, and install the NTP client:
opkg update
opkg install ntp
Configure the NTP client:
vi /etc/ntp.conf
Find the line that says "server 127.127.1.0" and change it to (press 'i' to edit):
server pool.ntp.org
Your file should look like this:
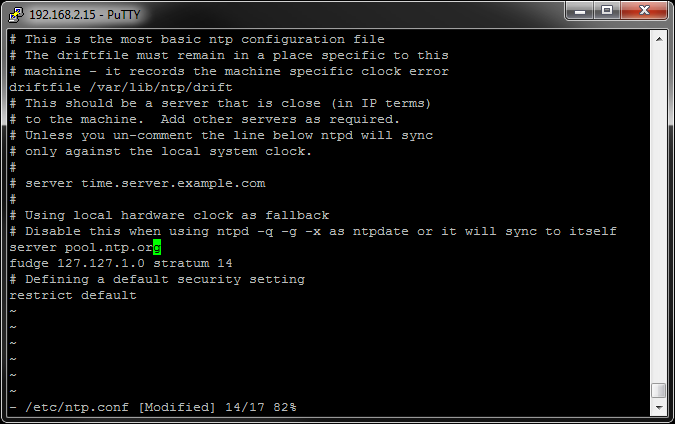
Save and exit ('esc' and ':wq'). Next, we want to adjust our system's local time to our timezone. Since I am in Mountain Standard Time, I'm going to use MST. We do this by creating a symbolic link /etc/localtime that points to the timezone we want in /usr/share/zoneinfo/ (note that I'm using MST for my timezone).
rm /etc/localtime
ln -s /usr/share/zoneinfo/MST /etc/localtime
When we're done, reboot:
reboot
You can check your timezone by entering the command:
date
This should print out the date, time, and timezone.

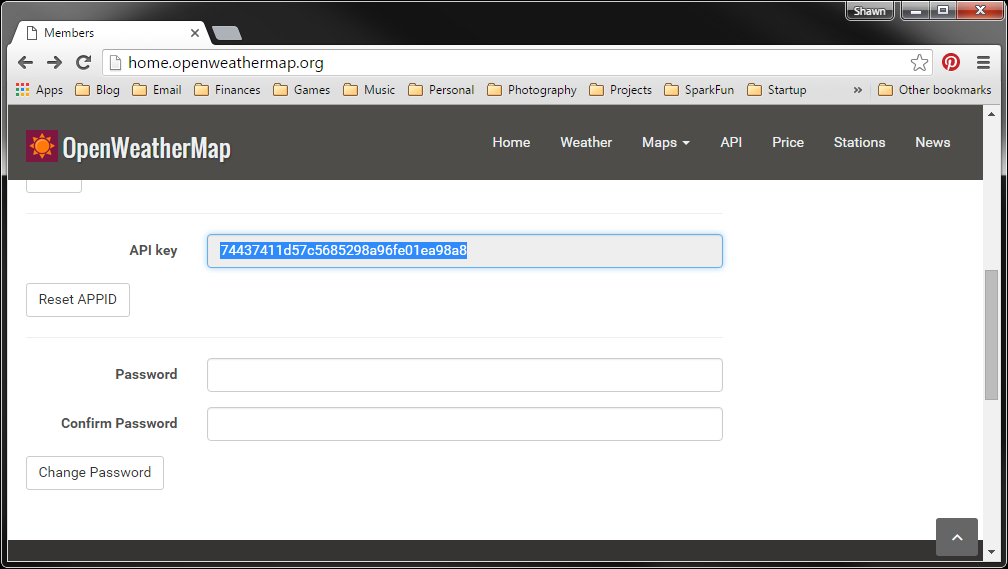
Configure OpenWeatherMap
We will be using OpenWeatherMap for our weather data, as it offers good hourly forecast data. In your browser, navigate to OpenWeatherMap's sign up page. Enter your credentials to make an account. Once you have logged in, scroll down on your profile page, and copy down your API key.
Find Your Location
We also need to find our location so we can pass that to OpenWeatherMap. Open up Google Maps, and place a marker at the location where you want to get weather data (left-click on the map). A pop-up note will appear with the latitude and longitude data.
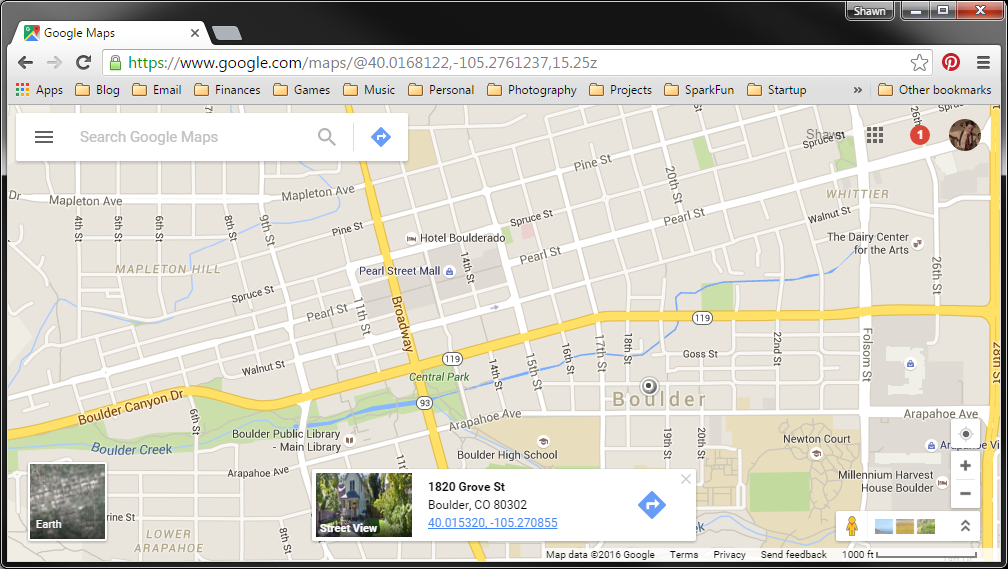
Copy down those two numbers as well. We'll need them.
The Code
Download the smart mirror code and unzip it:
rm master.zip
wget https://github.com/sparkfun/IoT_SmartMirror/archive/master.zip
unzip master.zip
mv IoT_SmartMirror-master IoT_SmartMirror
Edit the smartmirror.js file:
cd IoT_SmartMirror
vi smartmirror.js
Find the OPENWEATHER_API_KEY and change it to your API key. Additionally, change the LATITUDE and LONGITUDE variables to reflect your location (don't forget to press 'i' to edit text).
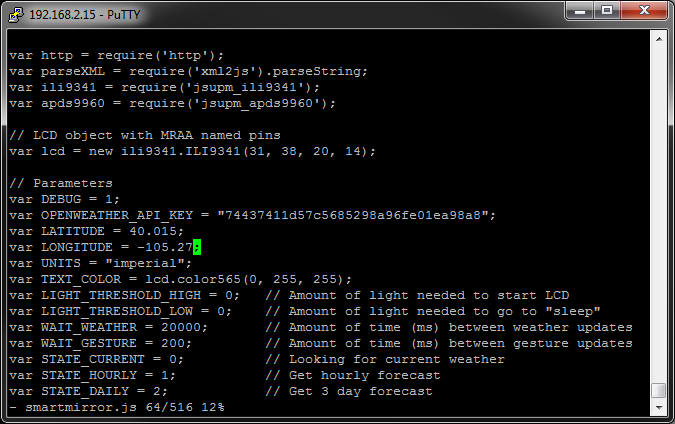
When you are finished, press 'esc' and enter ':wq' to save and exit. Now, we can run the smart mirror code!
export NODE_PATH=$NODE_PATH:/usr/local/lib/node_modules/
node smartmirror.js
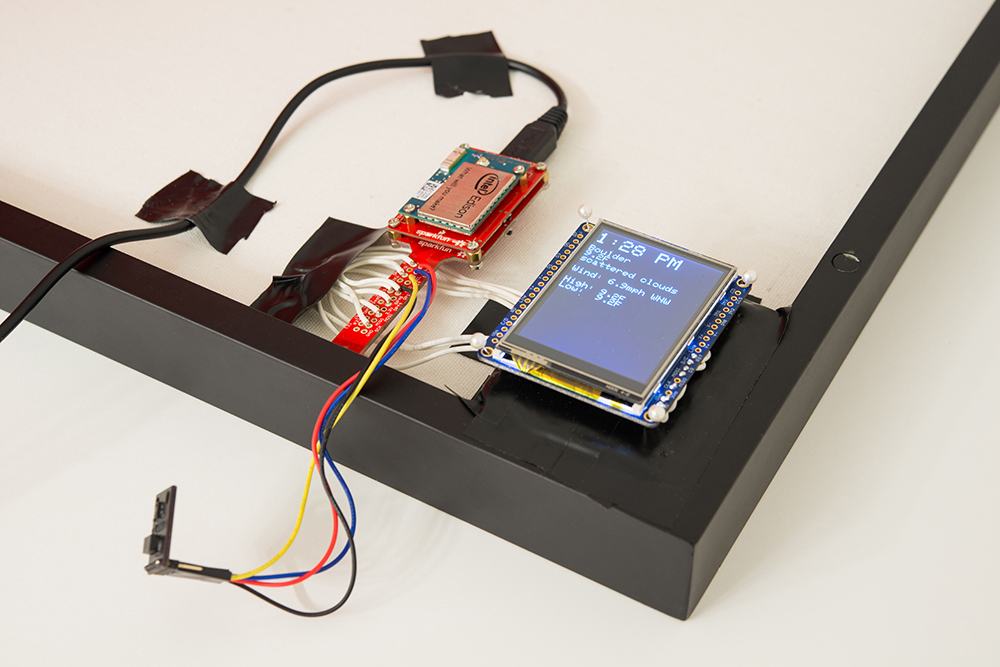
This should cause the mirror to (slowly) refresh and begin displaying weather data (make sure nothing is blocking the APDS-9960's sensor when you run the program). Press 'ctrl+c' to stop the code. Now that we know it works, it's time to configure the Edison so that our program starts on boot.
Run at Boot
Since we want to plug in the smart mirror and have it automatically start running our script, we need to create a service that starts the script on boot. Luckily, the IoT_SmartMirror project we downloaded already has a service already written for us!
Copy the smartmirror.service file to /lib/systemd/system/:
cd ~/IoT_SmartMirror-master
cp smartmirror.service /lib/systemd/system/
systemctl daemon-reload
systemctl enable smartmirror.service
Now, you can shutdown the Edison:
shutdown
Next time you boot it up, it should start displaying weather data!
Button It Up
Attach the Power Source
Since we don't want to keep the Edison plugged into the computer, we will use the wall adapter instead. Unplug the USB cable from the Base Block and plug the USB wall adapter into the Pi Block's USB port (this will provide 5V to the LCD, making it brighter).

Before you close the shadowbox, now is a good time to make sure the Smart Mirror is working. Wait for the Edison to boot up, and the screen should refresh black (again, make sure nothing is blocking the APDS-9960 sensor). In a moment, the Edison should gather weather data and display it on the screen.
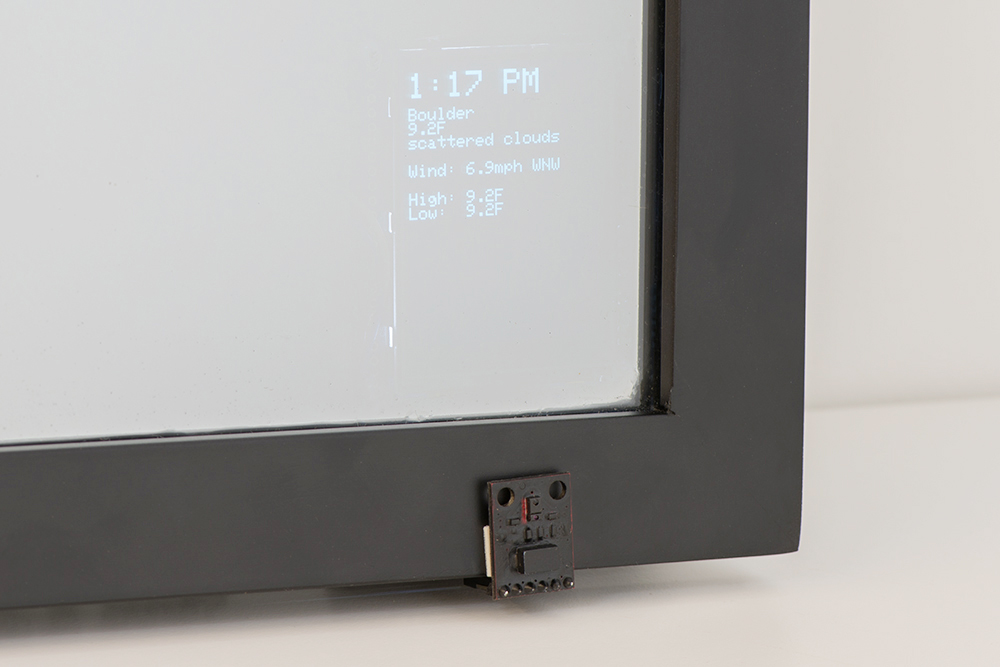
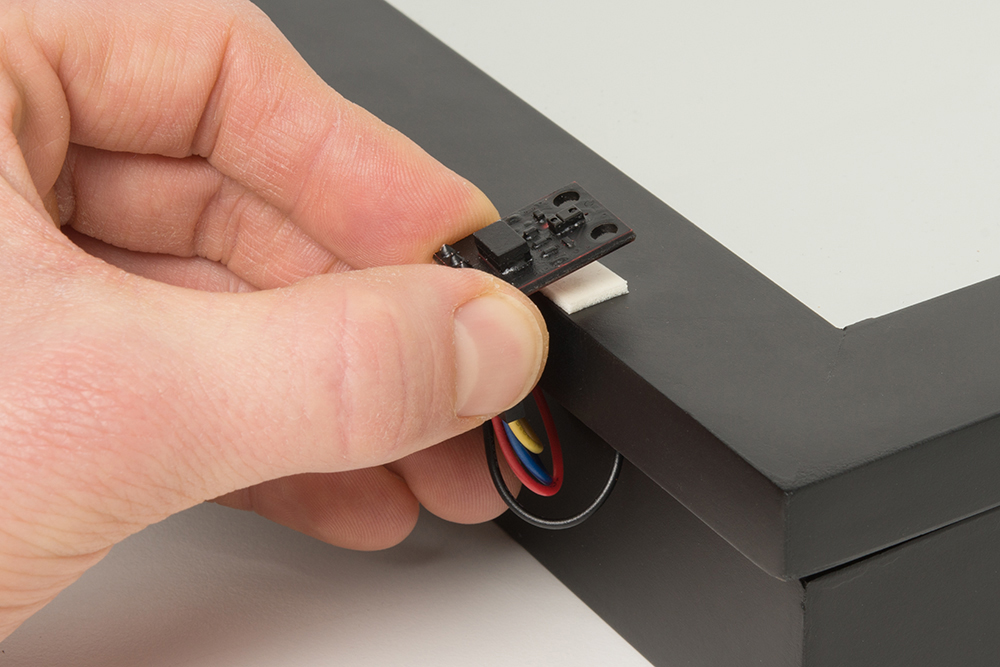
Close the Box and Attach the Gesture Sensor
Carefully close the shadowbox, and make sure the APDS-9960 is on the outside. Attach the APDS-9960 to the shadowbox's frame with screws or foam tape.
Mount the Smart Mirror
Find a place you want to hang or hold your new smart mirror, preferably near an outlet. Plug it in, and wait for the weather update.

Once the current weather data has appeared on screen, slowly swipe your hand left or right across the sensor to change the information to the hourly forecast.

Resources and Going Further
You now have your very own interactive smart mirror! Feel free to modify the code to display other information. Can you get news headlines to show up?
Resources
- Interactive Smart Mirror GitHub repository
- MRAA GitHub repository
- Custom UPM library for the Smart Mirror
Check out some of our other Edison tutorials: