Headless Raspberry Pi Setup
 Shawn Hymel
WiFi with DHCP
If you don't want to mess with extra hardware or use Linux to modify the Raspbian filesystem, then you may want to consider having the Raspberry Pi connect to your local WiFi access point, finding its IP address, and logging in over SSH.
Enable WiFi
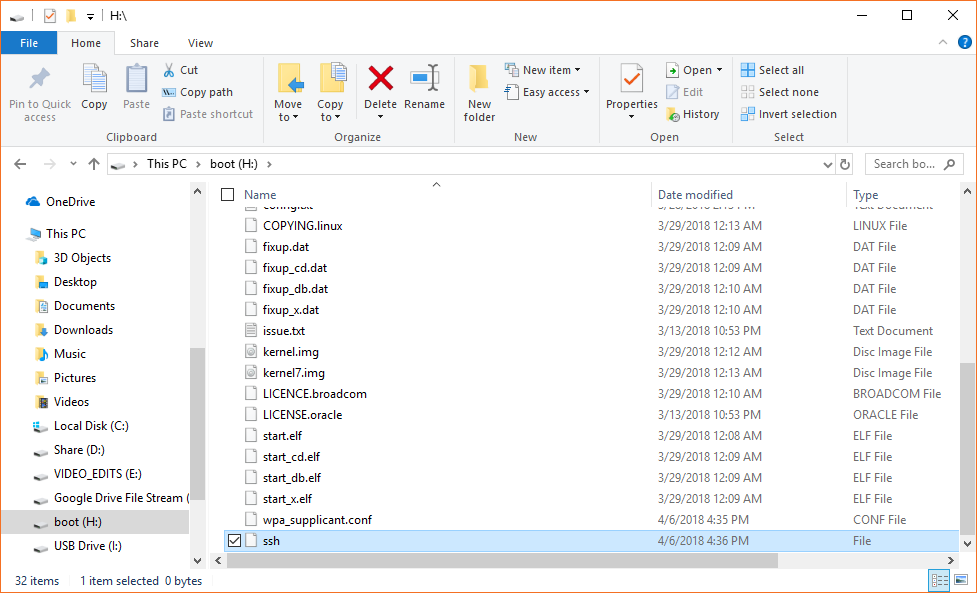
With the SD card plugged into your computer, navigate to the boot partition. In the root directory, create a file named wpa_supplicant.conf. The next time you boot up your Raspberry Pi, this file will automatically be moved to the /etc/wpa_supplicant/ directory in the filesystem.

Edit the file using your text editor of choice (on Windows, something like Notepad++ is recommended). Copy in the following text. Change \
language:bash
ctrl_interface=DIR=/var/run/wpa_supplicant GROUP=netdev
update_config=1
country=<YOUR TWO LETTER COUNTRY CODE>

network={
    ssid="<YOUR NETWORK NAME>"
    psk="<YOUR NETWORK PASSWORD>"
    key_mgmt=WPA-PSK
}
Save and exit.
Enable SSH
In 2016, much of the Internet slowed to a crawl as a result of the IoT DDoS attack brought about by the Mirai botnet. In response to vulnerable IoT systems with default username and password logins, the Raspberry Pi Foundation decided to disable the SSH connection by default on all future releases of Raspbian. As a result, we now need to enable SSH so we can log in over a network connection. You can read more about the reasonings for this here.
In the boot partition, simple create an empty file with the name ssh.
Unmount the SD card from your host computer and insert it into the Raspberry Pi.
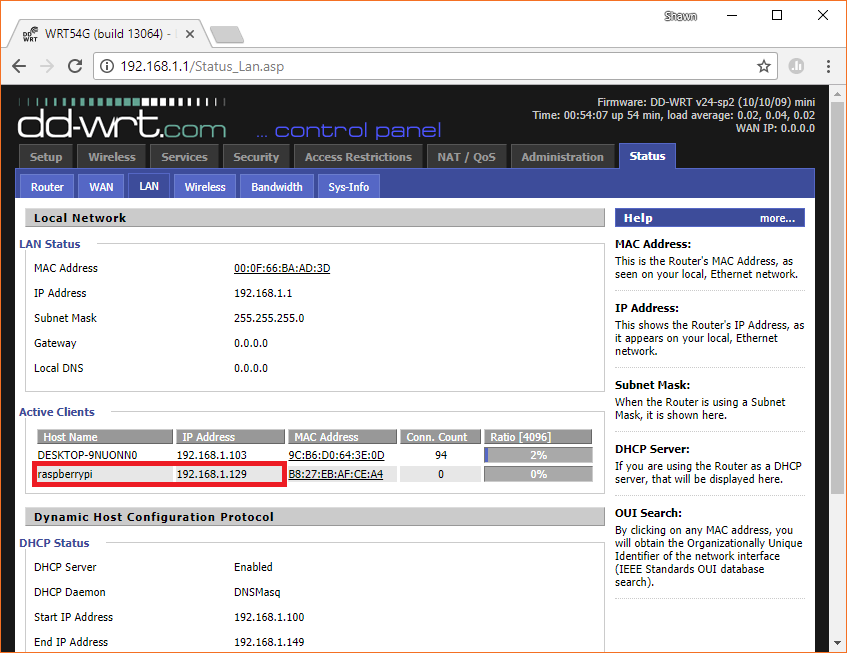
Find the Raspberry Pi's IP Address
Power on your Raspberry Pi and wait for it to connect to your WiFi network. Open up your wireless router's configuration page (for example, by typing in 192.168.1.1 into a browser window). From there, find your router's DHCP lease table and make a note of your Raspberry Pi's IP address.
Connect Over SSH
Secure Shell (SSH) gives us a terminal into an operating system over a network and encrypts the traffic, giving us a level of security. Depending on your host operating system, you have a number of options available to you.
Windows
PuTTY is an easy-to-use SSH, Telnet, and Serial terminal client. Open PuTTY, and set the Host Name to the IP address we found in the previous step and Port to 22.
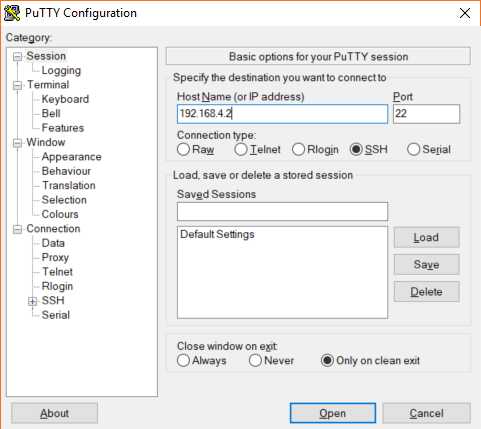
Click Open. If asked about caching a host key, click Yes.
Mac and Linux
The easiest way to connect to another computer over SSH is to use the ssh command line tool built into most distributions of Linux and Mac OS. Simply open up a terminal and type:
language:bash
ssh <IP ADDRESS FROM PREVIOUS STEP>
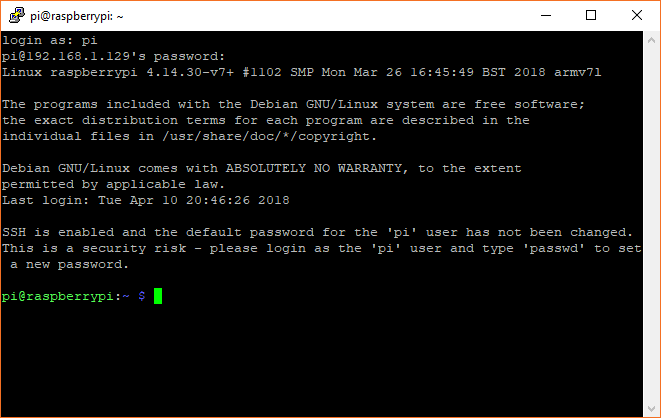
Log In
Once SSH connects, simply enter the default login credentials:
- Username: pi
- Password: raspberry
You should be presented with a command prompt, if all goes well.