Headless Raspberry Pi Setup
 Shawn Hymel
 Serial Terminal
If you would like to access your Raspberry Pi using the least amount of software work, you will need some extra hardware. Two of the pins on the Raspberry Pi offer transmit and receive data for serial communication. With a small change to a file on the boot sector of the SD card, a command line terminal will be broadcast over this serial line, and you can enter commands to control Linux, write programs, etc.
If the other methods do not work to gain access to your Raspberry Pi or you lose your video out signal, using the serial terminal is a great way to see if your Raspberry Pi is still working and to debug any problems you might have.
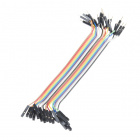
You will need a USB to serial converter for this to work. We recommend:
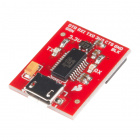
Alternatively, you could use a USB to TTL Serial Cable. Note that if you are using the Raspberry Pi Zero W, you will need to solder a header onto the GPIO port.
Enable the Serial Terminal
In versions of the Raspberry Pi after 3 (e.g. 3 Model B, 3 Model B+, Zero W), the processor contains two hardware UARTs. One is dedicated to the Bluetooth module, while the other is a less-featured "mini UART." This mini UART is broken out on pins 8 and 10 and can be used as a serial terminal into Linux.
The problem is that the mini UART's clock is tied to the variable clock speed of the graphics processing unit (GPU). We need to set a static system clock in order to use the mini UART as a serial terminal. This can potentially disable some features (e.g. overclocking or power-saving mode), but it should not affect normal operation. See here to learn more about the mini UART.
With your SD card still plugged into your computer, browse to the boot partition, and find the config.txt file.
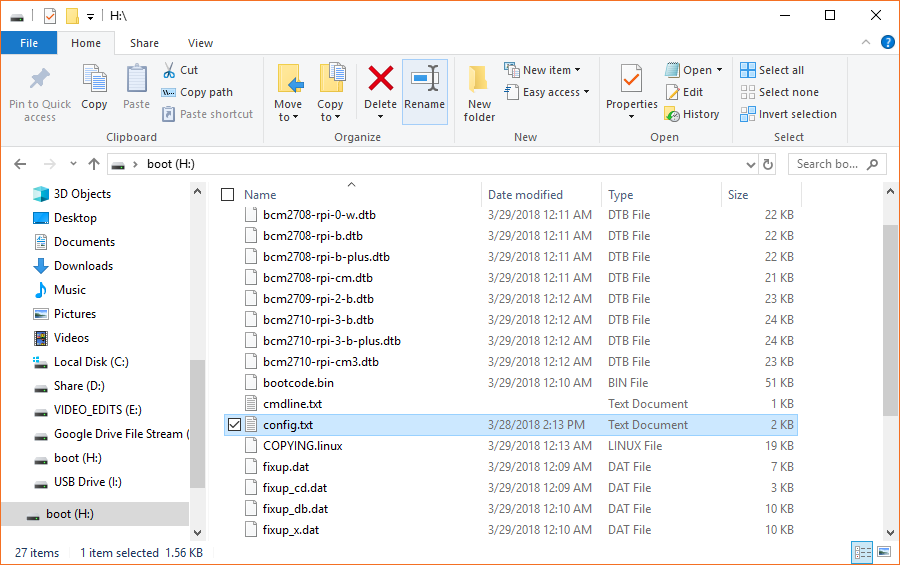
Use your text editor of choice to modify the file (on Windows, something like Notepad++ is recommended). Add
language:bash
enable_uart=1
to the end of the document.
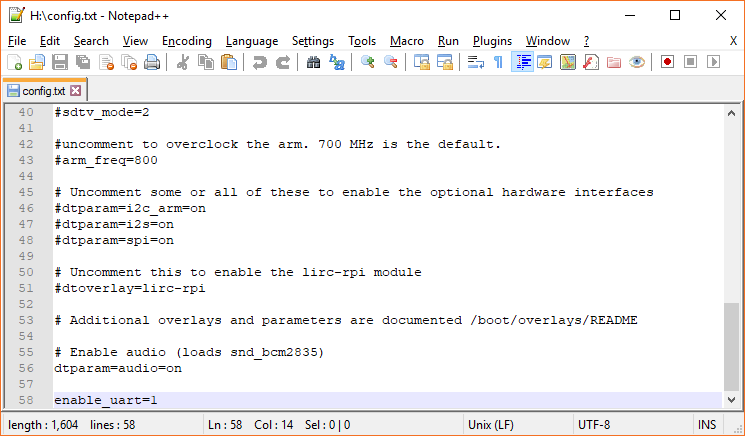
Save and exit.
Hardware Connections
Take a look at the pinout for the Raspberry Pi 3.
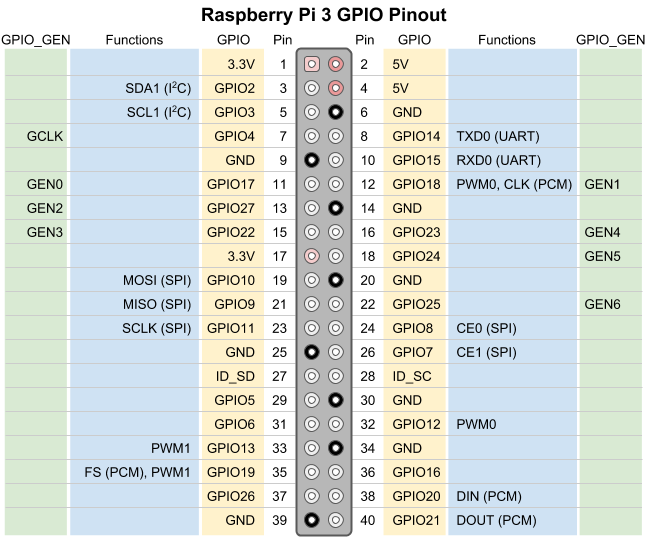
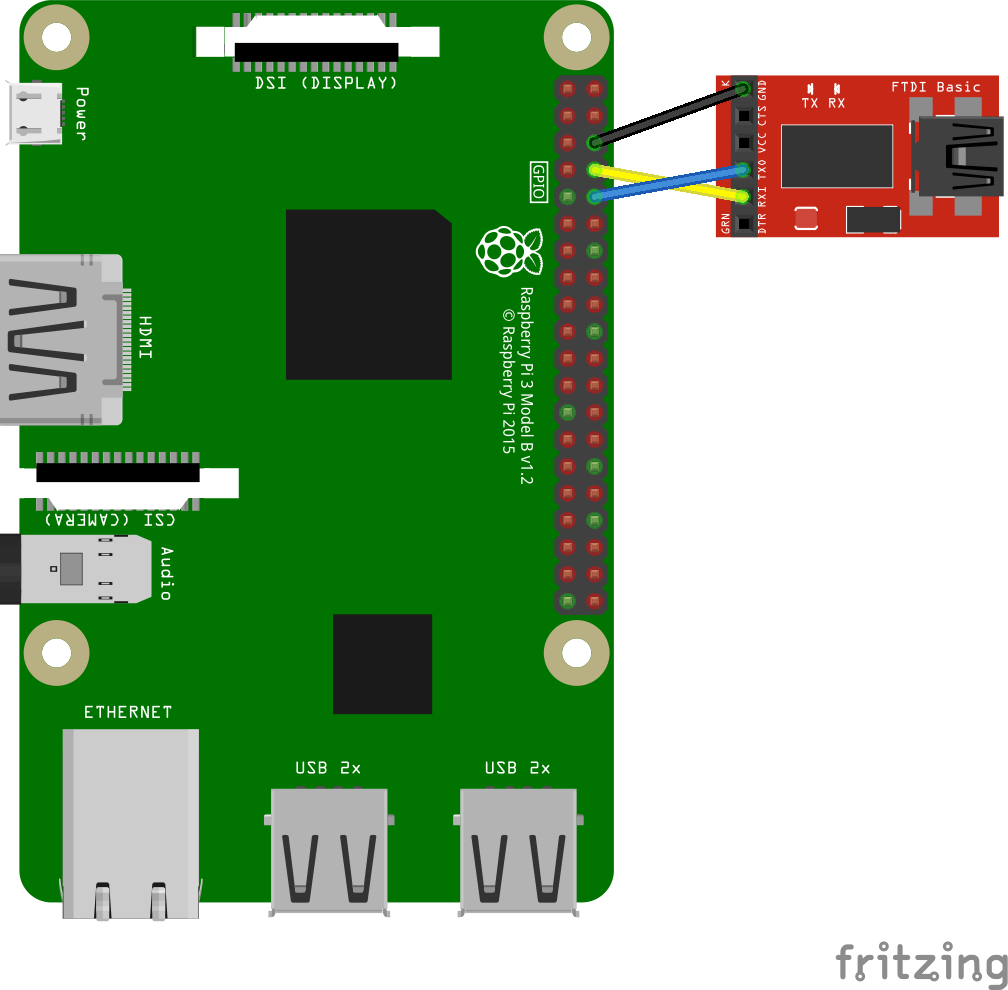
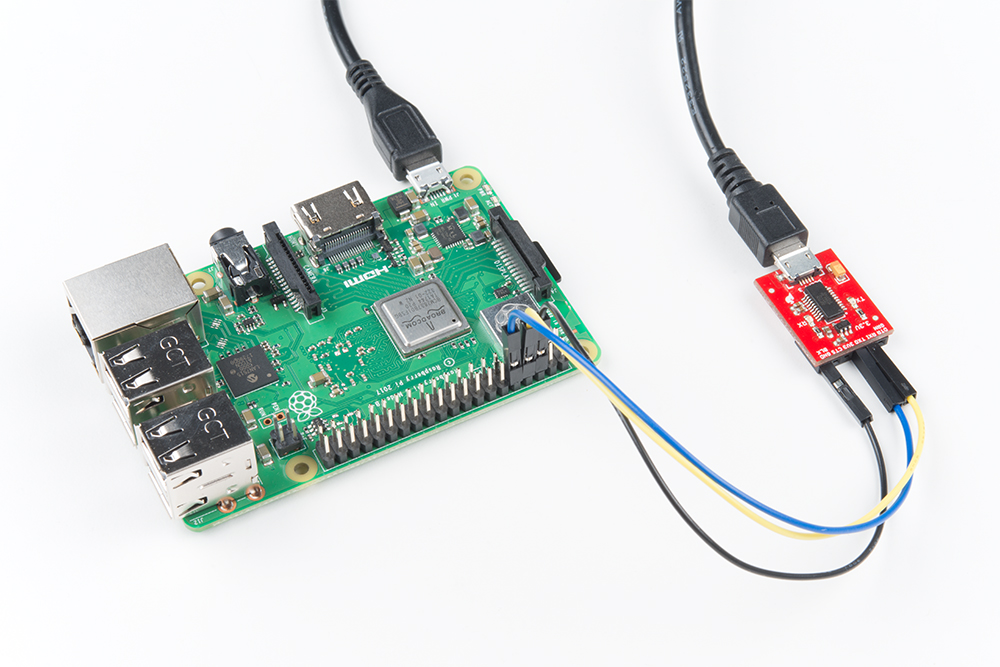
You'll see that pins 8 and 10 are connected to UART transmit (TXD) and receive (RXD), respectively. We'll need to connect GND (Raspberry Pi) to GND (USB to serial converter), TXD to RXI, and RXD to TXO. Note that we do not need to connect any power pins (3.3V or 5V).
Log In
Connect the USB to serial converter to your computer, and connect the wall adapter to the Raspberry Pi's PWR (USB micro B) port.
Choose a serial terminal based on your operating system (here are some options).
If you are using Windows, you will need to know the COM port number connected to your USB to serial adapter, which can be found in the Device Manager.
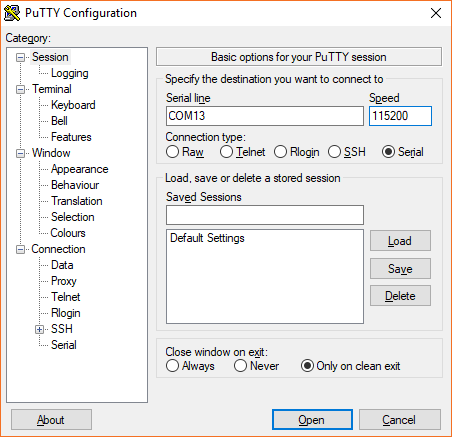
Change the settings as necessary to match the following:
- Baud rate: 115200 bps
- Data bits: 8
- Parity: None
- Stop bits: 1
- Flow Control: None
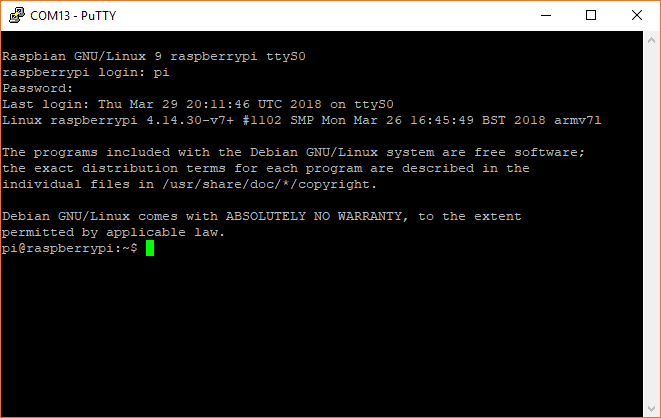
Open the connection, and press enter. You should be presented with a login prompt.

Enter the following credentials (default login):
- Username: pi
- Password: raspberry
You should be logged in at the command prompt and ready to type Linux commands!